- Learn how to add a new local account in Windows, how to change the account type, and how to switch between users.
- Microsoft is pushing users to use online accounts for a while now. It’s nothing new.
- You can still create a local account in both Windows 10 and Windows 11 if you wish to do so.
We’ve talked extensively about offline vs online accounts in Windows so I’m not going to repeat myself here. I stand by what I said: for privacy reasons you should not use a Microsoft online account. For now, it’s still possible to use an offline account, also called a local account in Windows, but I’m not sure for how long this option will be available.
Anyway, if you missed the “opportunity” to pick a local account during the initial Windows setup (or didn’t figure things out see our Windows 10 install guide and Windows 11 step-by-step guide.) you can still switch by following the guide in the article linked at the beginning of this article. It’s very easy to do so.
Now, we’re going to focus on how you can add a new local account in Windows after you’ve finished setup. It’s very easy to do so, but it might not be obvious for the same reason: Microsoft really wants you to use an online account. Fret not! I’m here to guide you.
CONTENTS
How to Create a New Local Account in Windows 10
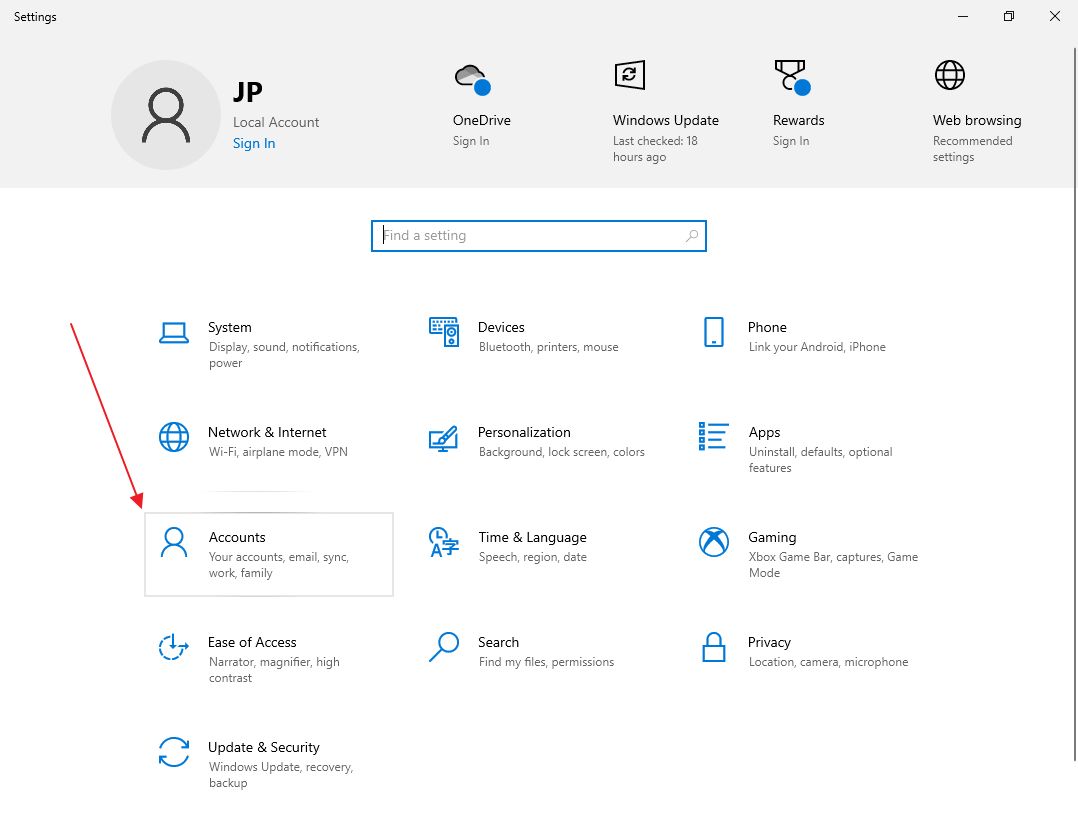
1. Open the Settings app – in the Start menu type Settings to find the app.
2. Navigate to the Accounts section.
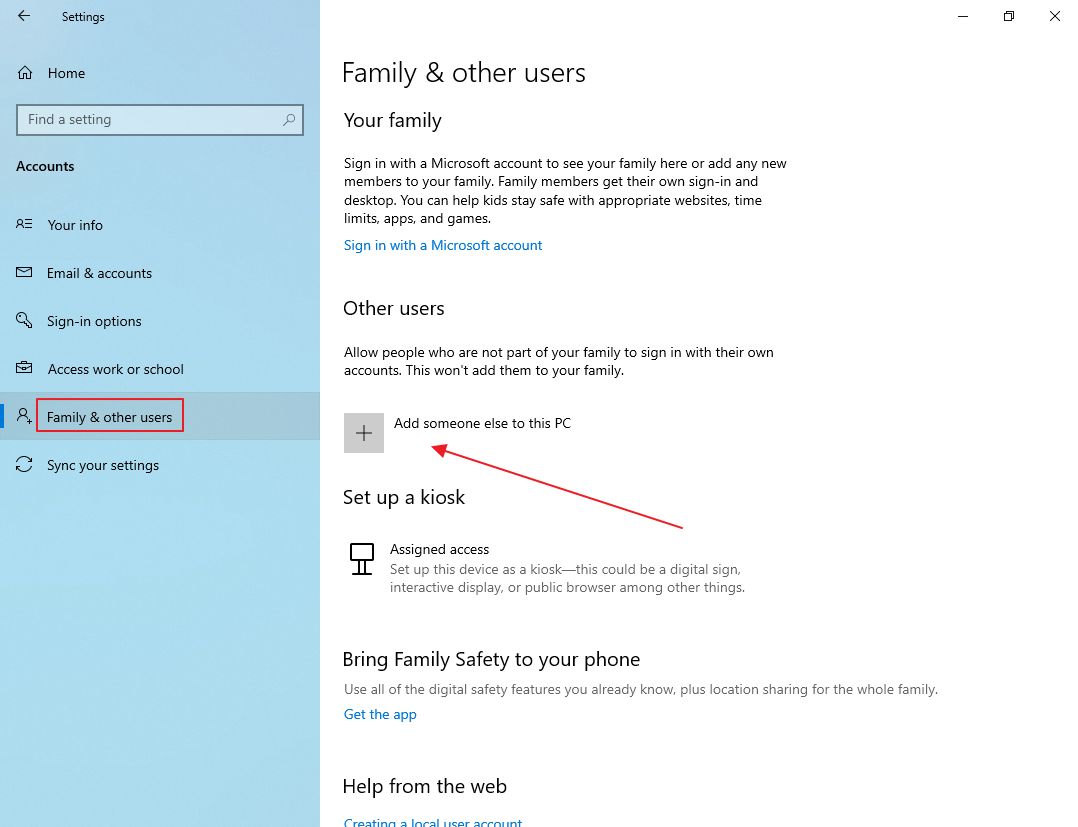
3. On the left-side menu select Family & other users.
4. In the right panel select Add someone else to this PC.
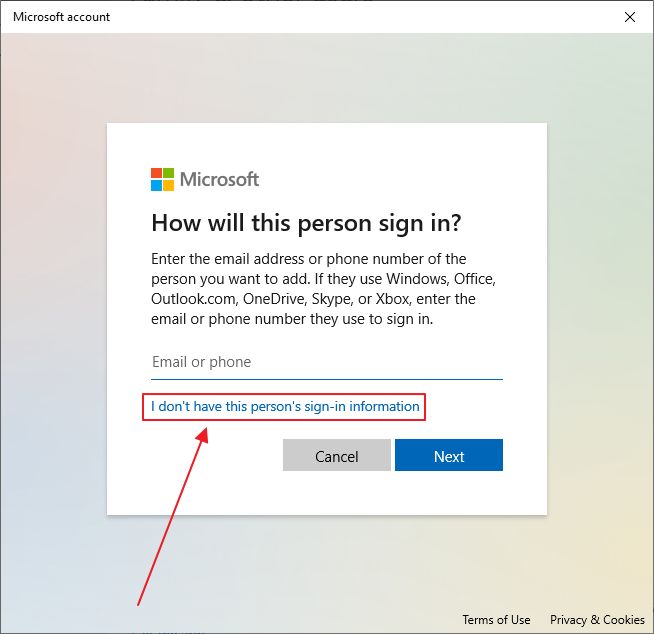
5. In the new popup window that invites you to sign in with your Microsoft @outlook email address make sure you select the link I don’t have this person’s sign-in information.
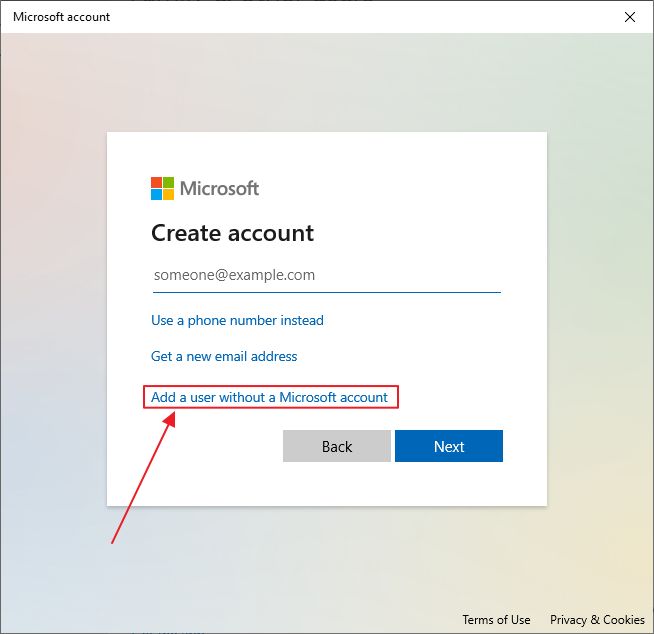
6. You’re invited to create a new Microsoft account, but you will politely select Add a user without a Microsoft account.
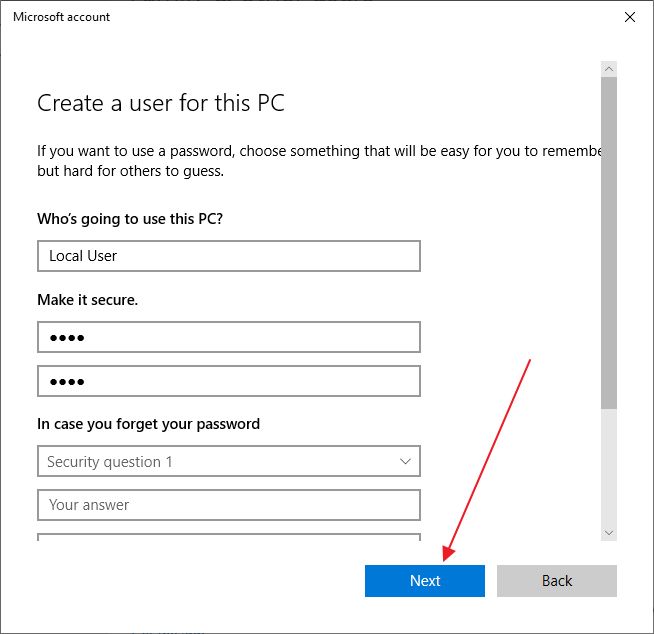
7. In the new dialog select a username, and password and also enter three security questions hints that will allow you to recover access to this new account if you forgot the password.
How to Switch Between Users in Windows 10
The new account is already accessible. If you want to switch to that account right away here’s how to do it:
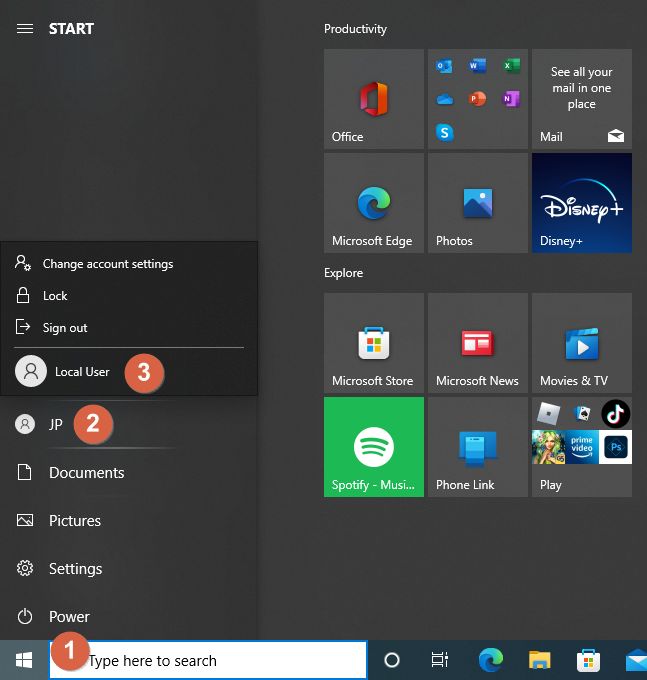
1. Press the Win key to open the Start menu.
2. Click on the current account username.
3. In the new popup menu you’ll see the newly created account. Clicking on it will select the username on the login screen and you will need to enter the correct password for that account.
4. Going this route means you’re logged into the same computer with both accounts, so system resources are split between the two. That’s why in the previous step it is recommended to select Sign out. This will send you to the login screen.
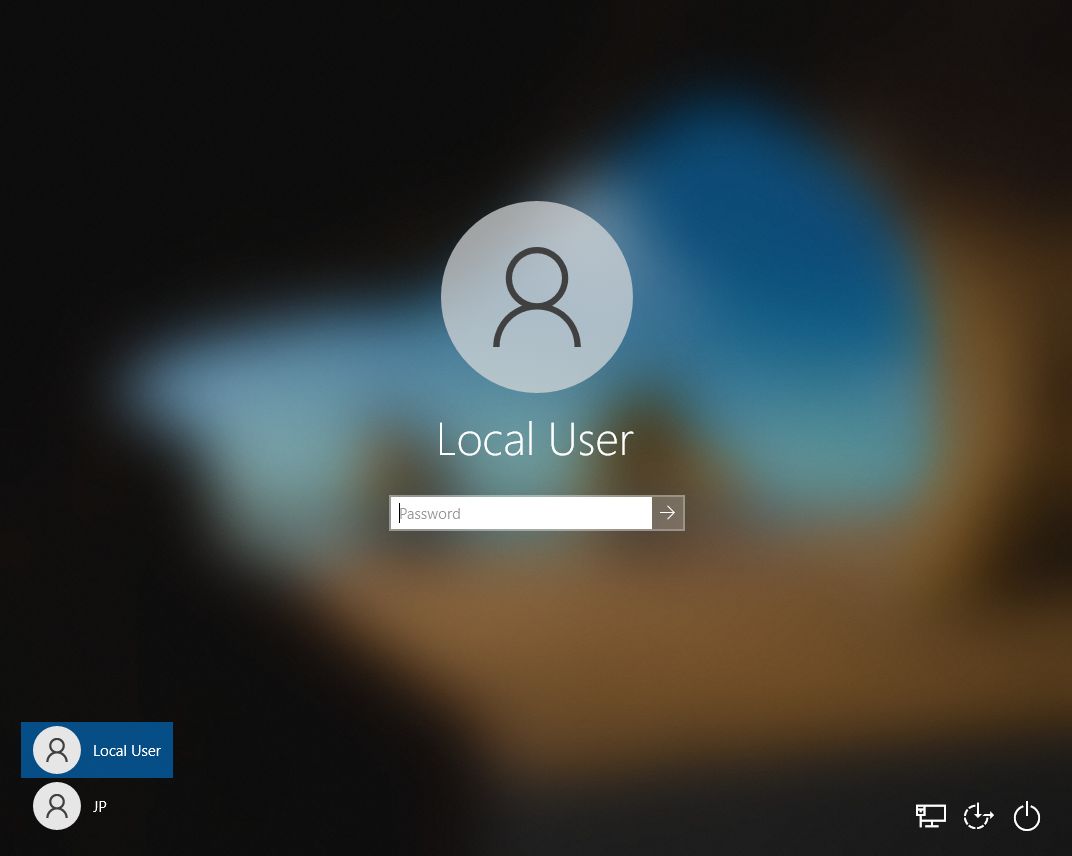
5. In the lower-left corner of the login screen you need to select the desired username, then enter the password to log in with that account. That’s it.
Changing the Account Type for Other Users in Windows 10
Requirements: you need to be logged in in Windows 10 with an administrator account
By default, all newly added accounts in Windows 10 are standard users. Thankfully, it’s possible to switch any existing account to an Administrator, which means a user that can do pretty much anything on this computer. Here’s how.
1. Launch the Settings app again.
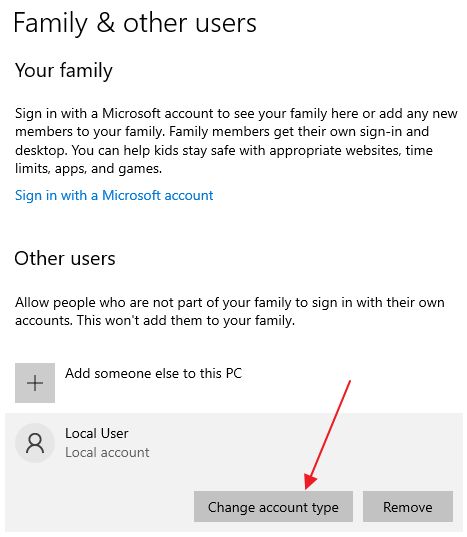
2 . Navigate to Accounts > Family & other users.
3. In the right panel under Other users there’s a list of existing accounts, other than the current one.
4. Click on Change account type.
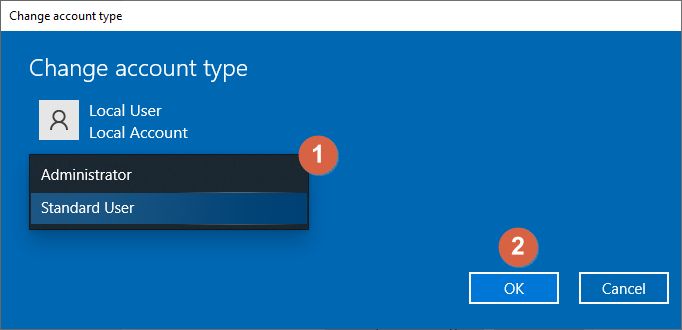
5. In the drop-down list select Administrator, then hit OK to confirm. That’s it. The newly added local account is now an administrator.
Near the account type change button, there’s also a Remove button. Clicking that and confirming will completely remove the account, its files, and settings from Windows 10.
How to Add a New Local Account in Windows 11
The procedure to create a new local account in Windows 11 is very similar.
1. Open the new Settings app (use any method, or just press Win + I).
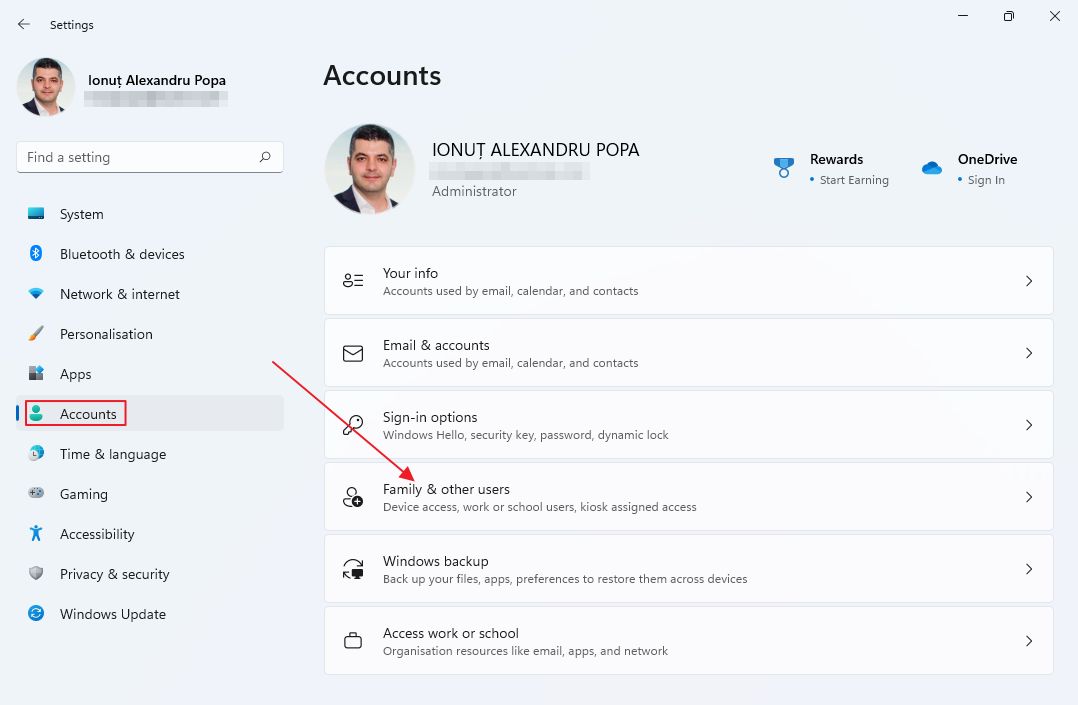
2. Navigate to the Accounts section on the left-side menu.
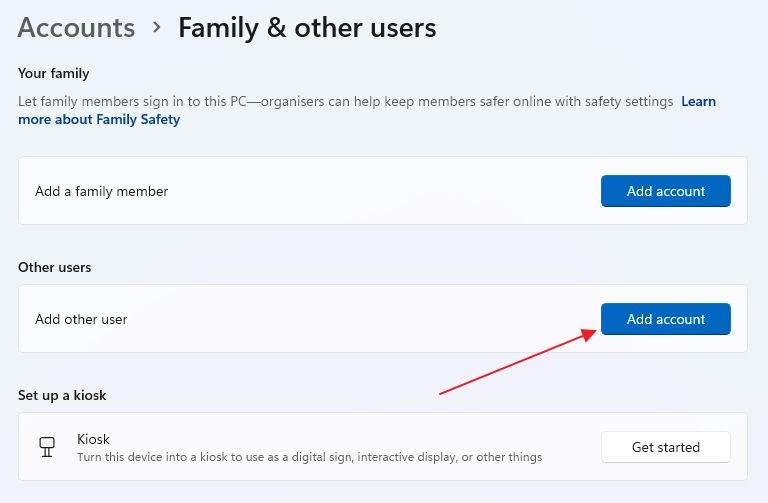
3. On the right panel click on Family & other users.
4. Click on the Add account button.
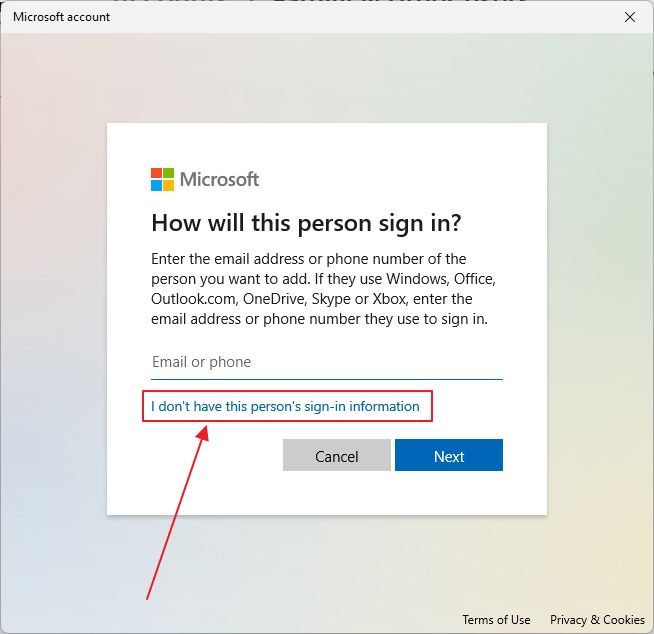
5. A new popup will open asking for Microsoft’s account email. Make sure you click on the I don’t have this person’s sign-in information link.
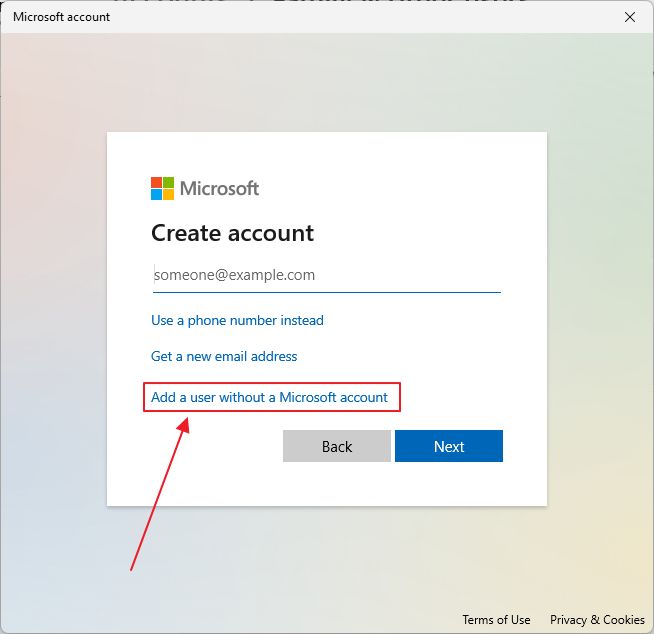
6. Don’t fall for the trap of creating a new account and click on Add a user without a Microsoft account.
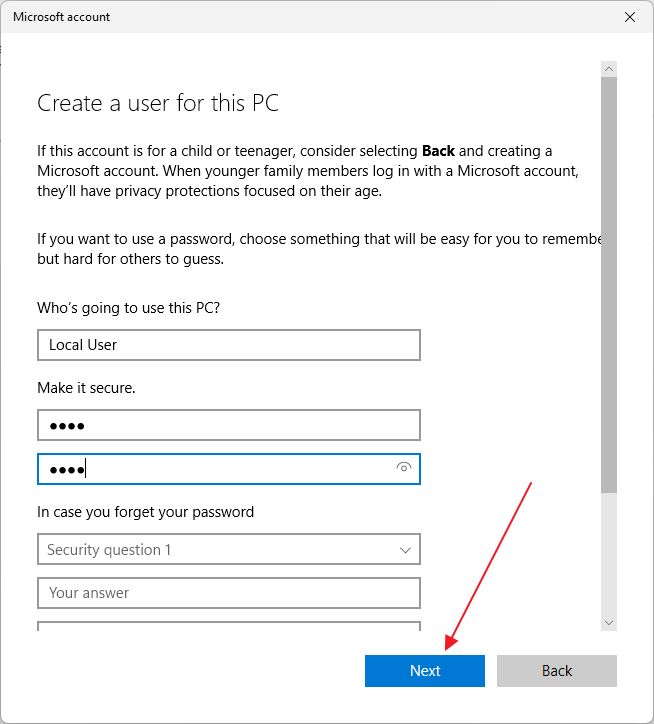
7. Finally, the local account creating form will open. Pick a username, and password, add three security questions that will help you regain access to your account, and click Next.
You’ve successfully added a new local, offline account in Windows 11.
How to Switch Between User Accounts in Windows 11
To switch between existing user accounts in Windows 11 you need to do the following.
1. Open the Start menu.
2. Click the currently logged-in user icon.
3. In the small popup window click on the desired account.
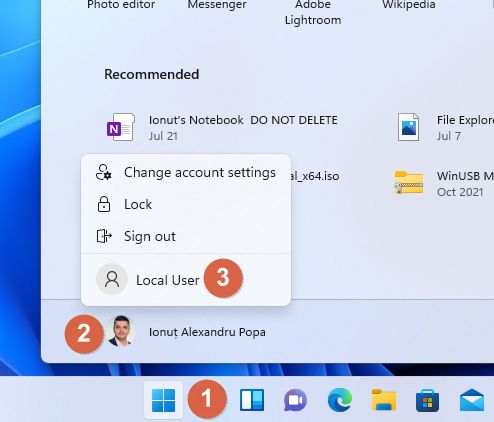
4. Ideally, to save system resources you should Sign out of the current account first. If you do so you will be sent to the Windows 11 login screen.
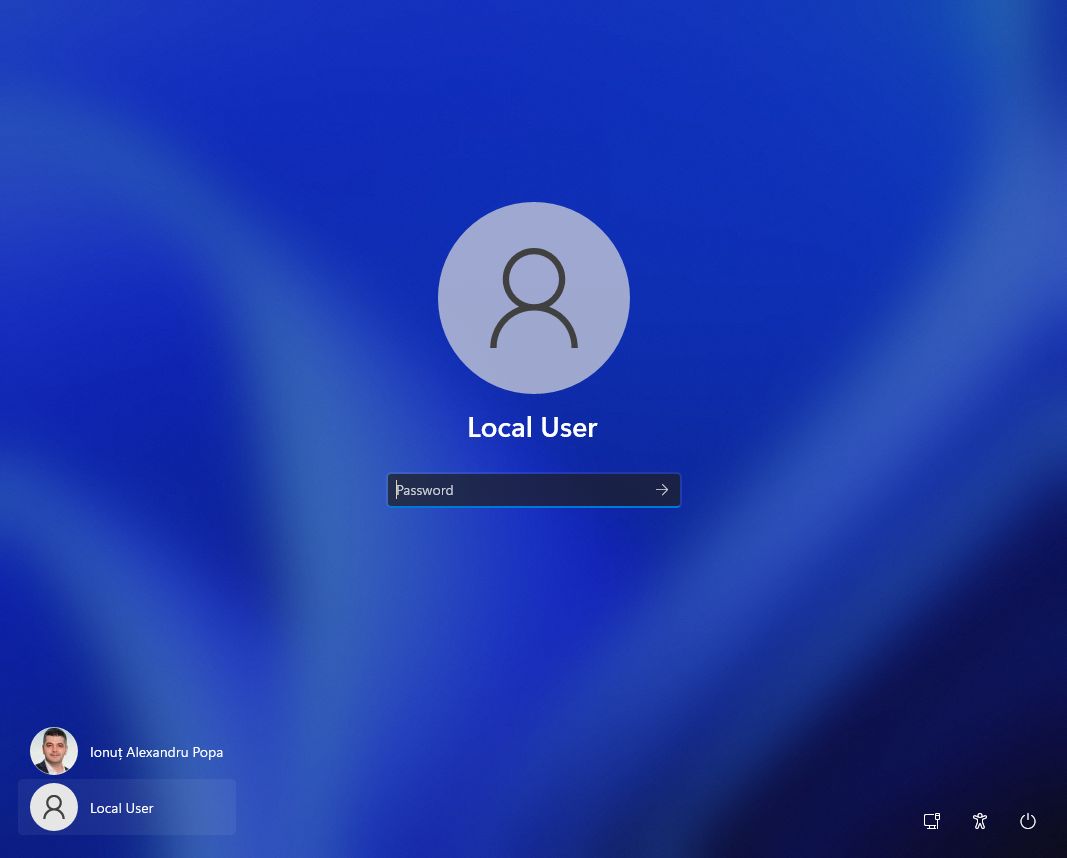
5. If you’re here, on the lower-left of the screen there’s a list of accounts from this computer. Pick the correct one, enter the password and you’re in.
Switching the Account Type for Another User in Windows 11
Requirements: you need to be logged in in Windows 11 with an administrator account
As in Windows 10, all newly added accounts in Windows 11 are standard users. As before, it is possible to change any existing account from Standard to Administrator, and vice-versa. Here’s how to do it:
1. Open the Settings app again.
2 . Find your way to Accounts > Family & other users.
3. On the right side, under Other users you’ll see a list of existing accounts.
4. Click on Change account type next to the account you want to change.
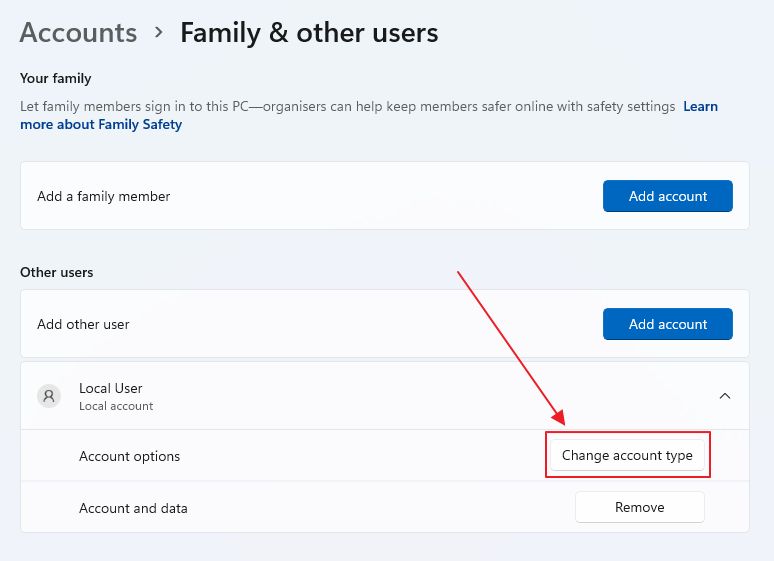
5. A new popup will open. Select the desired account properties from the drop-down list and confirm with OK. That’s it.

Below the Change account type button, there’s also a Remove button, which upon further confirmation will remove the select account completely from the system, deleting its files and settings.
See how easy it is to create a new local account in Windows? If you still have questions don’t hesitate to leave them in a comment below and I’ll do my best to help you.