- Did you know you can improve Windows performance by reducing the number of processes that start automatically?
- Debloating Windows will improve performance while also offering better privacy in the long term.
- Learn how to debloat Windows if it was installed a long time ago, without reinstalling by using the Christ Titus Tech’s Ultimate Windows Utility.
I like Windows 11. I don’t want to go back to Windows 10. That being said, I don’t like the direction Windows is heading.
It’s becoming too bloated, full of stuff I’m never going to use, it’s now cloud oriented, and to put a cherry on top: the lack of privacy is also a serious issue for me.
These problems can be fixed to a point, but the solutions are not really for beginners. You need some skills and an understanding of what these tools do for your Windows installation.
This is why I decided to do a short guide on debloating Windows on a machine running the same OS for a while now. I’ll demonstrate what I’m doing on my Windows 11 desktop, running the OS for about one and a half years now.
Important disclaimer: I can’t stress this enough: this operating is not risk free. You can break or seriously cripple your Windows installation if you select too many options. Always do a full system image backup (use our Windows Backup guides for that).
The goal of this debloating guide is not to strip Windows of features. I don’t want to create another Tiny11 ISO image that you can use to clean install Windows.
I just want to streamline my existing Windows installation, while enhancing privacy. I don’t want to reinstall anything, and I assume neither do you. If you want to do the same this guide is for you too.
First Debloat Step, Remove Startup Items
Before you proceed with the debloating I suggest you take a look at the startup items and remove any app that’s not necessary to start together with Windows.
This will improve the computer startup time and will free up RAM and CPU resources. You can always start these programs manually, when needed, and close them when you’re done.
Use this guide to check and remove Windows startup items. It works for both Windows 10 and Windows 11.
Check How Many Processes are Running in Windows
For a fair before and after comparison I think it’s mandatory to check the number of processes running in Windows before and after you debloat your system.
One program can launch one or (a lot) more processes, so no, your computer doesn’t run hundreds of apps at the same time. It does run a ton of small services though. Most of them are dormant or consume a tiny amount of resources. But they all do add up. On less powerful systems this could cause performance issues.
Here’s how to check the current processes situation:
- Launch the Windows Task Manager (Ctrl + Shift + Esc will do just fine).
- Navigate to the Performance menu on the left side.
- Select the CPU tab on the right panel.
- Check the bottom right zone and identify the Processes number.
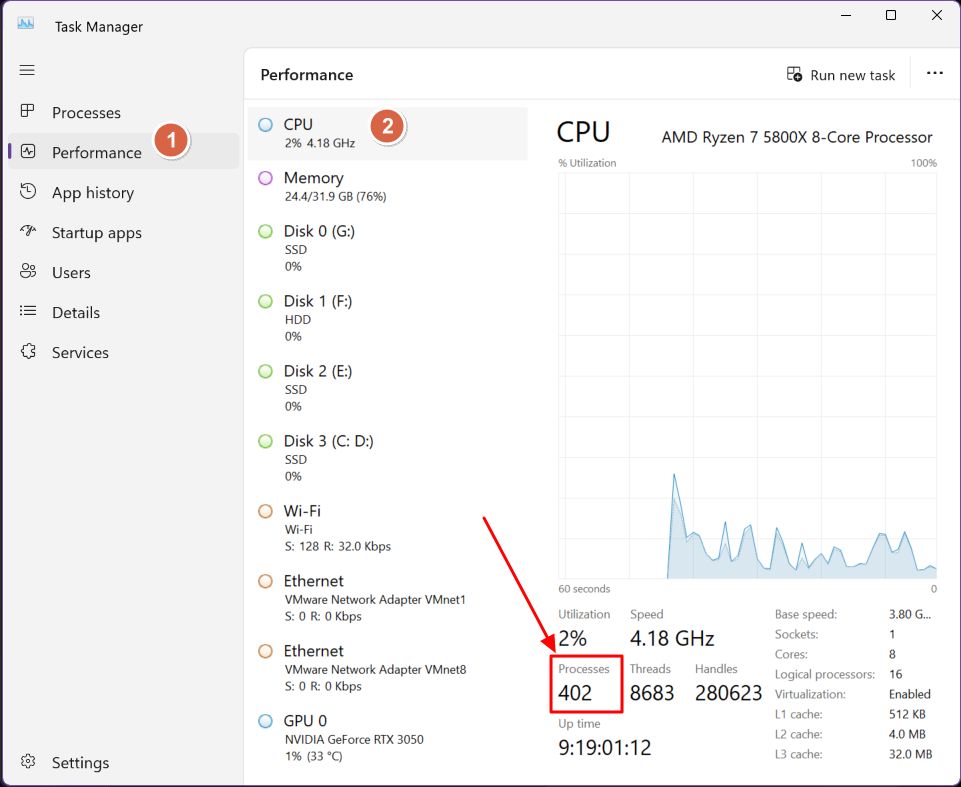
402 processes! Ouch.
That’s with all the programs I normally keep open. Edge creates 85 processes with a few dozen tabs open, so with the programs closed this number is likely to be a lot lower.
But that’s not how you run Windows, right? I promised a fair comparison. So, I will now run the debloater, then check again, after I reopen the same apps.
How to Debloat Windows 11 with Chris Titus Tech Windows Toolbox (WinUtil)
For this guide we’re going to use the PowerShell Windows Utility by Chris Titus. I’ve been following his YouTube channel for a while now and I can recommend it for a lot of practical Windows guides. He seems like a nice guy to have a bear with.
His utility is compatible with Windows 10 and Windows 11. There’s nothing to install. The script is hosted on his website, so whenever you run the utility, you’ll be using the latest version.
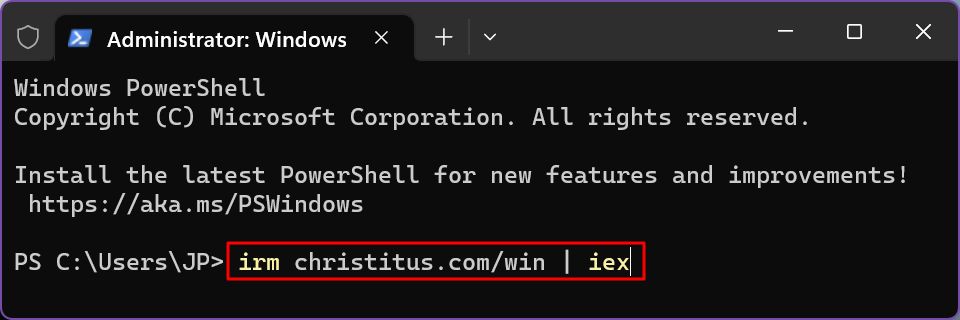
1. Right-click on the Start button and select PowerShell (admin) or Terminal (admin) to start the command line interface with elevated administrator rights. This is mandatory.
2. You need to type this command exactly:
iwr https://christitus.com/win | iexPress Enter to execute it.
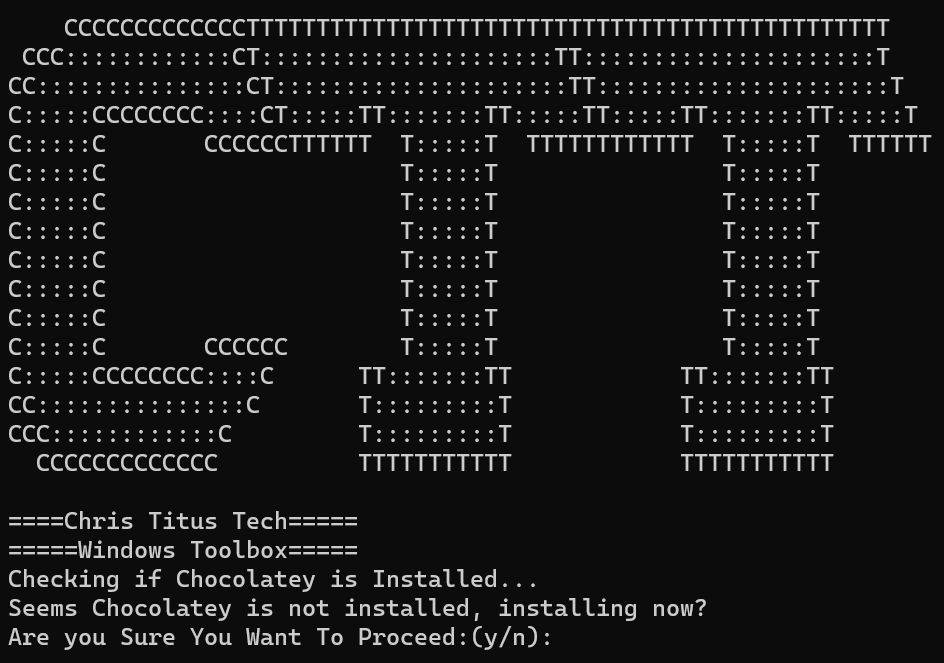
3. If you don’t have Chocolatey installed (more about that in another article), press the “n” key followed by Enter at this step. There’s no need to install this package manager.
Also take a step and enjoy the lost skill of ASCII art.
4. The Windows Utility window looks like this.
By default, it will open the Install tab, where you can install a bunch of utilities. This works similarly to Ninite and won’t require user intervention once you start installing stuff. It’s also possible to upgrade existing installations. I will definitely try this later.
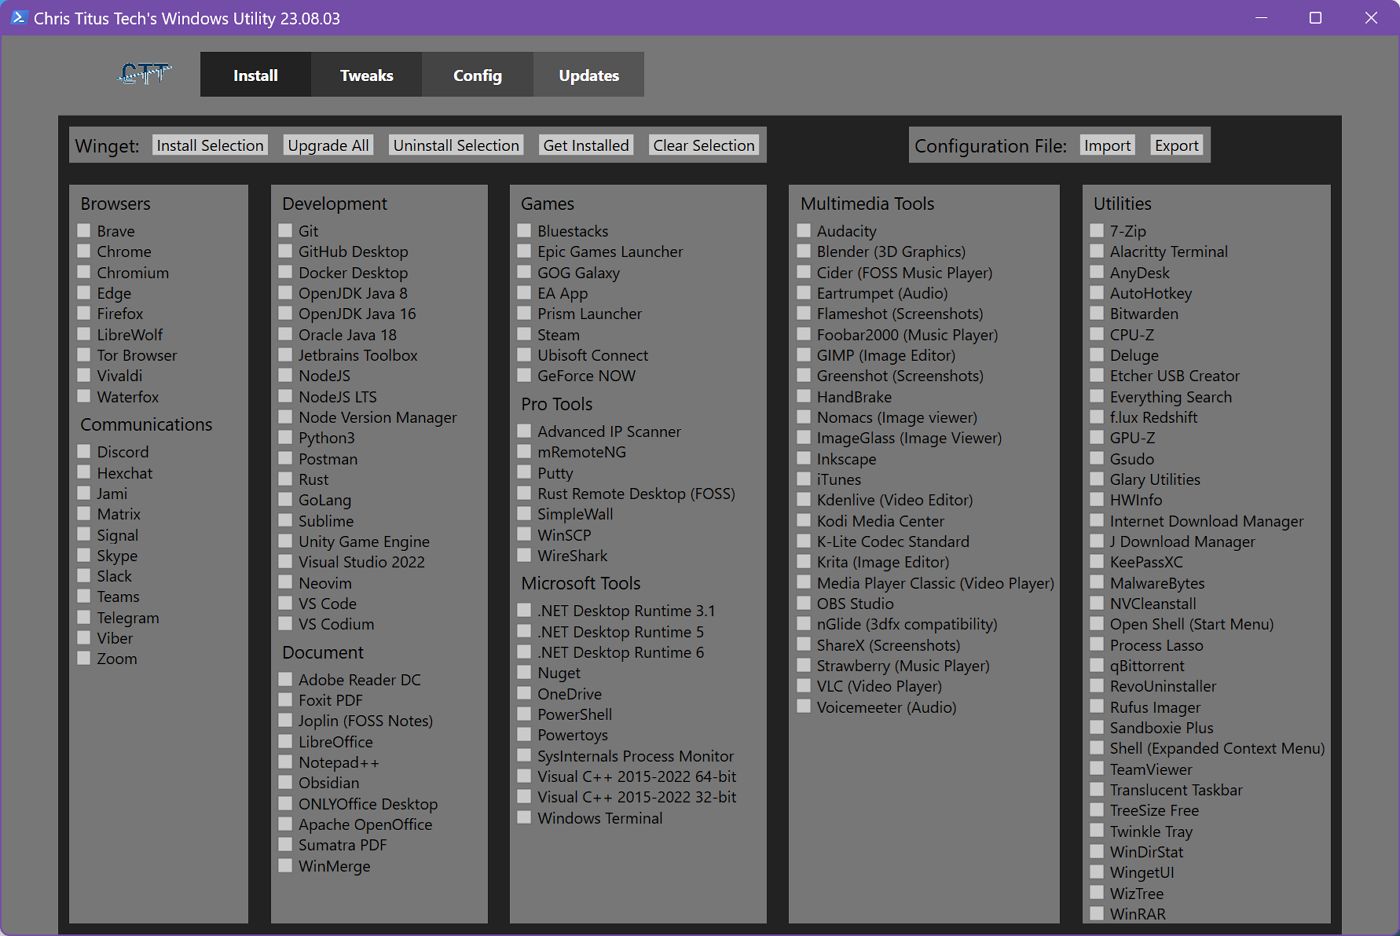
You need to select the Tweaks tab to proceed.
5. Instead of trying to figure out what to enable and what to disable use the Recommended Selections buttons at the top. For a good amount of debloating use the Laptop or Desktop options, depending on what system you are running.
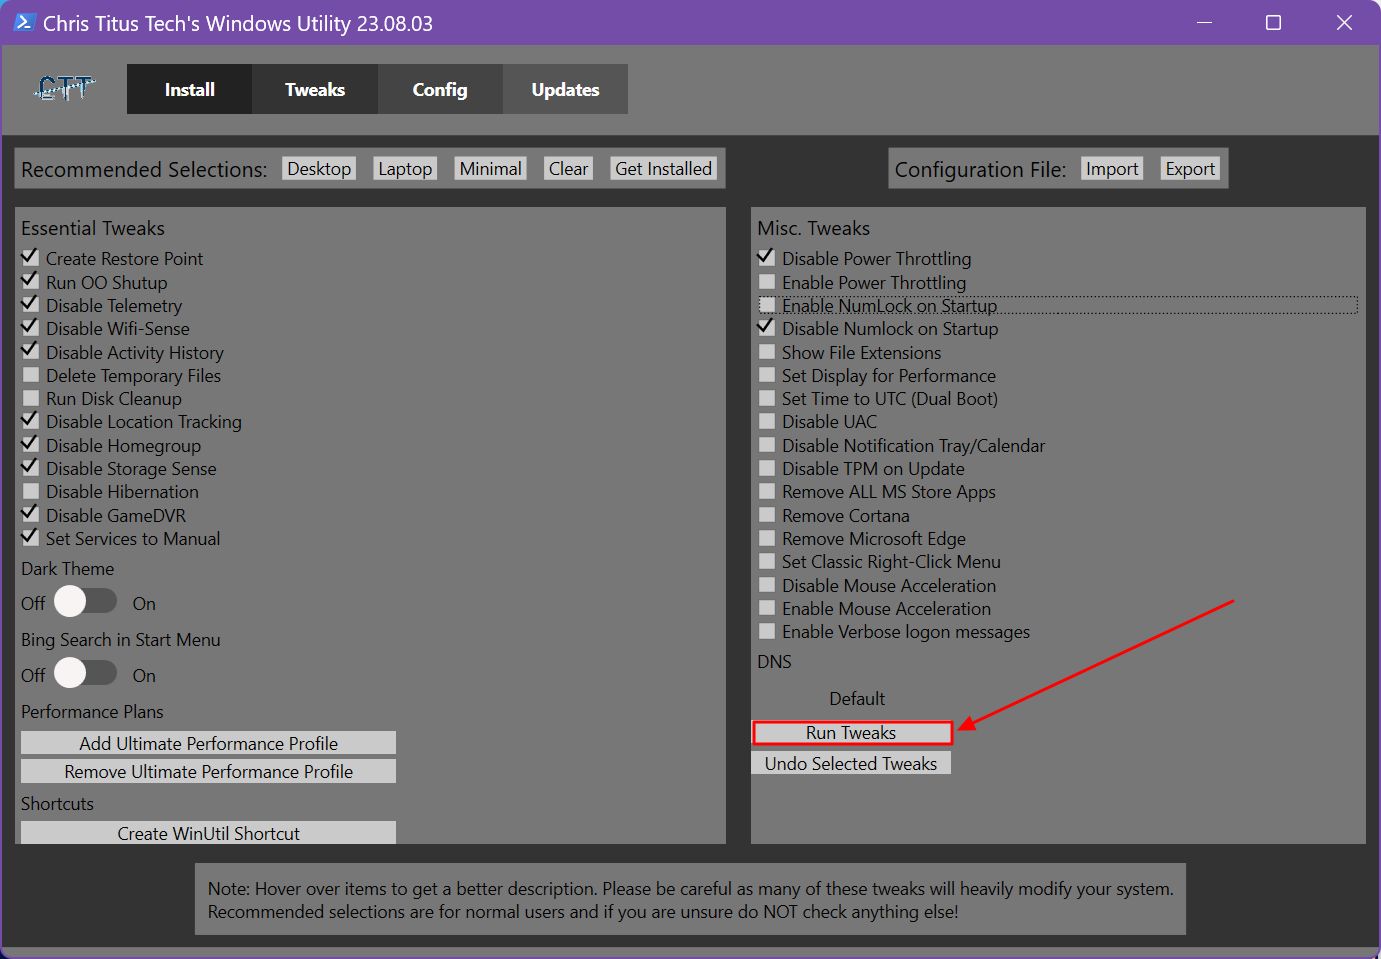
What’s the difference between Laptop and Desktop? Desktop disables Hibernation and app Power Throttling while laptop enables Power Throttling (lowers app background activity to preserve battery life).
Here are my settings:
- Laptop for my ROG laptop / Desktop for my PC minus “Disable Hibernation” because I actively use it.
- Bing Search in Start Menu set to off.
- Disable the NumLock key at Startup because I use a small 75% layout keyboard.
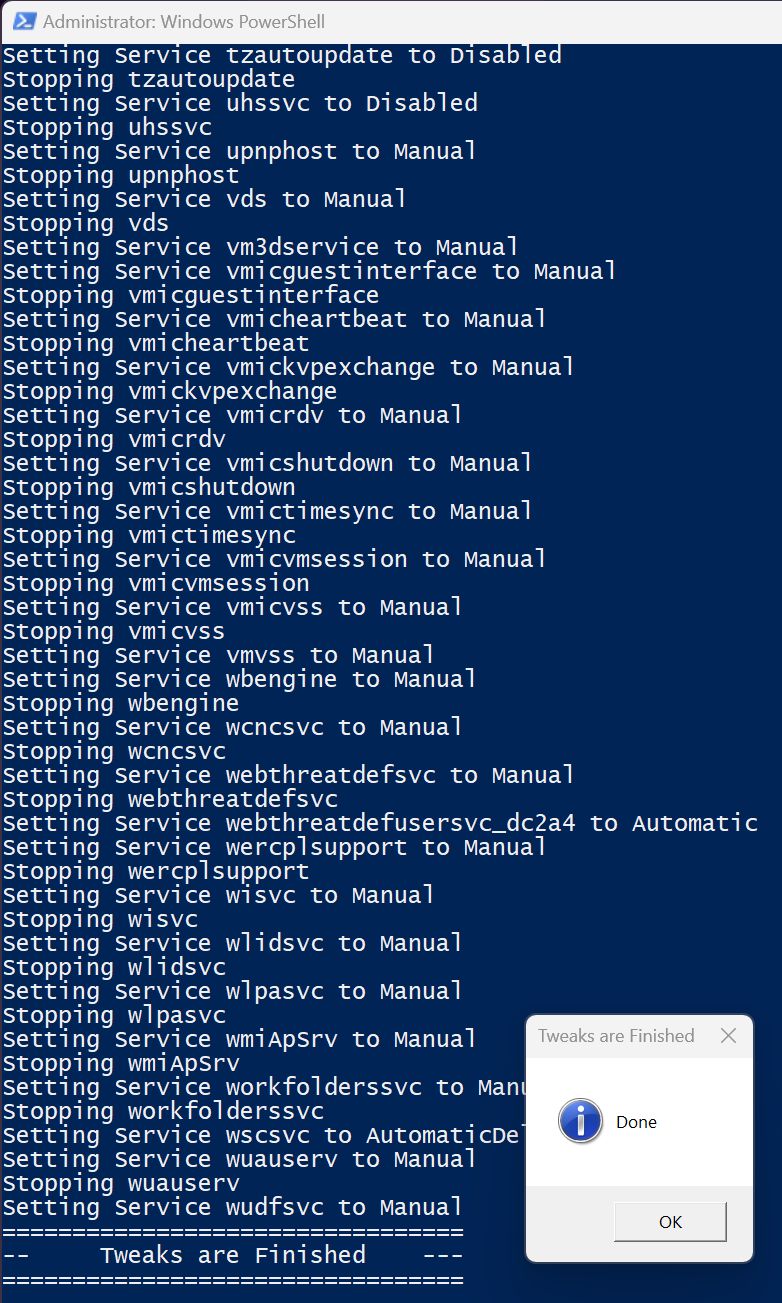
6. Once you’ve made your selection it’s time to get everything going. For that, click on the Run Tweaks button.
7. It will take a few moments for every selected change to apply. When you get the Tweaks are Finished message make sure to restart your PC.
If you feel courageous you can try and remove some of the Microsoft features such as Cortana, Windows Store, and the already installed Store apps, plus the Edge browser.
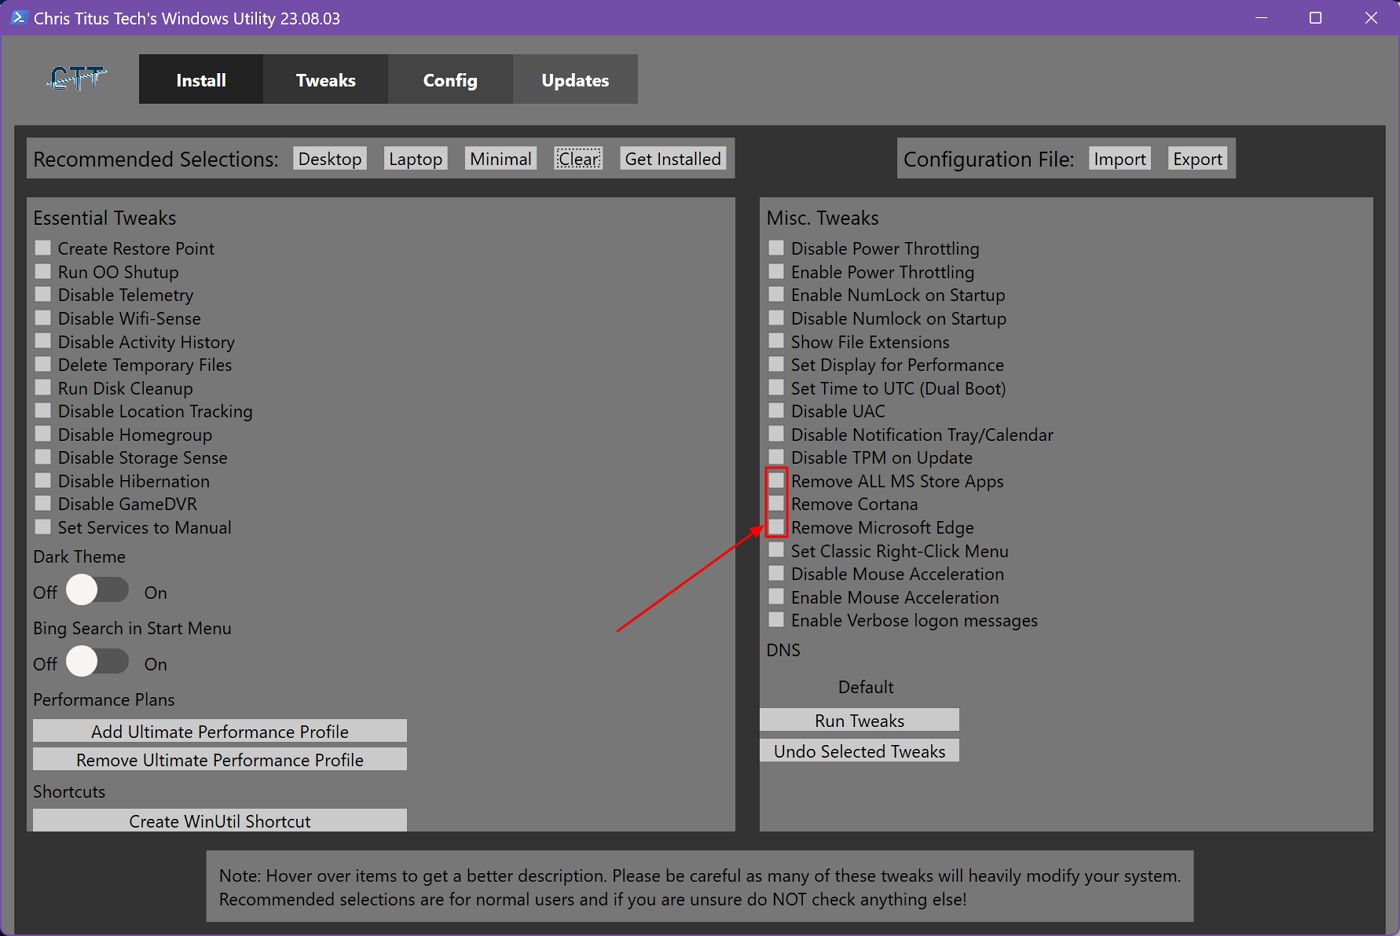
Just keep in mind what I said about doing a full system backup first. Removing too much stuff can cripple your Windows installation.
What’s the point of debloating then if you can’t fully use your machine?
What to Expect after Debloating Windows?
After debloating Windows and reopening all apps, I now have only 230 processes running.
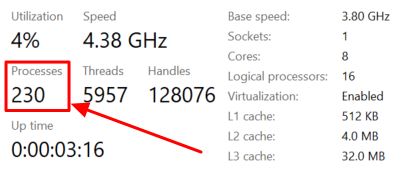
I suspect some of the Edge tabs are sleeping, so this number will creep up slightly. After a few hours it was hovering in the 270-280 range. That’s a nice improvement, nonetheless.
I’ve tried the same guide on a fresh Windows 11 VM installation with no third-party apps installed, and the number of processes dropped from 150 to just 90.
That’s a very nice improvement, considering you’re not removing important Windows features.
How to Revert a Debloated Windows Installation?
If you ever feel like you don’t like the debloated version of Windows, it’s possible to revert all changes. If you don’t like it right away just do a System Restore from the Restore Point created by this utility.
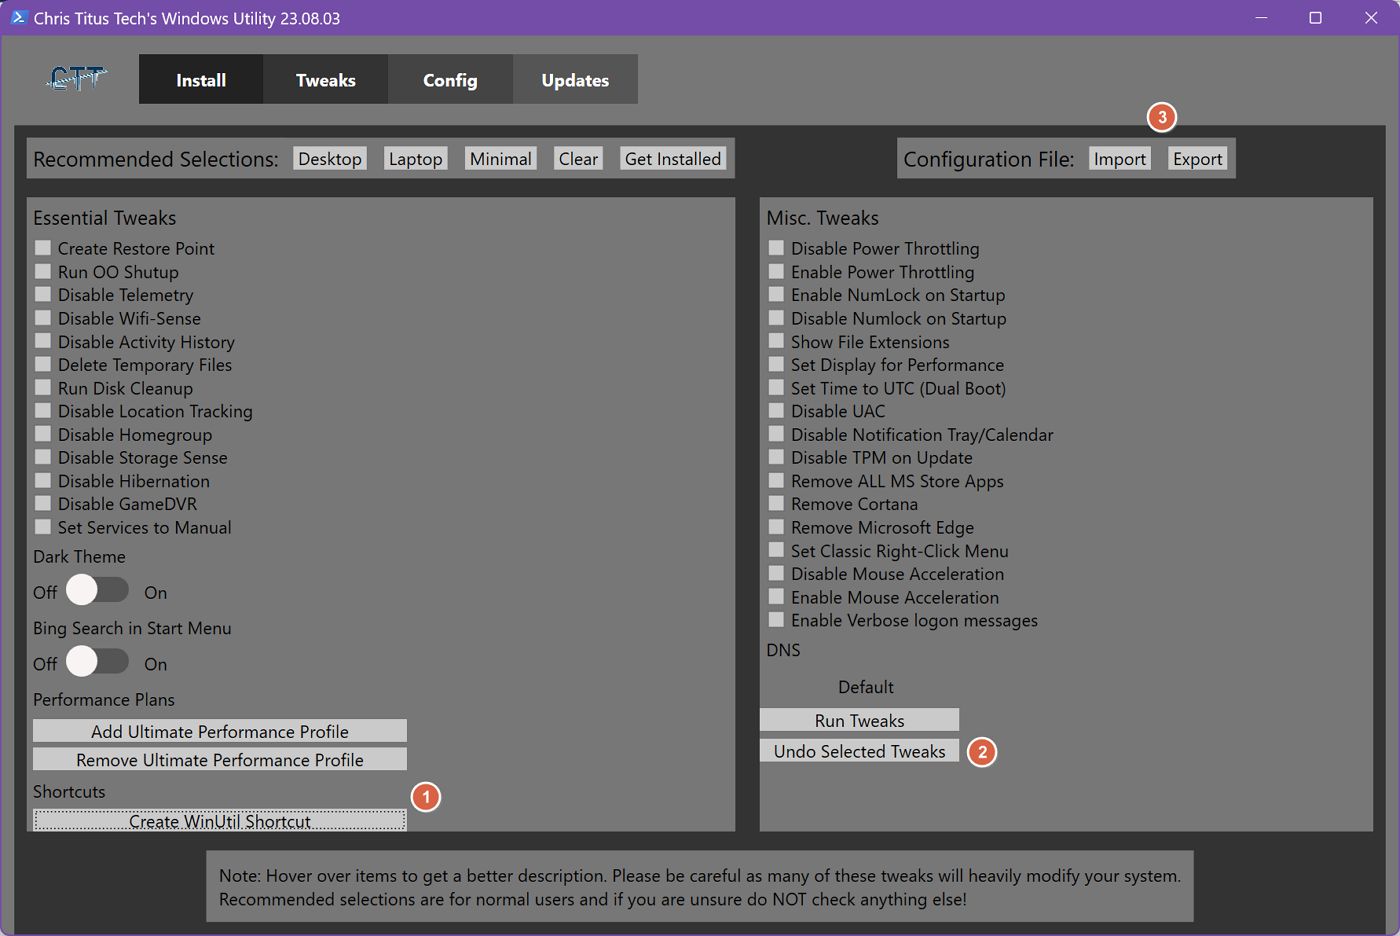
If down the road you don’t like the changes just run the Windows Toolbox Utility once again using a previously created WinUtil shortcut (1), reselect the applied tweaks and click on the Undo Selected Tweaks (2).
You can also Import and Export (3) a configuration file in case you migrate the same tweaks to another system or if you fear forgetting what tweaks you applied.
The Get Installed button will try and figure out what settings you have already applied.
Further Tweak Privacy Settings with O&O ShutUp
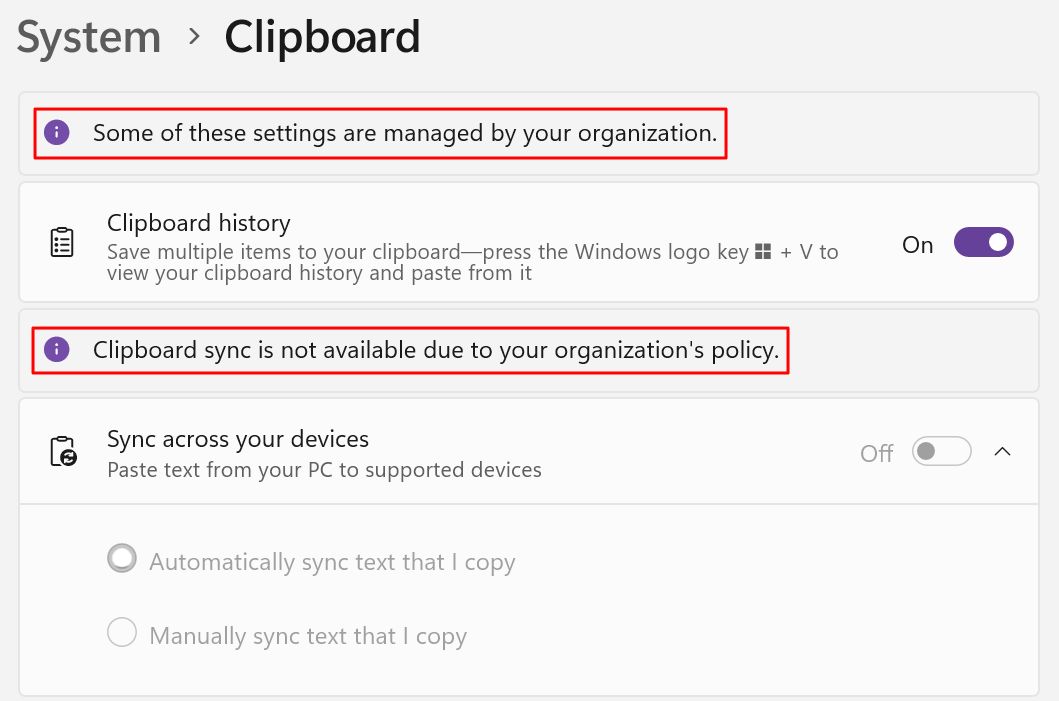
If you checked the option to run the O&O ShutUp utility some of the Windows’ settings will be disabled, and you won’t be able to change them back.
Instead, you will see the Some of these settings are managed by your organization. message.
If you find this annoying, you can revert back the privacy options by running Chris’ utility once again and selecting Undo Selected Tweaks.
Don’t do that if you care about privacy. Either use the Local Group Policy Editor to identify the specific policy and turn it back again. Or, the better option, download use the O&O ShutUp utility to control these policies in a better simplified interface.
On my two system(s) where I applied this guide, I’ve left everything as it is for now. The privacy feature lock down only annoys me in the Edge Browser when I start typing the address of a website I’ve previously visited. It will not autocomplete the address for me anymore.
This is a small price to pay for more privacy.
How about you? Have you debloated your Windows PC? What utilities or methods have you used to clean your Windows installation? Let us know in the comments.
Update: as I mentioned, debloating Windows and stopping all the privacy related settings looks nice on paper, but some functionality will be completely disabled, if it depends on one of these settings. You may be OK with that, or you may not.
That’s why I’ve reverted one of my machines to the out-of-the-box (OOB) Windows experience. I’ll run an experiment, side by side, see what’s going on, and let you know how I feel about Windows with and without privacy.