- Find out the main differences between an online and offline account, how to check which one you’re already using and how to switch between them.
- When you set up Windows at one point you will have to choose between a local or online account.
- The differences between the two are important, but not really essential.
Pretty much any modern operating system needs an administrator account. This account is created during setup and is used to access the computer and perform tasks that require this kind of authority, such as changing settings, installing and removing programs, or creating other users.
When you install Windows 10 or set up a clean Windows 11 install late during the setup process you need to choose between setting up your computer for personal or organizational use. The latter means an IT admin will provide you with the required access credentials.
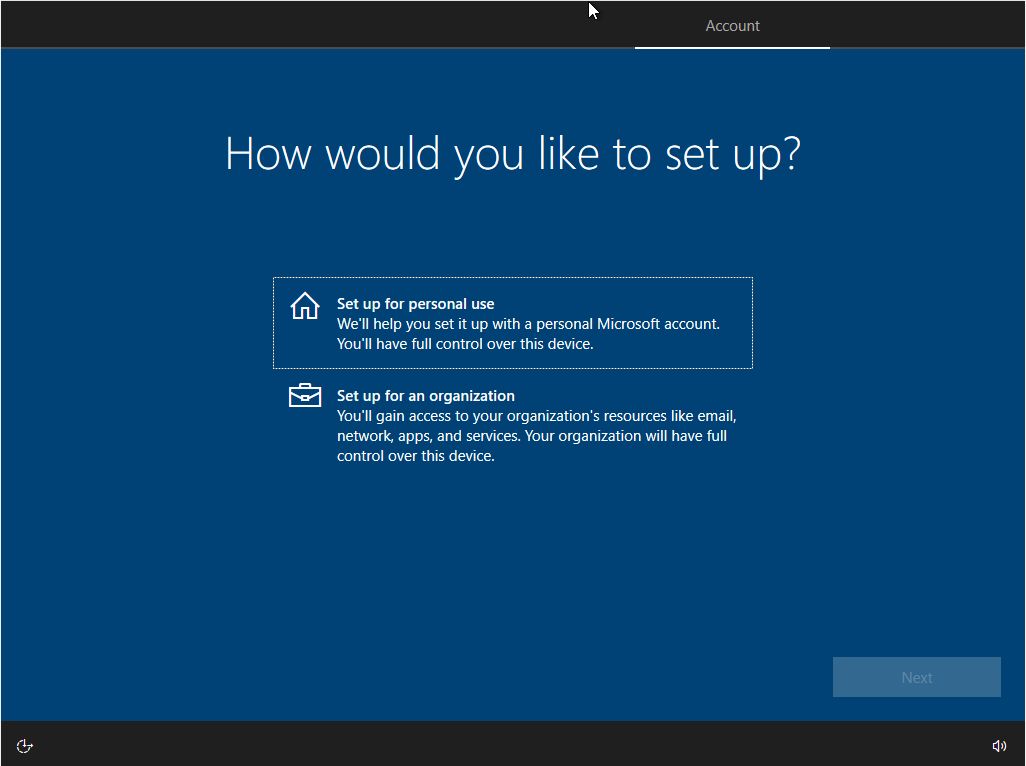
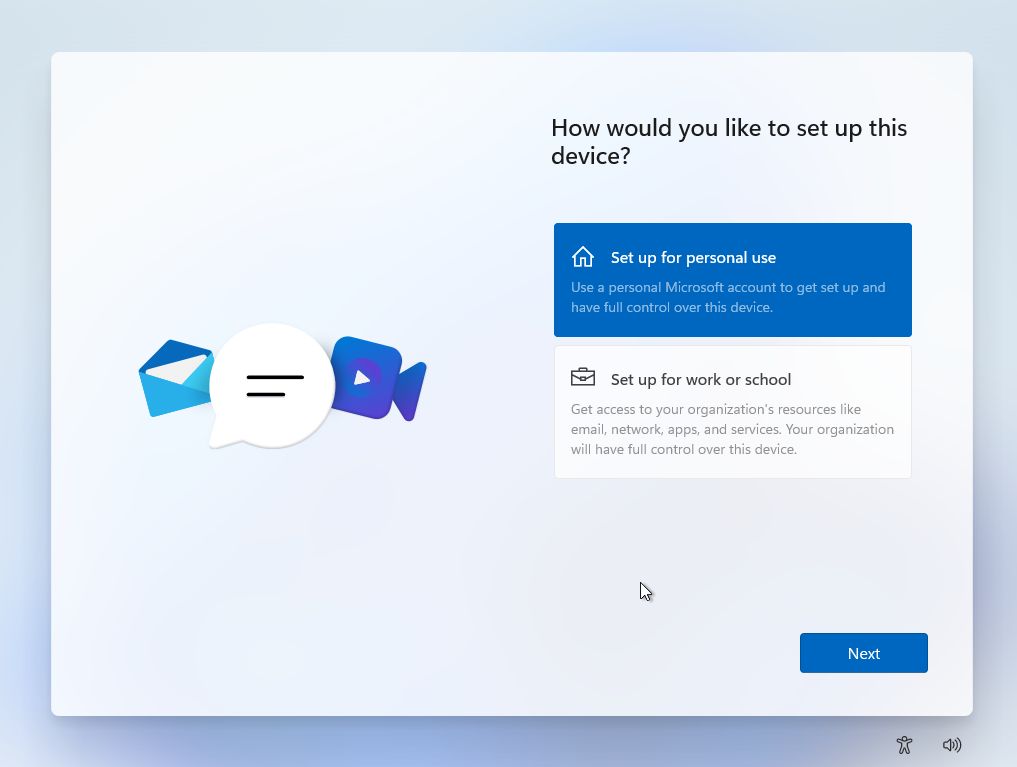
Most people will pick personal, which will provide two options: set up the main administrator account as a local or online account. The option is present in Windows 10, when the ability to use a Microsoft account was first introduced and in the new Windows 11, which now pretty much forces the use of this type of account, severely limiting the options of of using a local account (but it’s not impossible).
Find out how to create a new local account in Windows
This article will try and clear the waters when it comes to Microsoft account vs local account conundrum because that’s the choice everything boils down to at this point.
Microsoft will try and “guide” you toward the online account option but it’s easy to choose a local account. Here’s how these setup screens look in Windows 10 and 11.
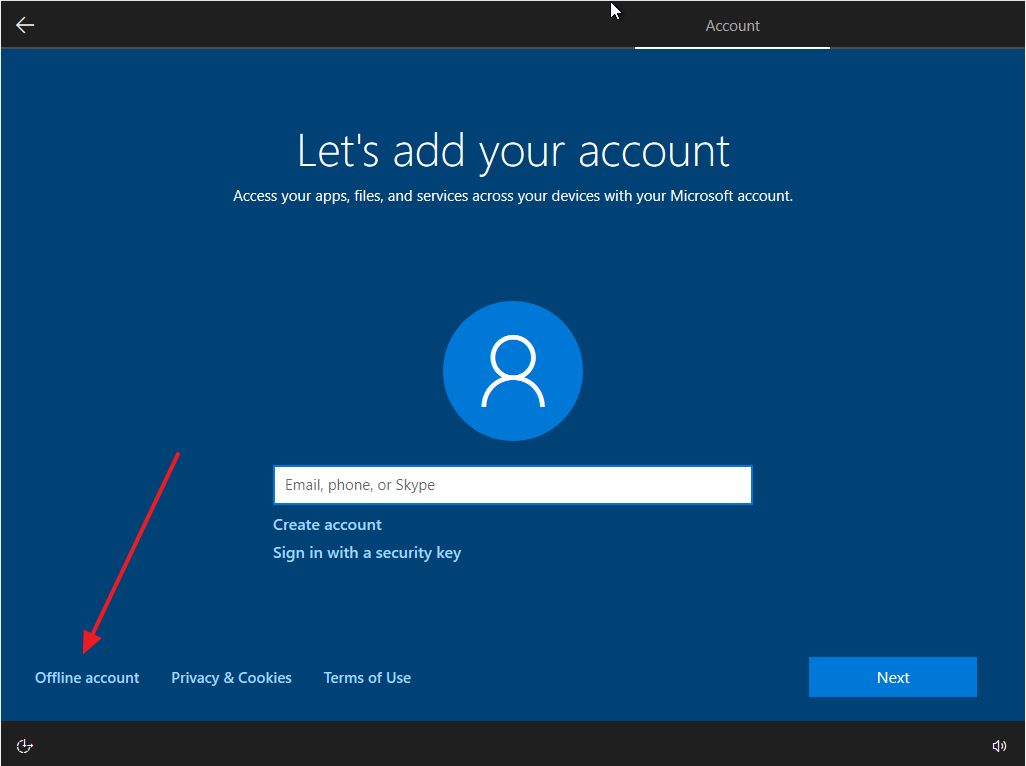
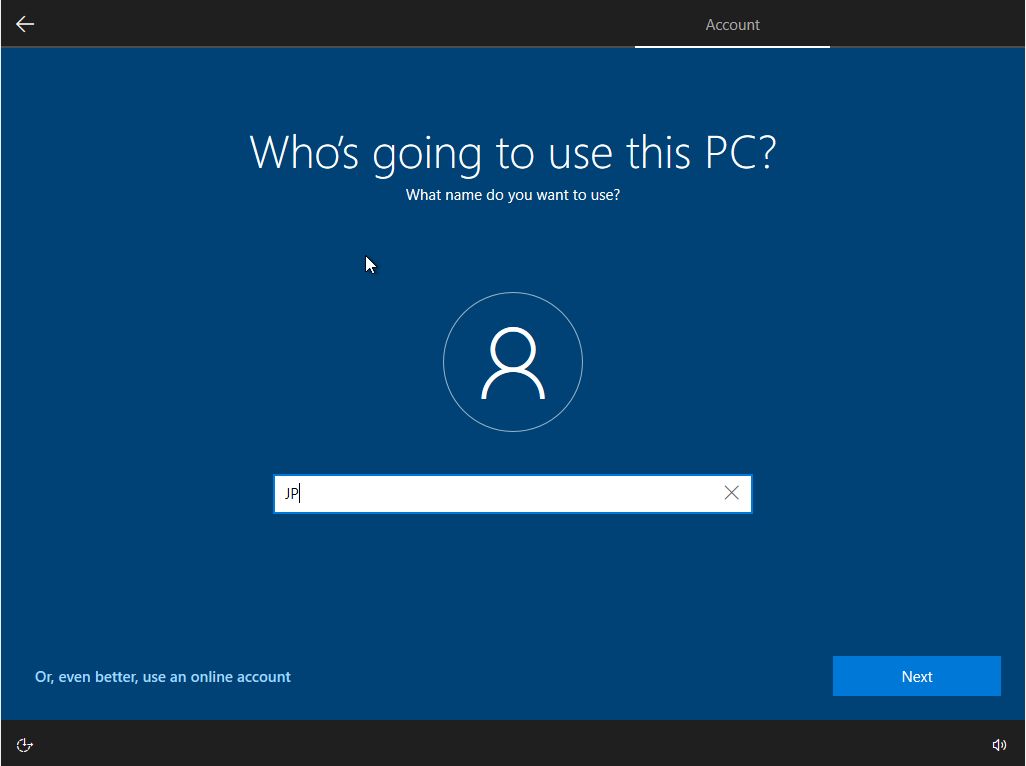
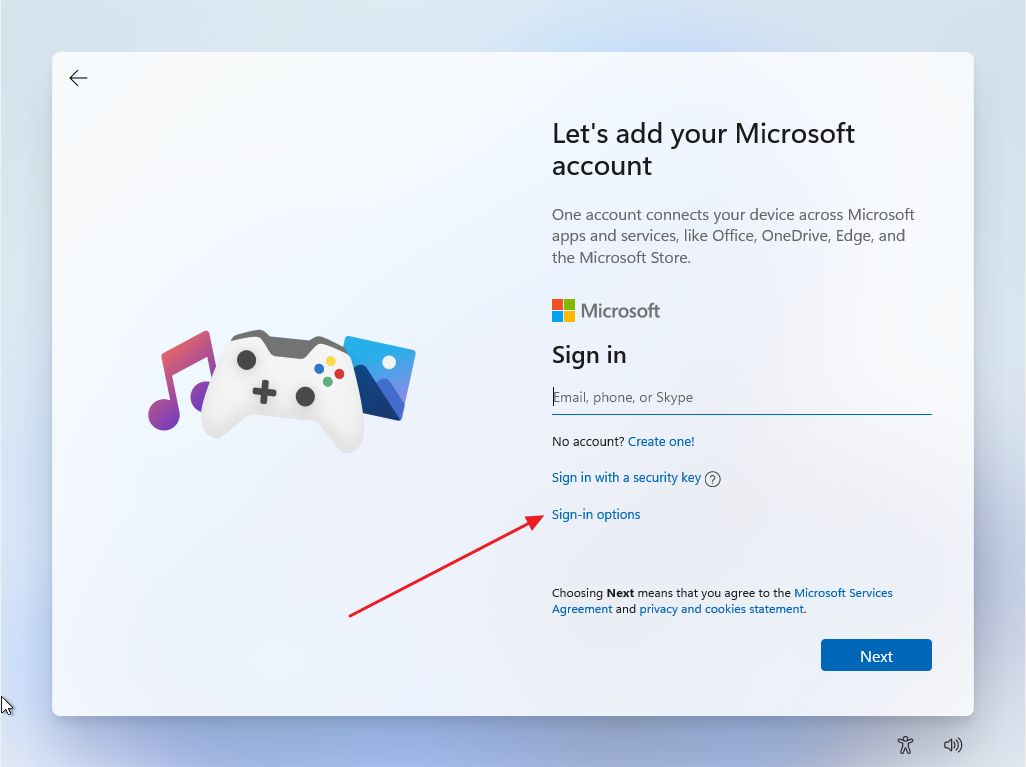
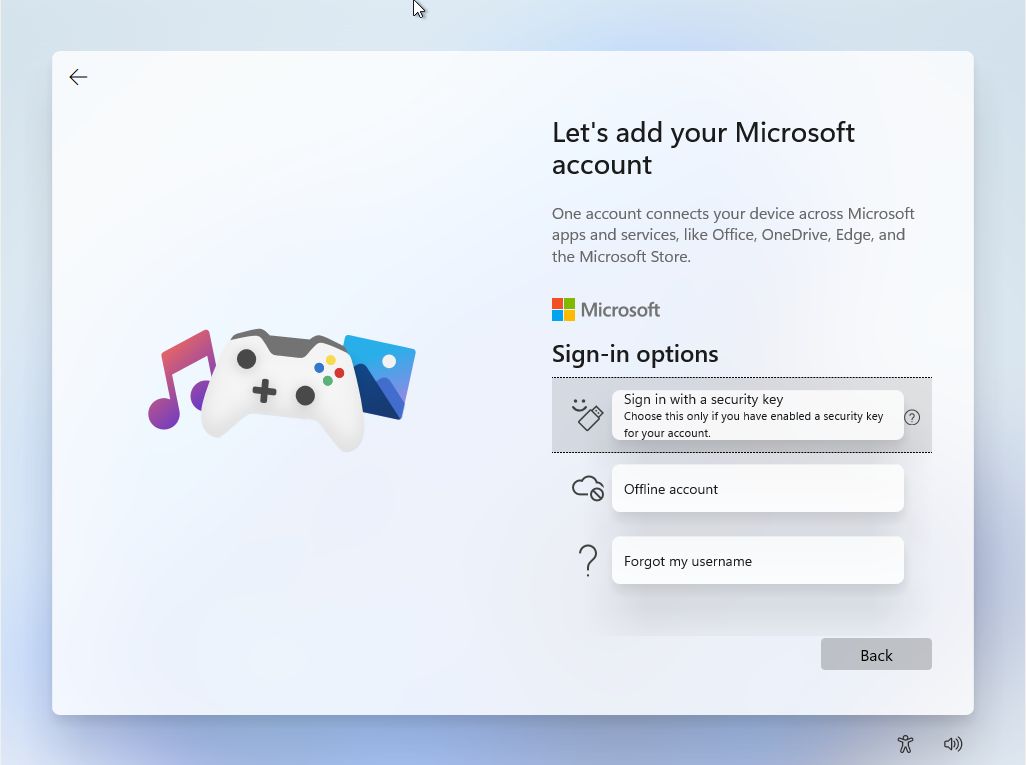
But what is a local account, or an online account? What are the differences and do they really matter? You’ll get all the answers for the local account vs Microsoft account debate below if you continue reading.
CONTENTS
- 1 Microsoft Account vs Local Account: Definition and Differences
- 2 What is a Local Account in Windows?
- 3 What is a Microsoft Online Account in Windows?
- 4 How to Check the Type of Account You are Using in Windows
- 5 How to Change a Windows Local Account to an Online Account on Windows
- 6 How to Change an Online Account to a Local Account in Windows
Microsoft Account vs Local Account: Definition and Differences
Let’s take the two types of accounts one by one and see what’s all about. It sounds more complicated than it really is.
What is a Local Account in Windows?
This is the classic way of setting up an administrator account. You pick a username and a password, they’re saved into the operating system somewhere secure.
Each time you boot up the computer you need to sign in with these credentials. After that, you can do pretty much anything you desire.
If you own multiple Windows computers the credentials will work only on one PC. So each computer can have different admin usernames and passwords.
A local account is basically a bit more secure since the password is not used online anywhere. It’s also a bit more private since settings are not synched between computers through the cloud (you can turn sync off, by following this guide). Don’t be fooled though, as Windows will still send a lot of data to Microsoft’s servers unless you act.
A local account is less dependent on an active Internet connection, but it’s not really important, as most of us work online and need the connection for other things anyway. Plus, the online account authentication works offline too, after the initial setup.
One other option that is only available with a local Windows account is the ability to remove the login password completely. It’s not recommended, of course, but you could do it if you wanted to.
What is a Microsoft Online Account in Windows?
The name might not seem intuitive, but it’s your [email protected] email. It’s your Microsoft account that you can use to access various services and devices.
When you create an online account during Windows installation you will be logging in with your existing Microsoft account (you can also create one during this step). You will need to use the same username and password. This is how you link the two together. After that, it’s possible to use a pin instead of a long password for the current computer.
Anyway, as things are evolving with Windows, more and more services are dependent on the Microsoft online account. With a local account, you can only download free Microsoft Store apps. Paid apps require you login into Microsoft Store, as these apps are tied to your online account, so you can install them on other computers too.
An online account allows you to sync Windows settings between your computers, and access OneDrive (learn more from this article), your Outlook.com Inbox, and other Microsoft services.
One downside of an online account, besides privacy, is the fact you may be unable to log in if your Microsoft account is blocked after entering the wrong password a few times, or because of any other reason. After your recover your account you will be able to access your PC again.
It’s also possible to remove the password from your Microsoft account, but you will be using other authentication methods. Local accounts can work without entering a password at all.
It’s perfectly possible to use a local account in Windows and only login into the apps that require a Microsoft account, but why not go all the way, right?
How to Check the Type of Account You are Using in Windows
If you forgot what type of account you used here’s how to check.
Check Account Type in Windows 10
1. Open the Start menu and type Settings. Open the first result.
2. On top of the Settings app you’ll see a large banner with the current username and type of account.
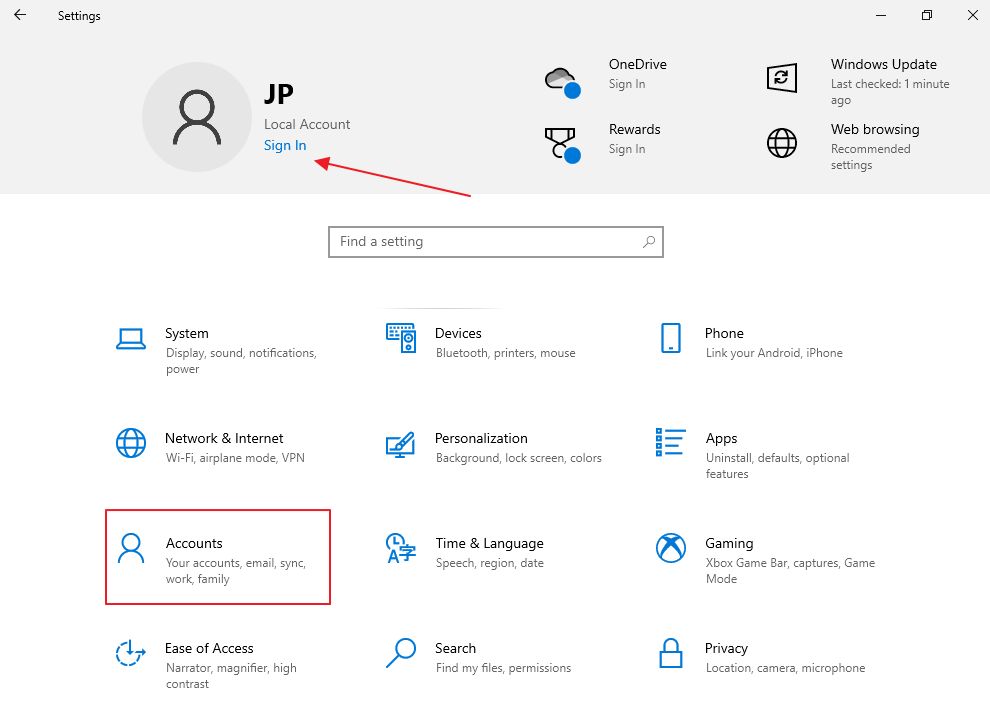
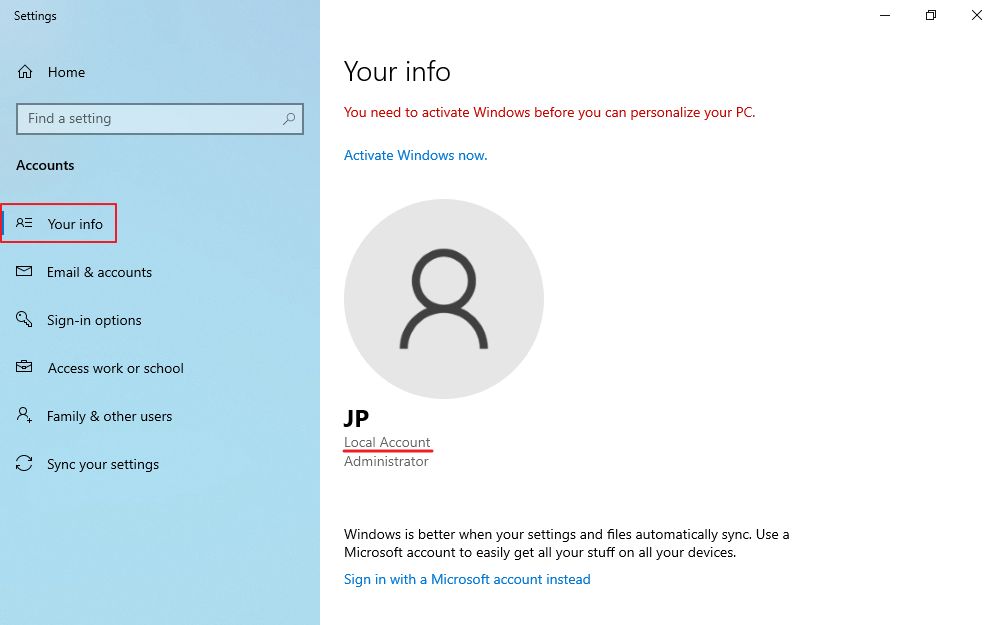
3. You can access the Accounts section if you don’t see the banner (it didn’t show up for me in older versions of Windows 10). Under the current bold username, you’ll see the account type.
Check Account Type in Windows 11
1. Open the Start menu and type Settings. Click to open the settings app.
2. On top of the Settings app, in the left corner you will see your username, and beneath either the text Local account or the login username if you have an online account.
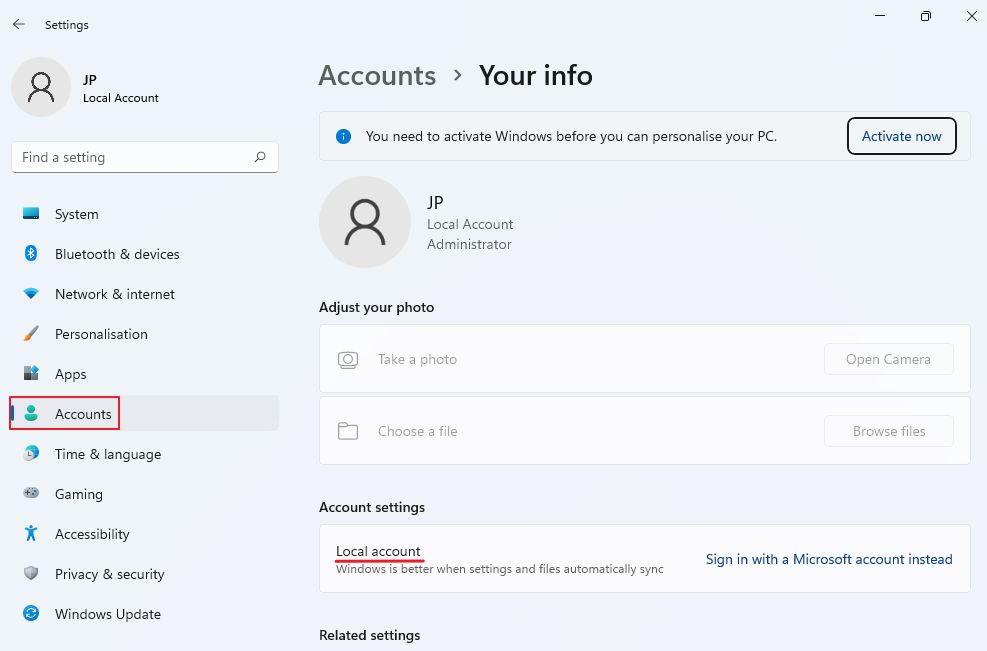
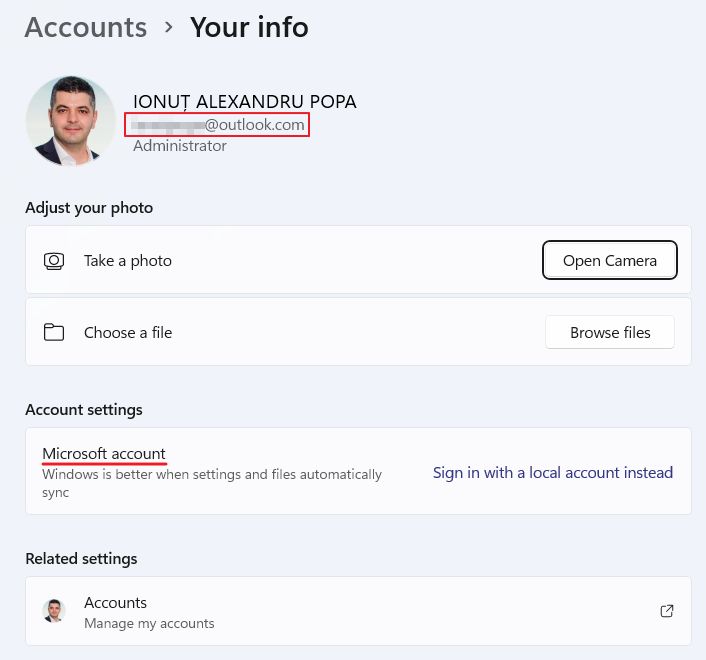
3. If you navigate to Accounts > Your info on the left side menu you will see more details about the current account you’re logged into.
How to Change a Windows Local Account to an Online Account on Windows
Believe it or not, you have the option to switch the current local (offline) account to an online account. Here’s how to do it:
1. Open the Settings app again.
2. Navigate to Accounts > Your info.
3. Click the link Sign in with a Microsoft account instead to switch from local to online.
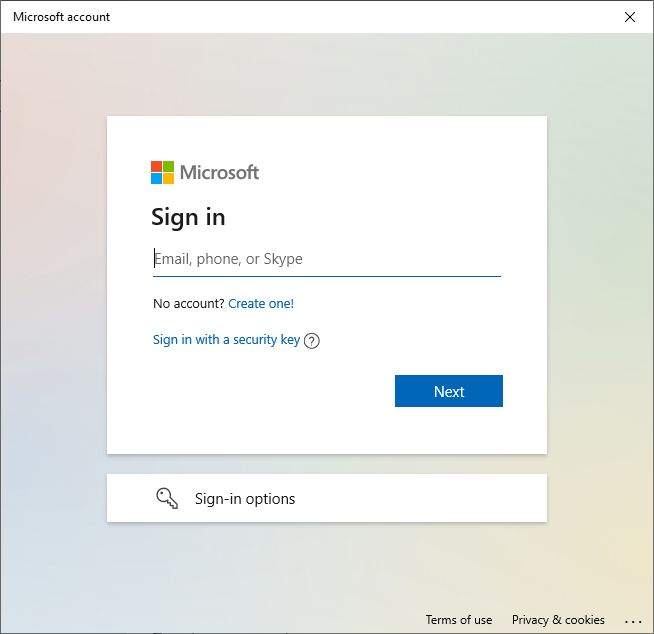
4. Enter your Microsoft account credentials to proceed.
5. Confirm the current account password.
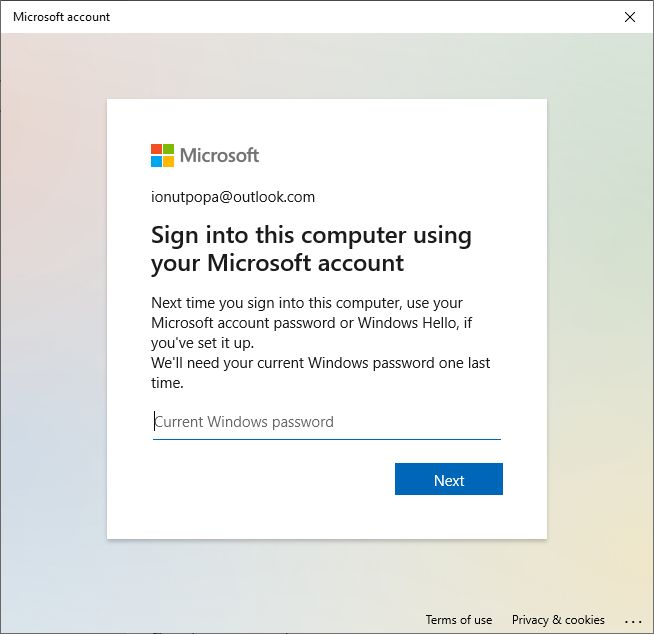
6. Check the banner on the main page Settings app and you’ll see a confirmation banner up top that says you’re now using an online account.

How to Change an Online Account to a Local Account in Windows
What’s more incredible to me is that you can also revert back to a local account. The process is pretty similar:
1. Go back to the Settings app.
2. Navigate again to Accounts > Your info.
3. Click on the Sign in with a local account instead to begin the process.
4. Ignore the following warning and press Next.
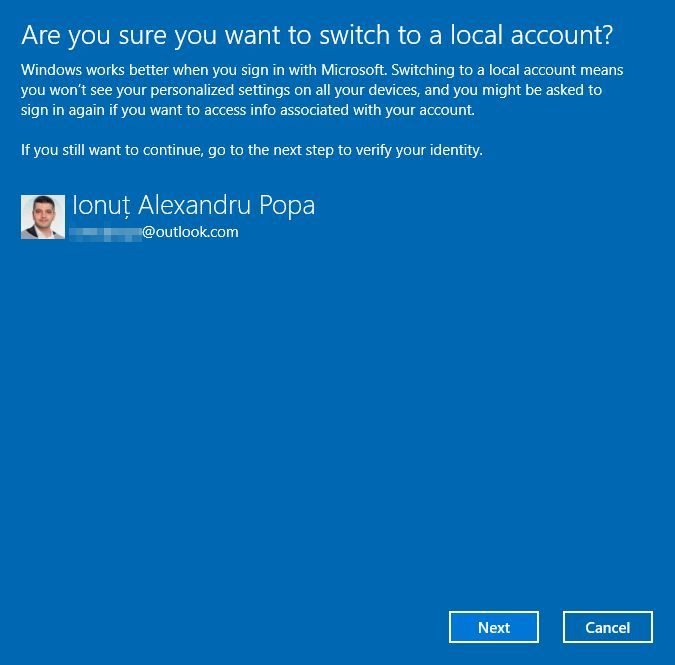
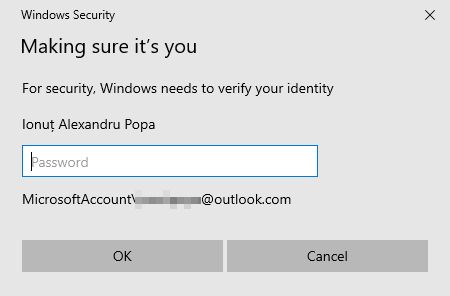
5. Confirm the password for the current offline account to continue.
6. Enter the needed details: username, password (twice), and password hint. Hit Next.
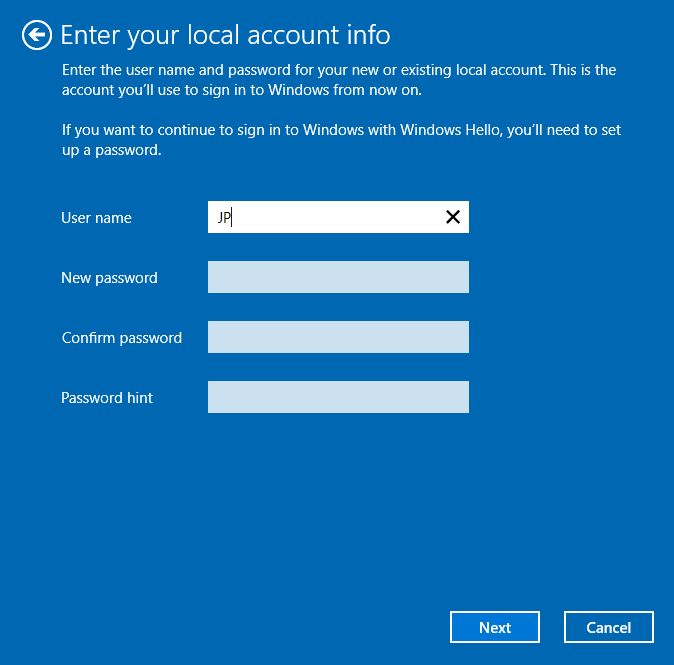
7. You will need to sign out and sign in again when changing your Windows installation to a local account. It’s not necessary when switching from local to online.
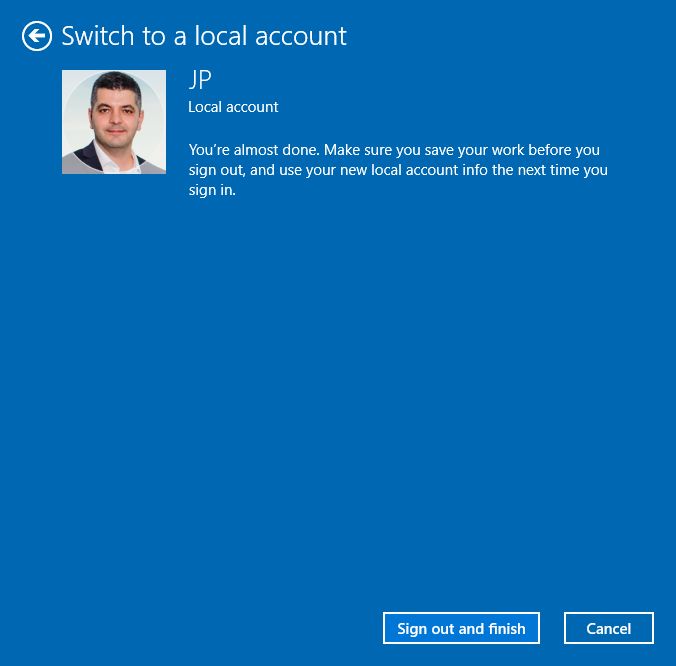
That’s it, you’re back to using a Windows local account now.
And this is pretty much everything you need to know about the local and online account types in Windows. If you have any questions let me know in a comment below.
