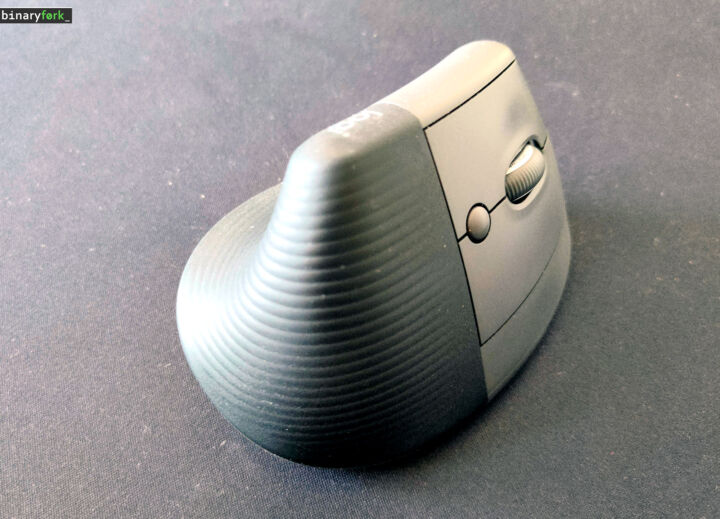
- Learn how to disable Turbo Boost with a simple Windows Power Plan change for better battery life and temperatures, at the expense of performance.
- On a laptop, when seeking better battery life, Turbo Boost can lead to higher power consumption and lower battery life.
- Modern CPUs can run up to their maximum limit without any user intervention thanks to technologies such as Turbo Boost (naming varies with the brand).

Overclocking used to be fun. I did it with every computer I had, except the last one with a Ryzen 5800X CPU. Why? Not because I’m too old for this s***, but because modern hardware already runs close to its limit by itself.
Now, as any overclocker knows, as you increase the frequency you need to pump a lot more voltage into the chip, so it can sustain that frequency without crashes. It’s not uncommon to add 30-40% more voltage just to get a 10% increase in performance.
That’s not efficient, not at all, but if performance is what you need, that’s the only way.
On laptops it works the same way, by design, and the CPU will boost as needed, taking a lot more voltage than when running at lower frequencies. That’s a problem when you’re trying to get as much battery life as possible from your portable.
I have this problem, as my gaming laptop is not that great when it comes to sipping power. So, one solution I’ve found to get a few dozen minutes more battery life is to disable Turbo Boost on my CPU when running on battery power.
You can do that too, with a simple tweak of your Windows Power Plan.
I won’t go in-depth about Windows Power Plans, but that’s coming in another article. For now, it’s enough to understand that you can have more than one Power Plan in Windows. Each power plan can tweak settings for when the device is plugged in, or running on battery, thus balancing performance and battery life, as you please.
CONTENTS
How Maximum Processor State Works in Windows Power Plan
What we are going to do is tell Windows to only run the CPU up to a maximum percentage of its capabilities. It’s interesting that at 100%, Windows will completely unlock the CPU, allowing it to get to its maximum Turbo Boost frequency, if thermal conditions allow it, for course.
Once you get that number to anything less than 100%, the CPU will run up to the selected percentage of its Base Clock, not Max Turbo Boost clock.
Example for my Intel Core i9-12900H:
- Max Turbo Boost is 5 GHz on Performance Cores – maximum 100% processor state will run the CPU up to 5 GHz.
- Base Clock on Efficiency Cores is 2.5 GHz – maximum 99% processor state will only allow the CPU to run up to 2.475 GHz.
That’s a huge decrease in maximum allowed frequency, thus you may see a difference in system snapiness during daily tasks, but considering the CPU has 14 cores, I think that’s enough for most of the things I do on battery, even at lower clocks.
Change Windows Power Plan to Disable Turbo Boost
Let’s see how you can easily adjust Maximum Processor State in Windows.
1. Open the Start menu with the Win key.
2. Start searching for Control Panel and open the first result.
3. Find the Hardware and Sound section. Open it.
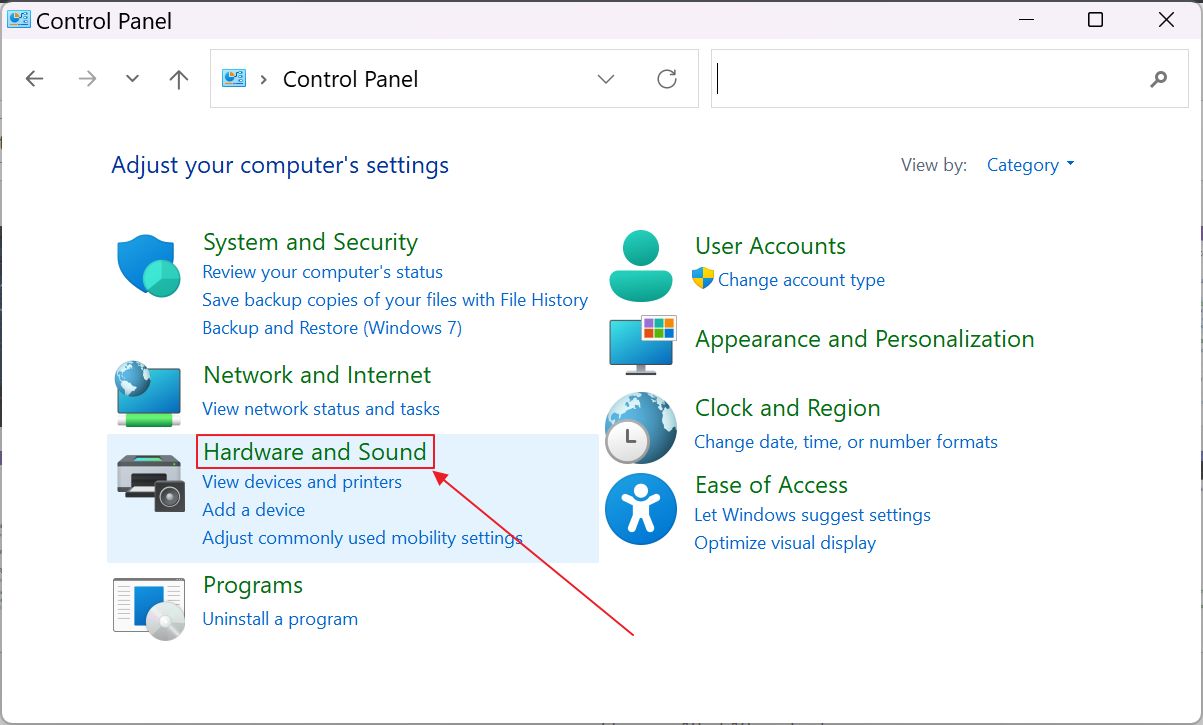
4. In this new panel find Power Options. Click on the Edit power plan link.
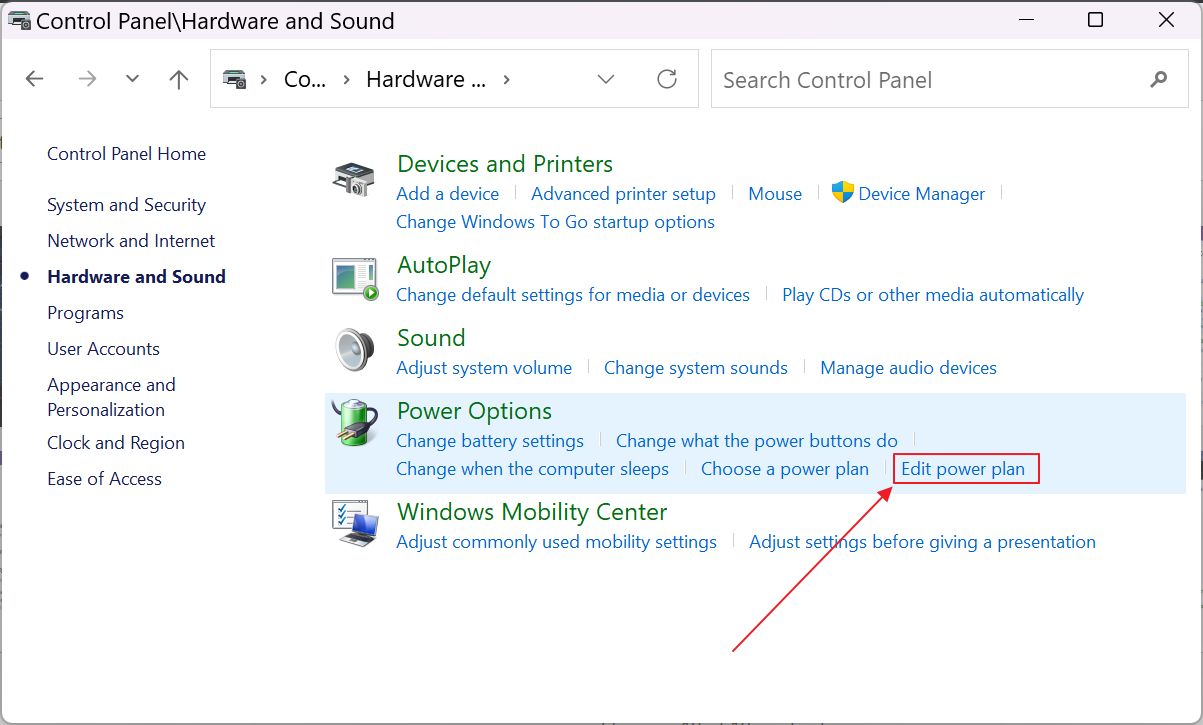
5. The window will refresh now. Find the Change advanced power settings link.
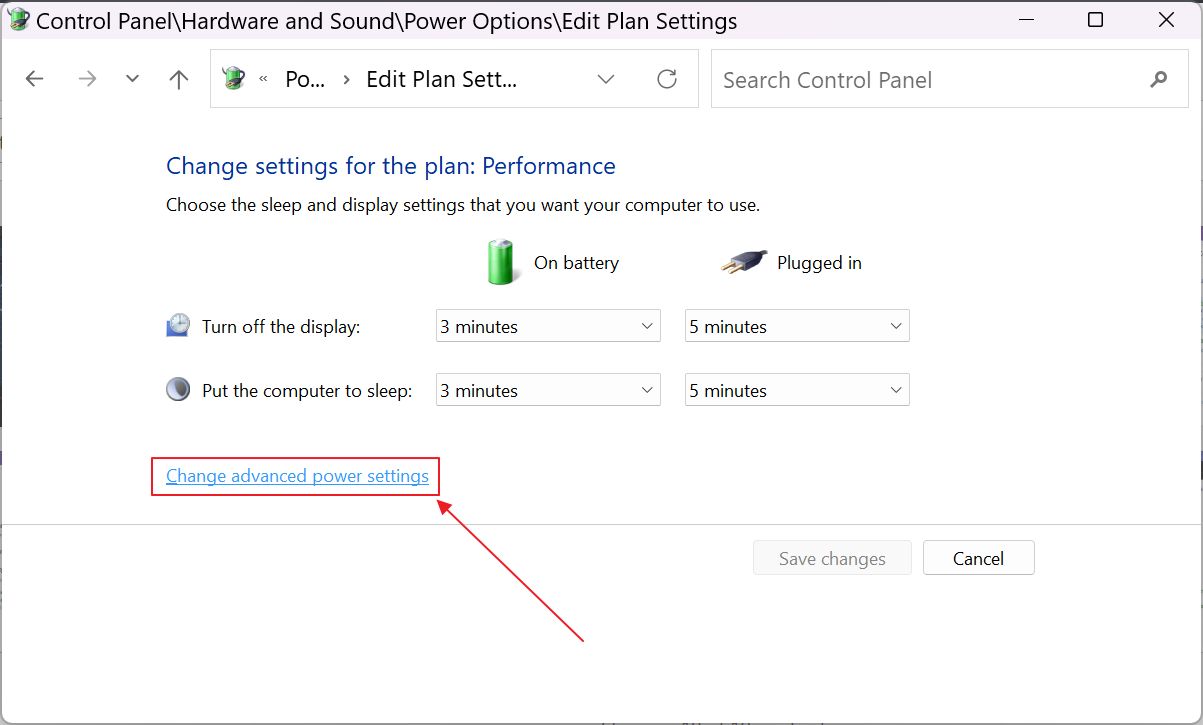
6. This will open a new window. You need to find Processor power management > Maximum processor state.
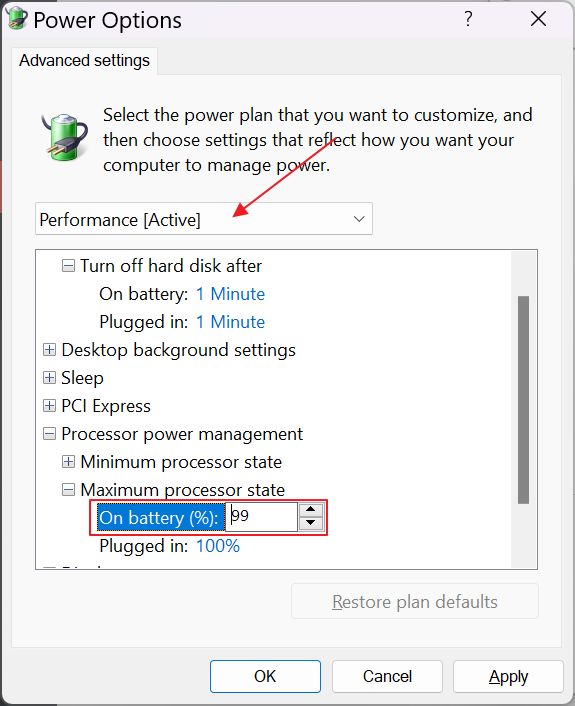
I advise you only modify the On battery setting, so the change will not affect the laptop’s performance when running from the wall. If you struggle with thermals, then you may adjust the Plugged in setting, but expect the maximum performance to go down significantly.
If you’re targeting the maximum battery life possible you can go even lower than 99%. Don’t worry about what happens if you set something like 1%. Your PC won’t stop to a crawl by running at just a few megahertz.
Windows can’t run the CPU out of specs. 1% will default to the minimum possible frequency of the CPU, as defined by the manufacturer. For Intel chip I believe it’s something like 800 MHz. So the 1% to 99% range is an interval between minimum clock and maximum base clock.
Did you try this trick? What kind of battery life improvements did you see? I’m only seeing a few dozen minutes more, but that may also be placebo, because it’s hard to replicate the same type of load when browsing the web and editing documents.
