- Follow this guide to automatically hide the taskbar in Windows 11.
- The new taskbar in Windows 11 is probably one of the biggest changes.
- Fortunately, you can still choose to autohide the taskbar to gain a bit of screen space.
To set the Windows 11 taskbar to autohide when not in use check the appropiate option in Settings > Taskbar > Taskbar behaviors.
If you’re paying close attention to Windows 11 you may have noticed that the new taskbar is a bit taller than Windows 10, not by much, but enough to worry those who have smaller screens.
I find the change welcome, as I don’t really like crowded user interfaces. If you’re in the opposite camp you can still opt to automatically make the taskbar go away when you don’t need it.
Automatically Hide the Taskbar in Windows Settings
1. Right-click on a free area of the taskbar to show the Taskbar settings.

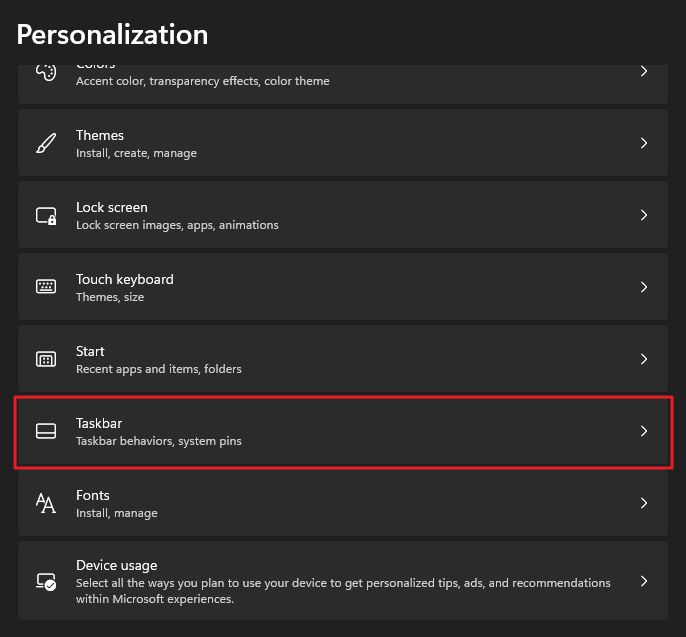
2. Scroll in the Personalization window that opens next until you see Taskbar. Click on it.
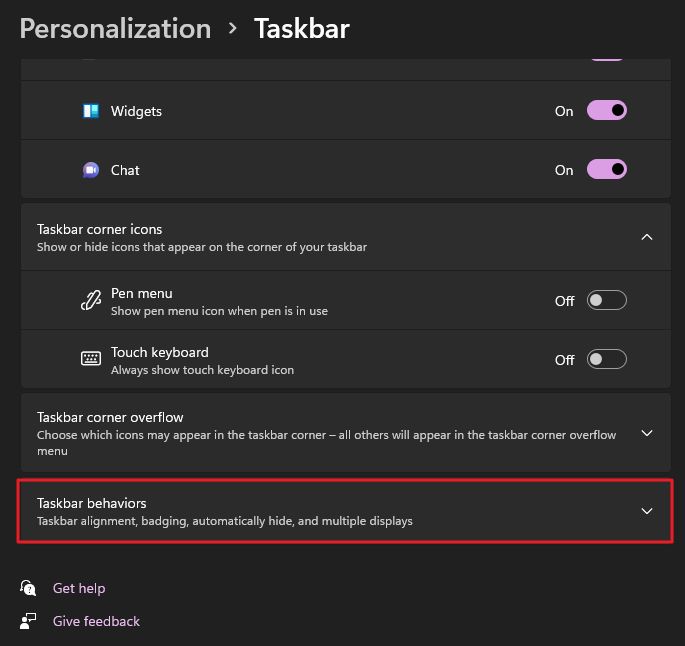
3. Scroll once more until you get to Taskbar behaviors.
4. Under Taskbar alignment there’s a checkbox named Automatically hide the taskbar. Once checked the taskbar will disappear from the bottom of the screen.
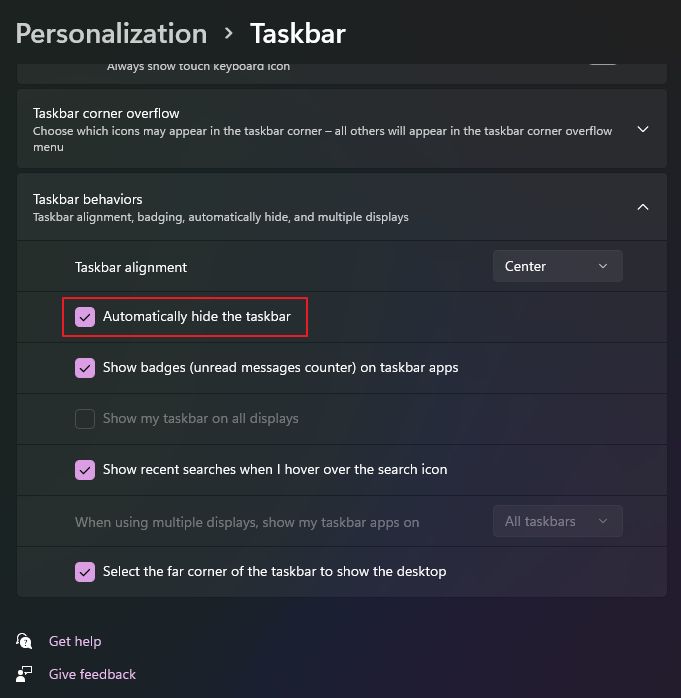
A very small line will let you know there’s something there waiting for your input.
Hovering over the taskbar’s normal designated area will make it pop again, just like in Windows 10.
Nothing changed here, but the setting that enables or disables this behavior has been moved to this new location in the Settings app (Personalization – Taskbar – Taskbar behavior).
Want to unhide the taskbar in Windows? If you need to revert this setting just head back to the same sport and uncheck the Automatically hide the taskbar checkbox.
That’s it. You should now be back to normal, with the familiar taskbar always present on screen.


