- Drag and Drop on Windows laptops is not as good as on a Mac, at least by default.
- If you activate ClickLock in the Windows Mouse Properties you can drag and drop long distances without having to keep your finger on the touchpad surface or without keeping the touchpad left click button pressed.
- Windows ClickLock works very well, but there’s one serious downside: it’s also enabled for your mouse.

One of the things the Mac really delivers better than Windows is the touchpad experience. I still don’t like my Mac, even after a few months of use, but I have to admit that Apple’s touchpads are really something else. And Mac OS is built around the touchpad experience too, not in favor of keybords shortcuts.
One of the things I like is the drag and drop experience. You can start dragging with a light double-tap, then move the object you want around, lift your finger from the touchpad surface, then continue dragging until you reach the destination. A final light tap will disable drag and drop. It will actually perform the drop part.
I always struggled with moving objects and apps with a Windows touchpad while making sure I didn’t accidentally lift the finger, something which would just drop the object below the cursor.
Little did I know that performing the same drag-and-drop action on Windows was possible if you enable one little setting called ClickLock.
CONTENTS
What is ClickLock?
ClickLock is a Windows setting that will let you perform drag and drop on longer distances without having to keep the mouse button pressed. On touchpads, ClickLock will let you lift the finger during a drag-and-drop operation without dropping the item you’re dragging.
ClickLock is especially useful on touchpads, as you can lift the finger during a drag-and-drop operation.
Enabling ClickLock is very easy to do if you know where to look for this mouse/touchpad setting. I’ll help you out:
1. Right-click or press Win + X to open the special menu hidden behind the Start button.
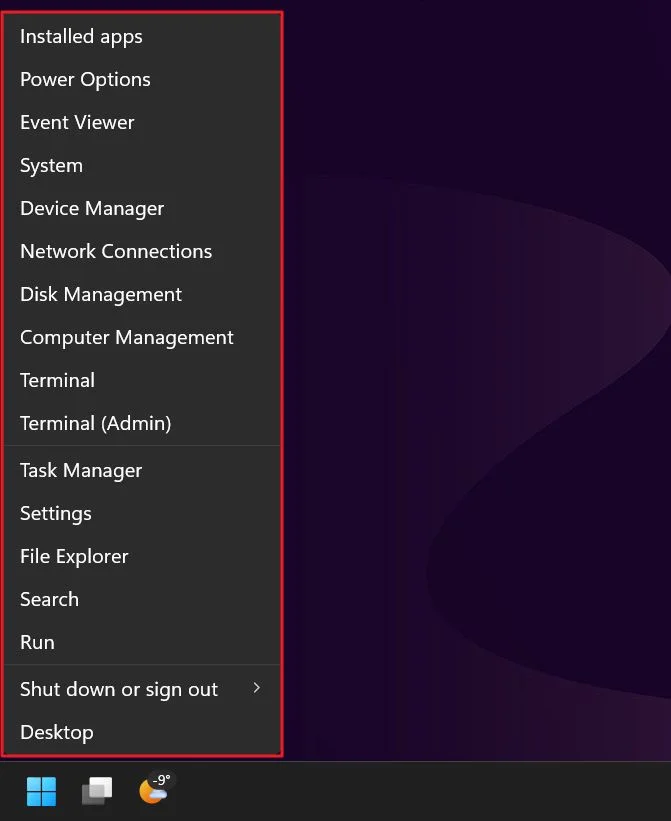
2. Select the Settings menu entry.
3. Navigate to Bluetooth & devices, then open the Mouse section in the right-side panel.
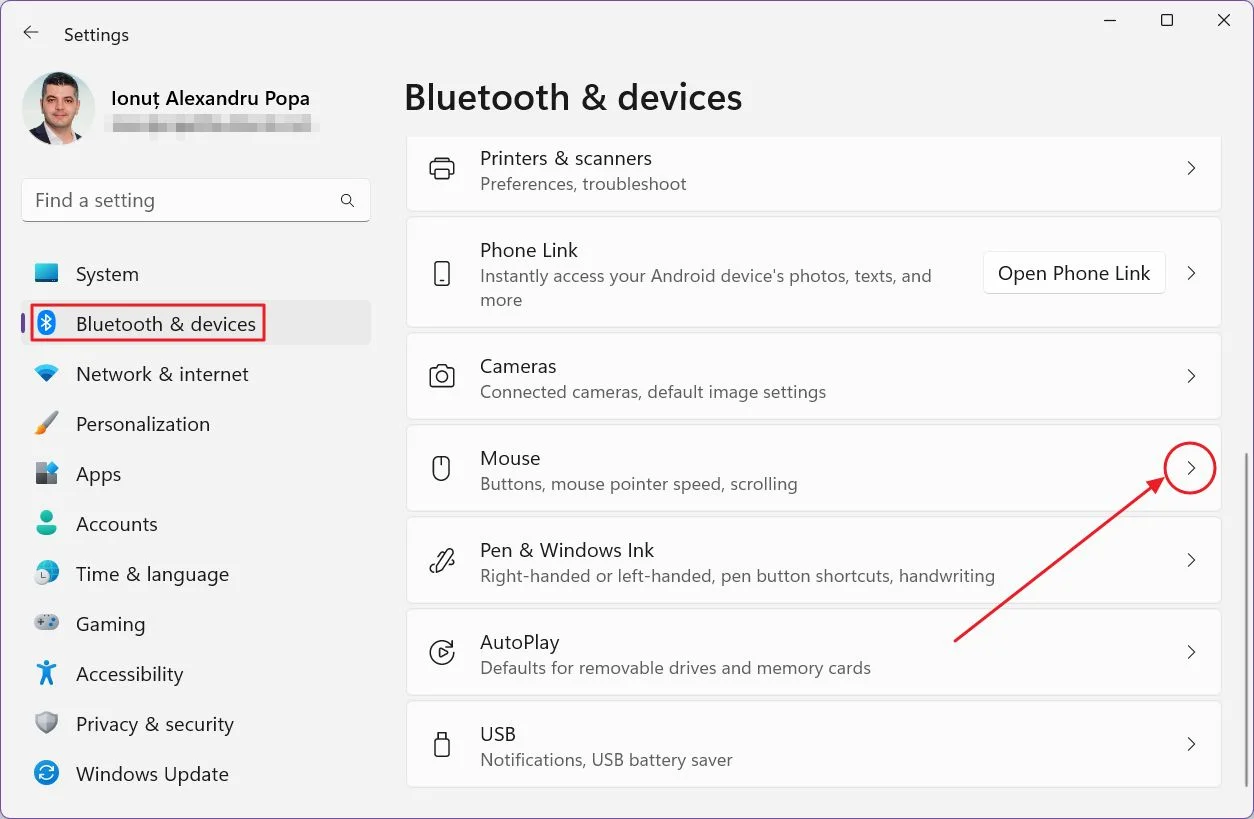
4. Scroll into the new section until you see the Additional mouse settings external link. Click to open the old Mouse properties window.
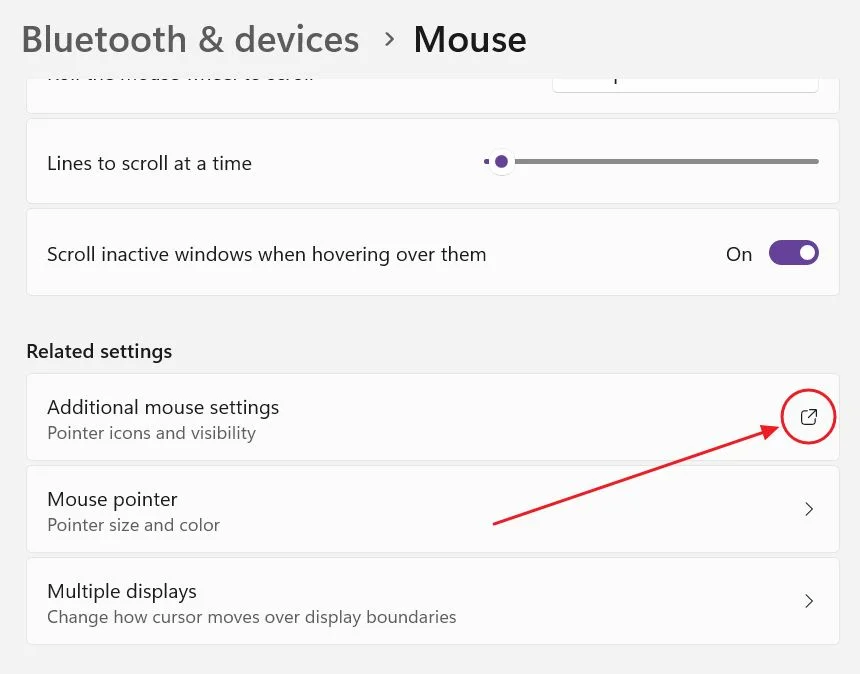
There’s no way to find this option by mistake, as Microsoft likes to keep things confusing. So, if you’re in the Mouse section don’t look for the mouse cursor options. These are found in the Accessibility section!
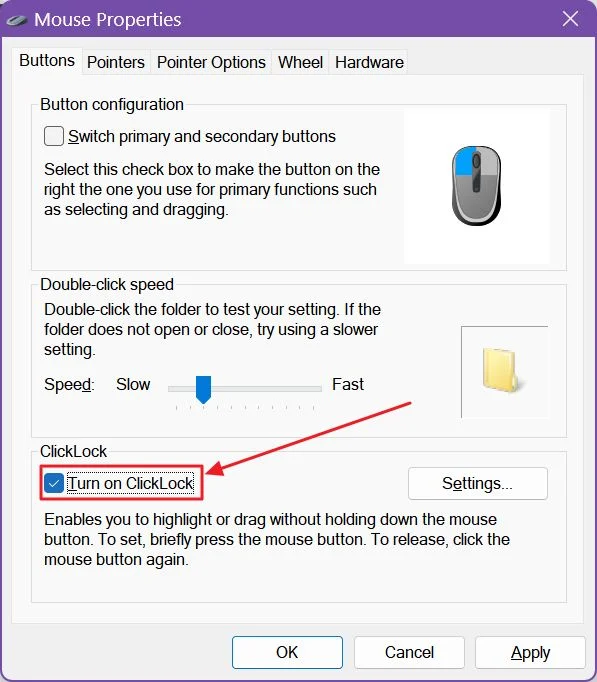
5. In the first tab, Buttons, you’ll find the Turn on ClickLock checkbox. Click to turn it on. Confirm with OK or Apply.
6. If you click on the Settings button next to ClickLock you can adjust the initial mouse/touchpad button hold period needed to activate the function. Adjust the slider to your liking.
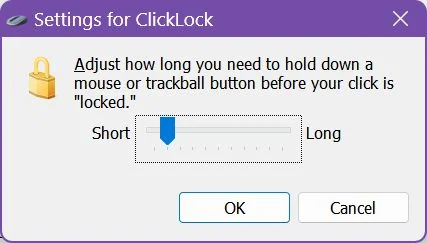
As you can see from the setting description, once enabled you will be able to drag without holding down the mouse or touchpad button.
How it works in practice: you briefly press the mouse button, release the mouse or touchpad button, keep moving the dragged option, then when you reach the destination click once again to end the drag and drop operation.
Why Did I Choose to Disable ClickLock?
I found the ClickLock functionality to work just like on my Mac. Despite that, I chose to disable ClickLock after a few days of use. Why?
Because I only want to enable ClickLock for my touchpad, not my mouse. No matter how long or short the ClickLock enable interval was set, it got activated every time I wanted to select a few lines of text for example. I had to remember to click one more time to release the selection cursor. I ended up frustrated and just disabled ClickLock because on a mouse this setting is no good.
It’s a pity Microsoft doesn’t let me select the devices for which ClickLock is enabled. Maybe in Windows 12, when all Control Panel settings have been migrated to the new Settings app. But I’m not holding my breath.
Does your Windows laptop touchpad still bother you? I know it does on my ROG gaming laptop, but I found a way to fix the touchpad’s random lag.
Then just disable the touchpad and use a mouse.


