- You can disable the touchpad of your Windows laptop easily if it gives you trouble.
- There’s even the option to disable the touchpad automatically when you connect an external mouse.
- Learn five effortless methods to disable the integrated laptop touchpad in Windows.
Touchpads on Windows laptops are terrible if you ask me. Yes, I know about the “amazing” Apple touchpads, but that’s true only if you compare them to Windows touchpads. A good mouse will always be the optimal choice, no matter how you look at it.
Fortunately, you don’t even need to use laptop touchpads if you don’t want to. I’ll guide you on how it’s done.
Why Would You Disable the Laptop Touchpad?
Performance is one big “selling point” for disabling the laptop touchpad, as I said. That’s still the main reason I think.
The other one is that touchpads are not 100% reliable regarding palm rejection. As touchpads are getting larger the change of resting your palms on the sensitive area while typing increases.
If the software is not up to the task of identifying between an accidental palm contact and a deliberate finger that tries to move the cursor you’re in for some frustration.
That’s why if you’re using an external mouse, wired or wireless, it’s best to just disable the integrated touchpad.
There’s no performance penalty or anything like that if you’re using a touchpad and a mouse at the same time. Cursor moves won’t cancel each other either, but if you can, I recommend disabling the touchpad.
How to Disable the Touchpad Automatically When You Connect an External Mouse
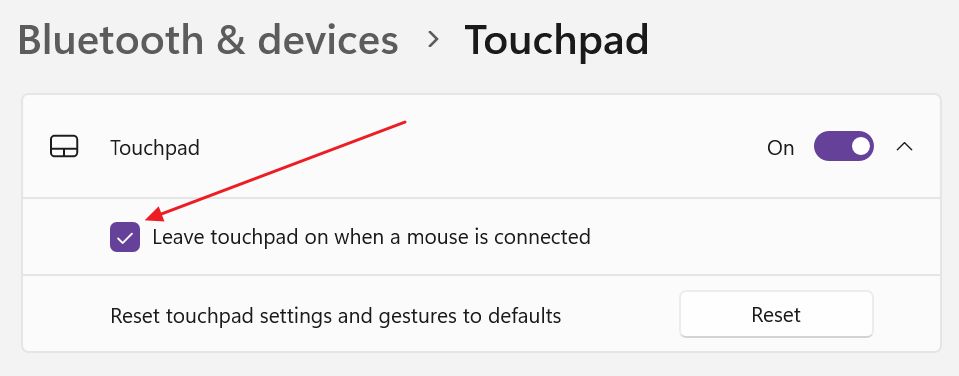
Windows is offering the option (on some models) to automatically disable the touchpad if the system detects a secondary mouse. By default, the option is not enabled in Windows Settings, so here’s what you have to do to enable it.
1. Open the Settings app. One quick way I found is with Win + I keyboard shortcut.
2. Navigate to Bluetooth & devices.
3. On the right side expand the Touchpad section.

4. Expand the Touchpad top option using the down-pointing arrow.
5. Uncheck the box that says Leave touchpad on when a mouse is connected.
From now on when you connect another USB, Bluetooth, or wireless mouse to your laptop the integrated touchpad will be automatically disabled.
Once you disconnect the second mouse the touchpad will automatically come back to life. That’s good, since using Windows with only the keyboards is not really possible.
Now let’s get to the six ways to turn off the touchpad on a Windows laptop. I’ve tried to order them from the easiest to the hardest method, based on the number of steps required and the complexity of these steps.
Quickly Disable the Touchpad with a Keyboard Shortcut on Most Laptops
Most laptops have a dedicated secondary shortcut on one of the function keys. You will need to press the Fn key together with the dedicated function key.
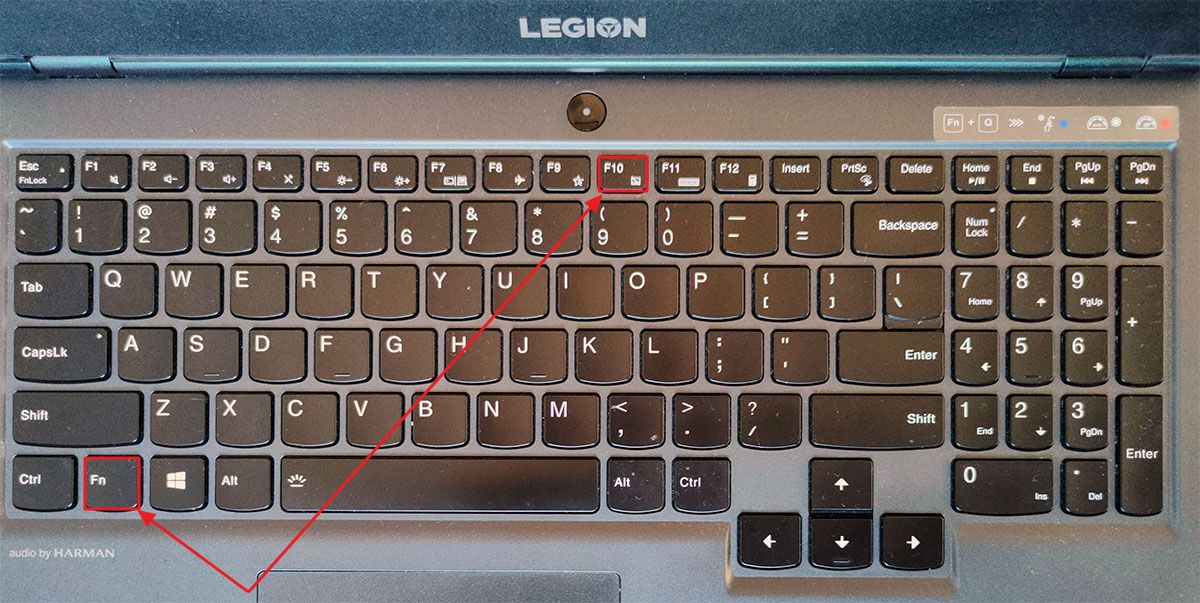

Usually, the keyboard shortcut is Fn + F10, but you need to check the small icon on your function row keys.
That’s true for Dell, HP, ASUS, Lenovo, Toshiba laptops, and most other laptop brands, but you have to check your keyboard to be sure.
On most laptops, if you’ve installed all the manufacturer drivers, once you press the Fn + F10 shortcut you’ll get a nice overlay message letting you know the touchpad was disabled.
Press the shortcut again and another message will show up, confirming the touchpad was re-enabled successfully.


Disable the Touchpad From Windows Settings
In Windows 10 and Windows 11, it’s possible to disable the integrated laptop touchpad from the settings menu if it’s a Precision Touchpad (most newer laptops don’t use proprietary touchpads).
Here’s how to do it:
1. Open the Settings app with Win + I shortcut (the quickest way I’ve found).
2. Go to the Bluetooth & devices section once again.
3. Expand the Touchpad sub-section on the right side.
4. Toggle Off the Touchpad from the top of the page.
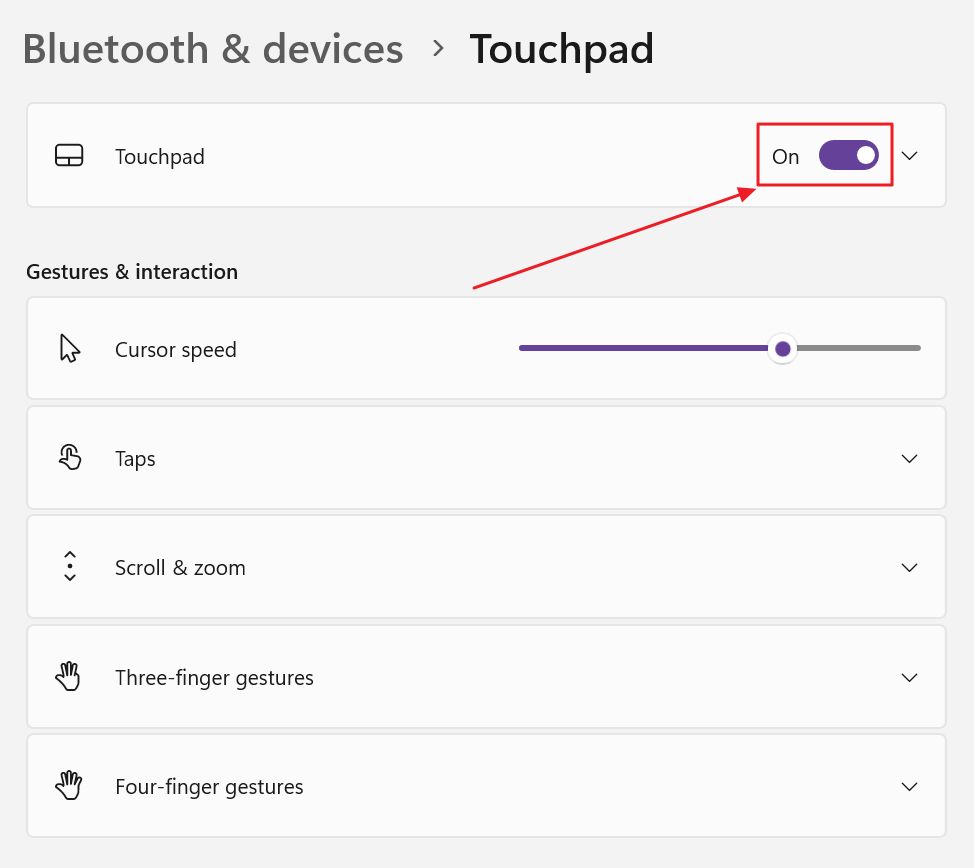
The touchpad will be immediately disabled. Turn the toggle on again to re-enable it when needed.
Disable the Touchpad from Control Panel
If you like clicking your way in Windows there’s a slightly more complicated way. Alternatively, you can use this method if there’s no Touchpad entry in the Settings app.
1. Open the Start menu and type Control panel, then open the first result.
2. In the top-right corner click on the View by filter and select Large or Small icons.
3. Now look for Mouse and click to open.
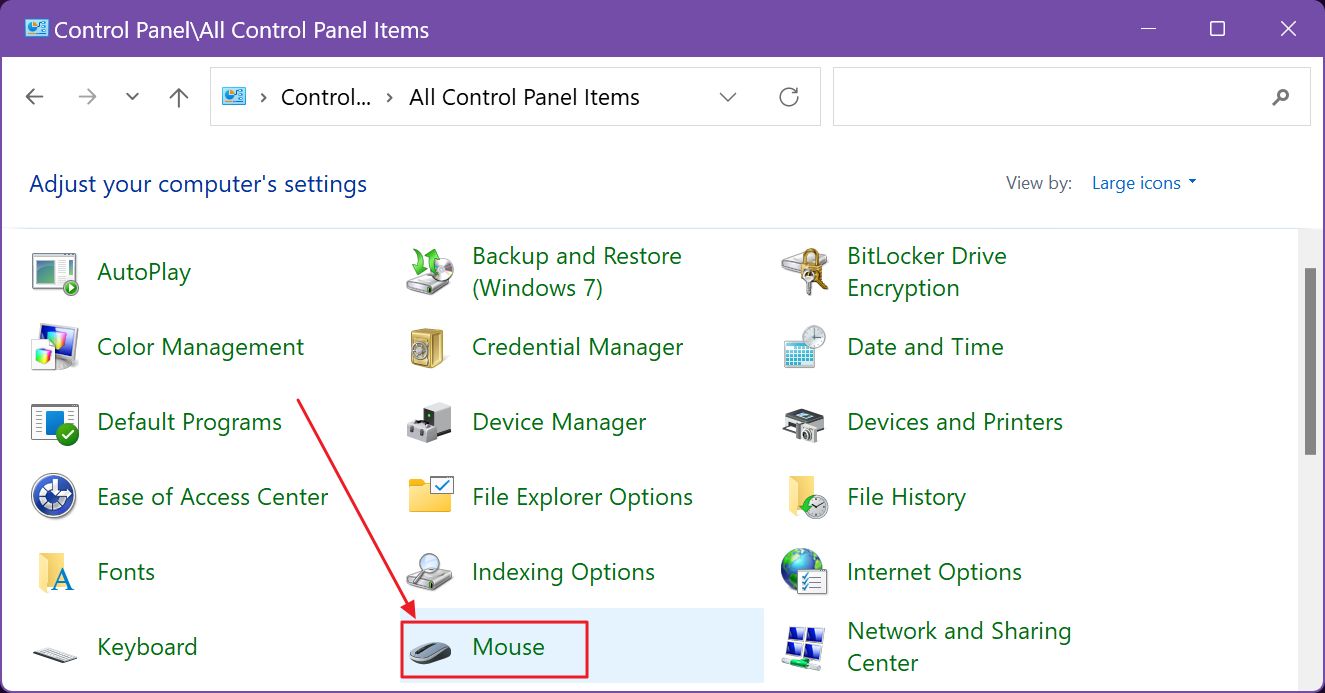
4. A new popup will show up, with all the mouse properties. Open the Hardware tab.
Here you should see a list of all detected mice that were ever connected to your laptop, including the touchpad.
Note: the touchpad might not show up here, if it was configured under Human Interface Devices. If that’s the case use the next method.
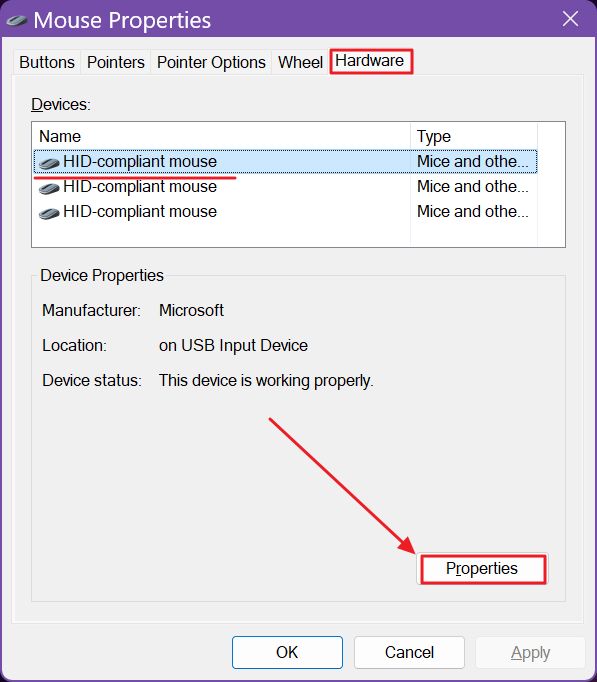
5. To disable click on the Properties link for each device in the list. A new popup will show up.
6. In the Driver tab, near the bottom you have a Disable Device button. Click once to turn off the touchpad driver, and subsequently the associated device.
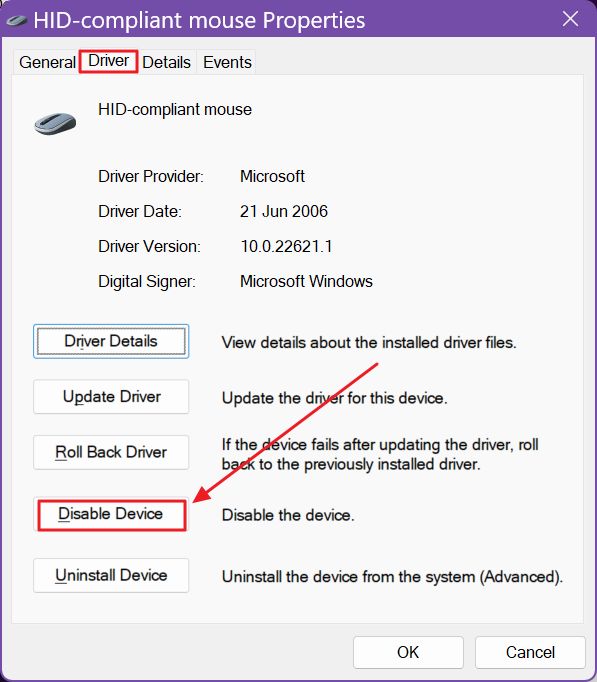
The device’s name is not always descriptive of the actual mouse model, so you would need to try and disable each device separately until you identify the correct one.
Needless to say that you must go through the same process to reenable the touchpad.
Use Device Manager to Turn Off the Laptop Touchpad
A very similar method to the previous one is to use the Device Manager. Why? Because it lists all system devices in a nice layout, grouped by device category. Let’s see how it’s done:
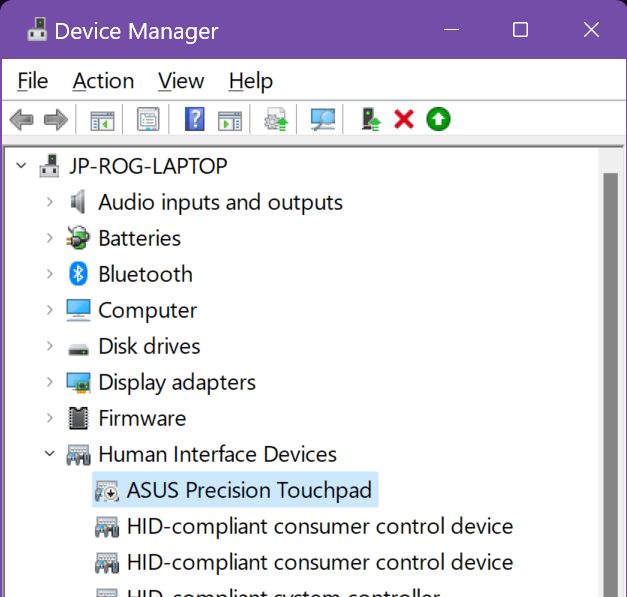
1. Press the Win key to open the Start menu. Type Device Manager and open the first result that comes up.
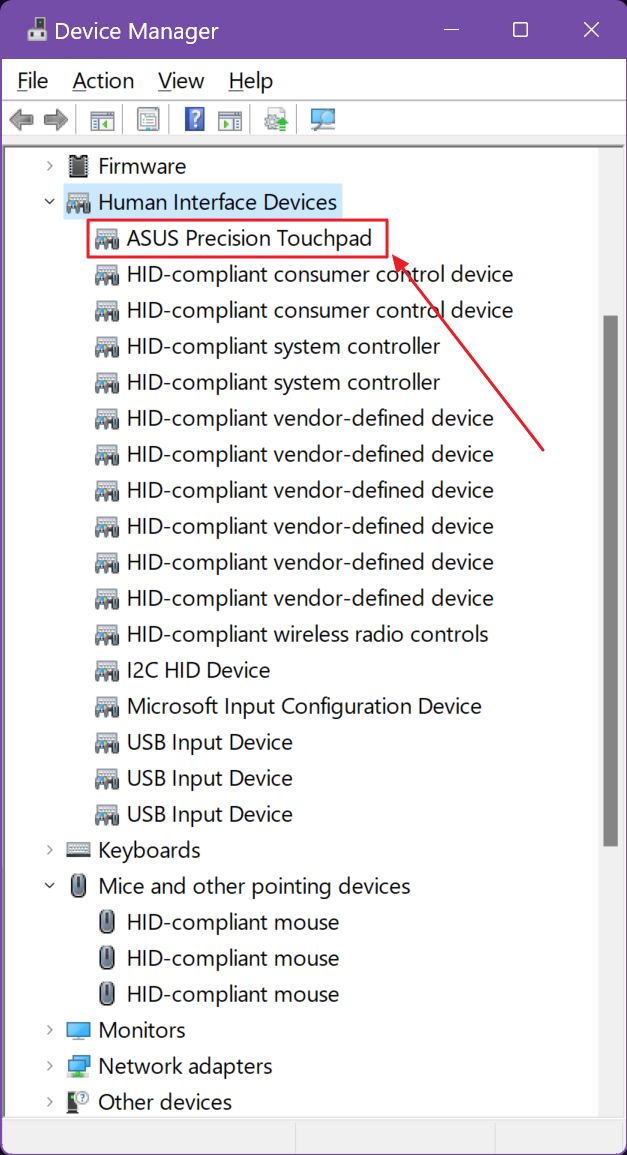
2. In the Device Manager window expand these two sections:
- Human Interface Devices
- Mice and other pointing devices
Depending on how your touchpad driver was configured by the manufacturer, the touchpad should be listed in one of these categories. It should also be named in a suggestive manner, but don’t be surprised if it isn’t, so be prepared for some guesswork.
3. Once you’ve identified the touchpad right click on it and select Properties.

4. In the properties popup navigate to the Driver tab and click on the Disable device button.
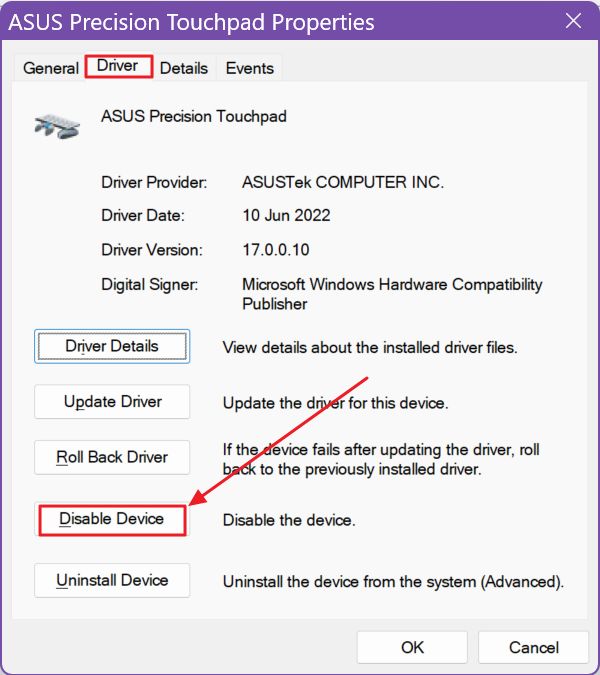
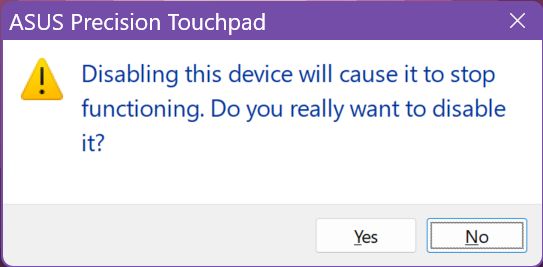
5. A confirmation message will ask you if you really want to disable this device. Confirm with Yes.
6. Now the touchpad will show up in Device Manger with a small icon that lets you know it was disabled.
To reenable the touchpad go through the same steps, or select the device again in Device Manger and click on the last icon from the horizontal menu, the green up-pointing arrow. This will reenable the touchpad faster.
Use the Manufacturer Software for non Precision Touchpads
Older laptops might not have a Precision touchpad, so if you’re using a touchpad with proprietary manufacturer software such as Synaptics, Elan, Alps, and so on, you may need to follow the next steps.
1. Open the Settings app again.
2. Navigate to Bluetooth & devices.
3. On the right side click on the Mouse option to open. It’s a bit counter intuitive, but trust me.
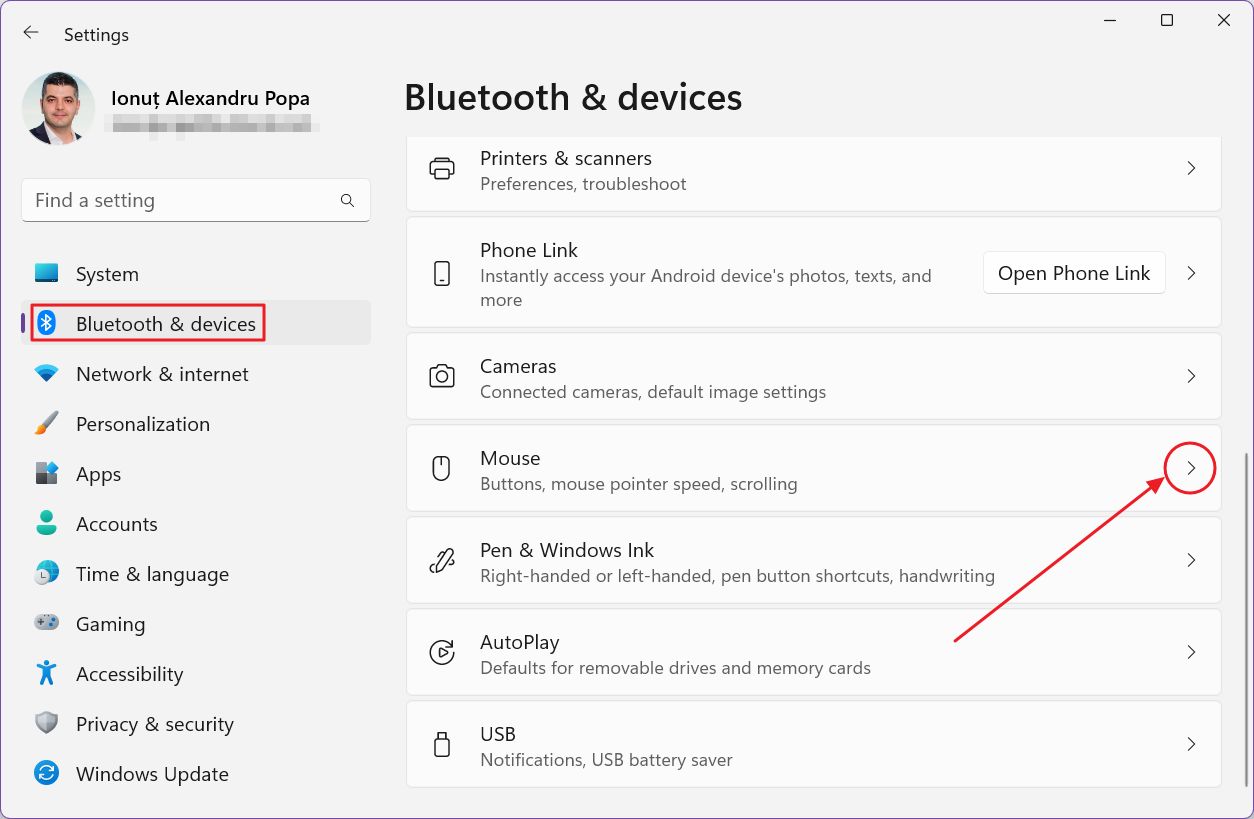
4. Navigate to the bottom of the Mouse section and click on the Additional mouse settings. This will open the old mouse settings app from the Control panel.
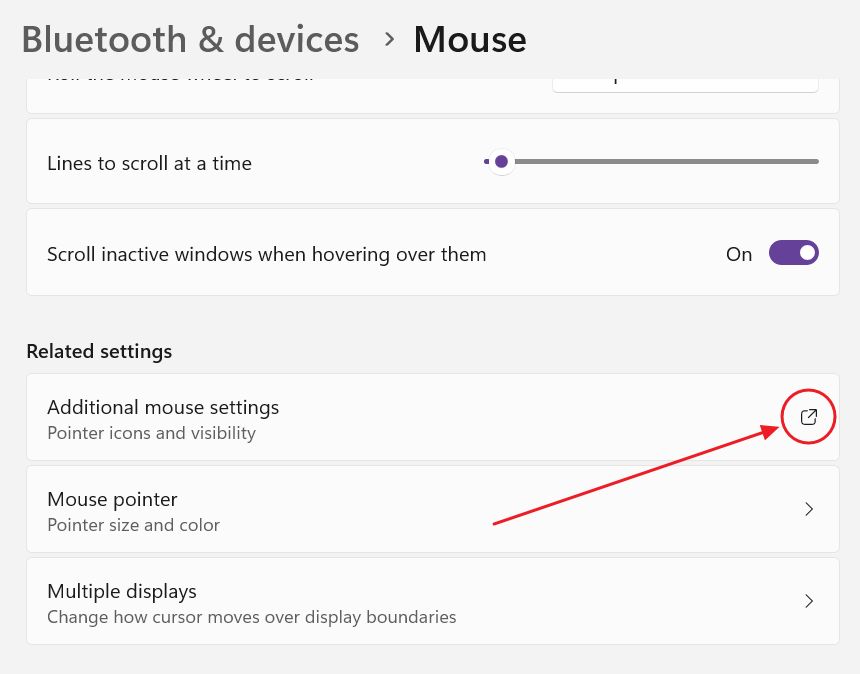
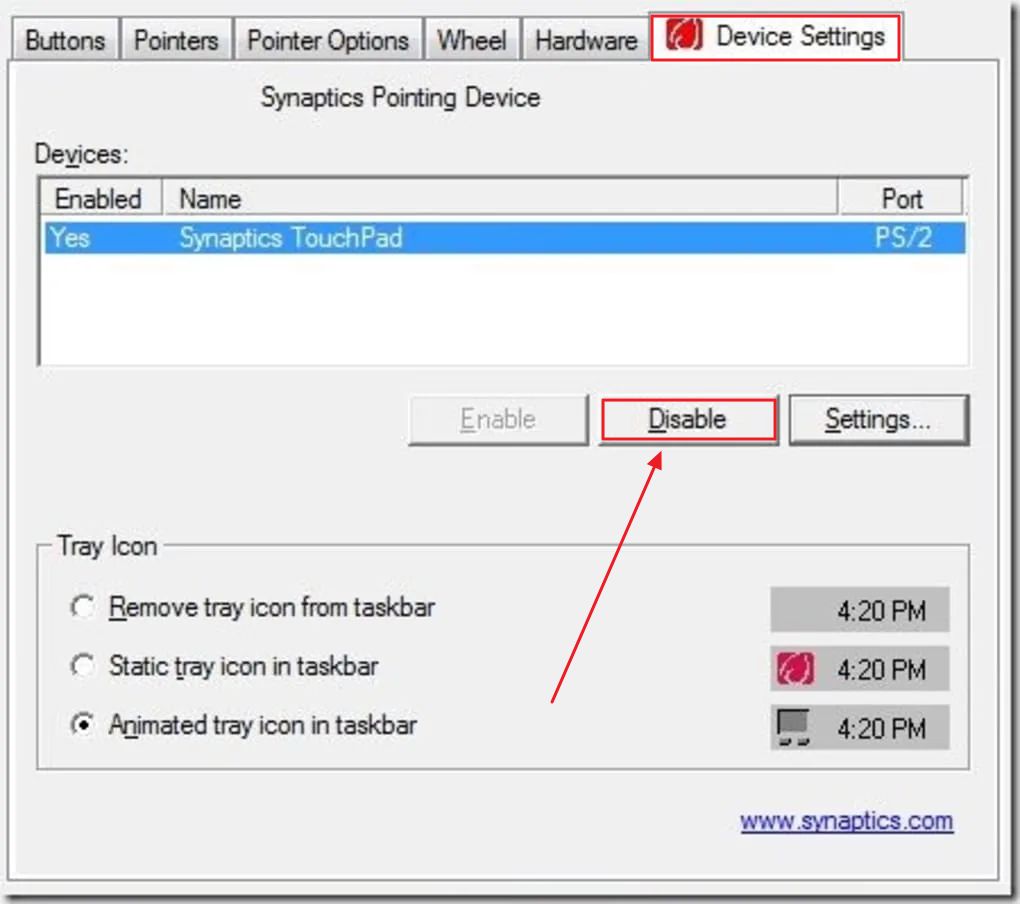
5. In the new window look for the last tab, which should feature the icon of the touchpad manufacturer. In the image below I’ve shown the old Synaptics interface.
You should see listed the touchpad model, with the option to Disable it with a simple button press.
Depending on the custom software your manufacturer provides, the steps to disable the touchpad may differ a bit. If you’re having a hard time read the manufacturer documentation.
Disable the Precision Touchpad Completely From the Registry
Finally, there’s a geeky way to disable the touchpad using the Registry. It only works for Precision touchpads.
1. Type Regedit or Registry editor directly in the start menu and open the first result.
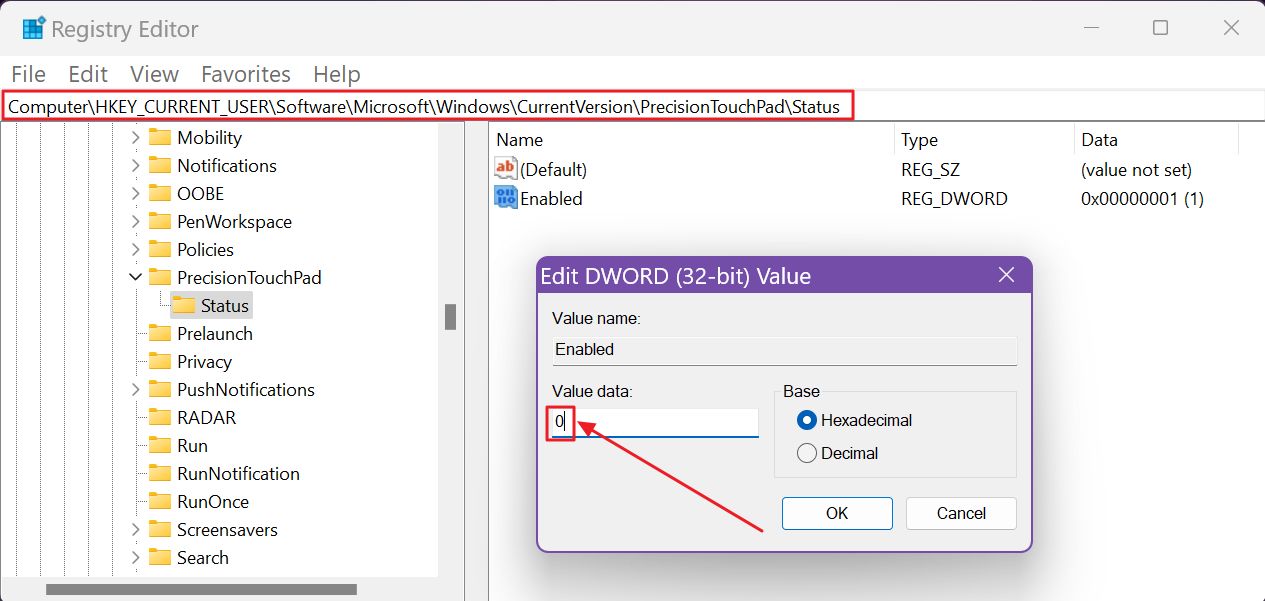
2. Navigate to the following section of the Windows registry:
Computer\HKEY_CURRENT_USER\SOFTWARE\Microsoft\Windows\CurrentVersion\PrecisionTouchPad\Status
3. In the right panel, double-click on the key called Enabled.
4. Set the value to zero, then click OK to continue.
Alternatively, you can delete the registry key. I don’t recommend it, because you will need to recreate it when or if you want to turn on the touchpad once again.
Do you have a laggy laptop touchpad? I have a solution to fix the laggy touchpad cursor, but it’s not for the faint of heart.
And there you have it, all the ways to disable the touchpad on a Windows laptop. I recommend you also read about how to disable the Sticky Keys option shortcut key and how to turn off certain keyboard shortcuts. If you’re looking to make your Windows laptop touchpad behave a bit like Apple ones you can enable Clicklock.