- Read on as we’ll explore manual and automated options to back up a network drive in Windows to the local disk or external hard drive.
- Network drives can be used to store important data from the local disks to a network location.
- Sometimes it’s useful to backup network drives completely, or just some of their folder to another location.

Network drives are usually remote network locations where people save files and folders to. It’s not the other way around. That doesn’t mean there aren’t enough situations when it’s useful to backup a network drive fully, or just some of its folders to the local PC/laptop or an external hard drive.
You can never be too careful when it comes to data backups. As someone who lost data to a failing hard drive or didn’t pay attention when deleting “old stuff” I know you can never have enough backups and backup versions.
So let’s explore the options for backup up a network drive. A network drive can be a simple NAS, without the cool stuff one such device can do, or another computer with a few shared folders.
Optional: Map the Network Drive for Easy Access
Even if it’s just optional I recommend you map your network drive first by following our dedicated guide. Why? Because if you will be using other utilities for automatic sync or automatic backup it’s possible that some of them will not support network locations.
If you map your network drive it will show up on the local computer as a separate drive. All programs are able to open and save local hard drive locations. So you can look at network mapping as a compatibility thing or plain convenience. That’s why I recommend it.
Backup Network Drive to a Local Folder with Manual Copy/Paste
The easiest method to back up a local network drive is to copy and paste the folders you want backed up to a local folder. Let’s see how it’s done:
1. Open File Explorer any way you like (you can use Win + E shortcut anywhere in Windows).
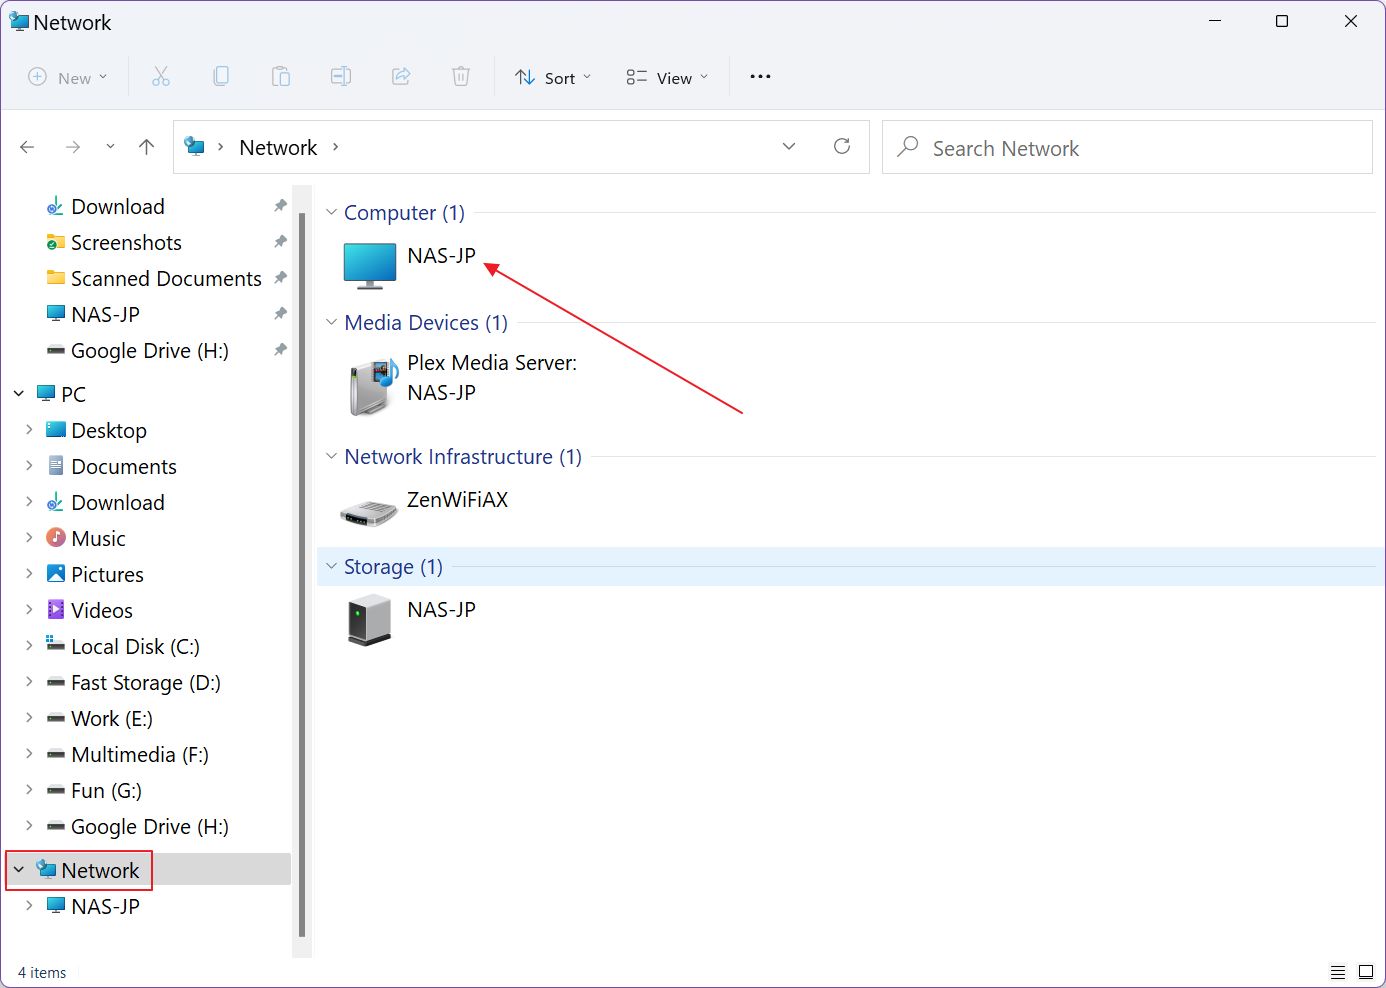
2. In the left-side menu navigate to the Network entry. Click to open all local network shares and devices. Double-click on the network drive you want to back up.
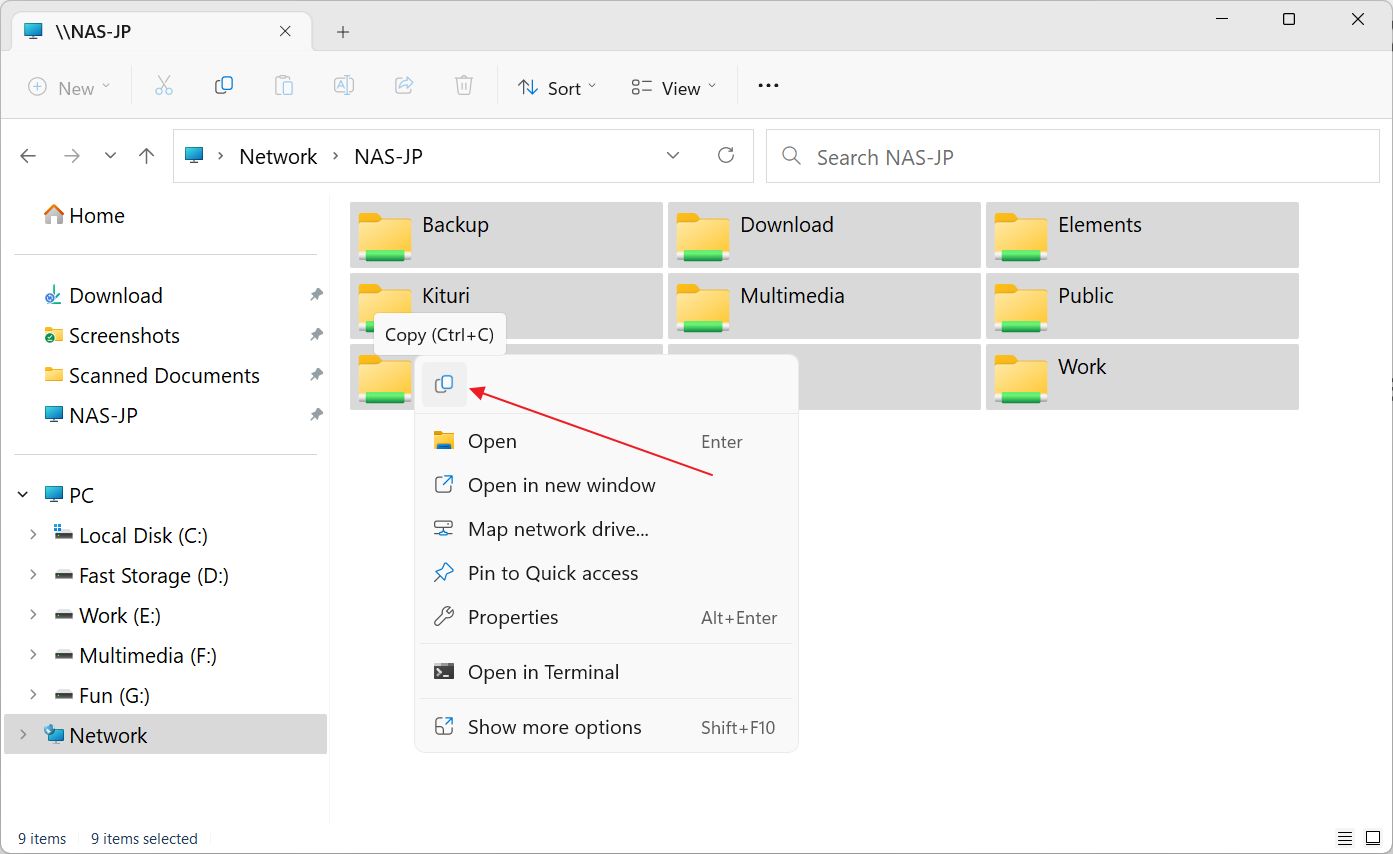
3. Once inside select all folders (Ctrl + A), or just the ones you like (Ctrl + left-click on each item). Right-click on any item in the selection and hit the Copy button in the contextual menu.
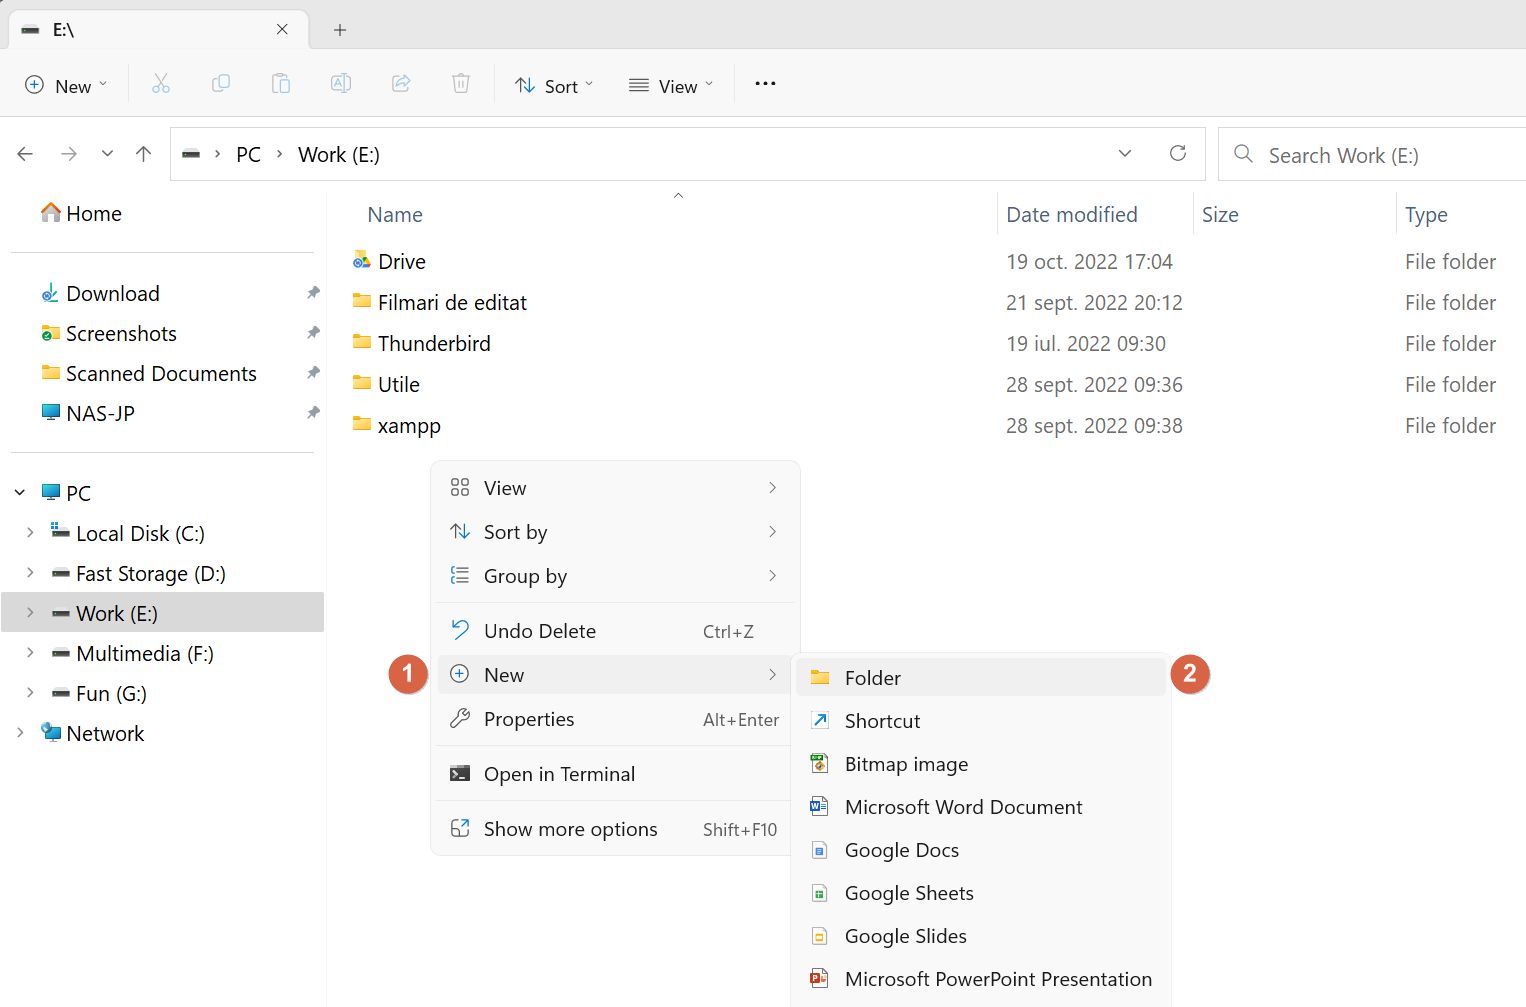
4. In the left menu navigate to the local disk where you will be adding the backup. I chose E:\ for this example.
5. Right-click anywhere in the root of the drive and select New > Folder from the contextual menu (or top-left menu bar New button in Windows 11).
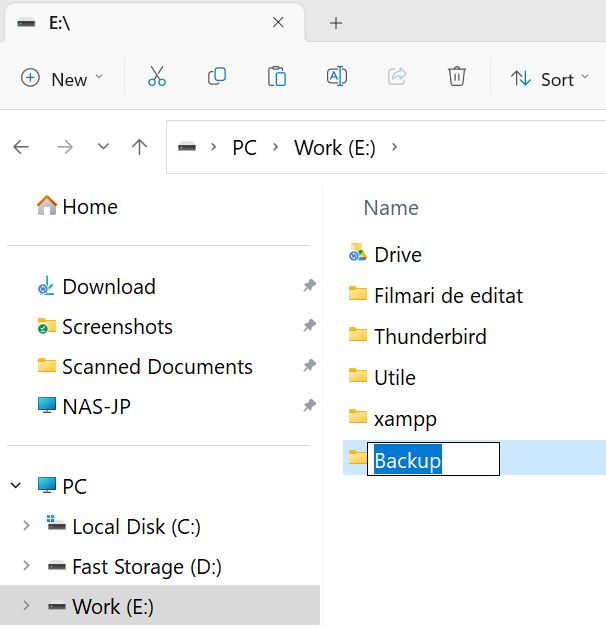
6. Name the folder to your liking. You can rename it again at any time by selecting the folder and pressing F2.
7. Open the folder and right-click in an empty area, then select Paste from the top of the contextual menu.
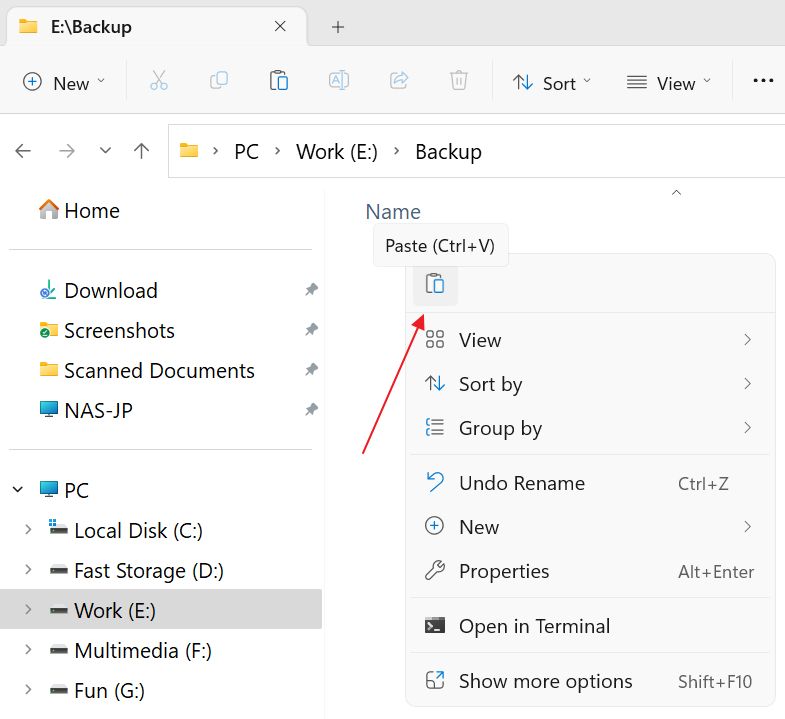
All you have to do now is wait for the copy dialog window to disappear. It can take a few seconds or a few hours for the backup process to complete, depending on how many files you are transferring from your network drive.
Backup the Network Drive to an External Hard Drive
Now let’s take things a bit further by compressing the newly completed backup and copying it to an external hard drive. This way you will have the backup saved in two separate locations.
1. First, compress the previous Backup folder from the E:\ local disk. You can use any archiving program you want, but Windows already includes support for ZIP files. So, right click on the Backup folder and select Compress to ZIP file.
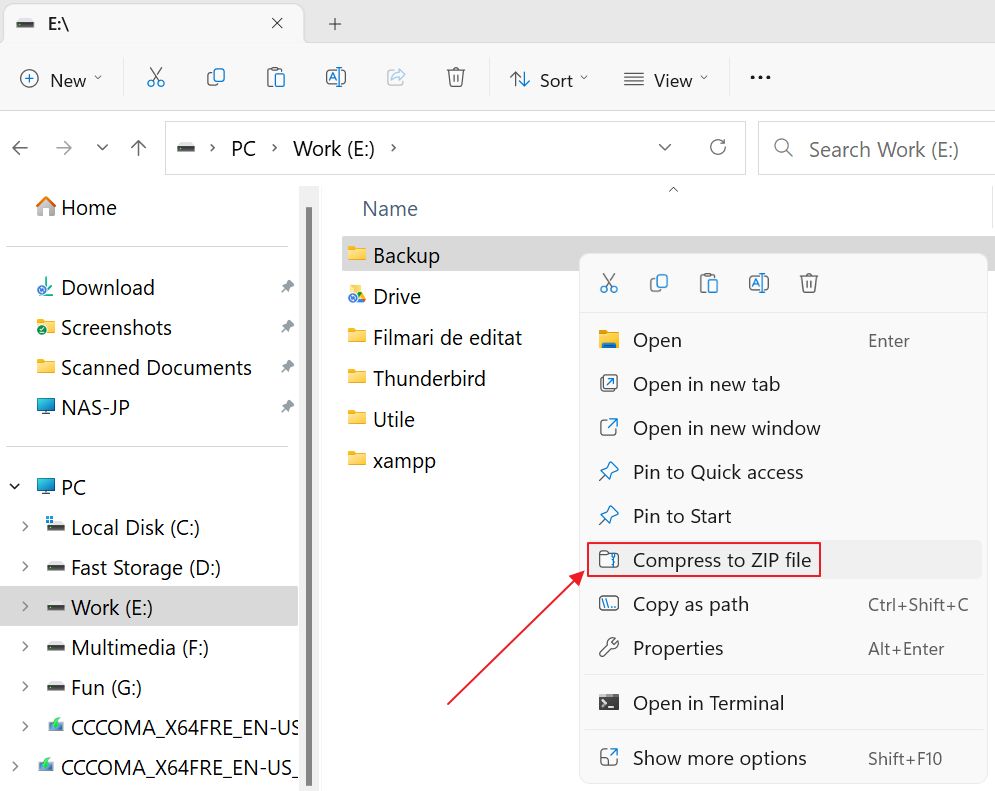
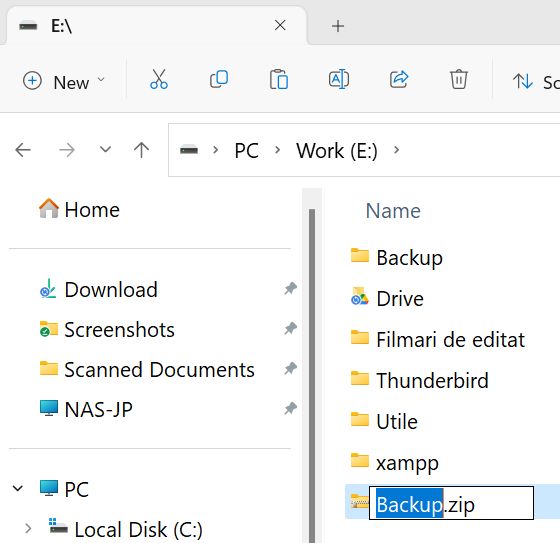
2. Name the ZIP file to your liking. I suggest you add the date of the backup somewhere in the file name. This way you can easily keep track of multiple backups of the same network drive.
3. Now it’s time to insert the external hard drive into a free USB port on your local machine. Wait a few moments until the disk appears in File Explorer.
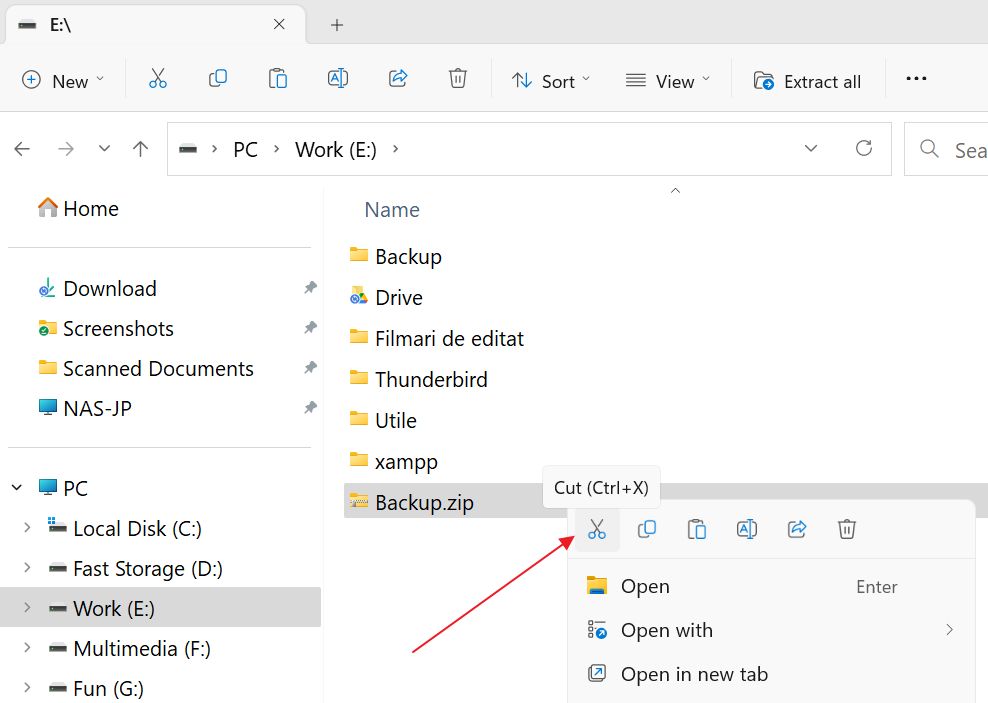
4. There’s no need to keep both the original backup folder and the compressed version, so you can move the ZIP file directly to the external hard drive.
Right-click on the ZIP backup file and select Cut from the contextual menu or from the top menu bar (Windows 11).
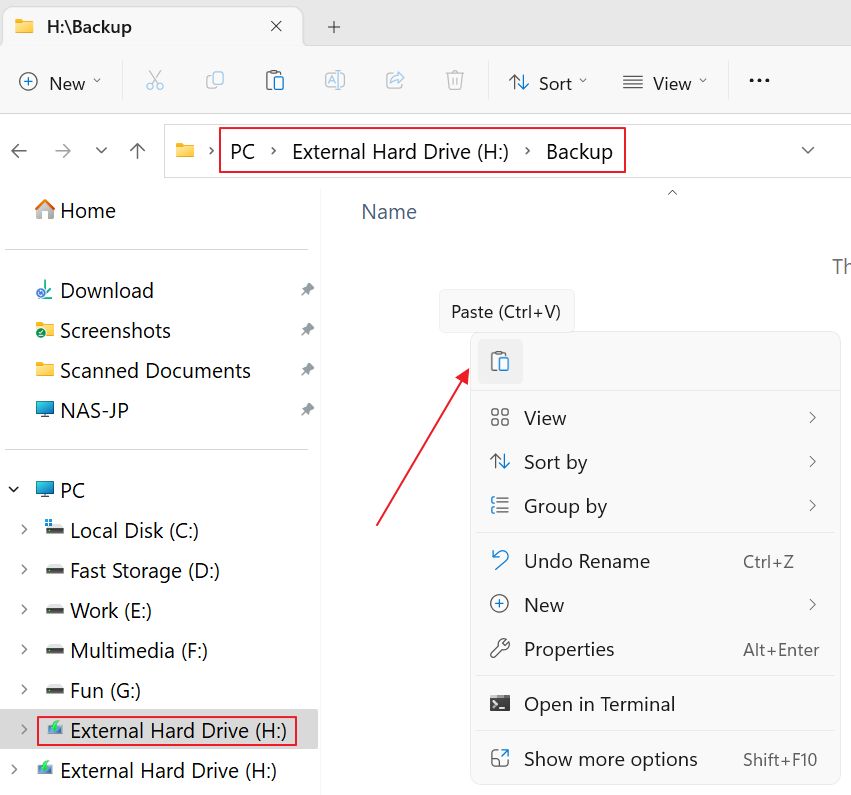
5. Navigate to the external hard drive, H:\ in this case, create a new Backup folder, if it doesn’t exist already. Open the folder, then right-click in an empty area and select Paste from the contextual menu or from the top menu bar (Windows 11).
That’s it, now you have a copy of your network drive backed up on both the local storage and to an external hard drive.
The entire process is easy, but can get annoying if you plan on doing a backup regularly.
Automate Network Drive Backup with Free Utility: Backupper
If that’s the case it’s worth exploring an automated way of doing a network drive backup by using a free utility that I’ve been using for the past couple of years: AOMEI Backupper (the review is here).
Use the button above to download the free version. What I’ll show you in this guide can be achieved with the Personal free-to-use version. You don’t need to pay for a license if you’re not using the advanced stuff.
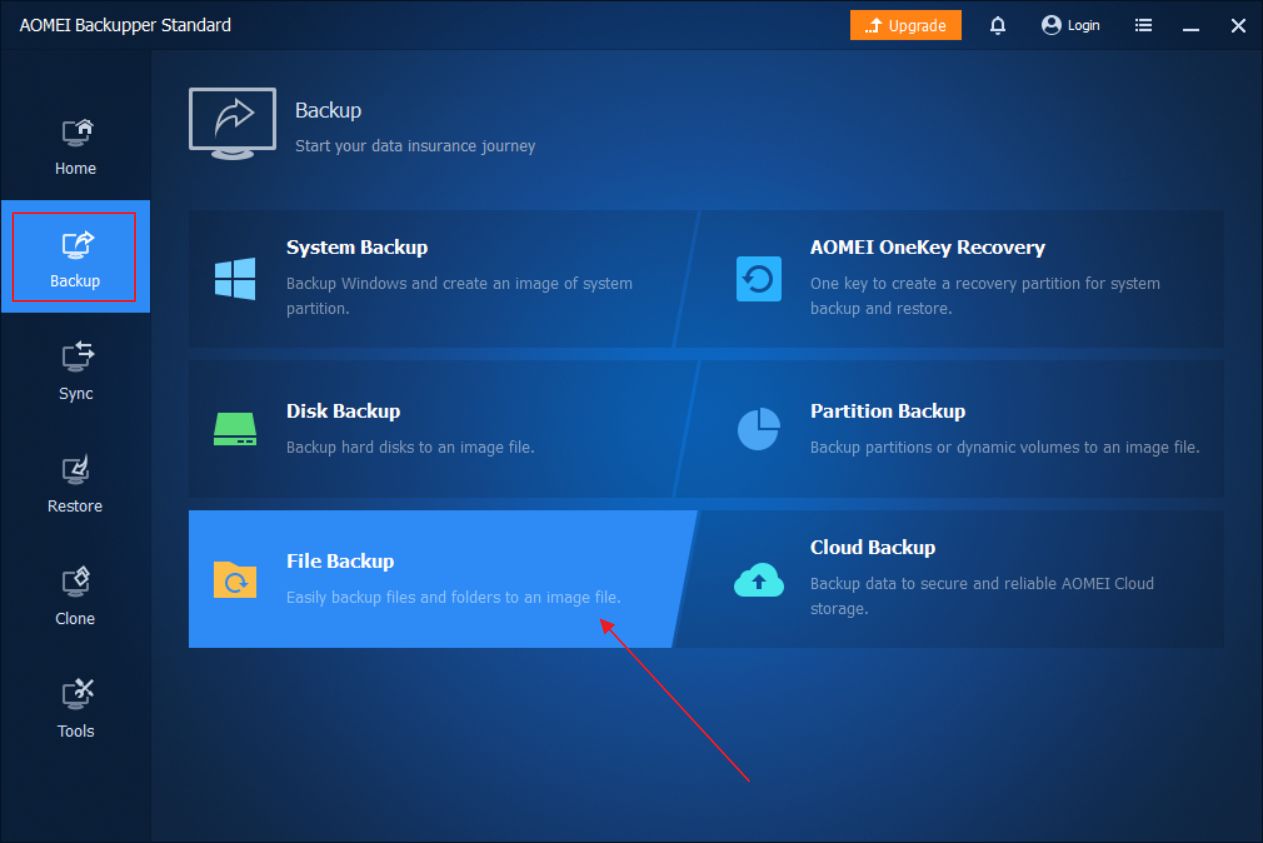
1. Open AOMEI Backupper and navigate to Backup > File Backup.
2. There are a few things you need to do here:
a) Name this backup task something that’s easy to remember. Edit the Task Name for this.
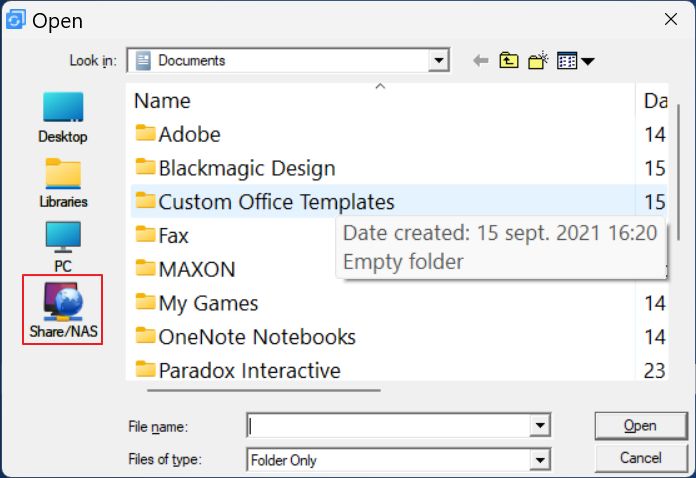
b) Select the source folder. For that click on the Add Folder button. A small popup window will appear. If you didn’t map the network drive as suggested head to Share/NAS.
You will see another window with all detected network devices. Select the one you want to copy data from.
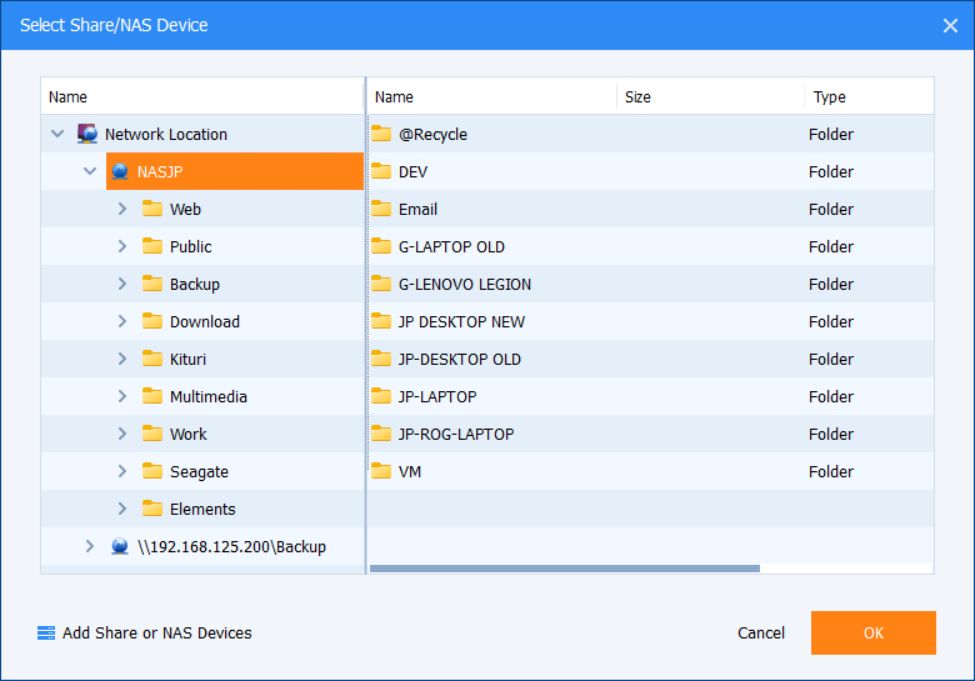
Browse the contents of the NAS or network device and select a destination folder. Unfortunately, you can’t select the entire NAS or a bunch of folders. You can only select one folder from the NAS that will be backed up.
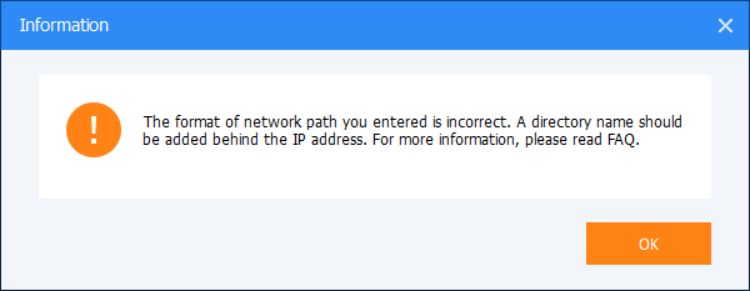
Mapping the network drive beforehand will solve this annoying limitation.
c) Now select the destination folder from your local computer.
In the end, the File Backup screen should look something like this:
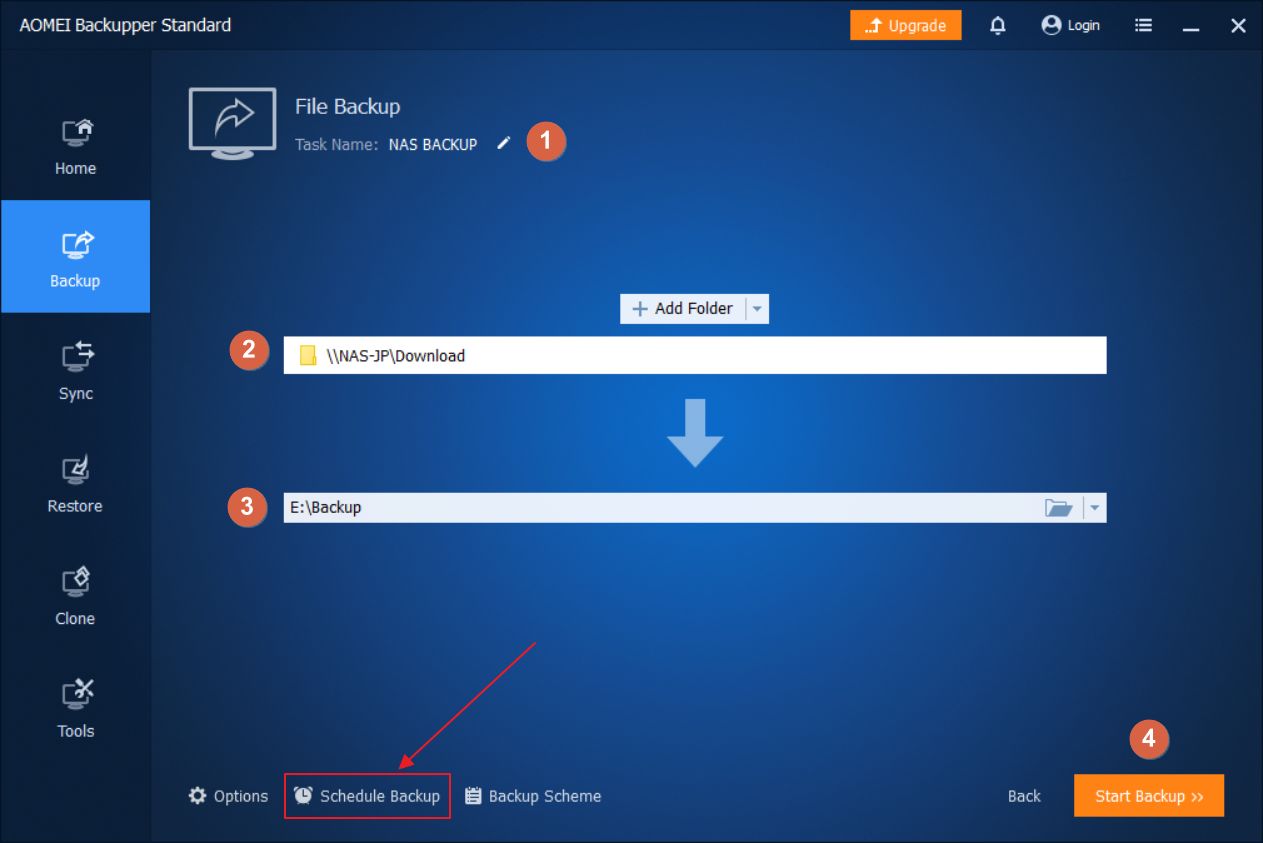
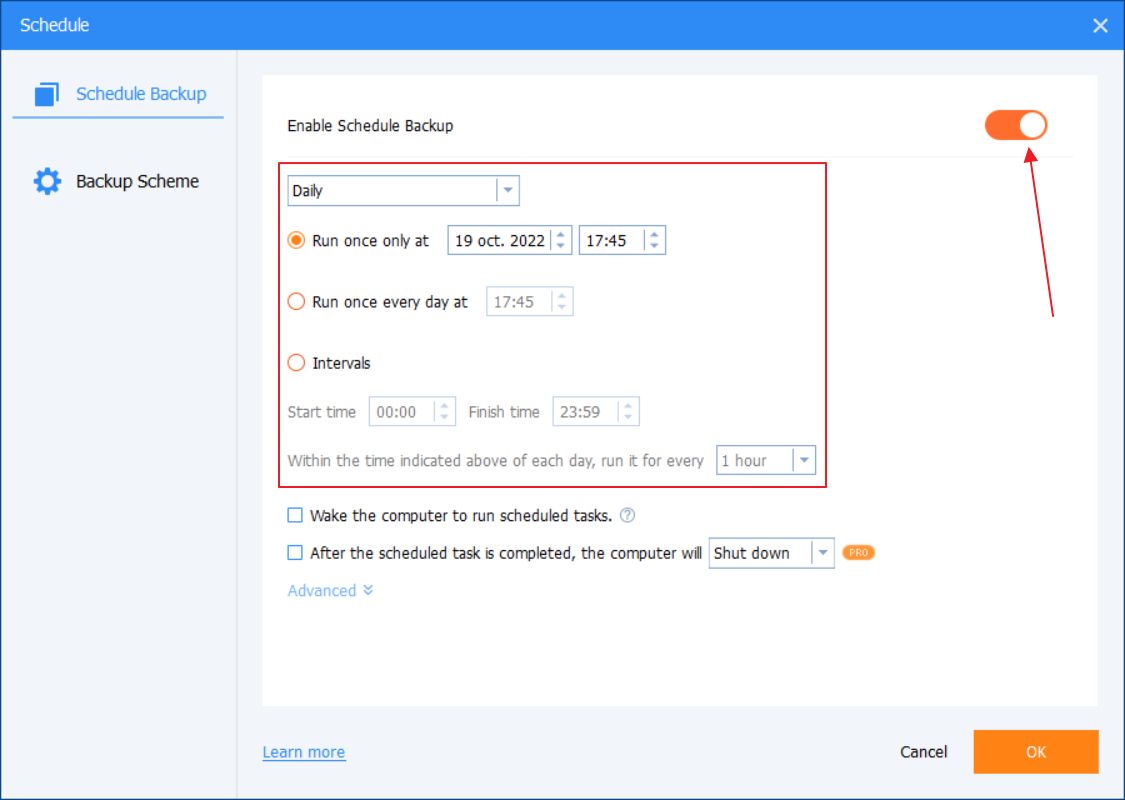
3. To automate everything you need to click on the Schedule Backup button at the bottom of this screen.
You need to toggle the Enable Schedule Backup checkbox first for the other options to appear.
You can schedule daily, weekly and monthly backups in the free version. Advanced triggers (user login, system startup, USB drive plugged in, etcetera) require a paid Backupper license.
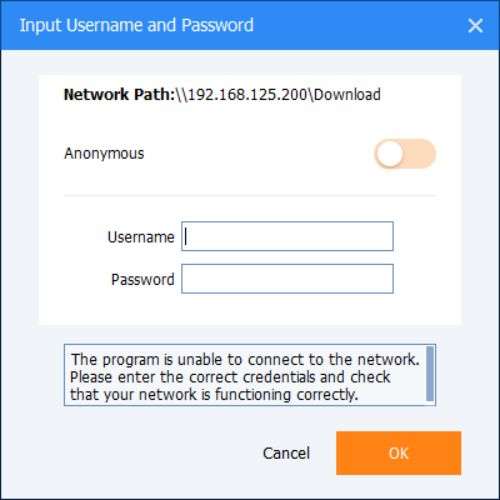
When everything is set up to your liking just click on the Start Backup button. If the network drive access is password protected you will see this popup, where you must fill in the correct credentials.
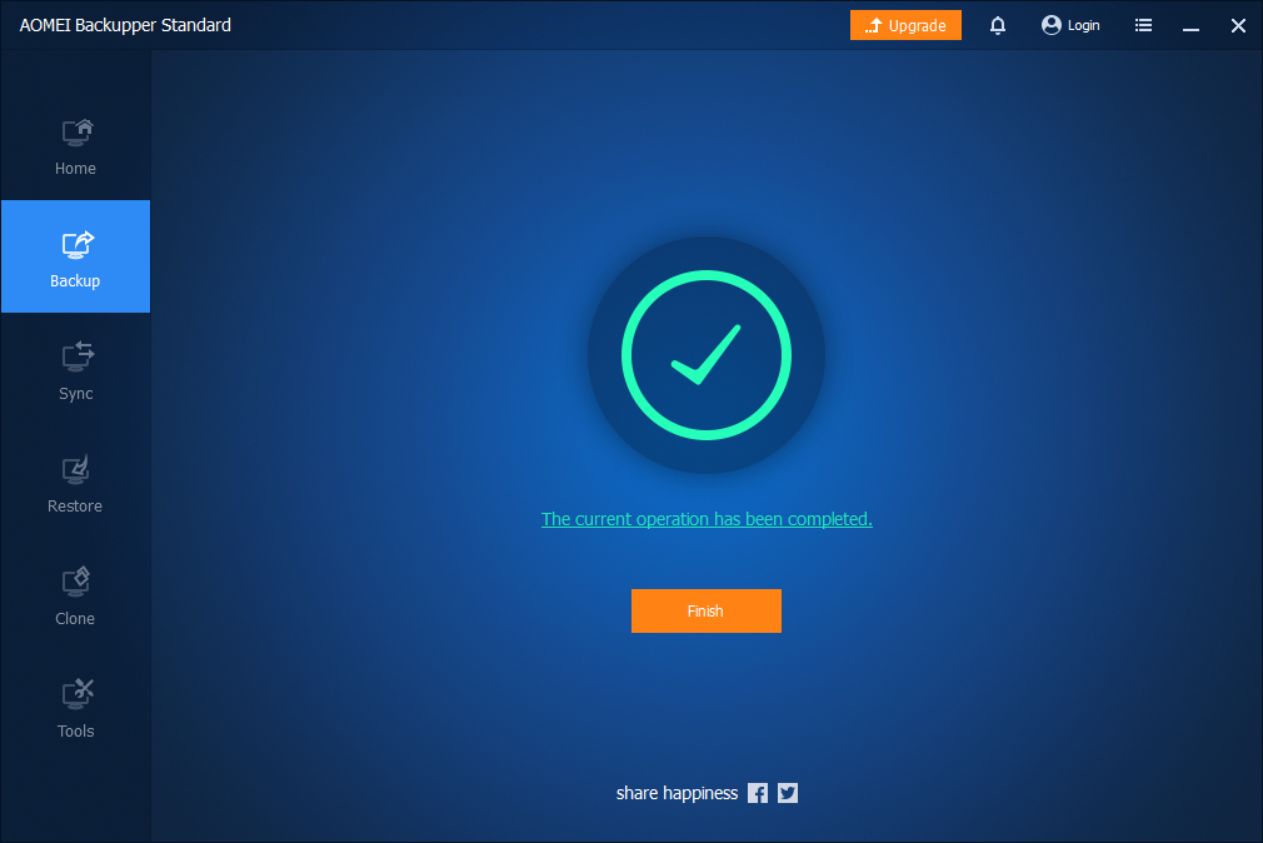
The backup operation will start afterward, and you will be notified when it’s completed.
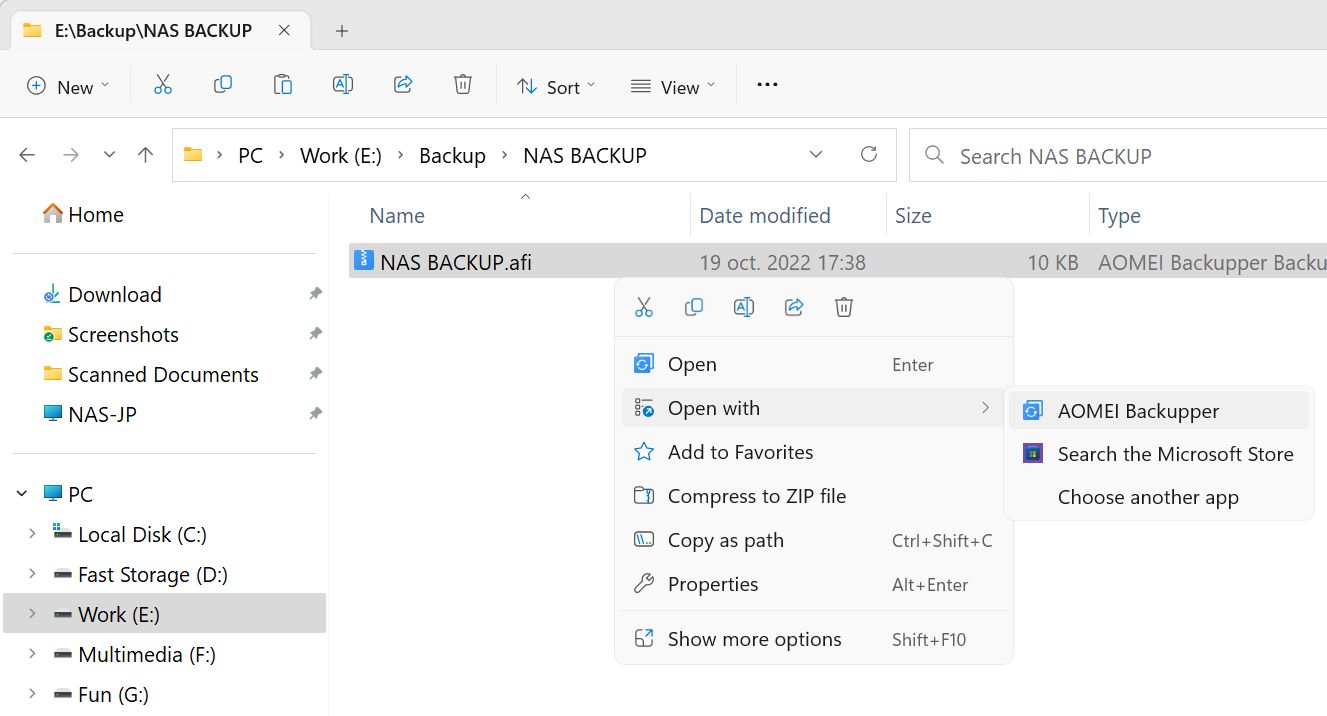
It’s important to understand that Backupper saves backups in it’s own format. You will not be able to open and explore Backupper AFI image file contents with Windows.
You can use Backupper though to restore a previous backup. See the Restore section for this where you can pick a backup task or a specific backup image. Exploring the contents of the backup image is possible too in the Tools section, but only if you have a Pro license.
And with this, you’ve reached the end of our backup network drive guide.
How to Rollback a Windows 11 Update: Downgrade to the Previous Build
If you have any questions or wish to recommend another backup utility, free or paid, feel free to use the comment form below this article.
Interested about backup up Windows to a network drive? We’ve got you covered.