- Windows 11 includes a bunch of optional features you can add or remove, as you please.
- Our guide will tell you everything you want to know about how to manage optional features in Windows 11.
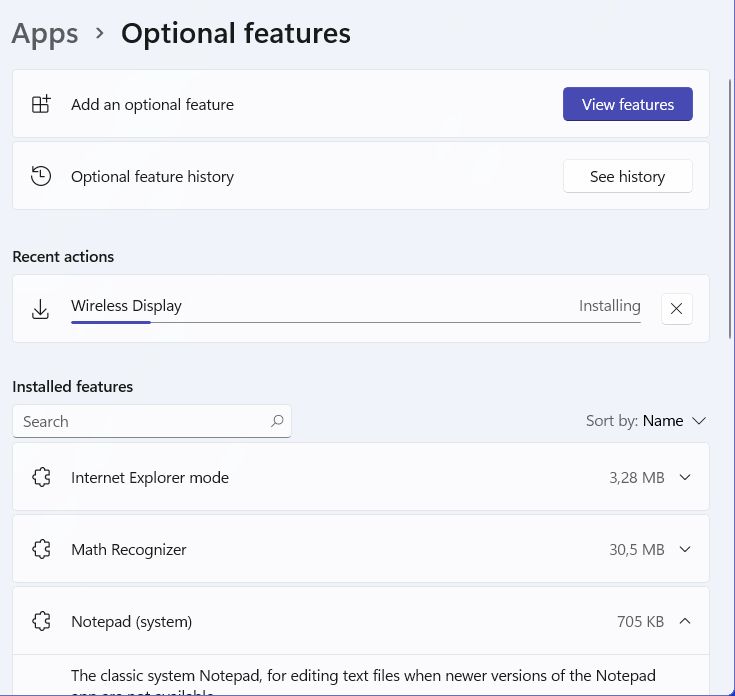
- It’s easy to see what features are already installed and the history of changes you’ve made.
Some people believe operating systems have only one goal: to make everything work on your computer so you can install third-party apps. Well, let me know if you find an OS that only does that.
Operating systems like Windows, Mac OS, and Linux come with a lot of pre-installed features. Windows 11, just as other previous versions allows you to add and remove a bunch of apps and services you may or may not need.
When you install Windows 11 a default configuration is loaded, with no input from your part. Fortunately, after everything installs properly you can add and remove some of these features. It’s very easy to do it, so let’s see the steps involved:
CONTENTS
Add Optional Features in Windows 11
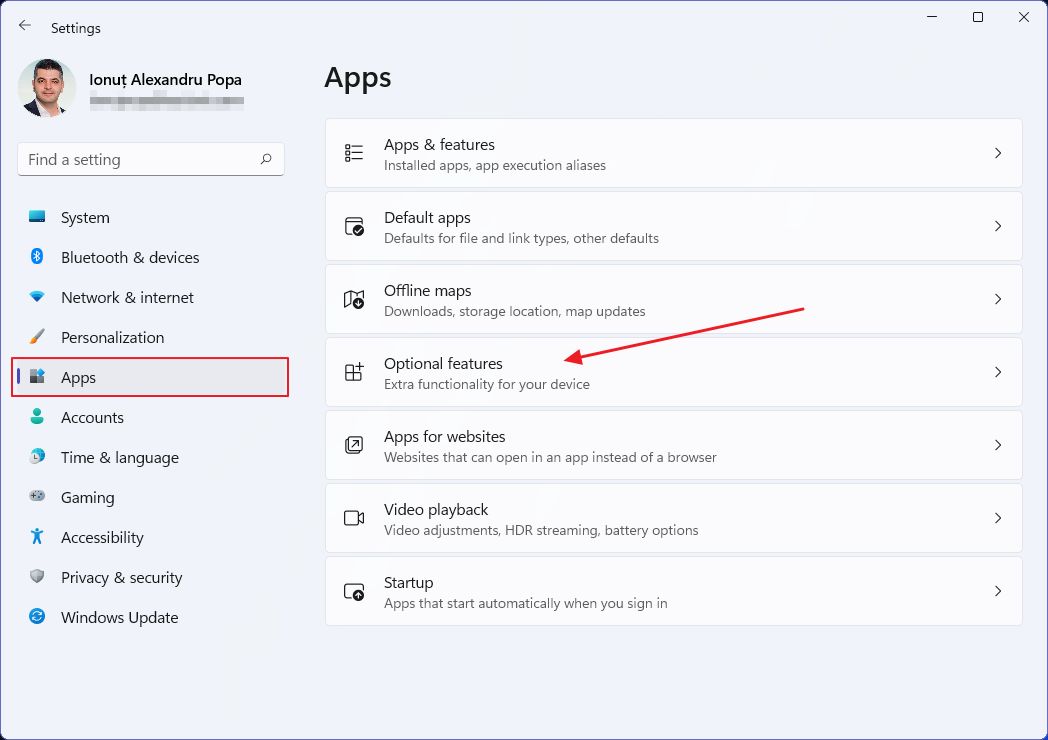
1. Open the Start menu and type Settings to find and hit Enter to open the settings app.
2. Go to Apps and click on Optional features.
3. Click on the View features button next to Add an optional feature. It’s at the top of the page.
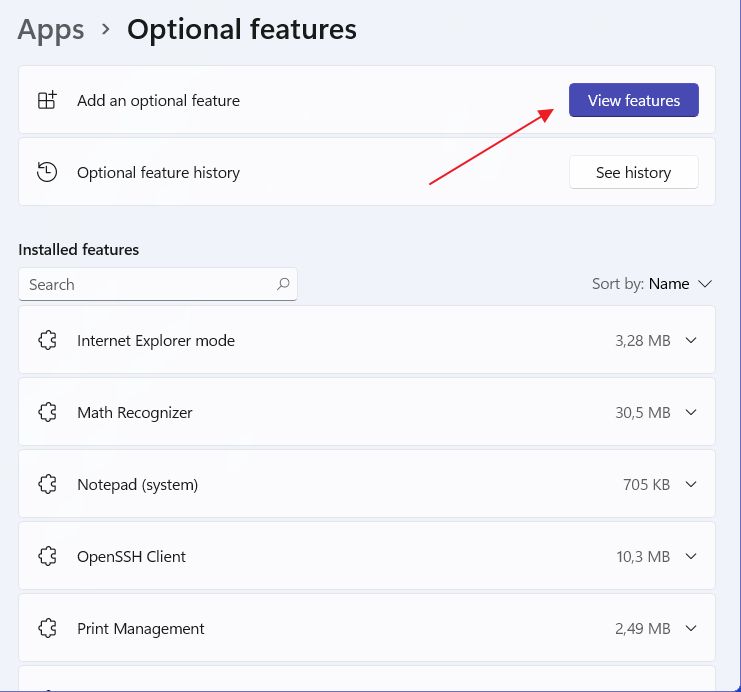
4. Scroll in the list that opens next or use the search box on top to filter the results. You can click the down arrow to expand each feature to get a short description of what it does.
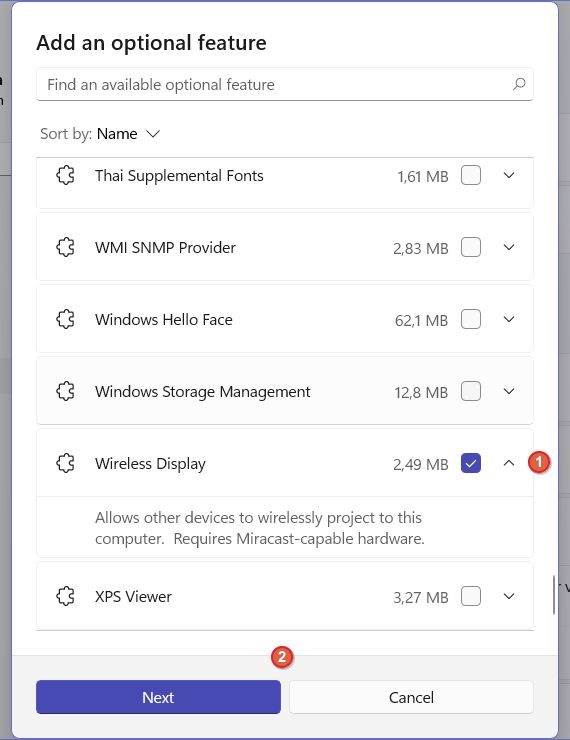
5. When you found the feature you need (1) click on the checkbox next to it, then (2) hit the Next button below. The button will activate when one or more features are selected.
6. A new confirmation window appears. Click on Install to continue.
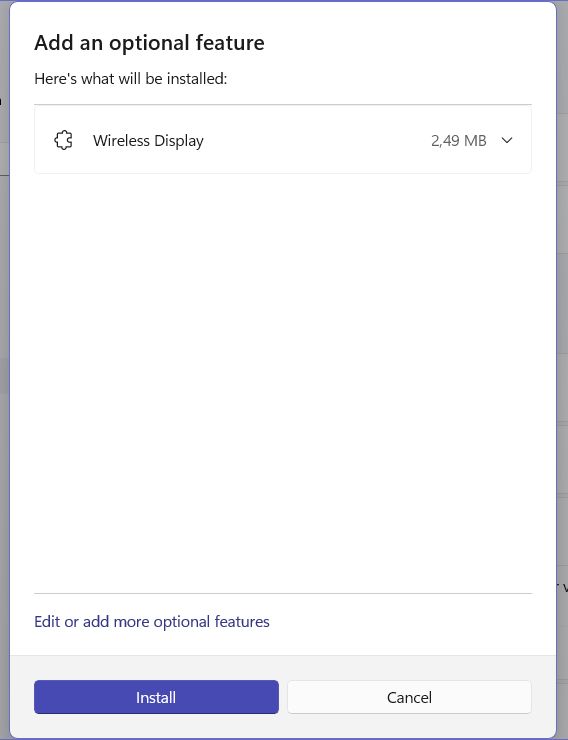
7. Wait for the installation to finish. It shouldn’t take more than a few seconds for most features.
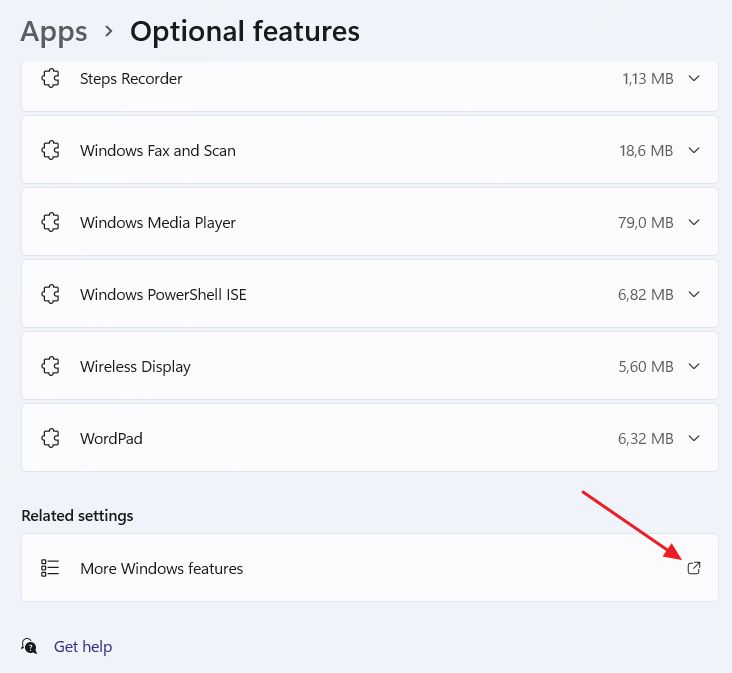
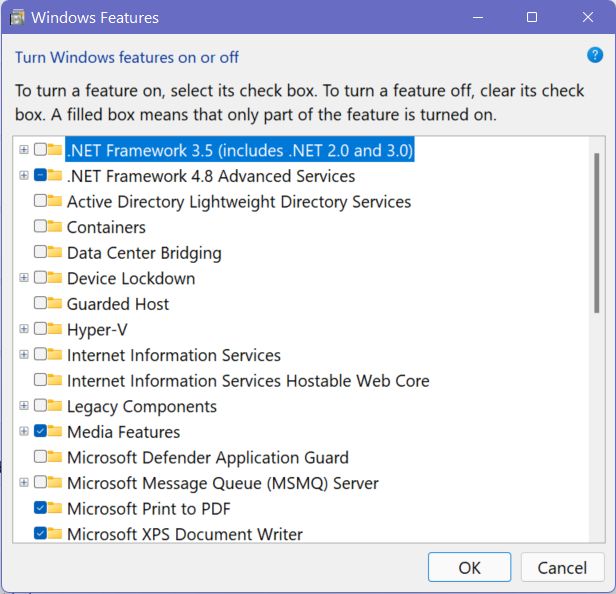
8. At the bottom of the Optional features page there’s a link called More Windows features.
This opens the old dialog window, “borrowed” from Windows 10. You can check/uncheck features and hit the OK button to apply changes.
Uninstalling an Optional Feature in Windows 11
You may want to remove some of the default installed features, or one that you’ve previously installed. Here’s how to do that:
1. Open the Start menu and type Settings to open the settings app.
2. Go to Apps and click on Optional features.
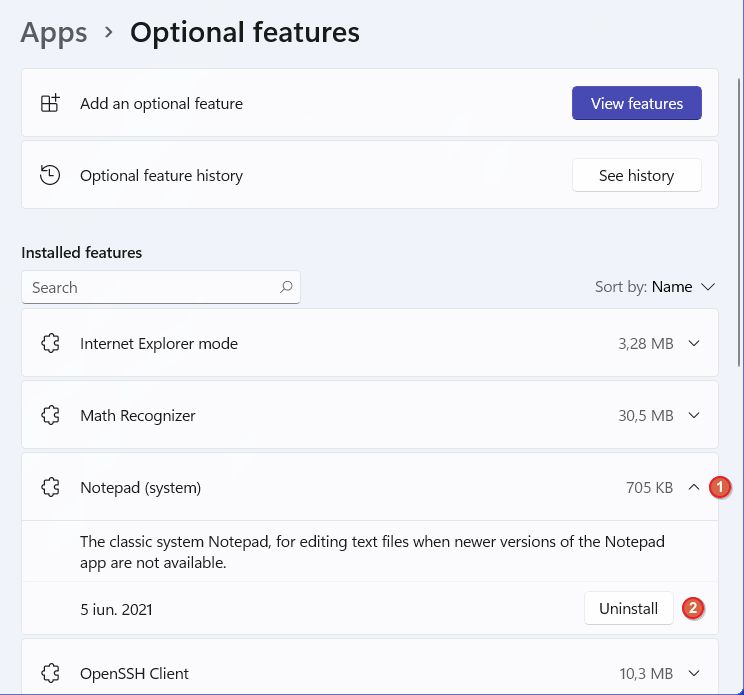
3. Scroll the list of Installed features and (1) expand each of them with the down arrow if you what to see the description of a particular item from the list. When you found the feature you want to remove just (2) click on the Uninstall button.
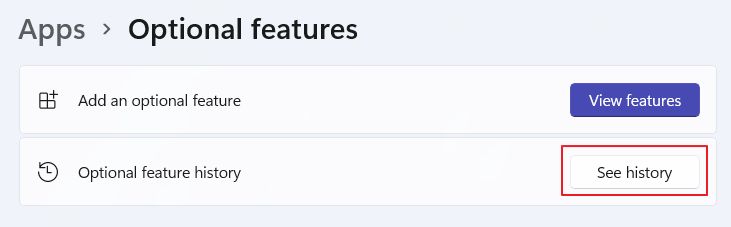
Optional: Check the Windows Optional Features History of Changes
1. While you’re on this page of the Settings app click on the second option, the button labeled See history next to Optional feature history.
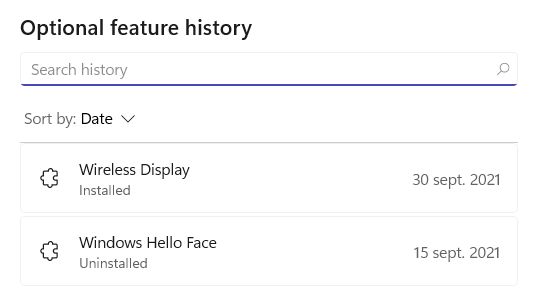
4. A new list opens with a changelog of all the features added or removed by you since you’ve installed Windows 11.
And that’s pretty much everything there is to add or remove features in Windows 11.
I hope this guide helped you understand how to turn Windows features on or off and that it’s easy enough to use, but if you still have questions let me know below and I’ll try to help you.
Also read about the evolution of this functionality, called Features on Demand, or FoD.