- If your system is slow when you open too many apps it may be that you don’t have enough RAM installed in your system.
- Having more RAM than you need doesn’t do you any good, but having less RAM will hurt your computer’s performance.
- Learn how to figure out how much RAM is installed in your computer using Windows utilities, so you don’t need to install anything else.
RAM is where your programs do their things. Internal storage is where the operating system, applications, and personal files are stored. When you need them, this data is copied to the much faster RAM where it is used to do what you want to do with it.
RAM is a tricky thing: having more than you need doesn’t help with performance. Having less becomes a problem, because your computer will try and use the much slower internal storage of your system to compensate.
Read our report on how much RAM you need as a casual user.
This is one of the reasons you may want to check how much RAM is installed on your system. Fortunately, you can do that in Windows 11 and Windows 10 without having to install third party apps.
CONTENTS
Check RAM capacity with About this PC
If you only want to find out how much RAM is installed on your machine you can use the About this PC section from the Settings app. Here’s how you do that in a few seconds:
1. Open the Settings app. I always prefer to use the Win + I keyboard shortcut.
2. Select the System section from the left side menu.
3. In the right panel scroll to About and expand this section.
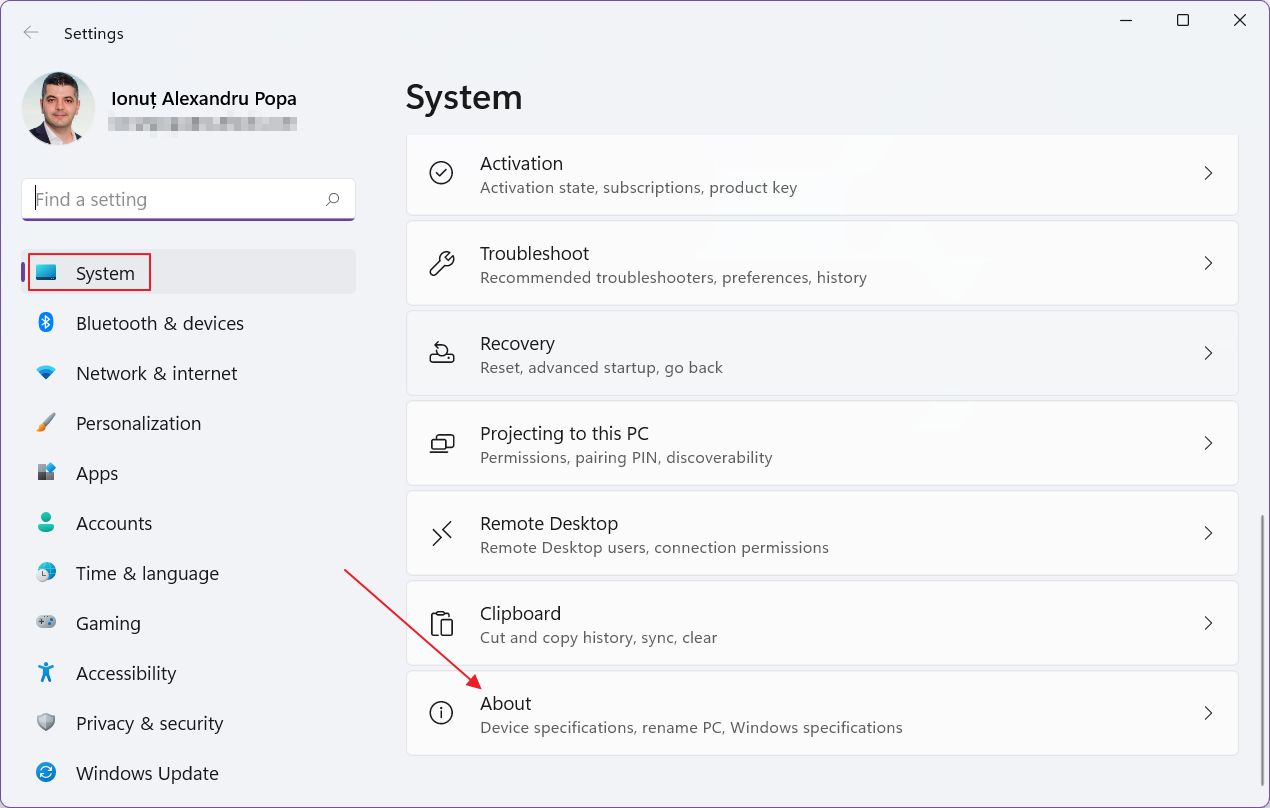
4. A new panel will open now. Look for Device specifications. Under Processor there’s a line called Installed RAM. In the example below the capacity installed is 32 GB of RAM.
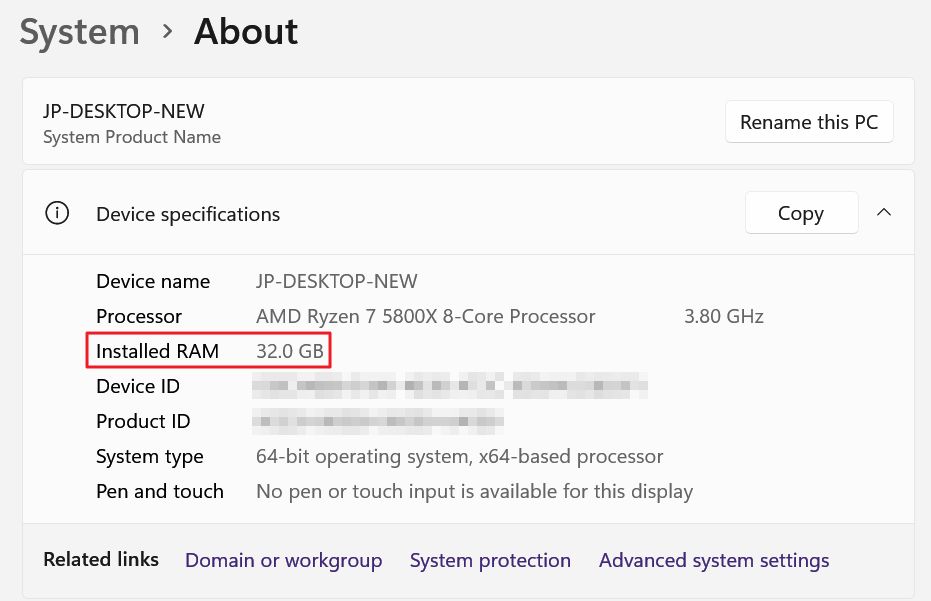
The About page is just a very brief overview of your computer configuration. There’s no info about GPU or internal storage for example.
Check RAM size, speed, and type with the Task Manager
For more details about RAM capacity, including current usage, operating speed, and type of your RAM we will be using the Task Manager.
1. Open the Task Manager by right clicking on the system taskbar and select the option with the same name.
2. Use the left side menu of Task Manager to select the second option, Performance.
3. In the middle column now select Memory.
Note that you can already see the installed RAM capacity (the second number), together with current usage in gigabytes (the first number), and percentage (last number).
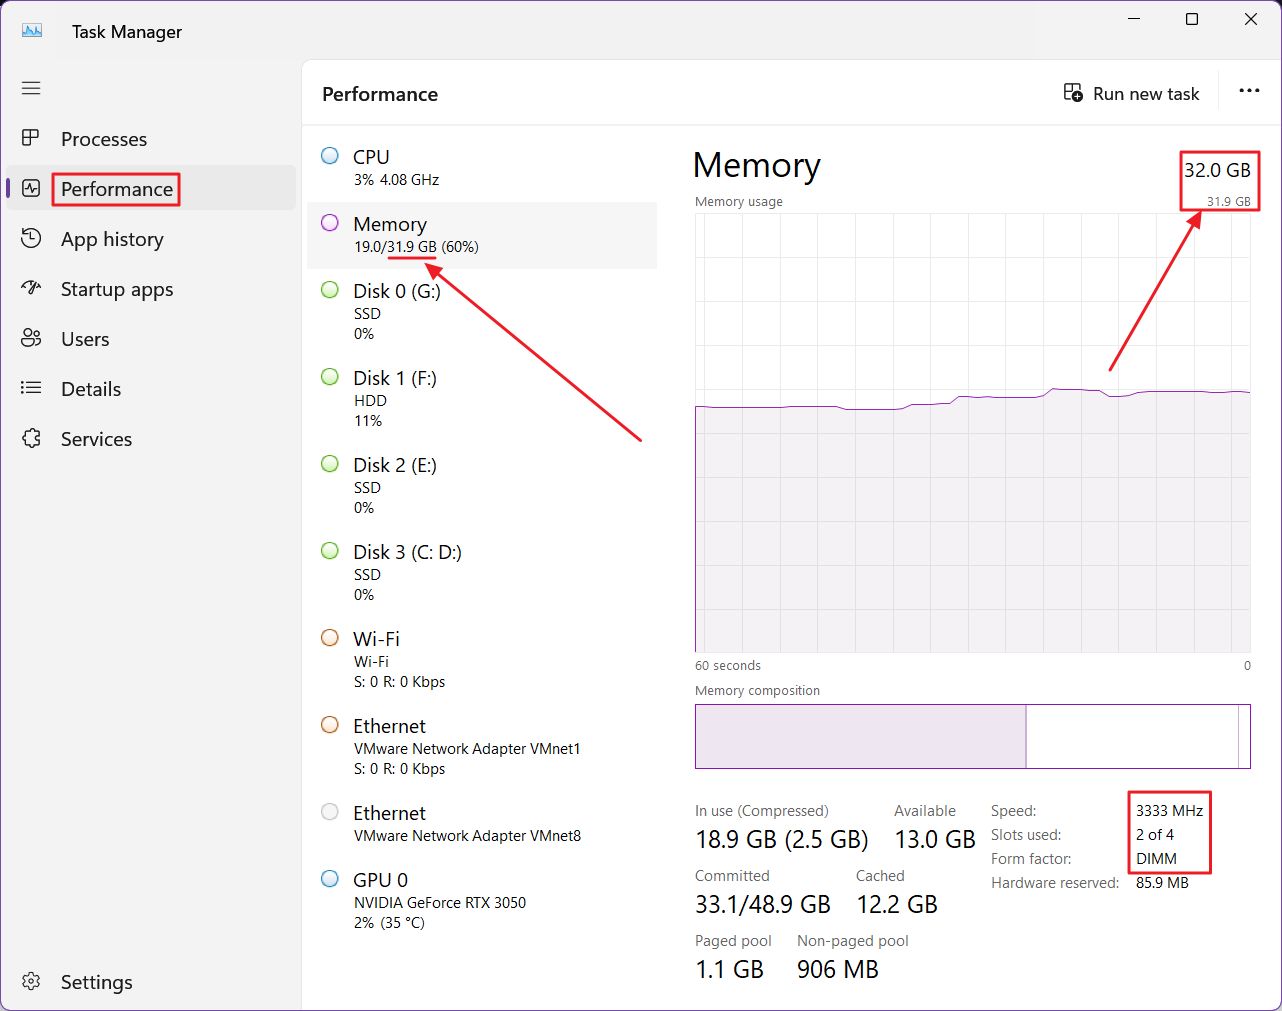
4. Moving on to the detail panel on the right, the RAM capacity is listed at the top as installed RAM modules (the bigger number), total available which excludes the system reserved capacity (the smaller number).
At the lower right of the screen, you will find details about RAM speed in MHz (3333 in the example above), the total available number of RAM slots and current use (2 out of 4), plus the RAM form factor, which is DIMM, aka full-size memory. On my laptop this is listed as SODIMM.
There’s no info about RAM technology (DDR4, DDR5, etc).
But the Task Manager is the place you find out the current and historic memory usage then learn which programs are eating up your precious RAM.
Check detailed RAM info using the Command Prompt
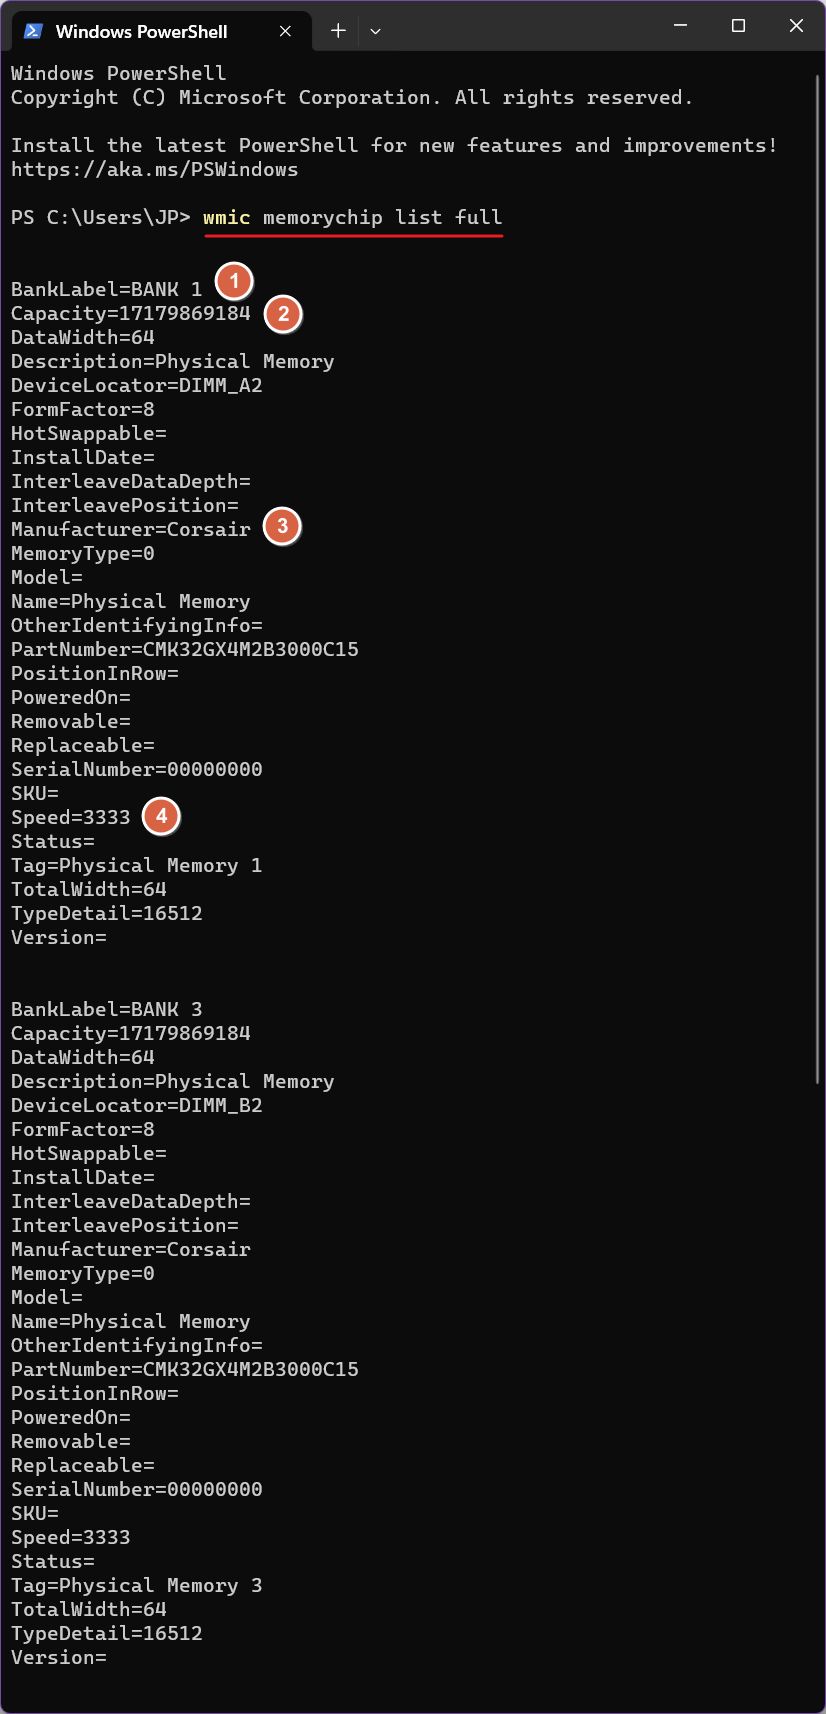
If you want to get geeky about RAM, but still don’t want to install any third-party app, you can run the following command in Command Prompt, PowerShell, or Windows Terminal.
wmic memorychip list fullYou will get something like this for each RAM module installed. In the example below you will find things like:
- Occupied memory slot.
- Capacity expressed in bytes (for gigabytes you will have to divide by 1024 three times which will result in 16 GB per module for my example).
- RAM manufacturer.
- Speed expressed in MHz.
If you want to check detailed info about your hardware, much more than Windows is capable of reporting you can try one of these free utilities. The most comprehensive utility is HWinfo64 but be warned that the amount of data it displays can be too much to handle.