- If you need to check the VRAM capacity of your video card, you can do it in Windows without the need to install third party apps.
- The GPU uses VRAM to store textures and 3D assets for faster processing, and this type of memory is much faster than the system RAM.
- Learn how to check GPU VRAM size using the Task Manager, display adapter properties and the DxDiag diagnostic tool.

GPUs (Graphic Processing Units) are much faster at parallel processing than CPUs. This means they need much faster memory to feed these chips with data.
Dedicated GPUs are using VRAM, short for Video RAM (Random Access Memory). Being faster means also being more expensive, so typically your computer would have less VRAM than RAM.
Knowing how much VRAM you have at your disposal can be beneficial in many scenarios, but I’ll only give you one example: you’re thinking of buying a PC game and want to make sure your computer meets the minimum requirements to run the game.
If you don’t know how much VRAM your GPU has you can now check this in Windows 11 easily, without needing do install third party utilities (like our free favorites for hardware monitoring).
Check VRAM size and usage with Task Manager in Windows 11
If you are running Windows 11, you already know the Task Manager is more powerful than ever, including a number of new features compared to Windows 10, such as GPU usage monitoring, including the temperature of the dedicated GPU.
Here are the steps to check and read the VRAM usage using the new Task Manager:
1. Open the Task Manager by pressing Ctrl + Shift + Esc.
2. In the left side menu click on Performance.
3. A new middle column will appear with various components of your system. At the bottom you will find your GPU(s). Usually, the first one is the integrated GPU, while the second one is the dedicated GPU. Click to open the GPU monitoring graphs and usage info.
4. Below the graphs there’s info about GPU memory, both usage and available capacity.
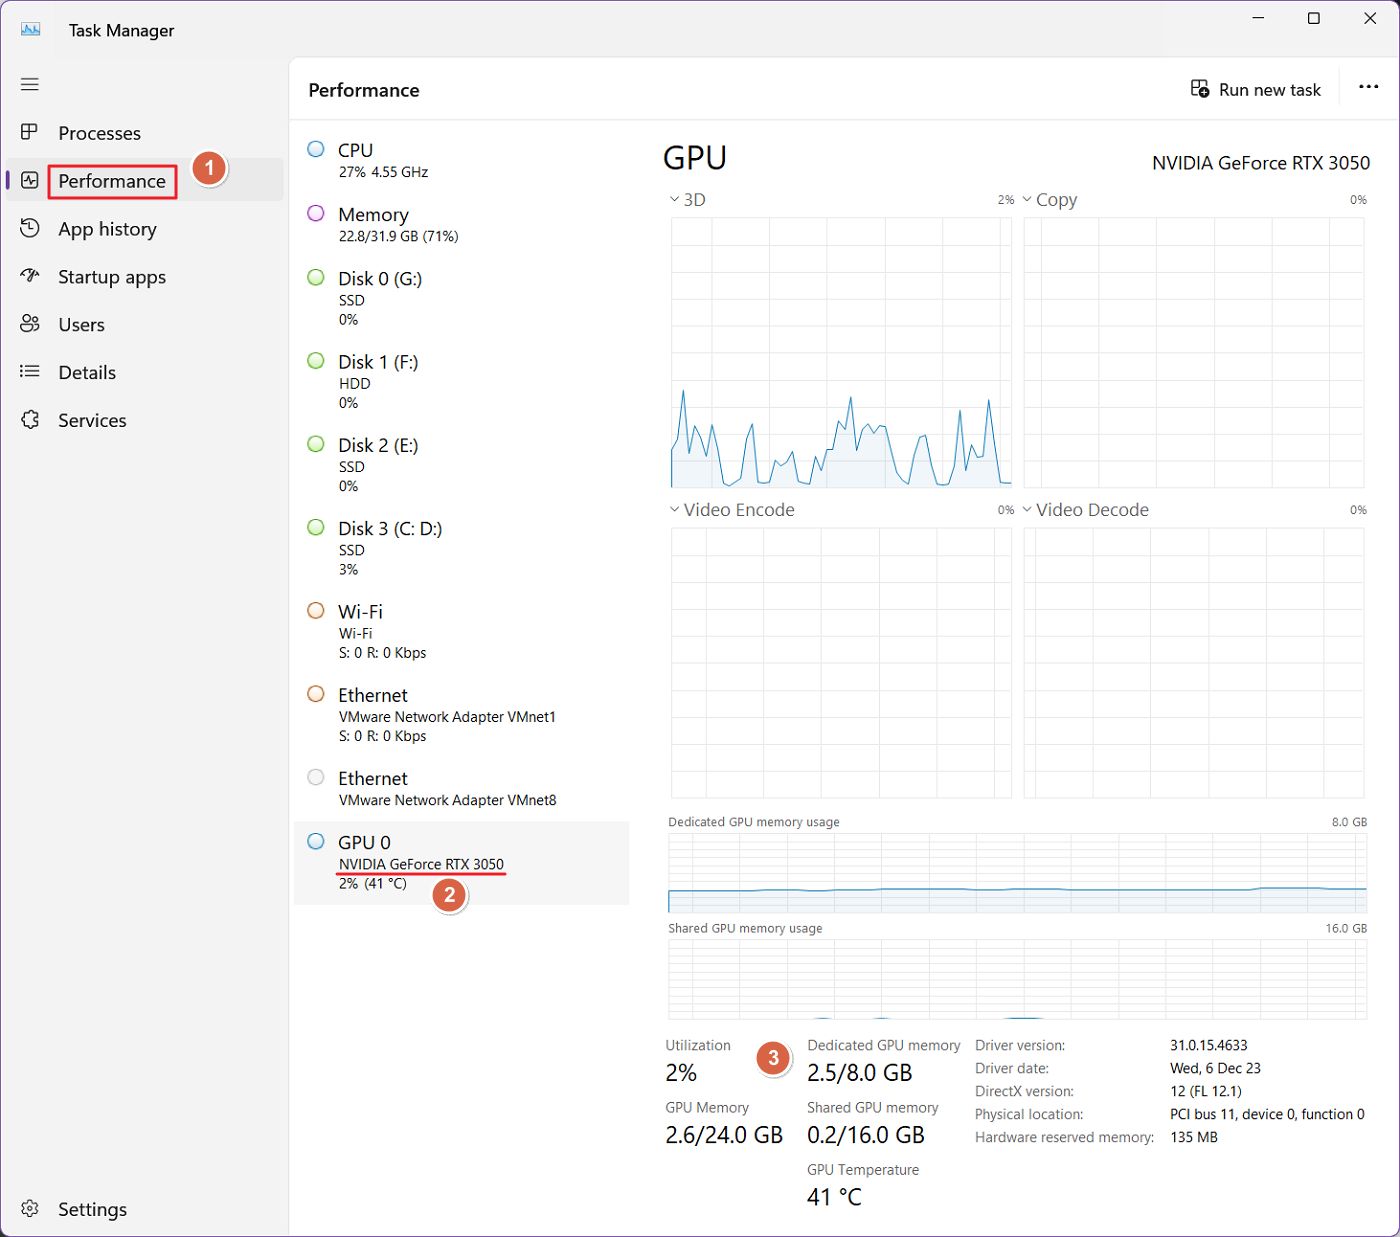
Here’s how to read this info:
- Dedicated GPU memory: this is the VRAM capacity installed on your video card. The first value is the current VRAM allocation in use. The second value is the total VRAM.
- Shared GPU memory: this is the virtual VRAM, aka a portion of the system RAM that will be used if VRAM usage goes above the installed capacity. This is similar to swap. Virtual memory will prevent your system from crashing, but performance will be seriously impacted if VRAM usage needs to use this section of RAM, which is much slower.
- GPU memory: this is the sum of VRAM and virtual VRAM.
If you are checking the integrated GPU usage in Task Manager, you will see there’s no dedicated VRAM for some chips (Intel Iris Xe in the image below).
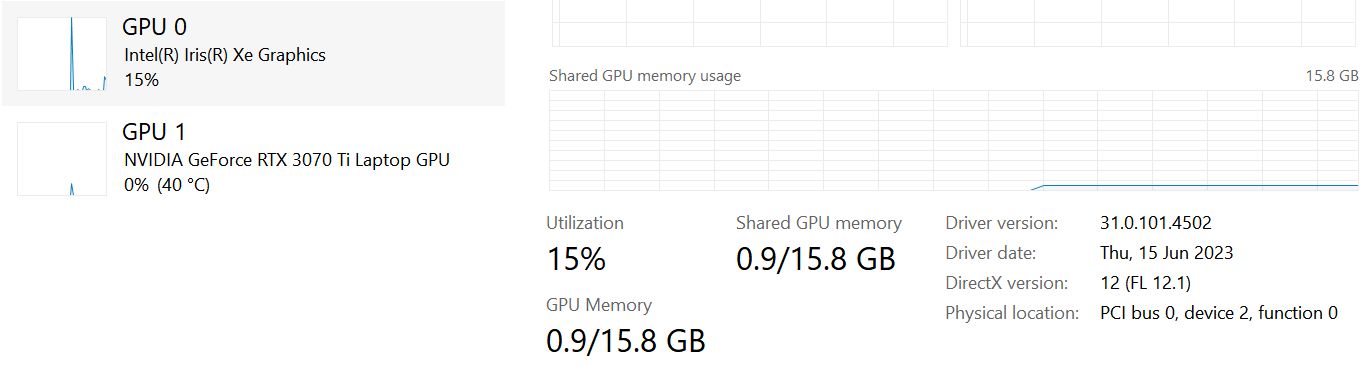
Other GPUs (AMD Radeon Graphics) will show a tiny amount of dedicated GPU, but it is still allocated from RAM. So it is not a dedicated VRAM chip.

Integrated graphics will almost always use RAM as VRAM, with some portions being allocated (you will have less RAM available for running apps), and some being allocated on demand (shared memory).
Ither way, RAM is much slower than dedicated VRAM and this is one of the reasons integrated graphics is slow compared to dedicated GPUs.
For more info about Shared GPU memory and it’s disadvantages we have put together a separate article.
Check VRAM size with the legacy Display Adapter Properties
This second method also works in Windows 10, not just in Windows 11. This is why I chose to show you this method:
1. Open the Settings app by pressing Win + I or use any method you like.
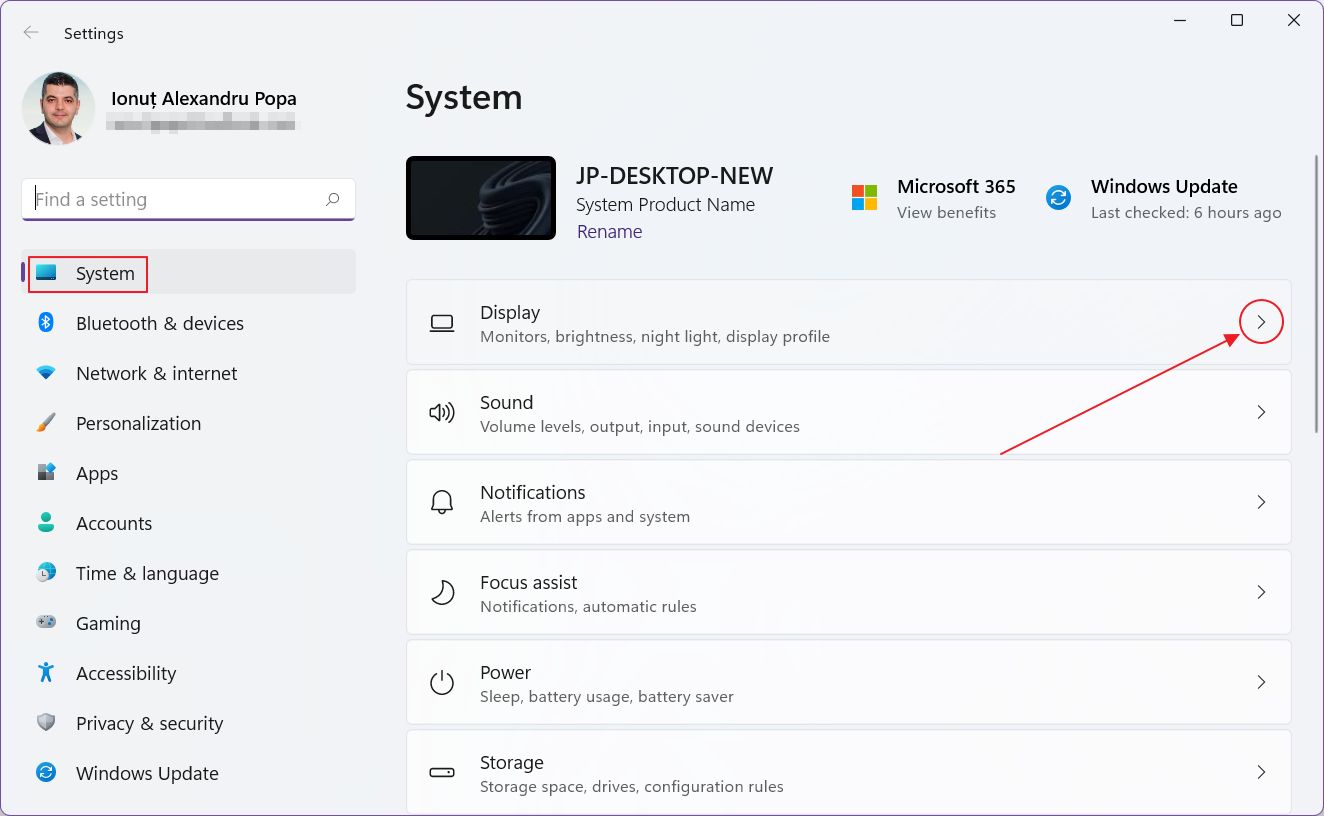
2. Navigate to the System section in the left side menu.
3. In the right side, the first option up top is Display. Click to expand.
4. Scroll in the new Display panel until you reach Advanced display. Expand this section.
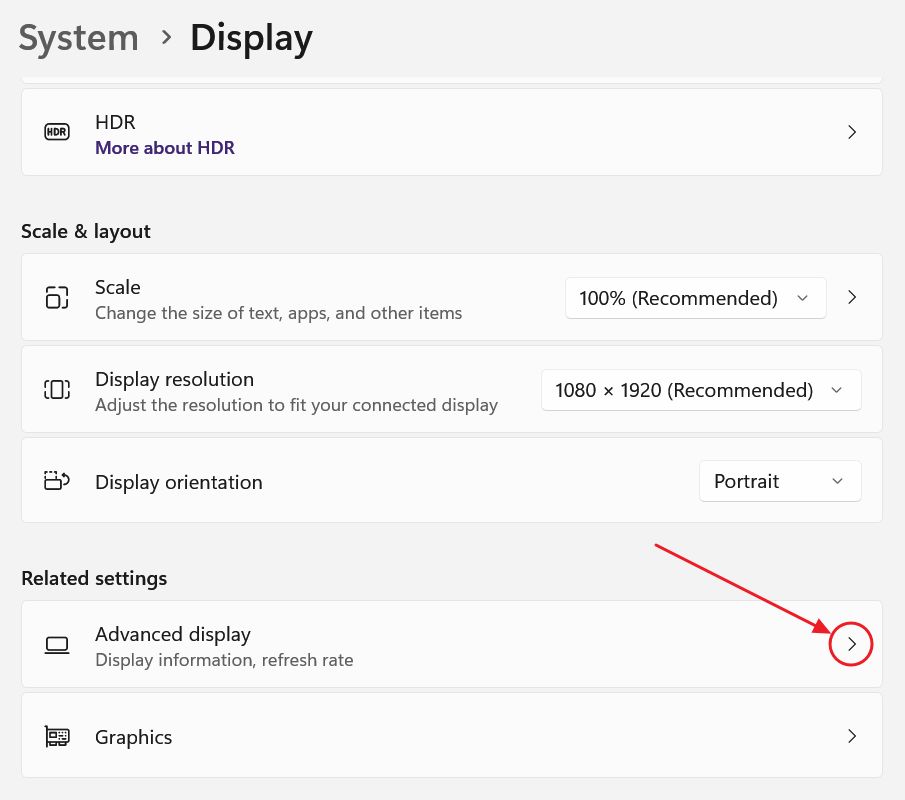
5. Under the display information you will find a link to Display adapter properties for Display X. Clicking this link will open an old Adapter properties utility.
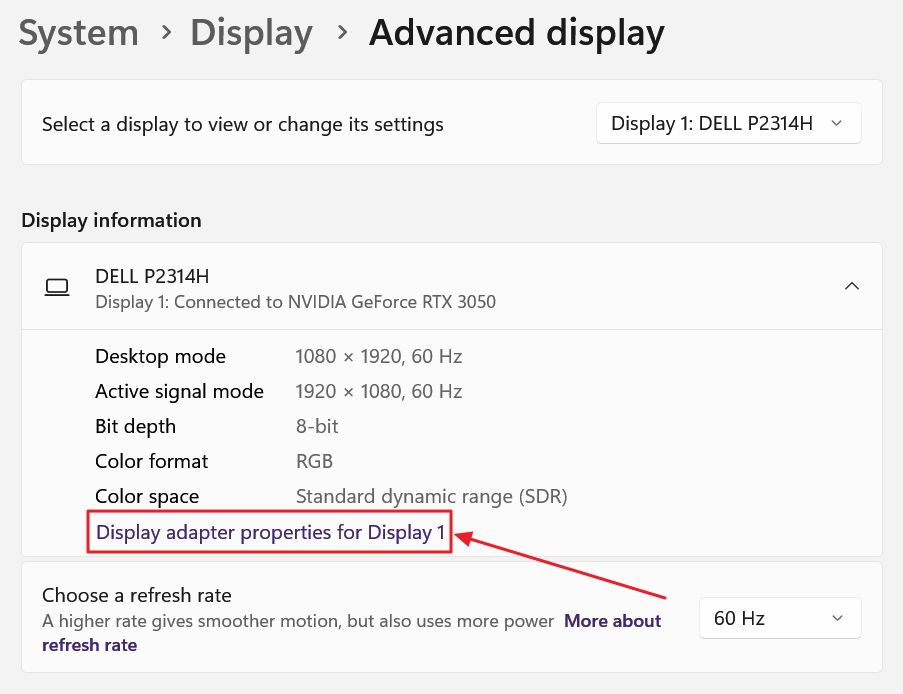
6. In this new window you can find your GPU name next to Chip type. The installed VRAM capacity is the one listed next to Dedicated Video Memory.
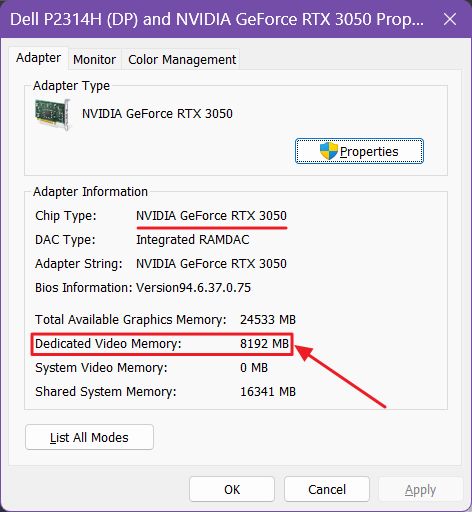
Notice this value is expressed in megabytes. Divide by 1024 to get the capacity in gigabytes. In the example above 8192 MB equals to 8 GB of VRAM.
Checking this info for an integrated GPU will list a much smaller dedicated video memory size. This is the value reserved in the BIOS from the system RAM.
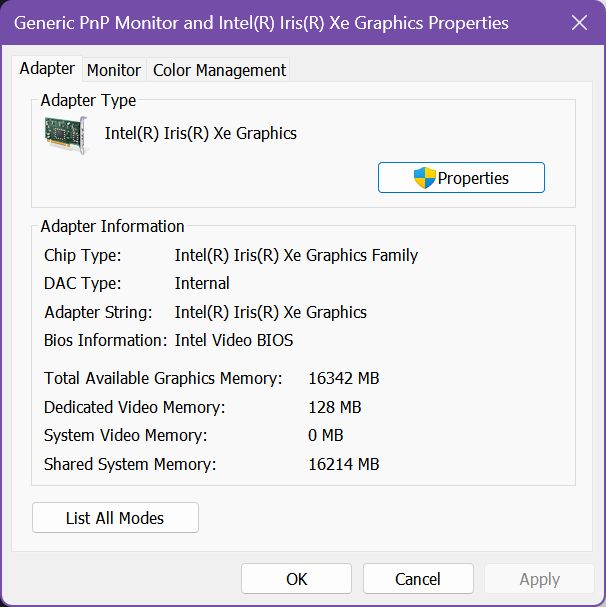
One important mention is that on systems with both integrated and dedicated GPUs this second method will only show you the info for the GPU that powers the display. That may not be the dedicated GPU.
This means you will need to find another method if you’re in Windows 10. Fortunately, that method exists, and it’s called DxDiag.
Check VRAM for all GPUs with DxDiag
DxDiag is one of the tools built by Microsoft do diagnose DirectX, the gaming language (API) used by a lot of Windows games. Here’s how to use DxDiag to find out the important details of all GPUs installed in your system:
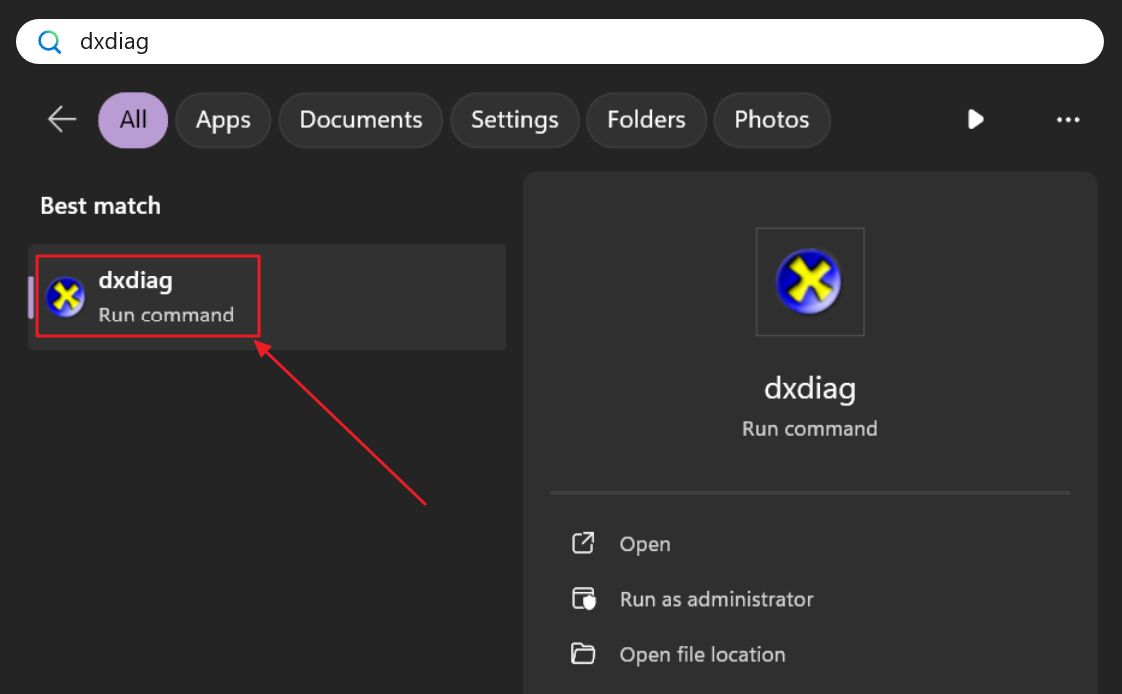
1. Open the Start menu and type dxdiag.
2. Launch the first result.
3. Wait a few seconds for DxDiag to gather your system information then select the Display 1 and Display 2 tabs. The first one is the integrated chip, the second one is the dedicated GPU.
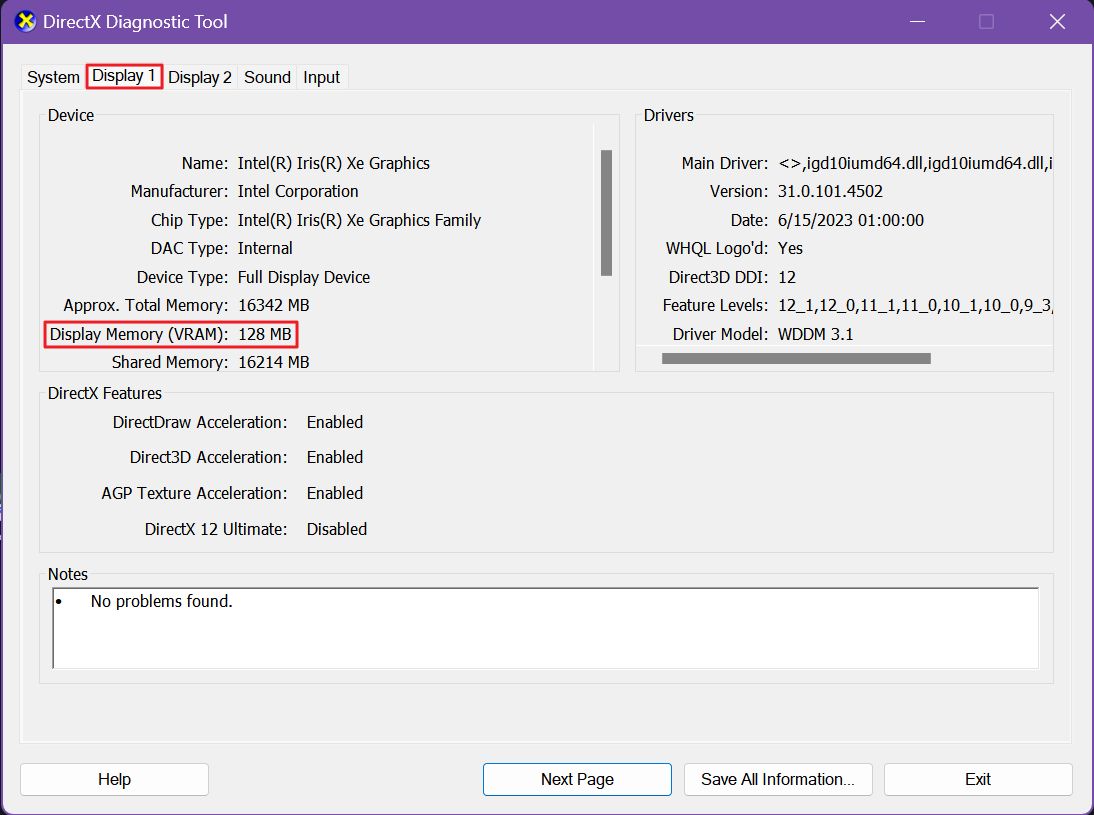
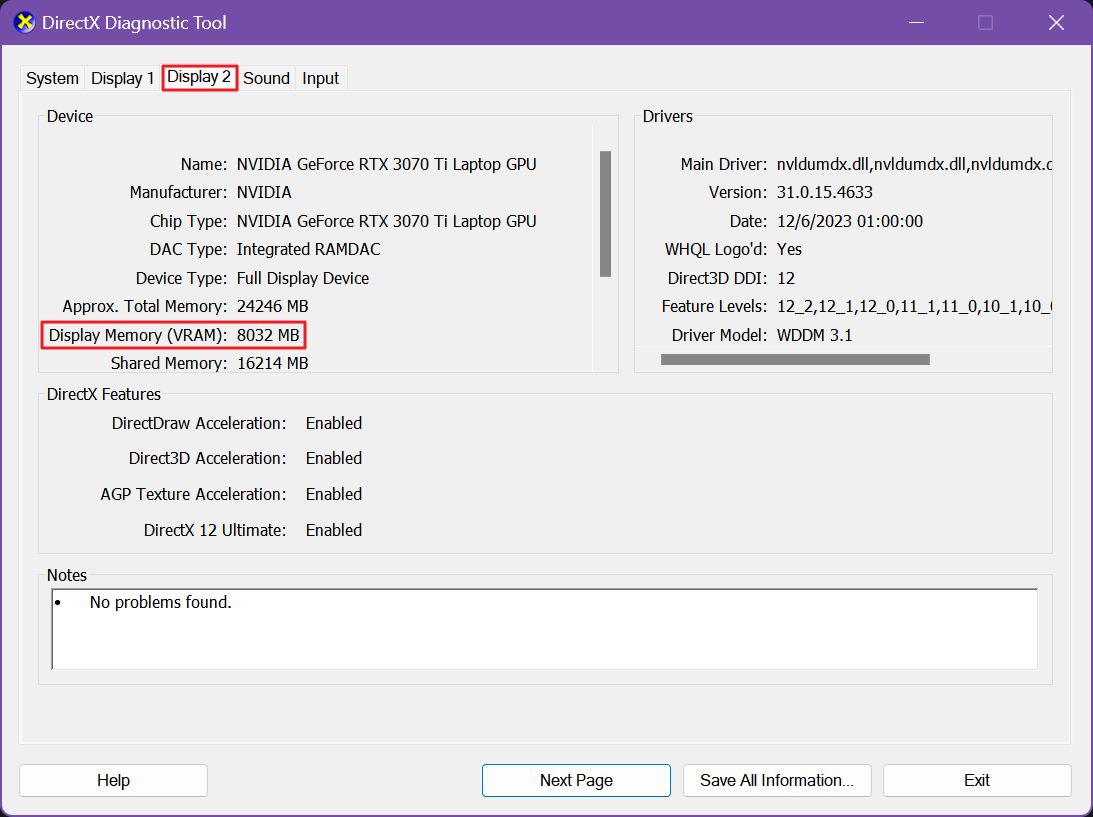
Look for the value listed next to Display Memory (VRAM). For some reason, this value is slightly smaller than the capacity shown by the Task Manager. I assume it’s just an error of some sort, or DxDiag doesn’t count a small, reserved amount.
Anyway, there you have three ways to check GPU VRAM size in recent Windows versions that don’t require to install third party software.