- Learn how to install Ubuntu Linux on your computer with this quick step-by-step guide.
- Want to give Linux a try and don’t know if you’re able to install it all by yourself? We’re here to help.
- Ubuntu is one of the most popular and easy to use Linux distros.

Linux is by far the most popular operating system in the server world, but regular users still use Windows. That’s not to say there aren’t plenty of Linux distributions (also known as distros, aka collections of apps packaged together with Linux) that are user-friendly, easy to install, and can offer pretty much all the apps you need for leisure and work.
Sure, not all apps can run on Linux and definitely not all games, but Steam might change that with their Proton emulation software in the future. But that’s for another article.
This is a quick guide on how to install Ubuntu on a new computer. It’s very similar to how you would install Windows 10 (a guide for that can be found here), but some differences might put off a newbie. I hope this guide will be of help to them.
CONTENTS
First step: Download Ubuntu Desktop and Prepare an Install Disk
There are a few flavors of Ubuntu, but this guide will focus on the desktop variant, which has all the features you would want in a modern OS that you can install on a modern PC or laptop.
With the ISO file downloaded on another computer, you will create an install disk. You have two choices: either burn a DVD with it or create a bootable install disk with this guide.
Installing Ubuntu Linux Step-by-Step Tutorial
1. Insert the install disk and then start the computer.
Note: if you’re using a tower case insert the flash drive into one of the rear USB ports. Front-panel USB connectors are known to cause issues occasionally during the install process.
2. Press the F8 key multiple times when the computer turns on to open the motherboard Boot Manager menu.
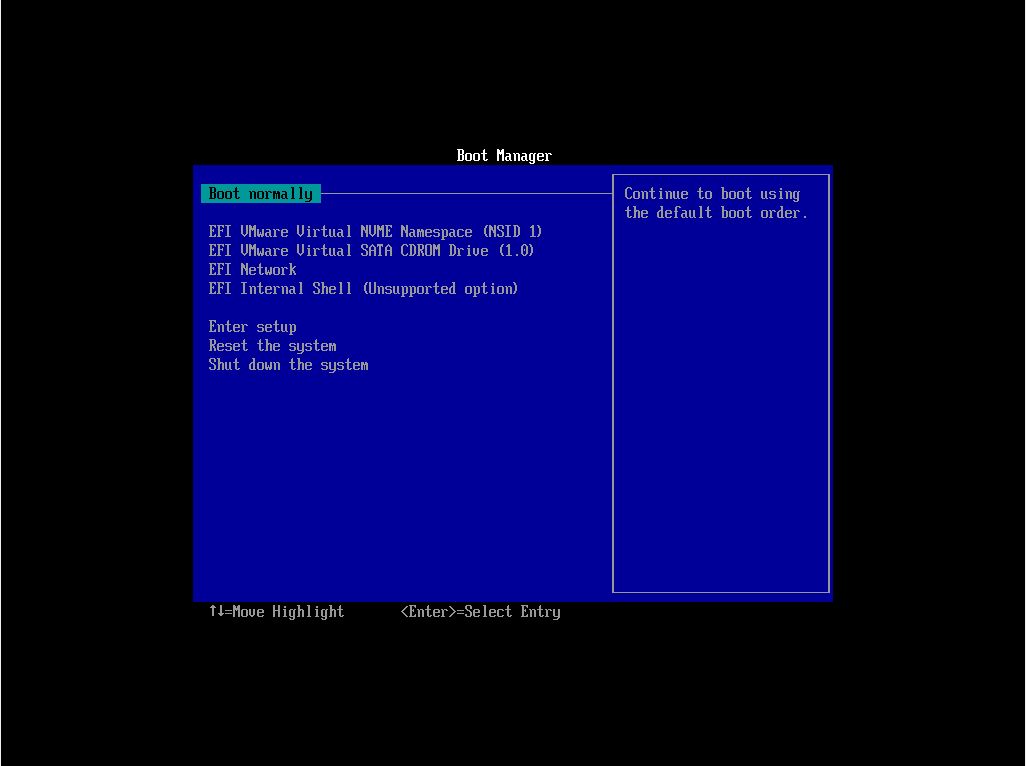
3. Select the drive unit that contains the Ubuntu installer. Some drives may show up twice. If that’s the case I recommend you chose the drive name that contains EFI or UEFI. UEFI is the modern way to install a new OS and take advantage of all the hardware features of your computer.
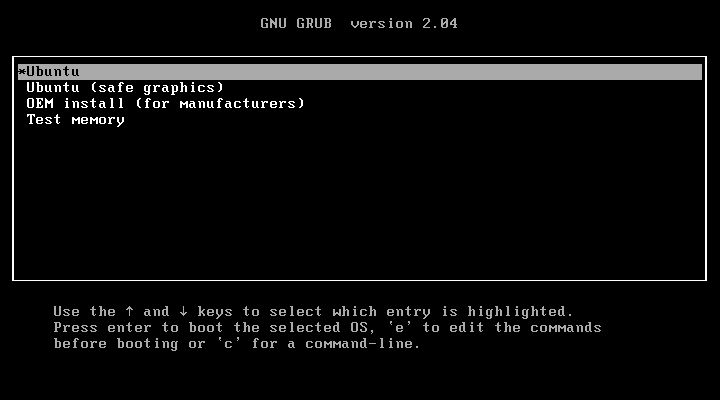
4. Now the GNU GRUB bootloader menu will show up. Select Ubuntu to continue.
5. After a few seconds of loading, you’ll get to the first step of the installer, where you can choose to Try Ubuntu or Install Ubuntu. Click on the latter.
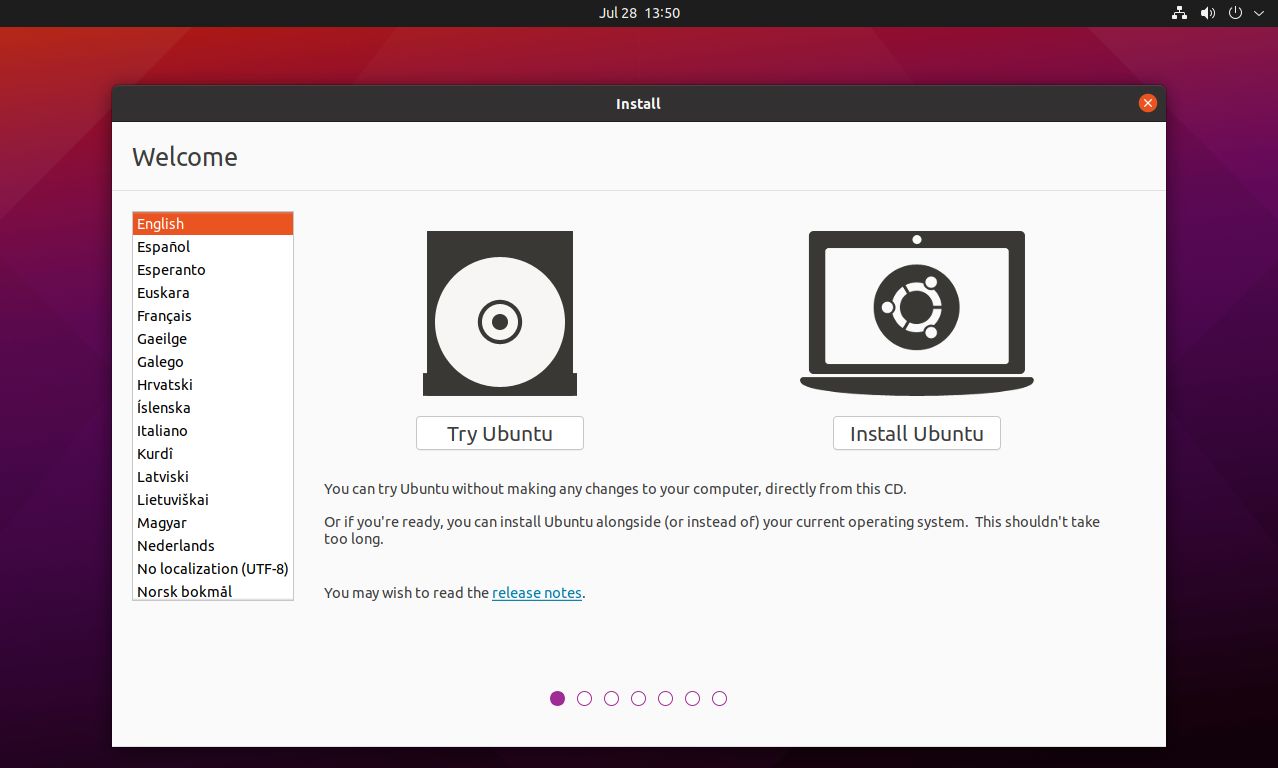
If you choose the first option you’re basically using the install disk as a Live CD. No permanent settings or files are stored while you play, so after a reboot, everything resets.
6. At this step you’ll have to select the keyboard layout. Don’t worry, you can switch later or add new layouts if needed.
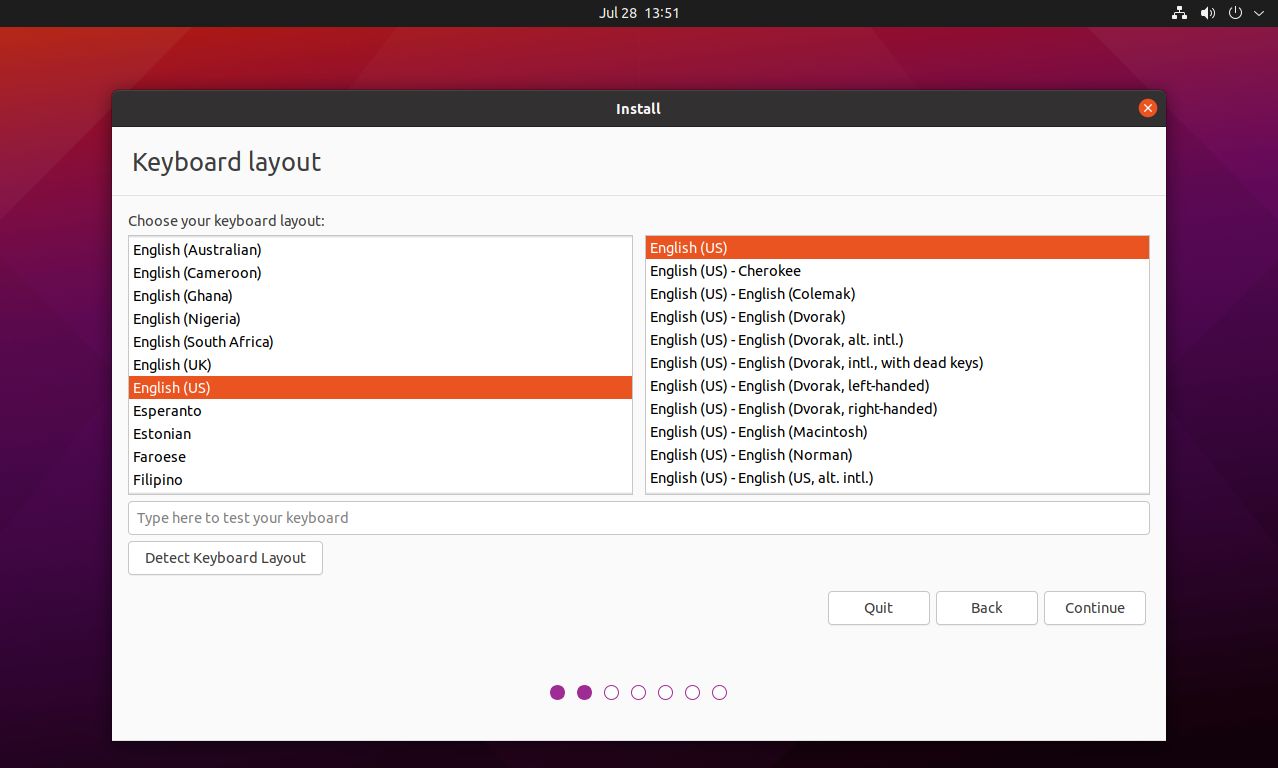
7. Next you’ll have to deal with a few installation settings. First the preinstalled apps. Normal means … well, normal, with all typical apps being installed. Minimal will install the web browser and just a few other system utilities.
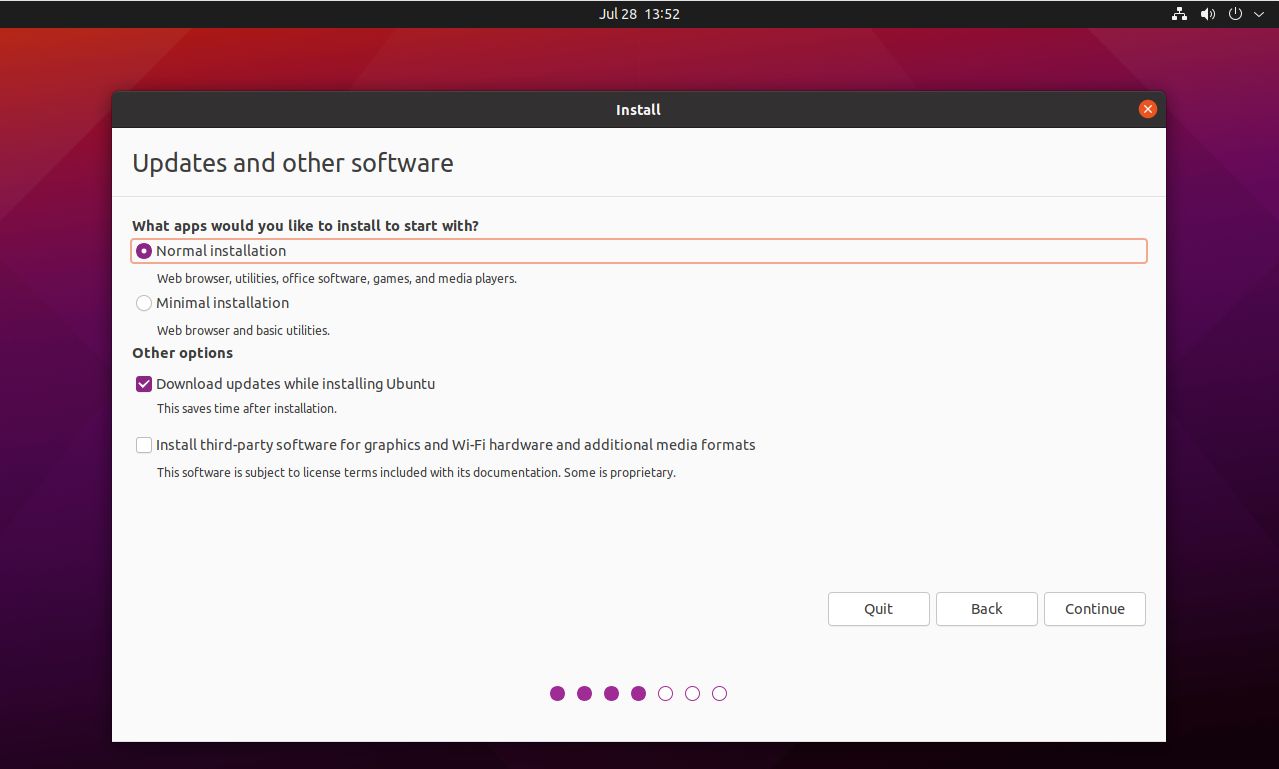
You can also opt to download system updates at this point, and third-party drivers for your PC components, and media codecs. Because most of these are not open-source, this option is not enabled by default. It’s basically an open-source statement from Canonical, the company that makes Ubuntu. Personally, I think they’re much needed and you should install them.
8. Now comes Installation type. I’ll assume you will install Ubuntu on a fresh PC. Choosing Erase disk and install Ubuntu will delete everything on the target hard drive.
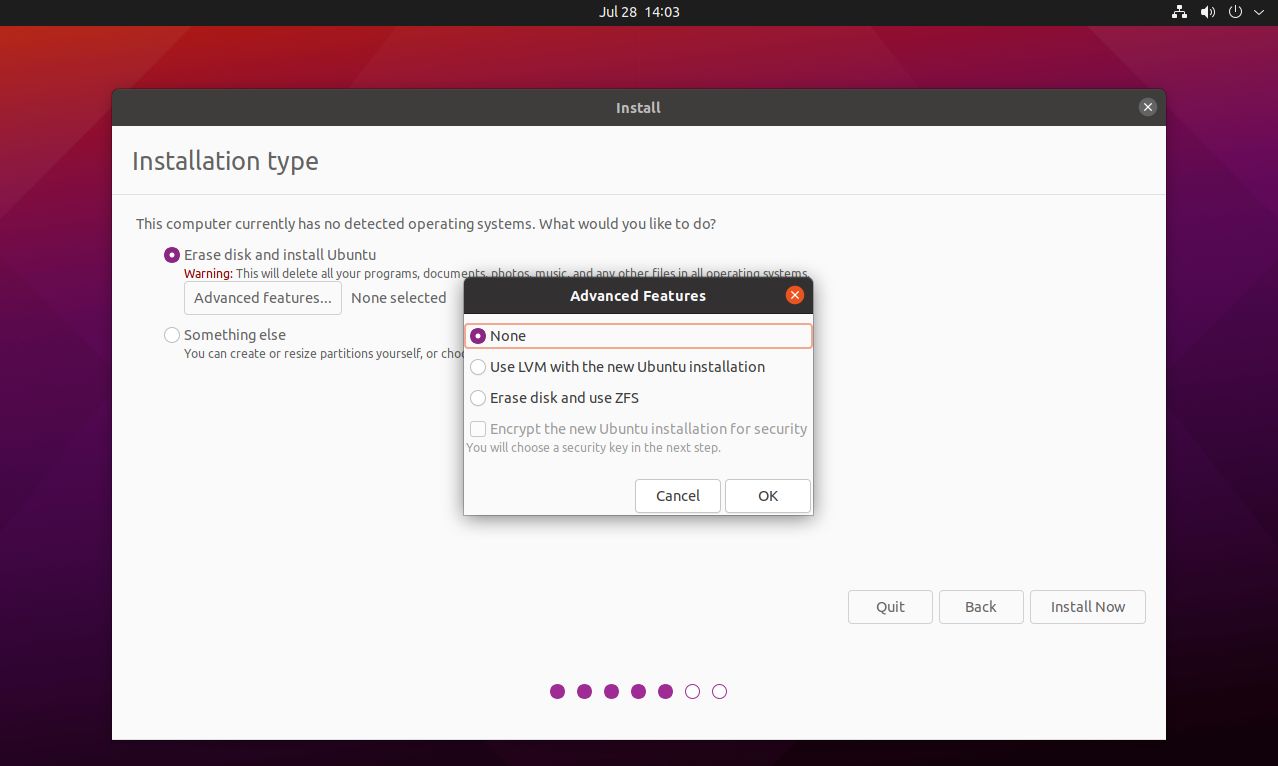
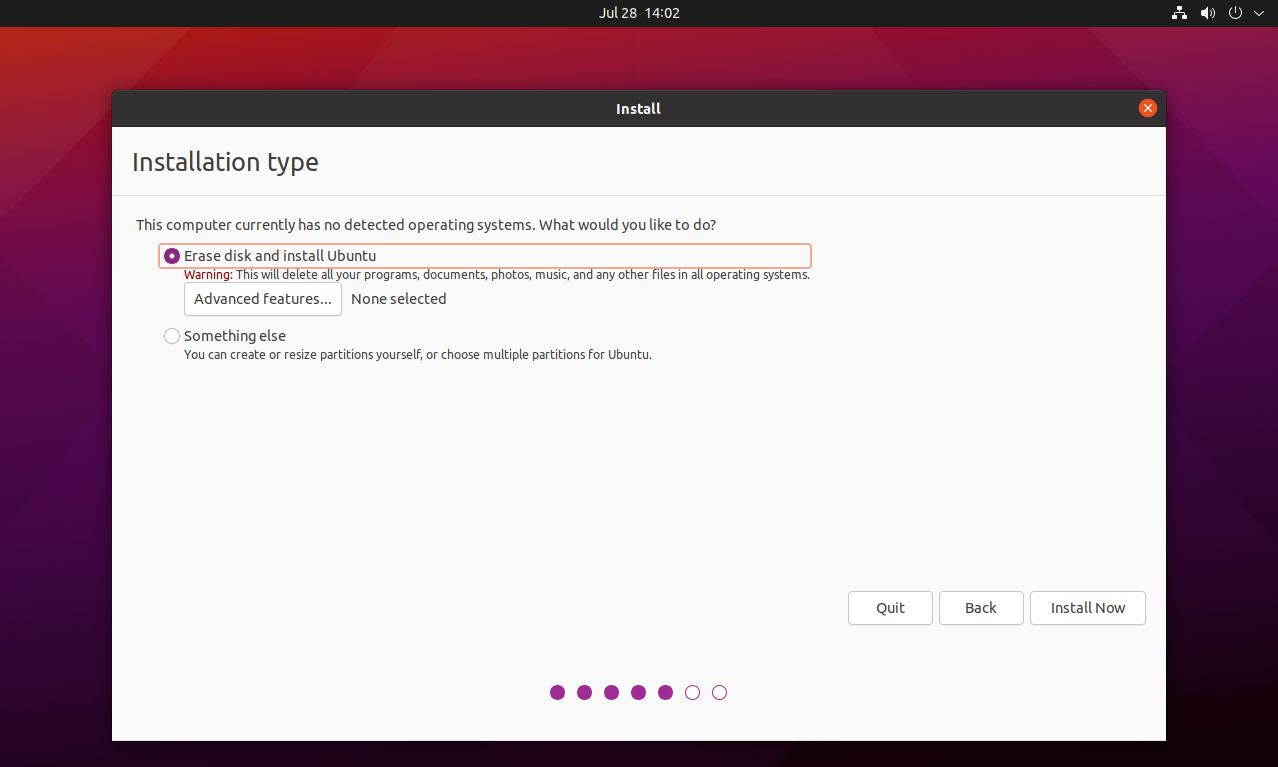
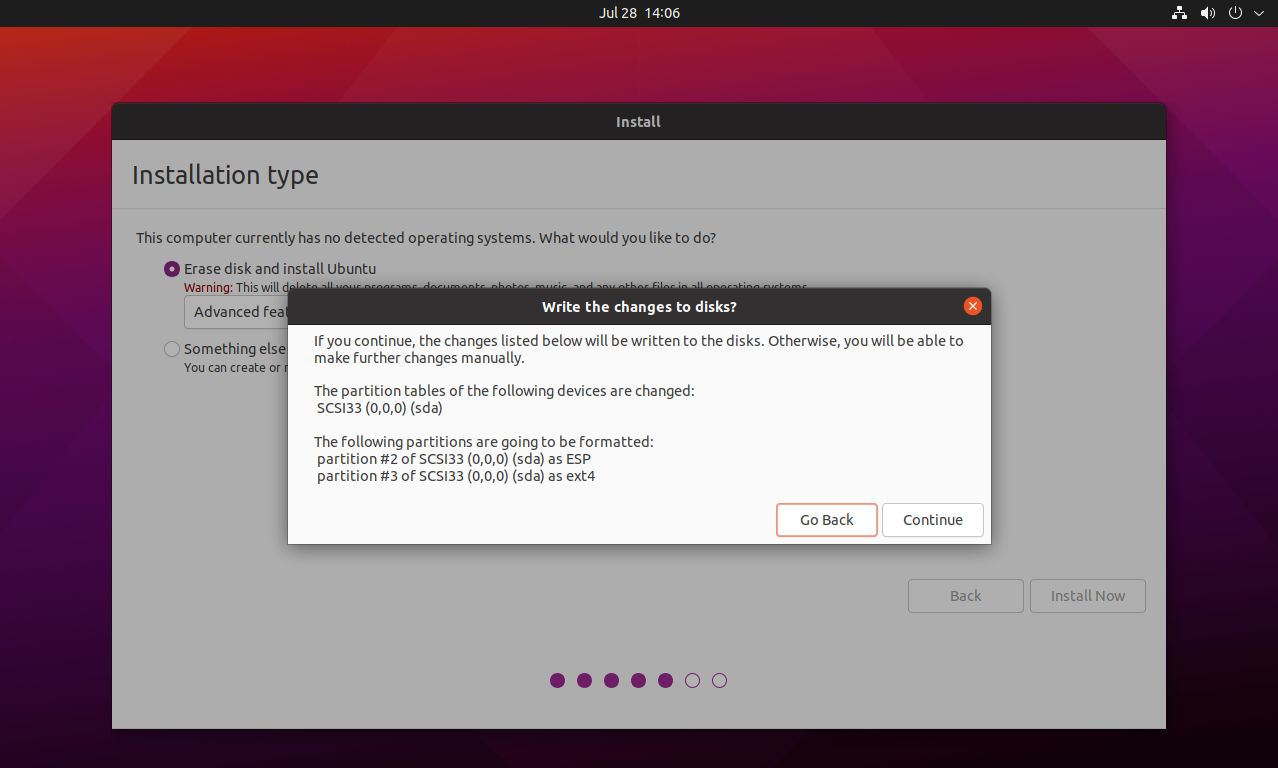
There are advanced options to use a smarter file system, encrypt the disk, make a few partitions, and even bundle up a bunch of physical disks into a virtual drive. These are too advanced for this article, but I’ll do an in-depth guide at some point, so stick around.
Hit Install now and confirm the warning message with Continue.
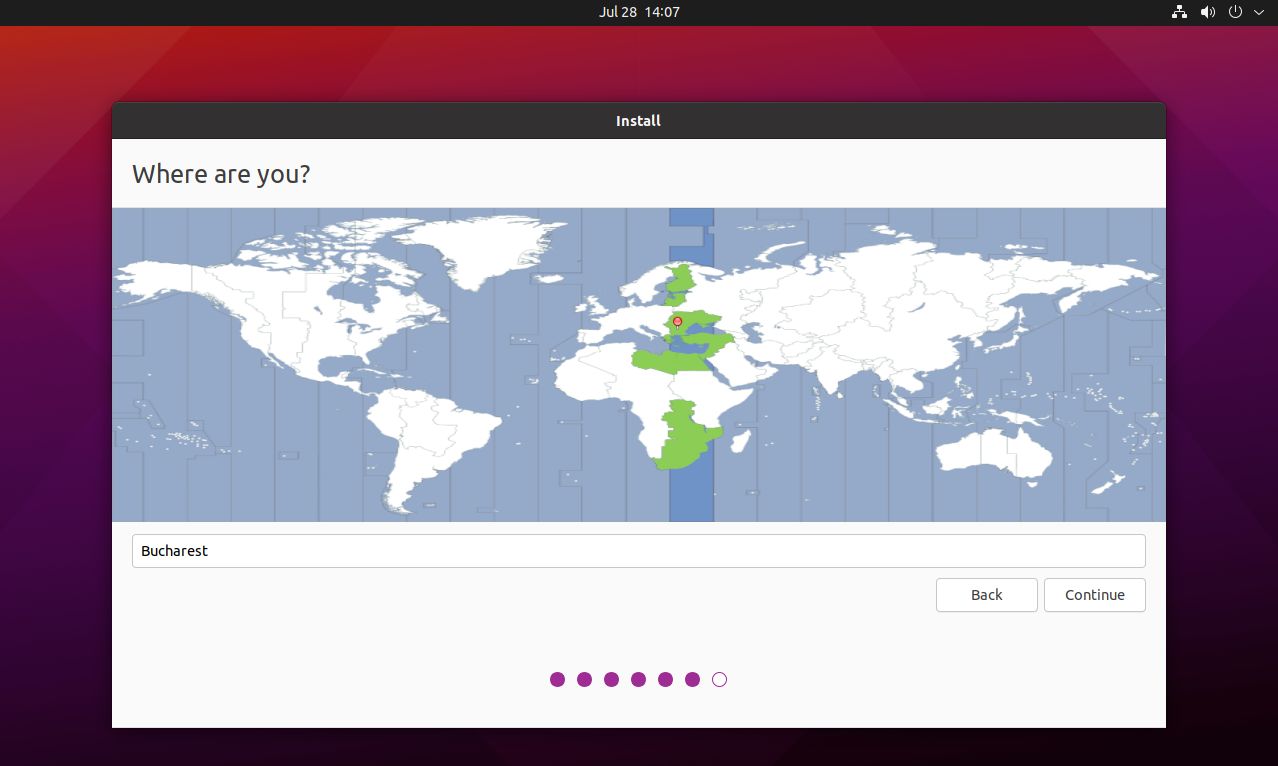
9. Next comes Regional settings. Choose your appropriate time zone.
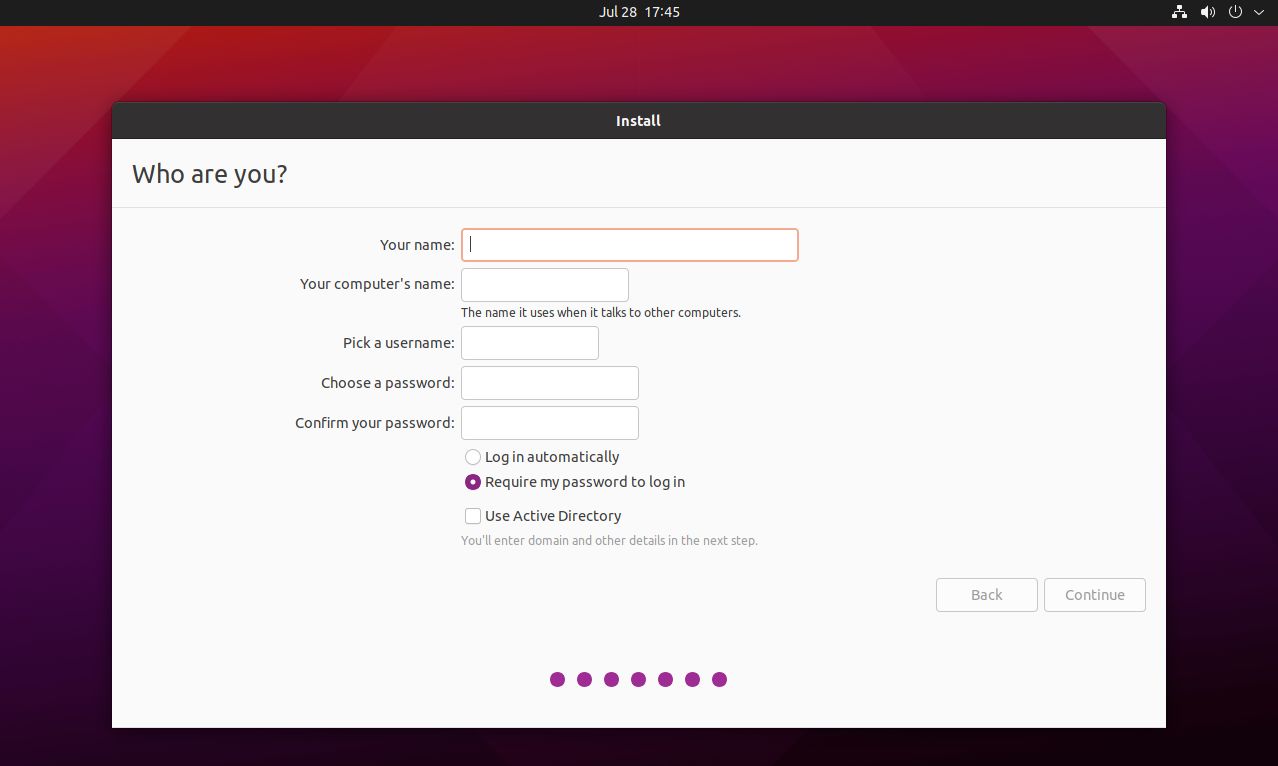
10. Now it’s time to set up your identity: name, computer name, username, and password. Make sure you set a strong password and don’t forget it, or you’ll be unable to access your files.
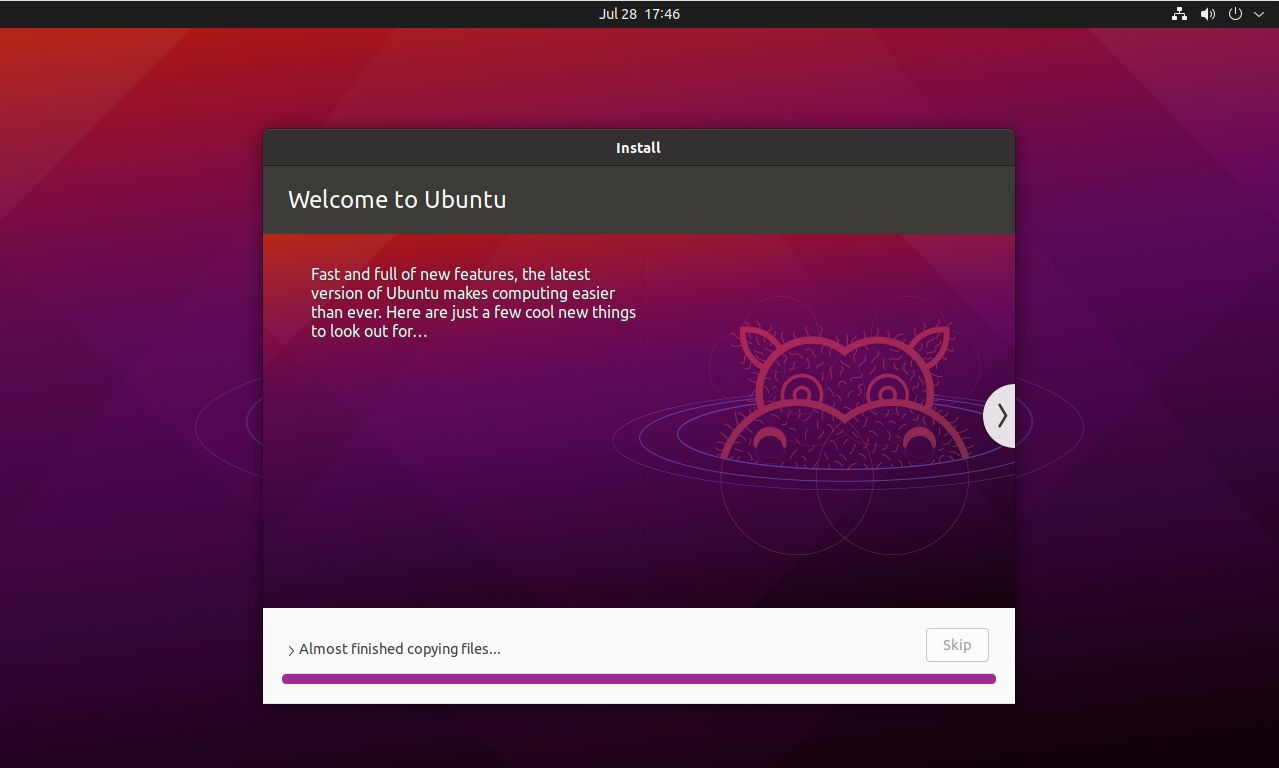
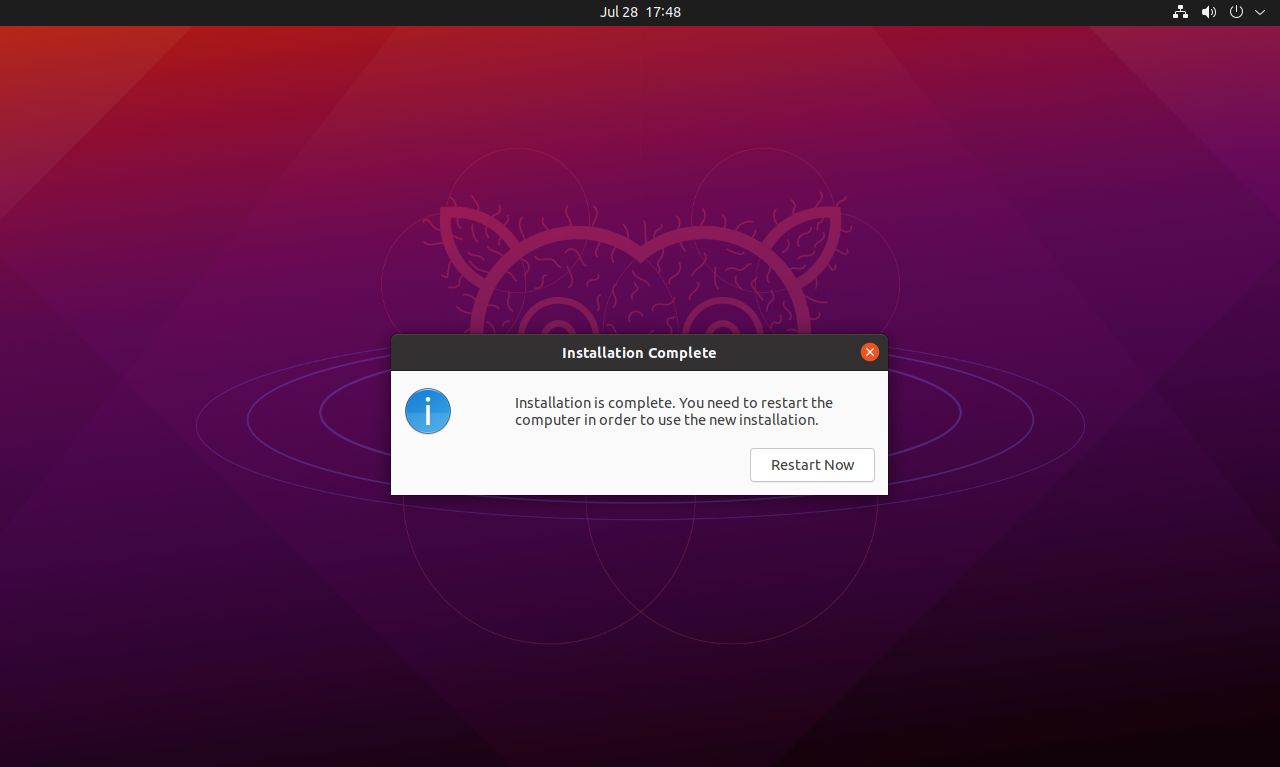
11. Now Ubuntu will start to copy files, and in just a few minutes, depending on your computer speed, you’ll see an Installation Complete message.
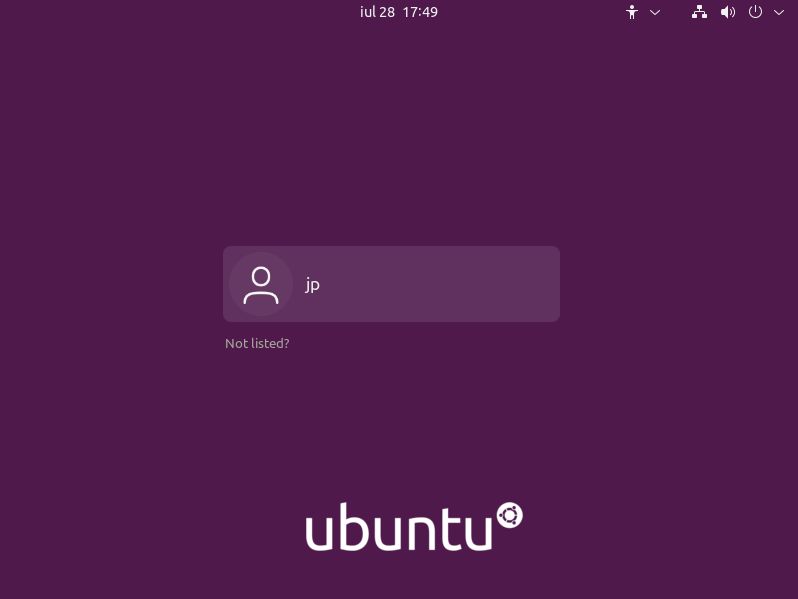
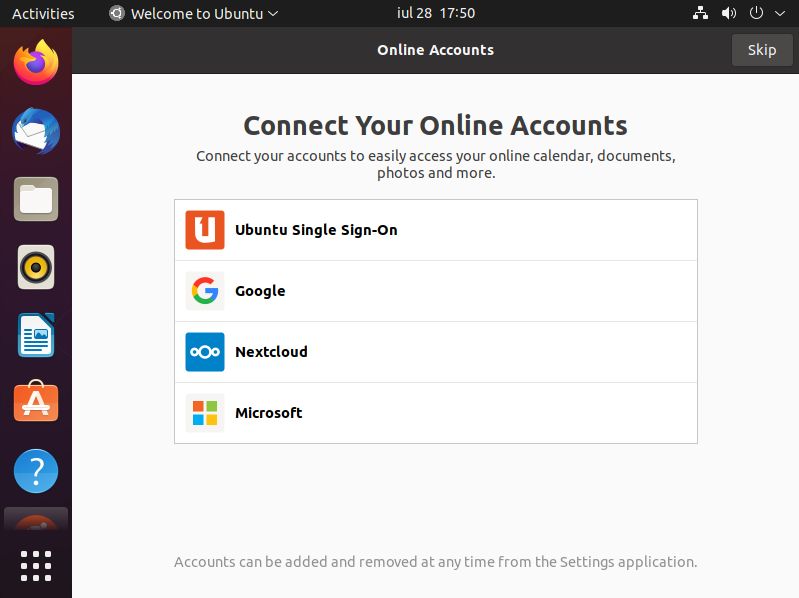
12. After the computer reboots you’ll get the Login screen. Enter your credentials, and connect your online accounts if you wish, to sync contacts, calendar, and emails. You can skip this step.
13. And this is the Ubuntu desktop. It might look a bit different than Windows, but it’s got the same main elements: a taskbar on the left, system tray in the top right corner, date and time at the top center position, and a start menu icon on the lower-left corner.
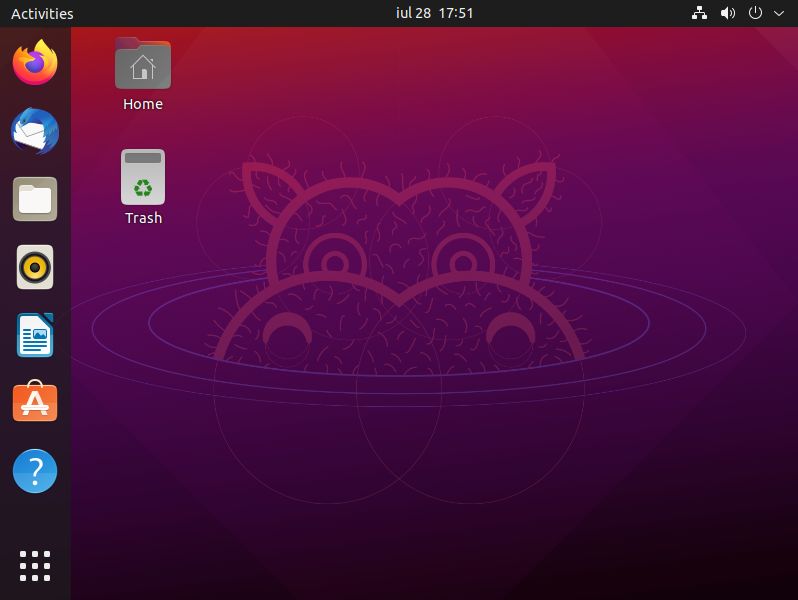
This is it, you’ve successfully installed Ubuntu on your computer. It was pretty easy, right? If you’ve got any questions let me know, and I’ll update this article as needed.
This Guide used Ubuntu 21.04 Hirsute Hippo


