- Reducing the number of programs and services that load every time you start the computer will speed it up significantly while reducing the load on its resources.
- There isn’t just one place where you can find everything that’s starting when you log in, so you need to know your way around Windows to clean everything up.
- Doing regular maintenance and keeping startup items in check is essential even for fast computers, and I’d say crucial for older, slower ones.

The longer you use your Windows computer without reinstalling the OS, the more cluttered it will get, with tons of programs and services slowing it down. Add to this issue orphaned files, and leftover registry entries, and you can start to see why most computers need a fresh Windows to install every once in a while.
Read on and you will find out 5 places where you can start looking to see what programs and services launch every time you turn on the computer. Disabling their startup or removing them completely from your system will speed up your computer, whether we’re talking about boot times or regular use.
Not having tons of programs running in the background can make a big difference with demanding apps, like games or with real-time tasks, when choppy performance can ruin the day.
A word of advice: do a System Restore before making any changes and try to disable one thing at a time, restart the computer, check if everything works OK, then repeat until you’re satisfied.
CONTENTS
5 Places Where You Can Find and Disable Startup Items
Windows has evolved a lot in the past decades, but there are still a lot of things under the hood that needs work. Consolidating settings in a cohesive manner would be one of these things that need addressing. In total, I’ve found no less than 5 places where you need to check for startup items.
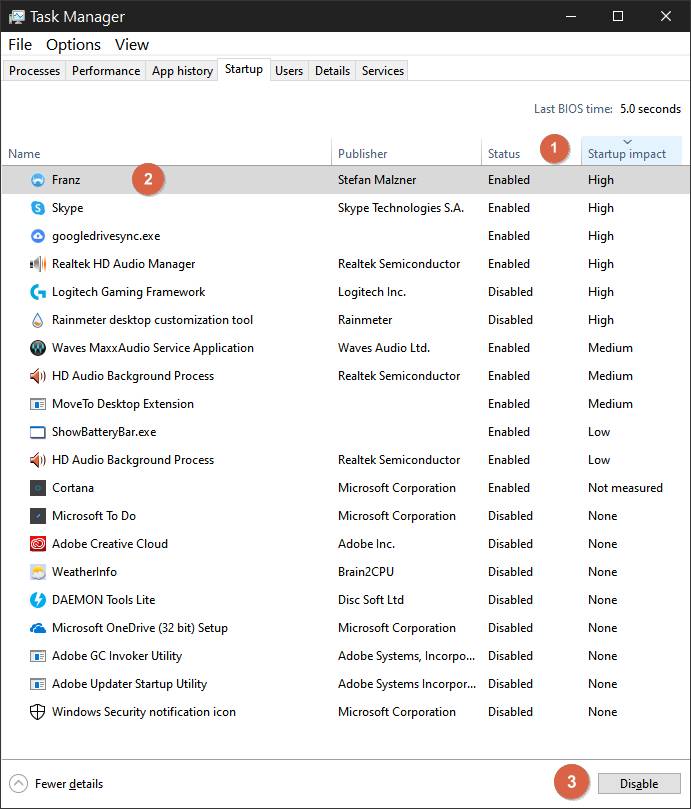
Enable/Disable Startup Programs from Task Manager
- Open up the Task Manager (CTRL + SHIFT + ESC)
- Navigate to the Startup tab
- Sort by Startup impact
- Disable the items you know you don’t need to start up every time the computer boots.
- Restart and check the changes in the Last BIOS time shown in the same tab.
Remove Shortcuts from Shell:Startup
- Open the Run dialog window (WIN + R)
- Type shell:startup and press Enter. This will basically open this location in Windows Explorer: C:\Users\%username%\AppData\Roaming\Microsoft\Windows\Start Menu\Programs\Startup
- Delete any shortcuts you don’t need or move them to another folder
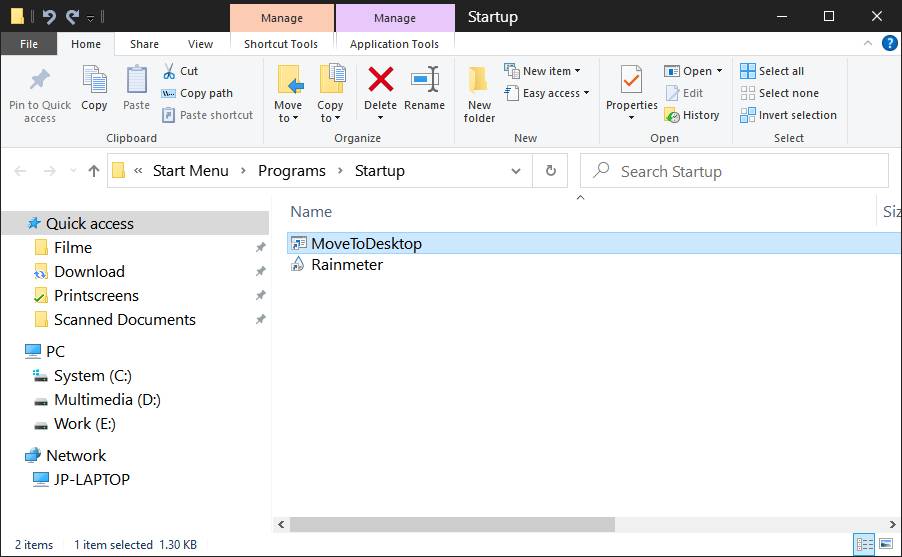
Hint: for programs that don’t have an option to start with Windows you can create shortcuts and move them to this folder.
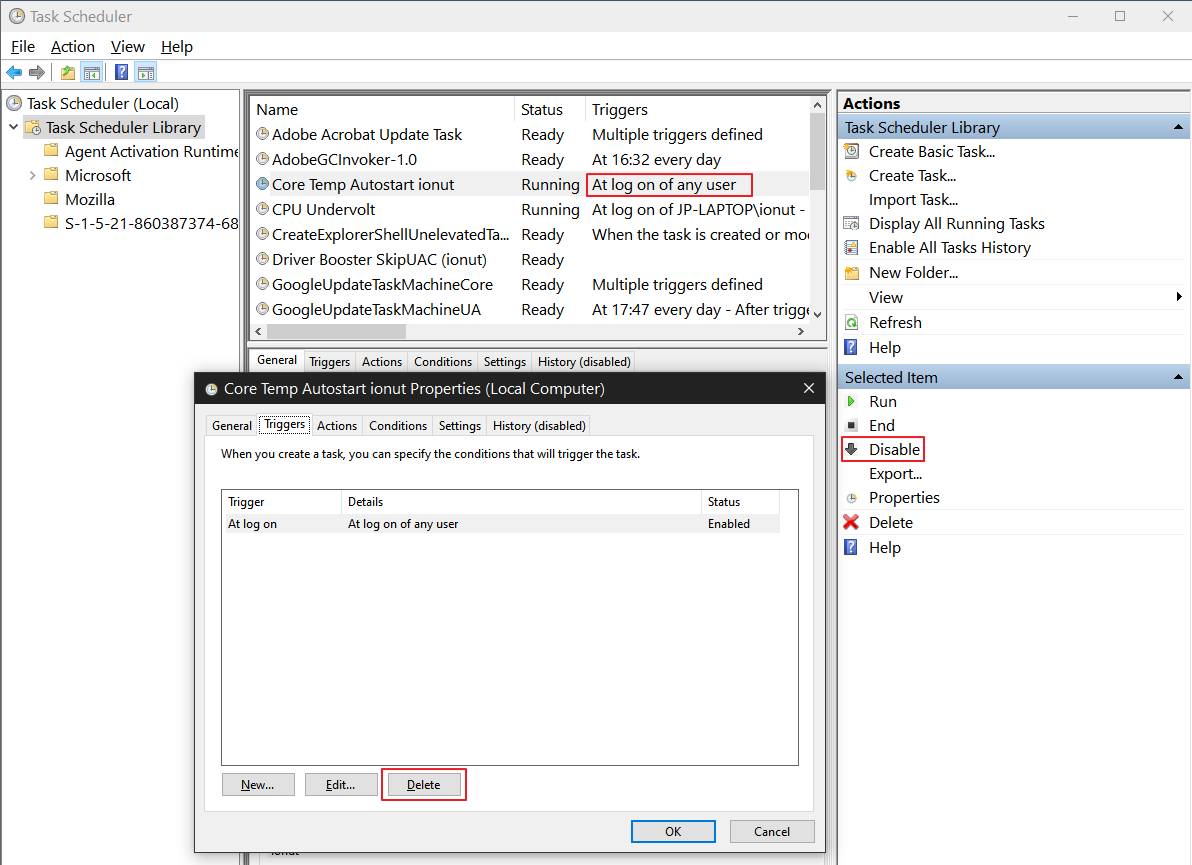
Check Starting Tasks from Task Scheduler
- Open the Start menu and type Task Scheduler
- Sort by Triggers
- Look for items that are triggered At log on of any user or At startup
- Disable the task from the right side menu or
- Double click to open and edit the trigger
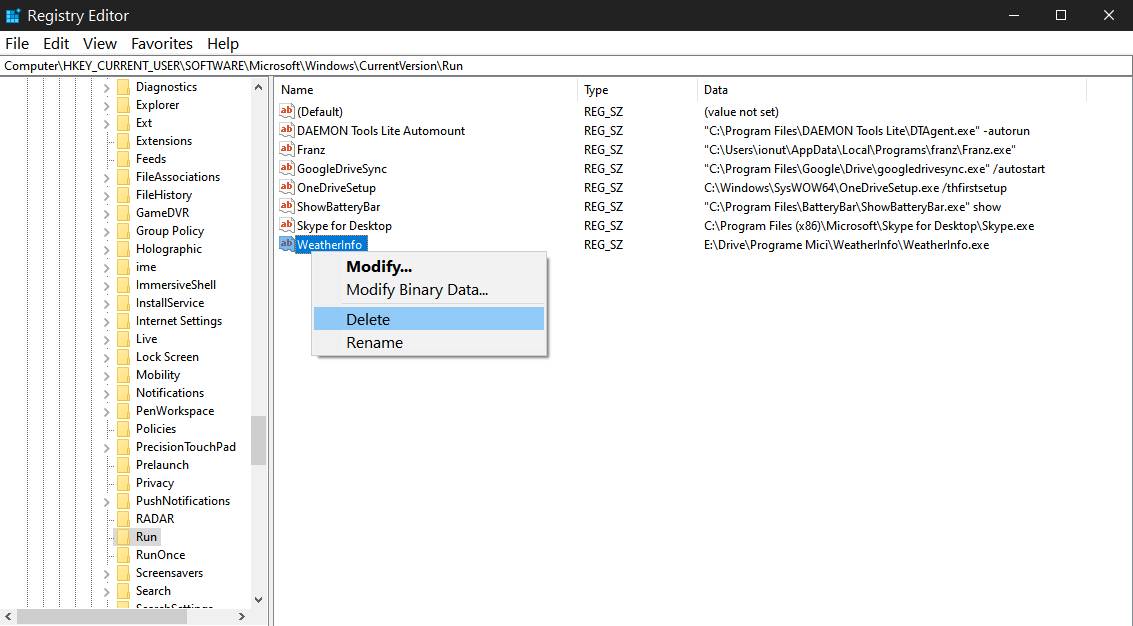
Remove Entries from the Registry Editor
- Open the Start Menu and type Registry Editor
- Navigate to:
HKEY_CURRENT_USER_\Software\Microsoft\Windows\CurrentVersion\Run
and
HKEY_LOCAL_MACHINE\SOFTWARE\Microsoft\Windows\CurrentVersion\Run - Delete all items you don’t need from these two places
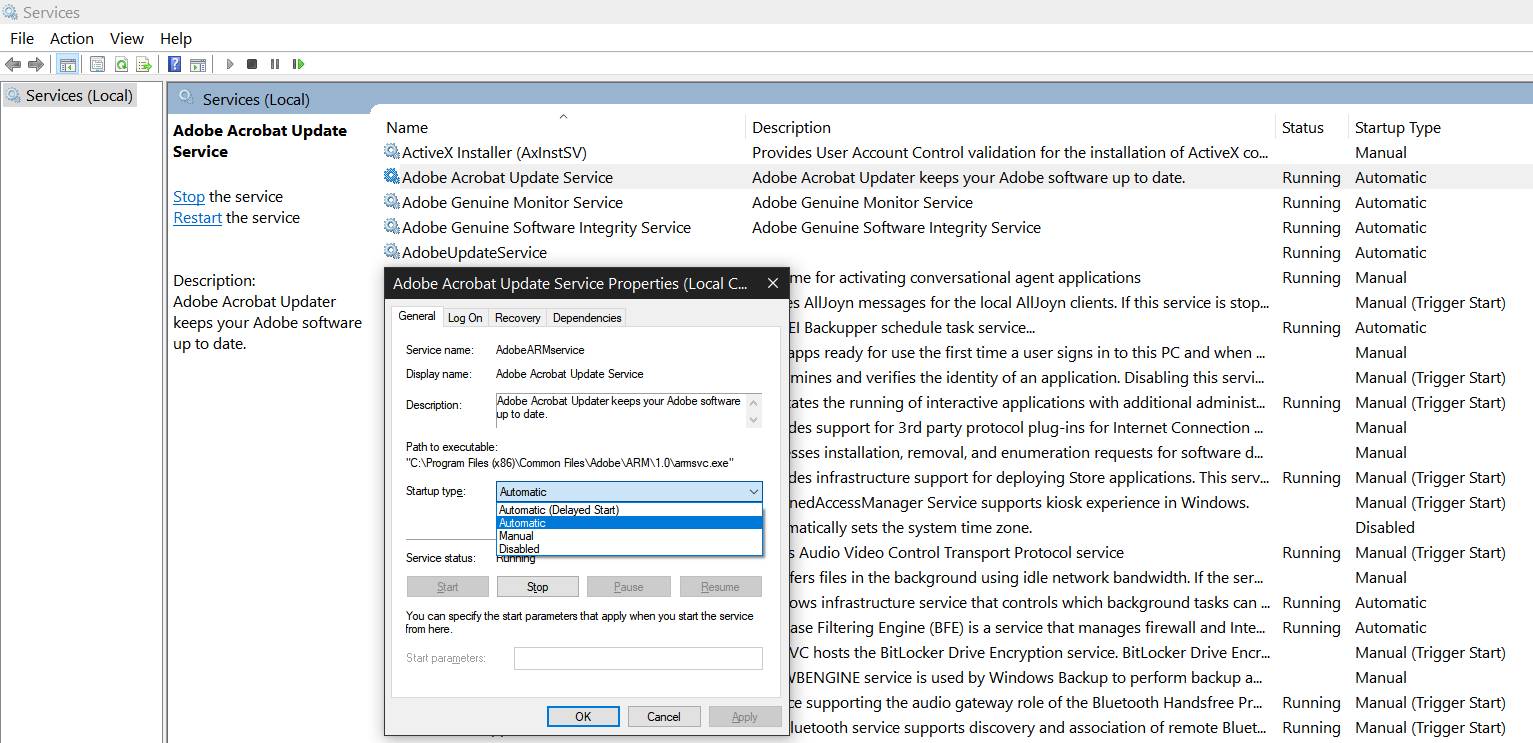
Enable/Disable the Services that Start when the Computer Boots
Besides regular programs that start together with the computer, background services are another source of resource waste. Fortunately, you can test them in a safer way by stopping the running services and, if nothing breaks, you can then proceed and disable their automatic startup.
- Open the Start Menu and type Services
- Sort by Startup type
- Double click on each item you want to edit
- Change the Startup type to Manual or Disabled
These are probably the 5 most important places where you can find and disable startup items in Windows 10. If you know of other obscure places, or third-party apps that you can use for this task don’t forget to mention them in a comment below.
Oh, almost forgot, another option to speed up boot times is to enable Fast Startup but read my detailed article and you’ll see why I don’t recommend doing it.
Tested on: Windows 10 Pro 20H2 build 19042.928
