- Learn how to check and modify app permission settings in Windows.
- Controlling app permissions is one of the ways you can improve privacy.
- Any modern operating system allows you to check and control how apps access the camera, location services, the microphone, and other sensitive items.

It’s been a few years since apps started to ask for permission before accessing the location, camera, microphone, and other sensitive areas when it comes to personal privacy and, to a lesser extent, cybersecurity.
It started with mobile OSes first, iOS and Android, but Windows does offer two simple ways to check and modify App permissions from the Settings app.
I’ve briefly covered app permissions in the article dedicated to Windows 11 privacy settings, so let’s see exactly how you check and modify which apps have access to sensitive documents, devices, or private data.
This guide works in both Windows 11 and Windows 10, as they use the same Settings app menus. It just looks a bit different, as you can expect.
CONTENTS
How to See Which Apps Can Access Location, Camera, Microphone, Contacts, Documents, and Others
This is the best way if you ask me. You pick a sensitive area, let’s say the Camera, and check which apps have access to it. You then turn on and off access on a per-app basis, or, if you choose, you disable Camera access completely in Windows.
Here’s how it’s done:
1. Open the Settings app (press Win + I).
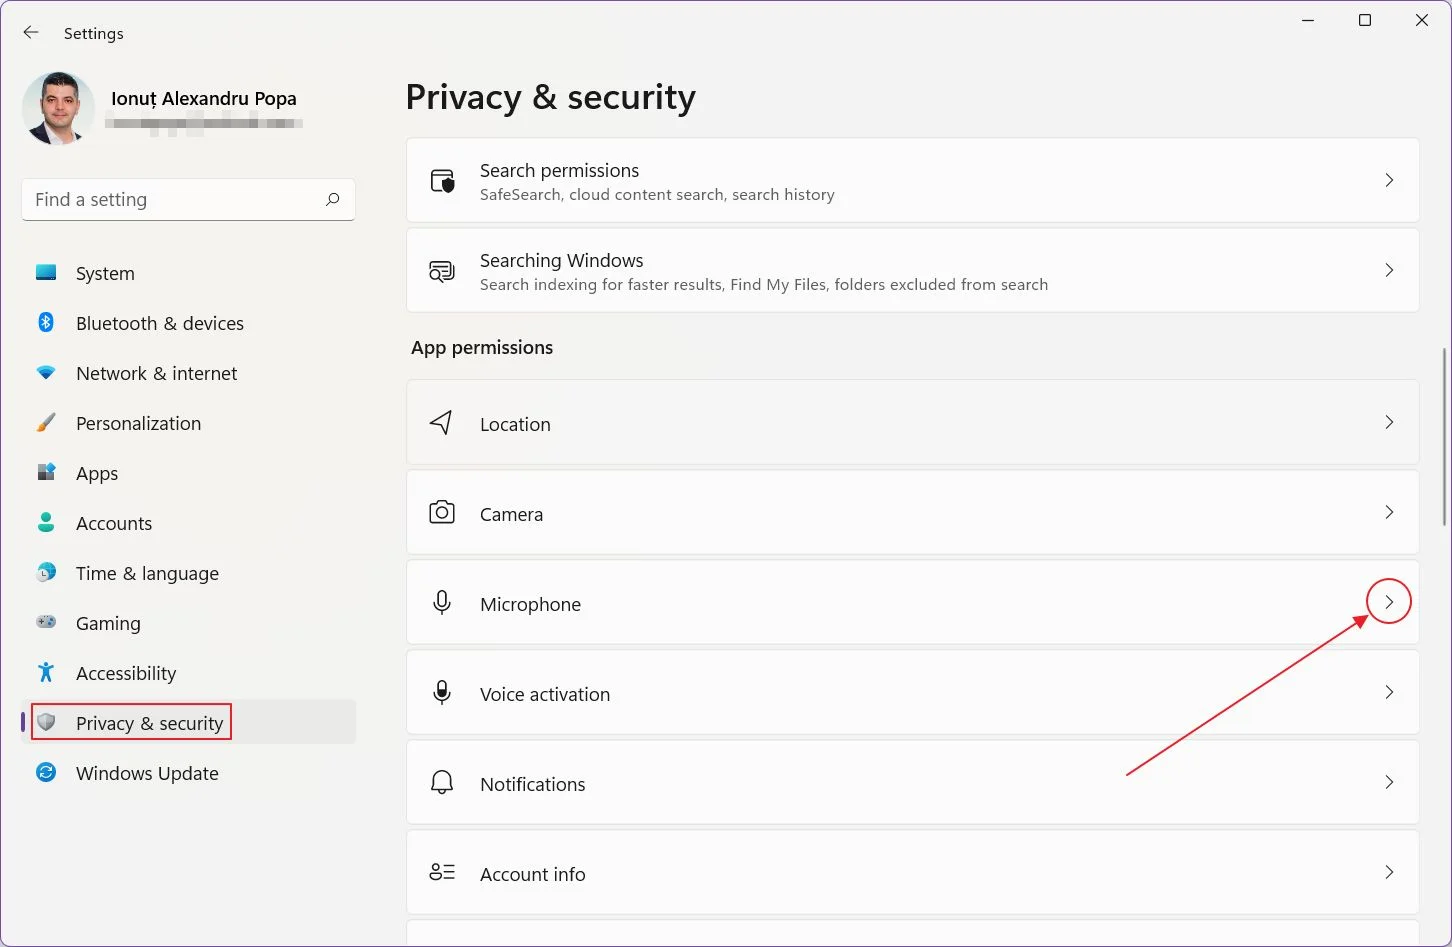
2. Navigate the left menu to Privacy & security section.
3. Scroll to App permissions, then click the right-pointing arrow next to the section you’re interested to check and modify permissions for.
4. There are tons of toggles. Let’s see what each one does: (1) toggles Camera access on or off for all apps, (2) Controls Windows Store apps access, general toggle plus a list of individual app toggles, and (3) normal desktop apps access, with only a general toggle.
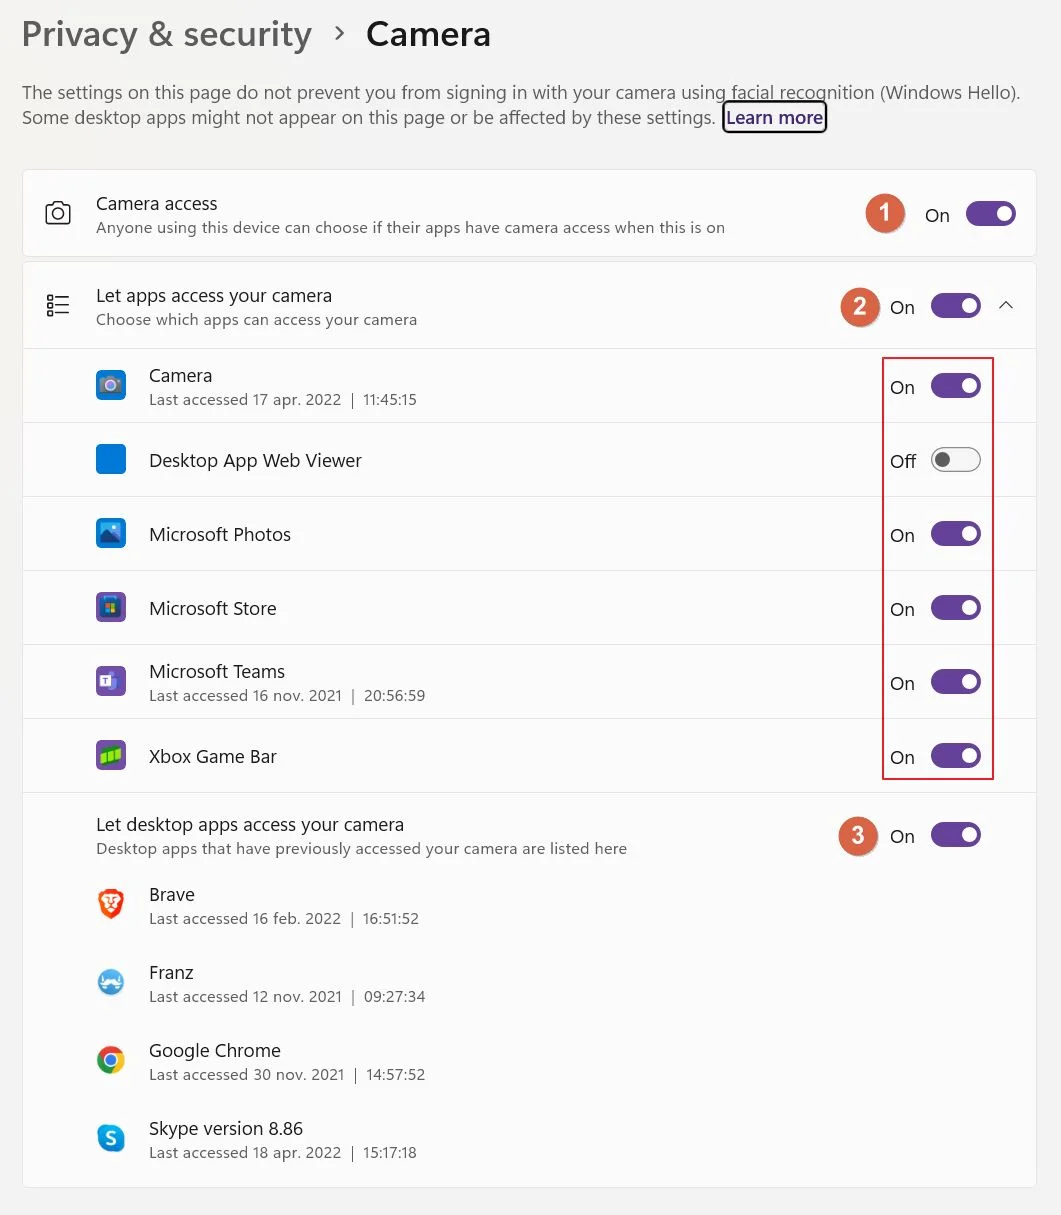
Check and uncheck toggles as you please. This method offers the most complete options when it comes to app permissions in Windows.
How to Check Permissions in Windows for Each App
But there’s another way. Let’s say you wish to check a specific app, to see what it can access exactly. I call this the suspicious before proven guilty way to control app permissions.
1. Open the Settings app once again.
2. Navigate to the Apps section.
3. In the right panel, select Apps & features.
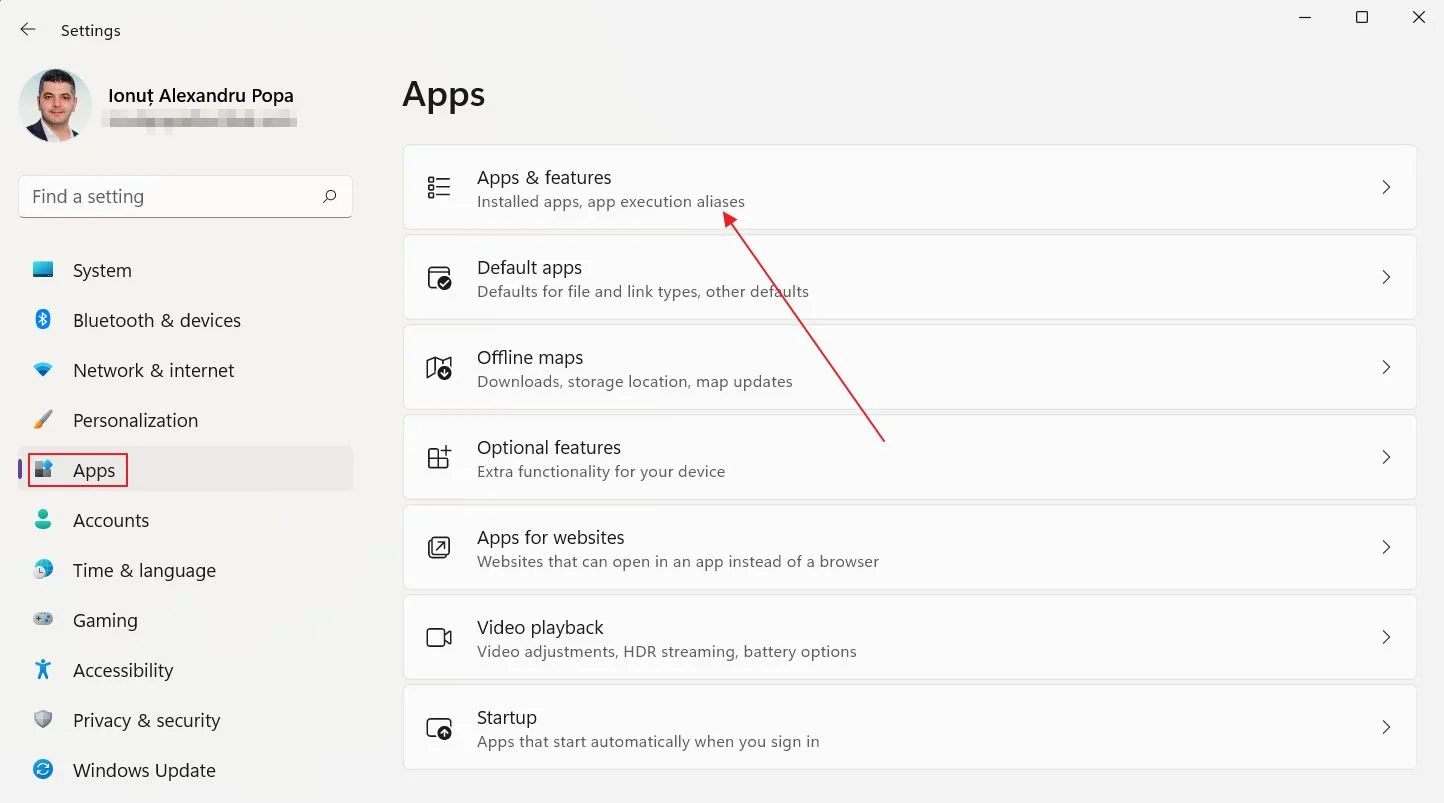
4. You will see the full list of apps installed on your system, both apps from the Windows Store and those apps you’ve downloaded and installed separately.
This method only allows you to control app permissions for Store apps.
5. There’s no easy way to identify which apps are from the Store, and which were downloaded separately, other than looking at the app icon.
Those apps from the Store have a rounded square background. Only some of the downloaded apps have a similar type of icon. I told you it isn’t easy to differentiate them.
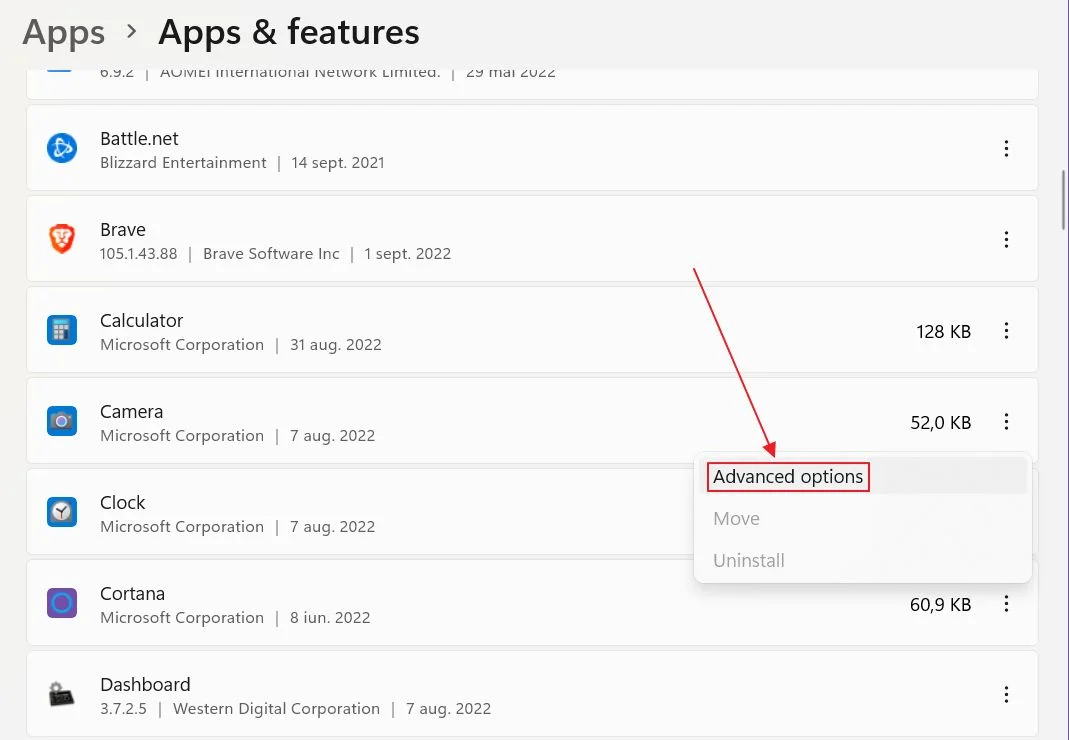
Anyway, click on the three-dot menu next to a store app and click on Advanced options in the contextual menu. This menu only shows for the Store apps.
6. In the new app detail page, you’ll see a sub-section called App permissions. Here you can toggle access to privacy-related features one by one.
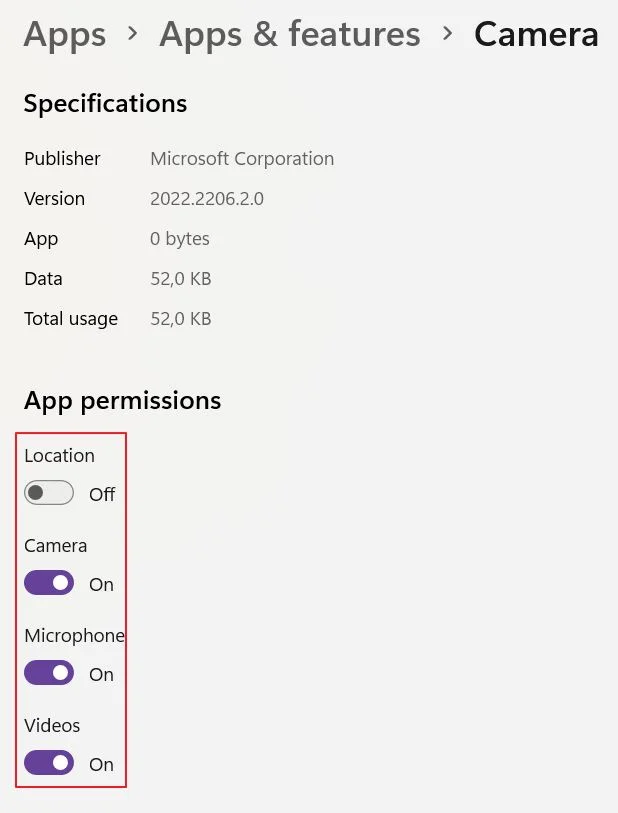
Unlike on your Android or iOS phone, you can’t give an app permissions just when it’s running in the foreground. These toggles will completely allow access, even in the background, or will deny access at all times. Windows should update this in the future, but for now, it is what it is.
That’s it: these are the two quick ways to modify app permissions in Windows and guard your privacy. Now, is it possible for apps to do something shady and still access sensitive personal data? Most likely, but that’s a discussion for another day.

