- Learn about the differences between public vs private network connections in Windows and which you should choose.
- When you first connect to a network in Windows you’re asked if you want to set it as a Public or Private network.
- This setting is the easiest way to secure your connection.
Technology is not for everyone and even tech-savvy people are having a hard time understanding advanced networking lingo. If you’ve used Windows, you might have come upon a prompt when you connect to a new network for the first time. It basically asks how you want to set up the new connection: as a Public Network vs Private Network.
It’s pretty intuitive if you ask me.
- If you’re at home you should select Private.
- If you’re connected to a public hotspot you should select Public.
I wouldn’t fault you if you didn’t know what this setting actually does. So, if it’s not clear what these settings mean and how they impact your connection then read on.
CONTENTS
- What Happens When You Select Public or Private Network?
- What is Private Network and Public Network: Main Differences Between Network Types
- How to Check Network Type for Current Connection in Windows
- How to Change Network from Public to Private and Viceversa
- How to Change Windows Firewall Rules for Public and Private Networks
What Happens When You Select Public or Private Network?
Once you make the choice Windows will set up your connection differently and will also apply all firewall rules according to what type of network you’re connected to.
As you can imagine, a Private network is more trustworthy, so Windows will ease rules while tightening them on a Public connection, ensuring your computer is safe(r).
What is Private Network and Public Network: Main Differences Between Network Types
Private network – only set for the networks you trust, such as your home network or the network at a friend’s house.
In private networks, your PC is discoverable by other computers in the same network. File sharing and printer sharing are possible on a private network.
Public network – set for any other connection, be it in an airport, cafe, or mall. This is the default setting and will hide your PC from other computers in the same network.
So, the Private vs Public network debate is a matter of the environment you find yourself in. You should use the appropriate type depending on where you are when you’re connecting to the Internet.
If you’re wondering which is safer, public or private network, I’m sure you’ve guessed already that the public network settings is safer because Windows automatically applies more restrictions when you’re out there, in the open.
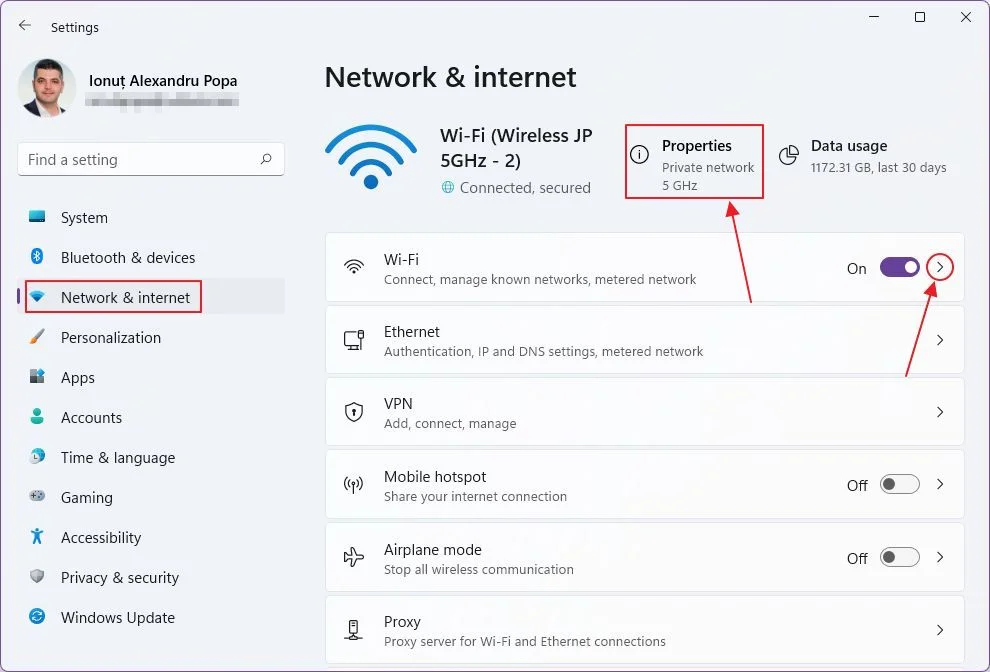
How to Check Network Type for Current Connection in Windows
1. Open the Settings app in Windows 11 (search for settings in the Start menu directly).
2. Navigate to Network & internet.
3. On top of the right-side pane you’ll see details for the current connection. Look for the Properties heading. Underneath you’ll see mentioned the type of network.
How to Change Network from Public to Private and Viceversa
1. Open the Settings app again.
2. Go to the same tab, Network & internet.
3. Click on Properties (it’s a link actually) or, click on the right arrow next to Wi-Fi or Ethernet (if connected by wire).
4. This will open a page with more Wi-Fi or Ethernet settings. Click on the right arrow next to the current connection.
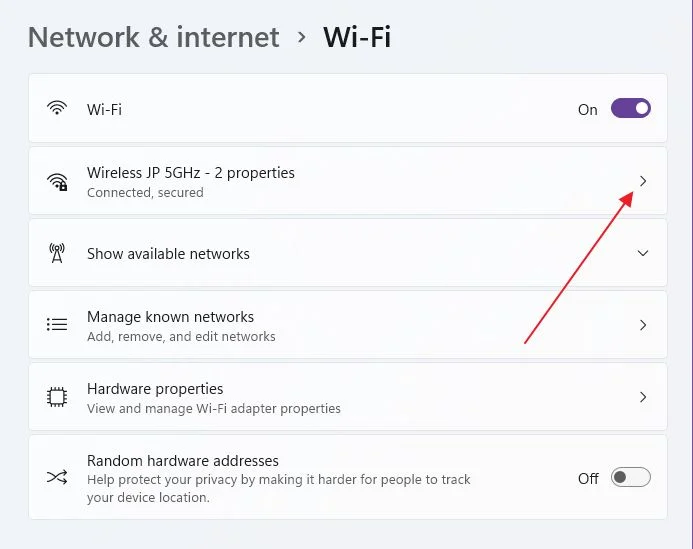
5. This is where you’ll see the toggle for network type, with a brief mention of what each setting does.
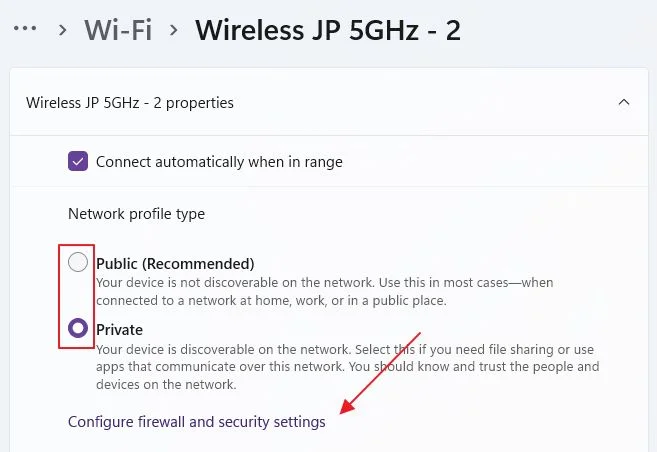
Keep in mind the link named Configure firewall and security settings. We’ll use it in the next section.
How to Change Windows Firewall Rules for Public and Private Networks
I’ve said that automatic firewall rules apply based on the type of network you have previously selected. You can tweak the firewall settings by yourself, but you don’t really have to.
Clicking on the Configure firewall and security setting link from the previous chapter will open the Windows Defender app in the Firewall & network protection tab.
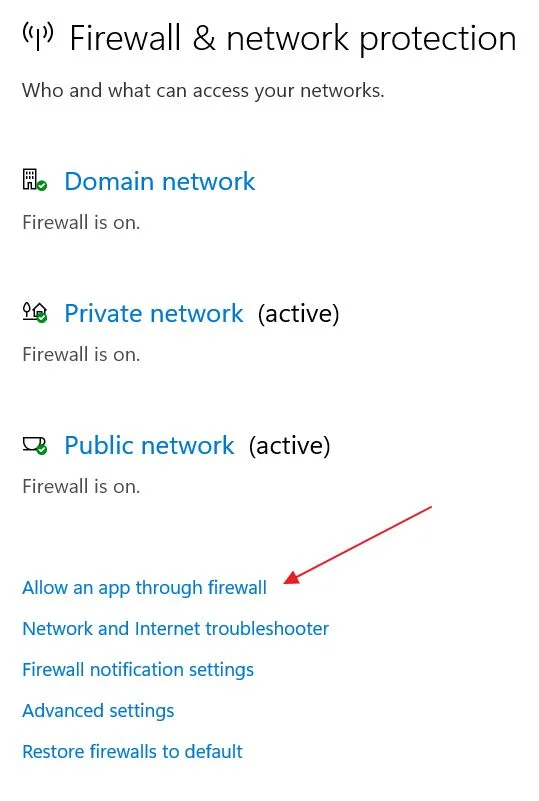
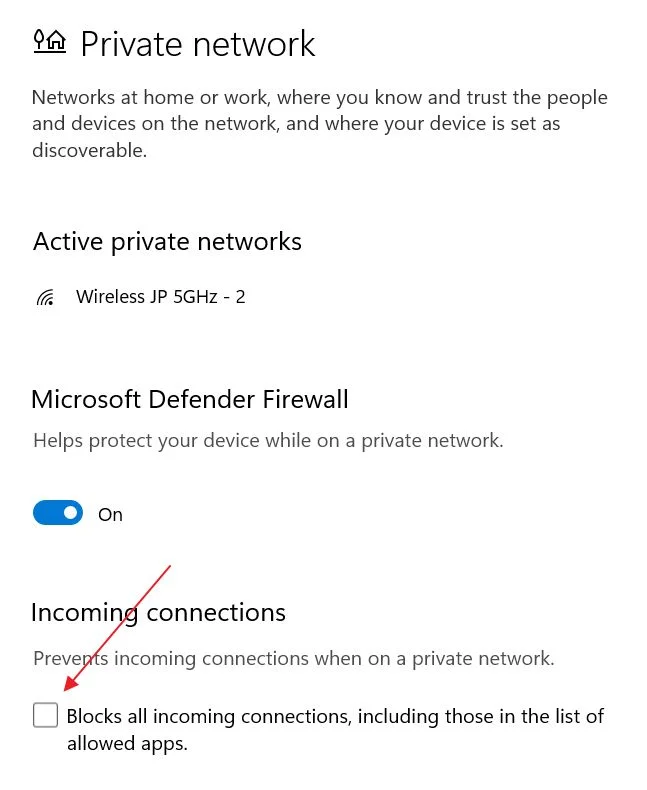
Here you have the option to turn the firewall On or Off for a (1) joined Domain network, (2) Private network, and (3) Public network. Here’s what each page looks like:
Now, let’s see how you can apply firewall rules differently for the same app, according to network type. Click on the Allow an app through firewall link on the main page.
This will open one of the few remaining old Control Panel pages dating back to Windows XP I believe.
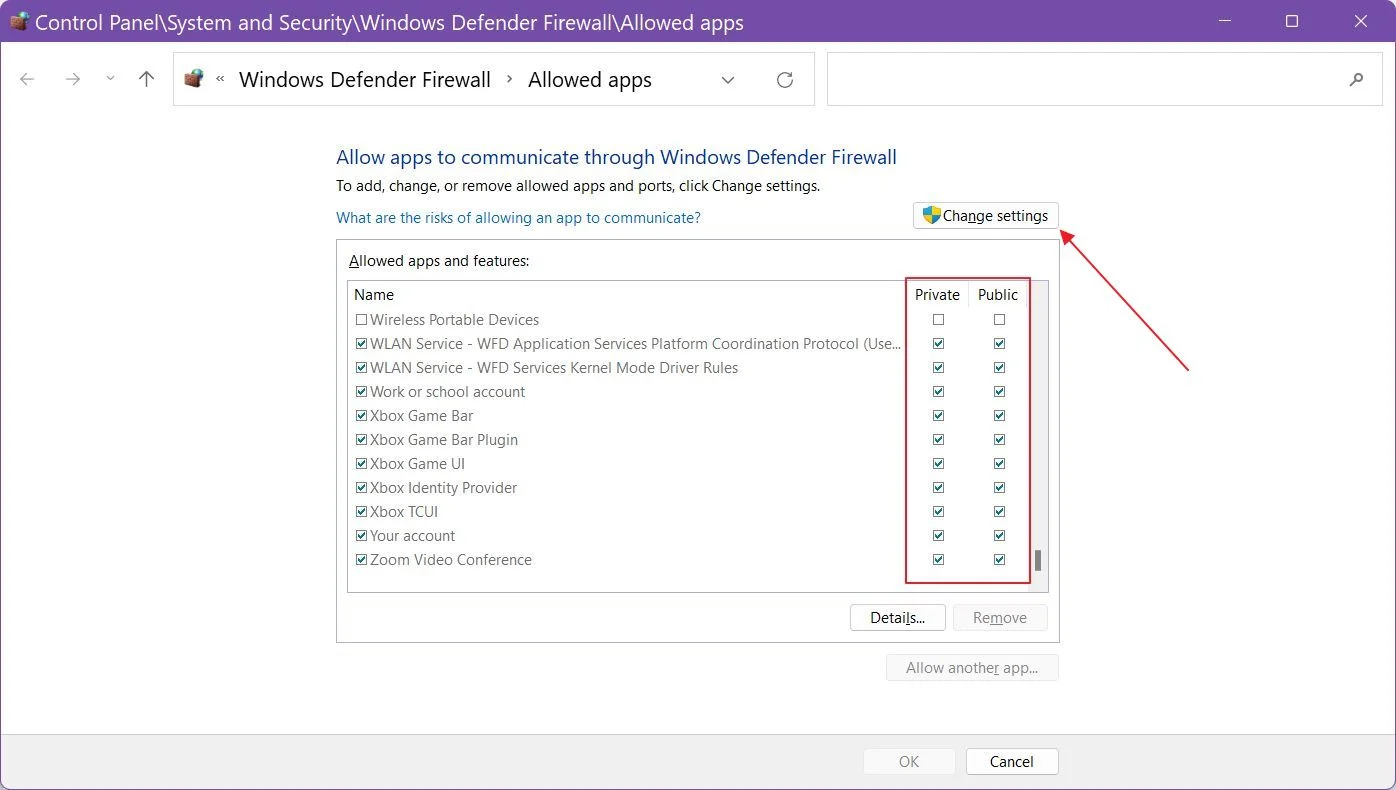
Scroll down the list and if you need to check/uncheck a specific app, to change its behavior make sure you click on Change setting button.
To manually add another app click on the Allow another app… button. It will become visible after clicking on Change settings.
And this is all there is to know about Private network vs public network connections in Windows. Let me know if you have any questions.