- If you want to transfer data easily between the local network computers you should share without a password on Windows.
- Learn how to turn off password protected sharing in Windows 10 and Windows 11.
- Do this and you can skip creating specialized accounts that need to be used to access Windows shares.
- Also learn why you should reconsider before turning off password access to network shares.
After spending time recently trying to understand Macs I got to appreciate Windows even more. That being said, sharing in Windows is not one of those things you get to appreciate. It’s supposed to be easy, but most often than not it’s a head-scratcher.
That’s why I’ve decided to write this short guide that will show you how to turn off password protected sharing in Windows.
First, let’s start by explaining how folder sharing works by default in Windows. You can only share in the same local network, by the way. It works over the Internet, but only if you use a VPN to access the same network (some routers allow you to set a VPN in order to do this, btw).
So, you naively share a folder with Everyone.
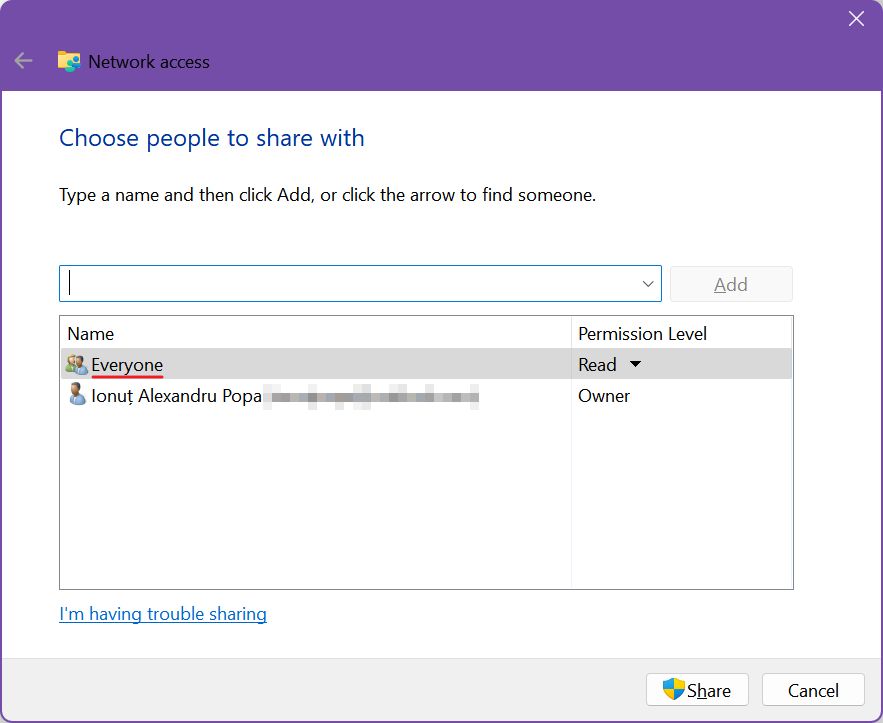
You go to another computer in the same network and try to access the host computer. You’ll be greeted with this message: enter network credentials.

You see, Everyone in Windows sharing context means Everyone on this computer. When you’re on another computer and try to access a shared folder you will have to provide the username and password for one of the accounts on the host computer, an account that has access to that folder.
Why is this a problem? Imagine this situation: you have friends over and want to share some pictures with them. If you don’t have a second guest account on your computer (most people don’t, and I don’t either), you will have to provide them with the main administrator account and password.
That’s not safe, by any means. Even if you trust your friends they may get hacked at some point.
This is why I prefer to have specific folders shared on my private network, without a password. When I need something shared I just copy everything to that folder and that’s it.
I’m still in control, but I don’t have to worry about how others will access the share.
Let’s see how it’s done, quick and easy.
Turn Off Password Protected Sharing in Windows 11 Settings
In Windows 11, this configuration option has been moved to the Settings app, where it should be.
1. Launch the Settings app (the Win + I shortcut is the fastest way).
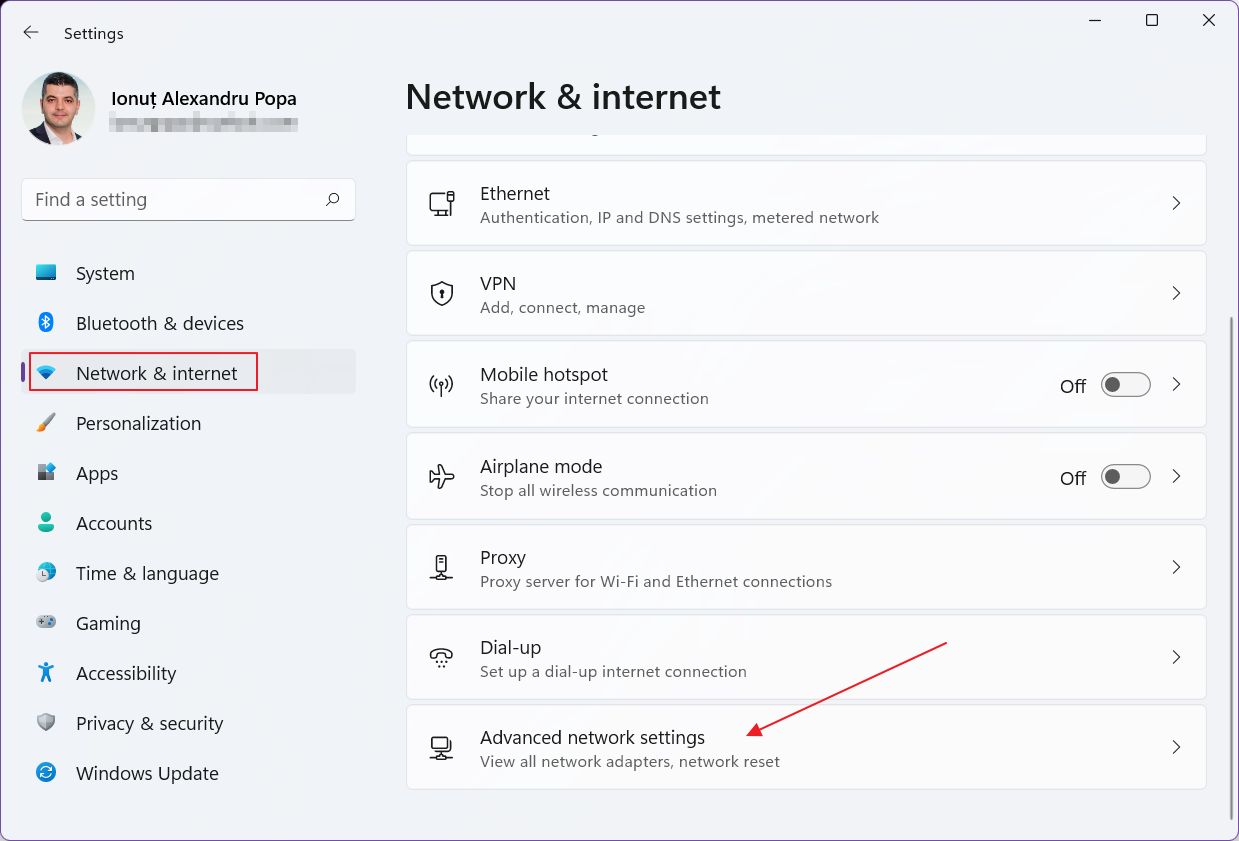
2. Navigate to Network & internet in the left side menu.
3. On the right side scroll down to Advanced network settings. Click to open.
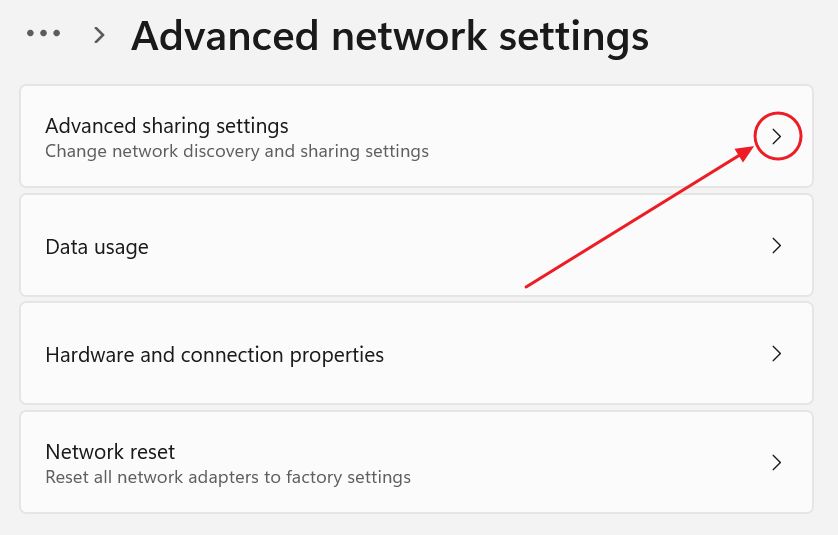
4. The right panel will refresh. Scroll down again to More settings and on top, you will find the Advanced sharing settings. Click to open a new settings page.
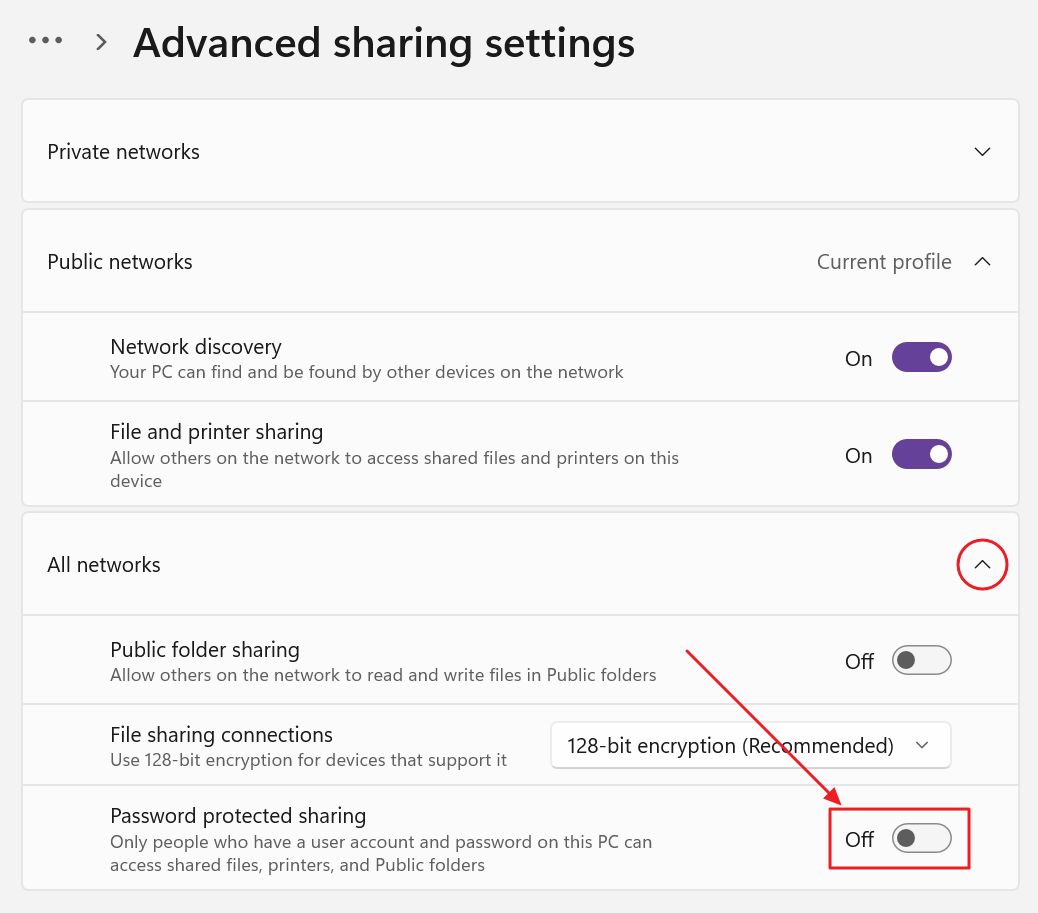
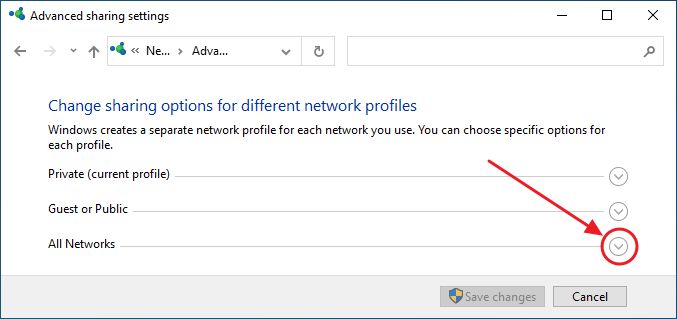
5. This page is split into three sections: Private networks, Public networks, and All networks. The last one is the one you want. It’s contracted by default, so expand by using the arrow pointing down.
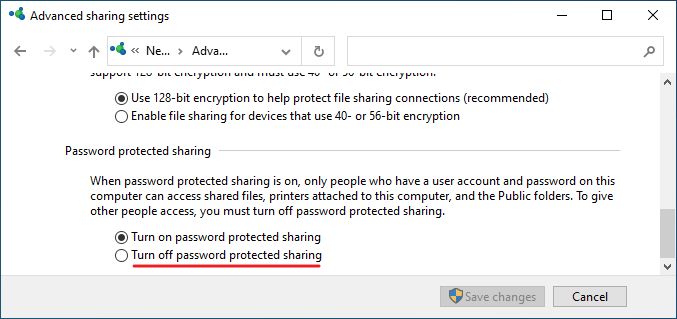
6. Make sure the Password protected sharing checkbox is turned off if you want to access shares in the same network without having to use a password (and a username, contrary to what the setting’s name suggests).
Turn Off Sharing with a Password in Windows 10 from Control Panel
If you’re still on Windows 10 here’s how to disable sharing with a password. We have to use Control Panel for this.
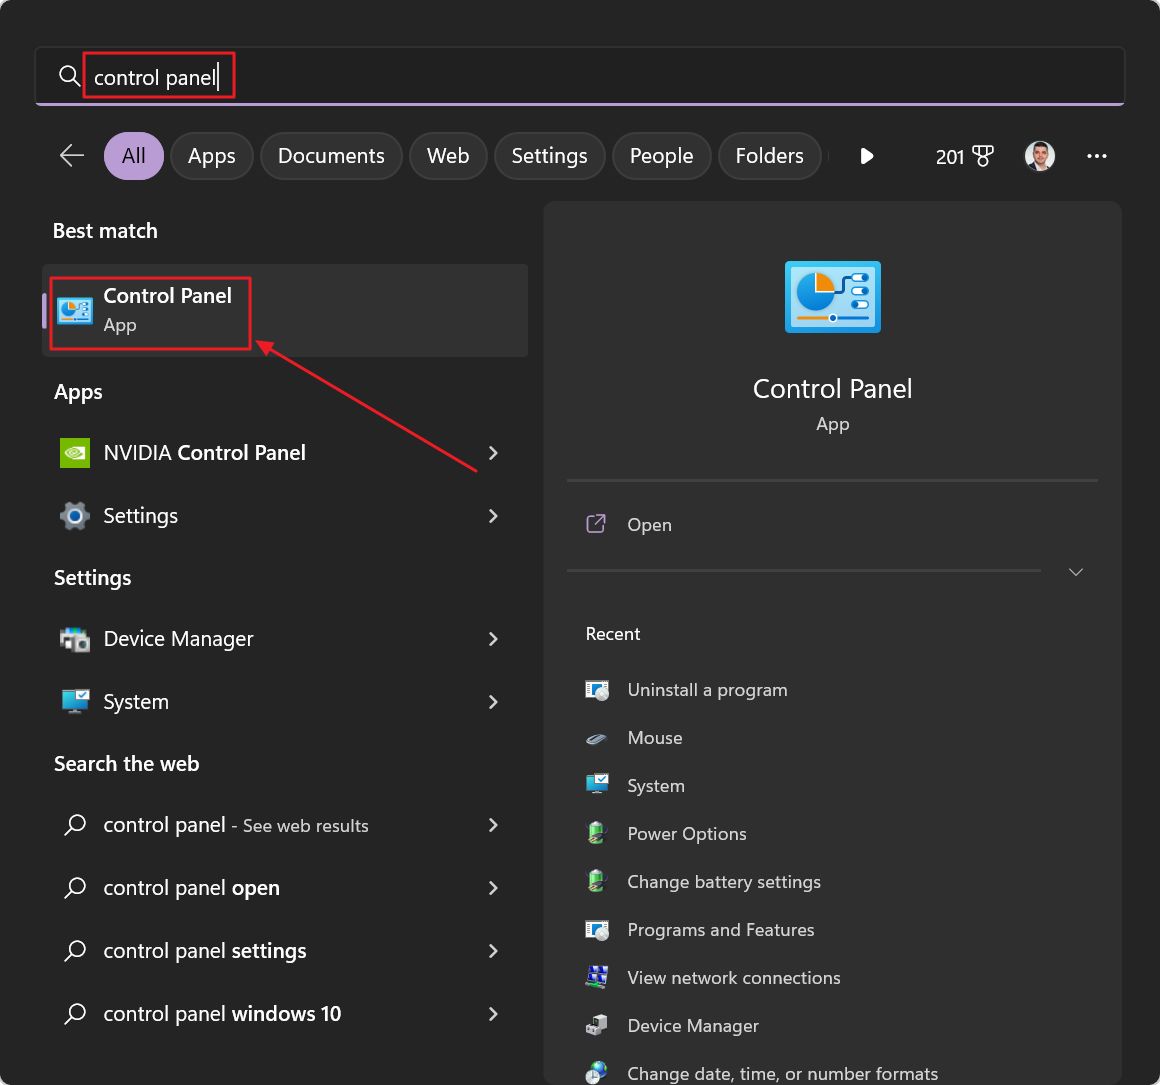
1. Click on the Start menu and type control panel, then open the first result.
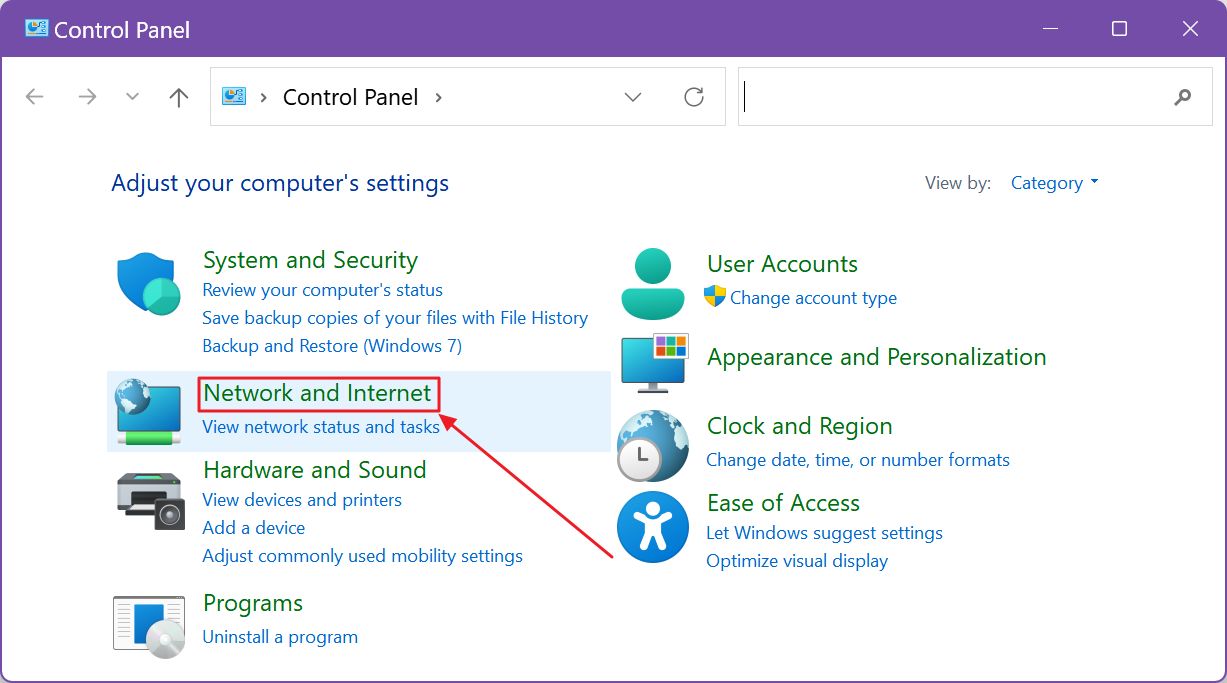
2. Click on the green Network and Internet subheading.
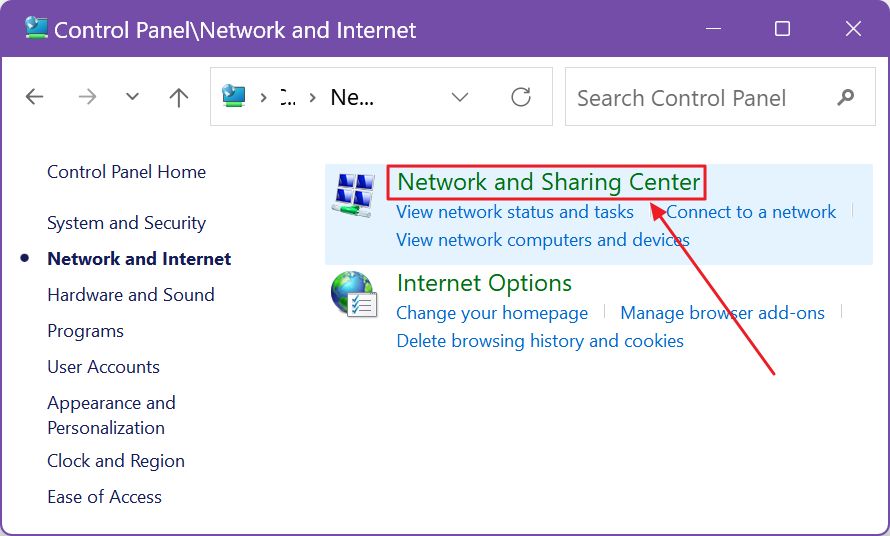
3. Do the same thing for the Network and Sharing Center on the next page.
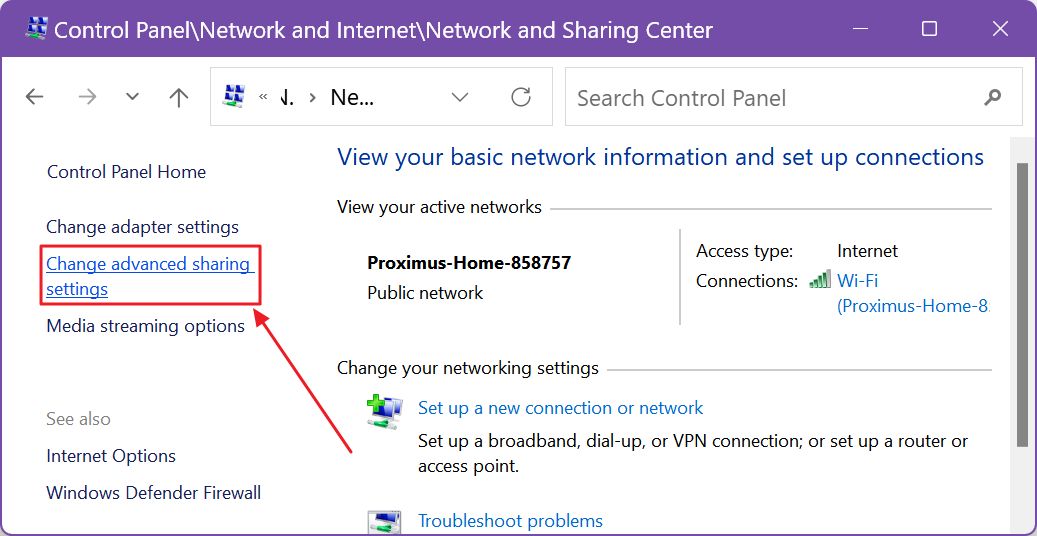
4. In the new page, locate the link called Change advanced sharing settings on the left side menu.
5. Up until now these steps also work in Windows 11. This is where the difference starts. Windows 11 will redirect to the Settings app, while Windows 10 will open a new settings page.
Expand the last section called All networks.
6. At the bottom select the Turn off password protected sharing radio button, then click on Save changes. The shield indicates you should expect a UAC prompt.
If you’re on a Public network, when you restart Windows you may find that the setting will change back to On, the implicit value. That’s done in order to protect you because you’re on a public network. If you know you’re in a safe environment, set by mistake to Public, here’s how to you switch the network type from Public to Private.
What do you do if you see this message when you try to access a network share?
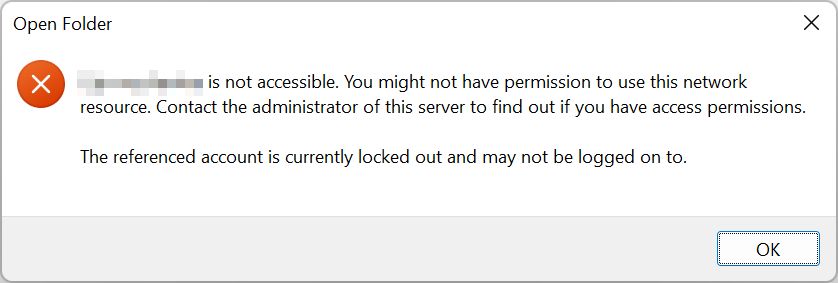
It doesn’t give much info about what’s going on.
Normally, you don’t need to restart your host computer (the one sharing folders) for the setting to take effect. I was able to access the shared folders password free from my Mac and from another Windows 10 machine, but from a Windows 11 machine I’ve got the message above.
That’s why one important fix is to restart the host computer after disabling password-protected sharing.
If you’ve used credentials in the past, when you’ve accessed the shared folder with a password, previous to disabling password-protected sharing, it may be a good idea to also reset the guest computer(s).
If you’ve tried the wrong set of credentials and checked the Remember my credentials checkbox then you either have to reset the guest computer or use the Windows Credential Manager to erase the wrong credentials, without a need to restart.
One last option: if you use password-protected sharing and use the same account to access a share from two different computers that may also be causing this message. Make sure you disconnect one of the machines (close the programs accessing the share) and try again after a while on the other PC.
Password-protected sharing is enabled by default in Windows for a good reason: it keeps data safe(r). If you disable this option potentially anyone connected to your home network could access all shared folders, regardless of which user has access. That’s because this option overrides folder access settings.
Ideally, you should turn off password-protected sharing only for a short time, when needed, then immediately turn it back on. That’s what I would do.
One interesting thing I’ve found is that on my Windows computers where I’m logged in with the same Microsoft account, there’s no need to specify a username and password because that account already has access to the shared folder on the host computer, so accessing it from a guest sees to work seamlessly. Finally a good use for Microsoft online account?
I hope I’m not just imagining things, so I welcome your feedback. Also, what kind of problems and fixes have you found while trying to share and access folders in your Windows network?