- Learn how to improve gaming performance in Windows by disabling the Virtual Machine Platform and Memory Integrity (Core Isolation) features.
- If your computer is not performing as expected when gaming in Windows 11 Microsoft says you could try and disable two security features.
- It’s possible to boost gaming performance this way, but you may also expose your machine to threats, so make sure you enable them again after you’re done playing.

I’ve been a Windows 11 early adopter, and I like the OS, despite the obvious UX shortcomings pertaining to the taskbar and Start menu. That being said, some people are more focused on gaming performance, something that can be a problem with some configurations under Windows 11 versus Windows 10.
Microsoft acknowledges this issue, which thankfully it’s not a widespread one, and even offers suggestions that you can try today, namely disabling two security features: the VMP (Virtual Machine Platform) optional feature and the Core Isolation from Windows Security.
These two features come pre-enabled on new Windows 11 installations, so if you’re running an older install they might be already disabled. It’s worth checking out, though.
Anyway, if you’re the type of user who prioritizes gaming performance before anything else, here’s what these two features do and how to disable them.
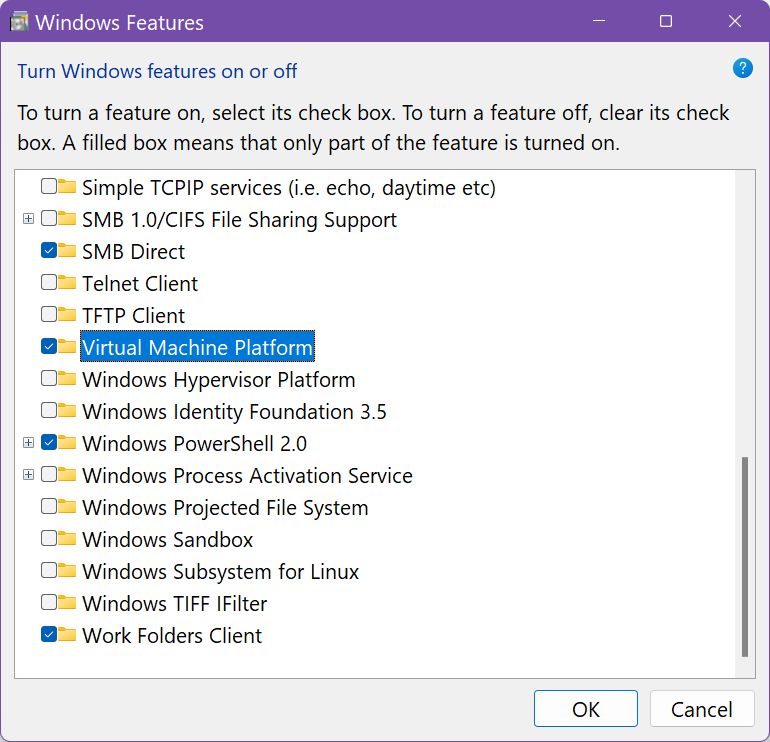
How to Disable Virtual Machine Platform
Virtual Machine Platform is part of Windows Features (discussed here) and, once enabled, will provide support for virtual machines in Windows 11.
It’s super easy to enable/disable:
1. Open the Start menu (press Win key).
2. Type Windows Features and open the first result.
3. In the new windows scroll until you see the Virtual Machine Platform checkbox. Select/Deselect and then hit OK to confirm.
At this point, you have to restart your PC for changes to take effect.
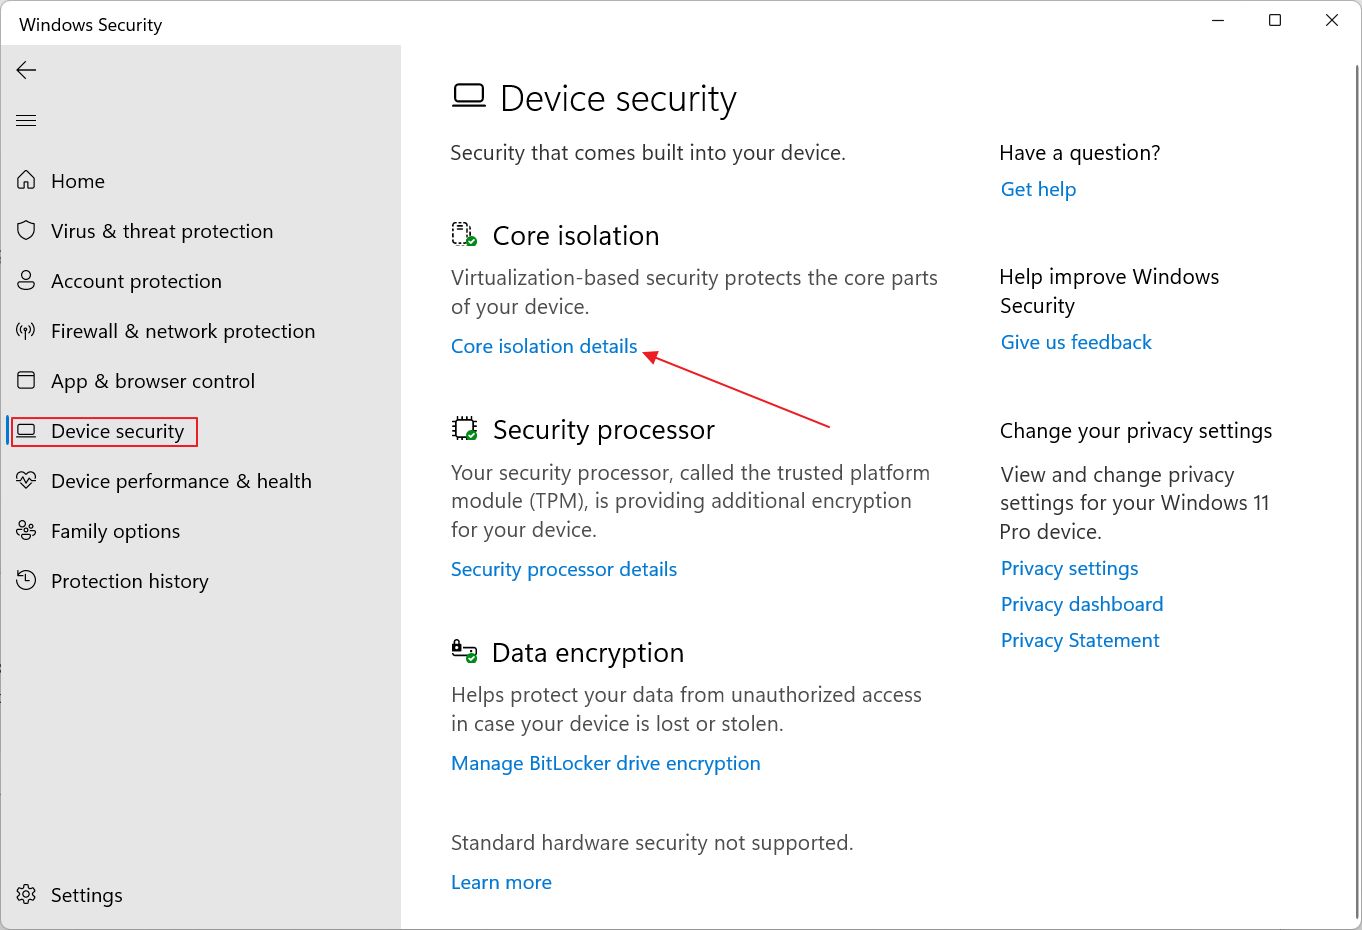
How to Disable Core Isolation
Memory Integrity or Core Isolation is responsible for running some processes in a sandboxed environment, similar to Windows Sandbox. It’s part of Windows Security, so I feel it’s a bit more important than the VMP option.
1. Open the Start menu with the Win key.
2. Type Windows Security and open the first result in the list.
3. Navigate to Device security > Core isolation and click on the Core isolation details link.
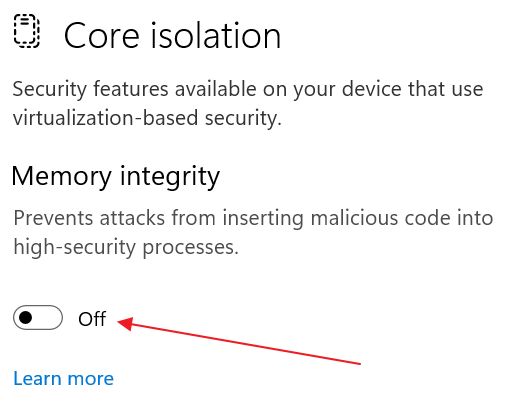
4. A new panel will open. Here you only have one checkbox. Turn off Memory integrity to disable Core Isolation. Microsoft recommends a restart after toggling this feature On or Off.
Microsoft Recommends Enabling Them When Finished Gaming
I know it sounds a bit annoying, but Microsoft recommends enabling these two features after your gaming sessions are finished. Yes, enable and reboot again. Is it that bad to run Windows with these two disabled? Probably not, but it depends on the type of work you’re doing and how critical it is.
I’m currently running with these two disabled on both my desktop and laptop and didn’t have any issues, but that’s not to say Microsoft’s recommendation is not a good one, so you should proceed with caution.
You’ll have to decide if it’s worth the trouble of enabling/disabling these options every time you’re gaming, especially if the performance impact is not that big. It might be a better idea to take a look at your game settings first and enable your laptop MUX Switch, if present. That’s what I would do.