- Read on to learn how to downgrade Windows 11 to the previous stable build with just a few steps.
- Sometimes Windows updates go wrong and you wish you never upgraded in the first place.
- Fortunately, you can roll back Windows 11 to the previous version easily.
Windows Updates are a subject that people like to complain about, more than other issues, but I do reckon that sometimes they can cause real problems.
This is why I’ve dedicated quite a few articles on BinaryFork to this sensible subject. Here are a few of the key topics discussed:
- How to uninstall Windows Updates
- How to rollback driver updates
- How to pause updates
- Disable automatic driver updates in Windows
After showing you how to force update Windows to the latest version it’s time to see how you can go back to the previous version of Windows, in case you’re not satisfied with the speed of the new build, or if you encounter critical bugs that prevent you from using your system as before.
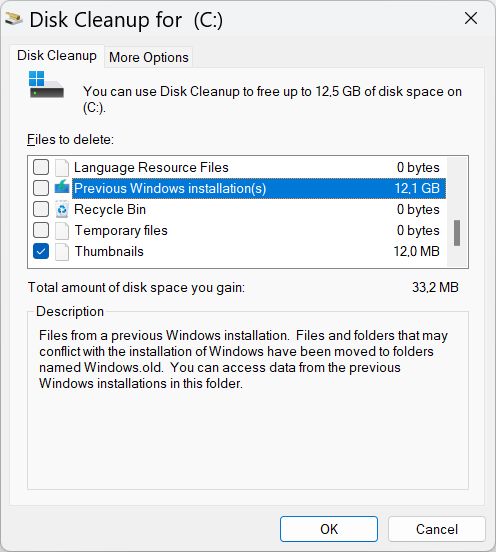
Requisites: it’s crucial that you haven’t removed the previous installation files from Disk Cleanup or System > Storage > Cleanup recommendations
You can check Disk Cleanup for the C: partition and you should see a large option called Previous Windows installation(s).
Use System Recovery to Go Back to the Previous Windows Version
The process is pretty straightforward, but there are some tricks involved, as Microsoft will try and keep you on the same build. Nothing too annoying, to be fair. Let’s get started:
Note: this guide can be used to downgrade from Windows 11 to Windows 10 too if you’re in the 10-day window in which you are allowed to do so.
1. Open the new Settings app. I prefer to use the Win + I keyboard shortcut for that.
2. Navigate to System > Recovery. Open this section.
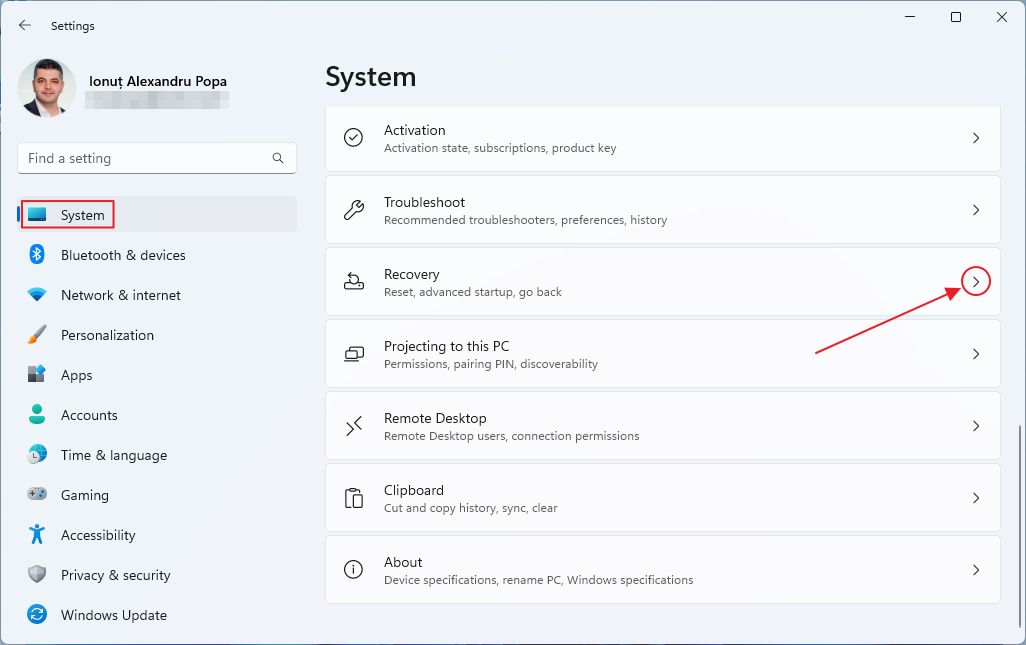
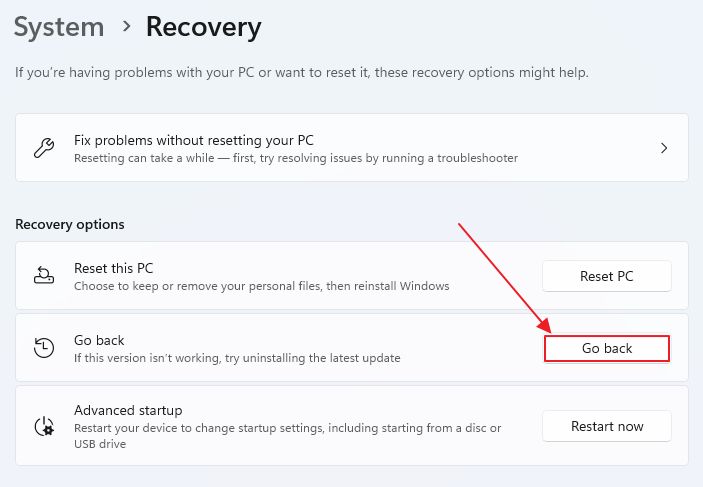
3. Scroll until you see the Go back option. Clicking on the button will start the Windows rollback process.
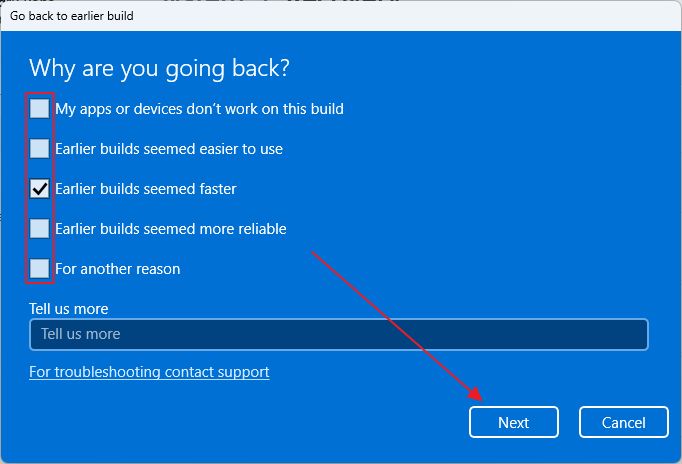
4. In the first step you need to provide a reason for why you want to go back. Select anything at random, if you don’t feel like providing feedback, but I strongly suggest you be honest, as this could help Microsoft improve their software. Isn’t that what we want?
After selecting a reason the Next button will become active. Click to continue.
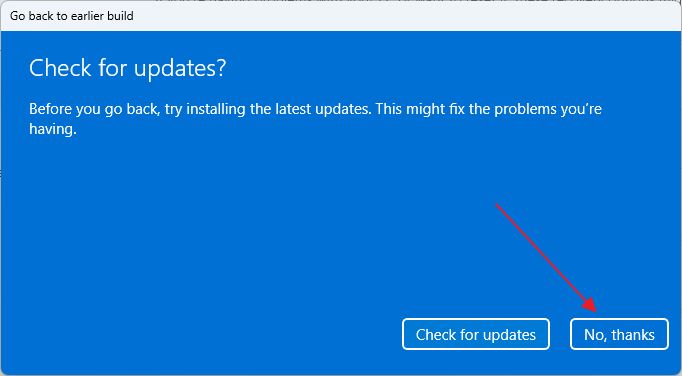
5. This is the tricky part I told you about: if you select Check for updates you will stay on the same Windows version, but the system will try and get updates that hopefully help with the problem that made you look for this guide in the first place.
Make sure you click on No, thanks to continue.
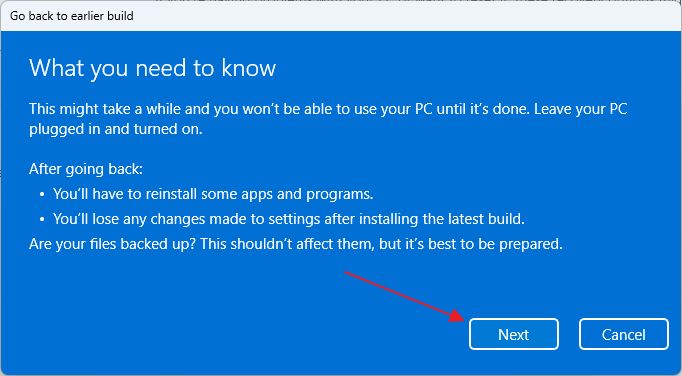
6. This is a warning that undoing the previous update might potentially break some files (so do a backup) and you will definitely need to redo some settings and reinstall a few apps. Click on Next to proceed further.
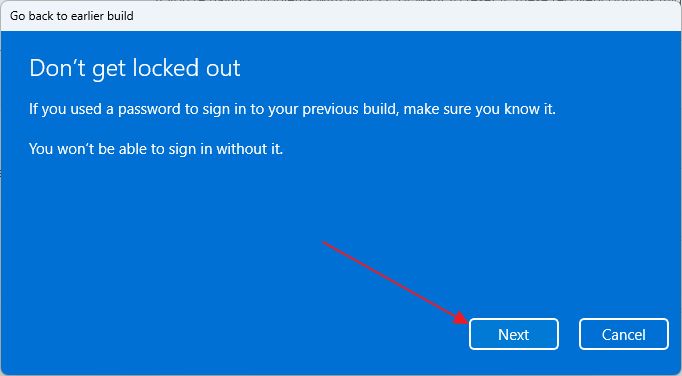
7. One interesting thing is that if you’ve changed the password or removed it completely after the Windows update that went wrong, by rolling back to the previous build, authentication will also default to the previously used password. Make sure you know that password!
8. A final confirmation prompt will ask if you really want to Go back to earlier build. Of course you do, so confirm.
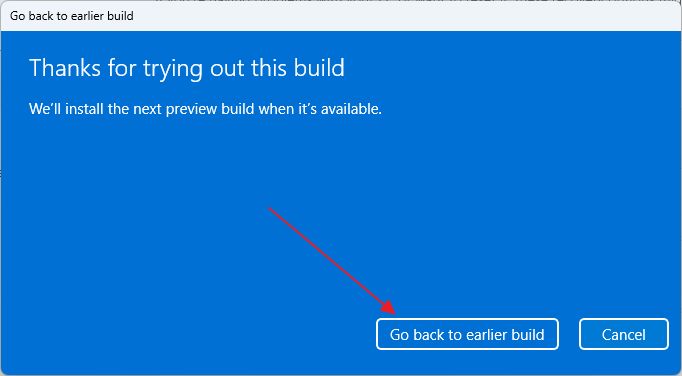
9. Your system will reboot at this point. Just wait for the rollback process to finish. You will soon see the previous login screen, depending on how powerful your PC is.

I suggest you confirm the current Windows build version by using this guide. If the rollback was a success you should be on the previous version right now.

How to Fix Windows Won’t Start and Boots Into Recovery Environment (RE)
So, did you ever need to downgrade Windows to the previous version by using this rollback procedure? What went wrong? Let us know in the comments.
