- If you still need to find the IP address of your computer here’s how to get it in Windows 11.
- The IP address, short for Internet Protocol address, is what makes Internet connections possible.
- Most people don’t need to know anything about IP addresses, as connections and communications are mostly automatic, and are transparent if you don’t want to get your hands dirty.
The Internet is all about IP addresses, and each device connected to the network has its own unique external IP (Windows computers also have a unique hostname). Because there aren’t enough unique IP addresses (IP v4) for all devices two things happened:
- Internal IPs were added (read about the differences).
- Longer IP v6 addresses were added.
The state of IP v6 doesn’t look particularly good, so most networks are still on IP v4 and we use NAT (Network Address Translation) to get by every day with IP v4.
This article is about how to find out the current computer IP address in Windows 11 (we also have an article on how to do that in Windows 10, if you’re still using that version and an entire section dedicated to guides).
You may need it to configure something on your router, or to debug connectivity issues. These are the most common uses, but not the only ones.
CONTENTS
Find the Internal IP Address with Command Prompt or PowerShell in Windows 11
For me, who likes the command line, this is the fastest way to get the current IP.
1. Open the Start menu and type Command prompt or Powershell (you can also use Windows Terminal).
2. Type the following command ipconfig and press Enter to execute.
3. The current IP address is listed next to IPv4 Address.
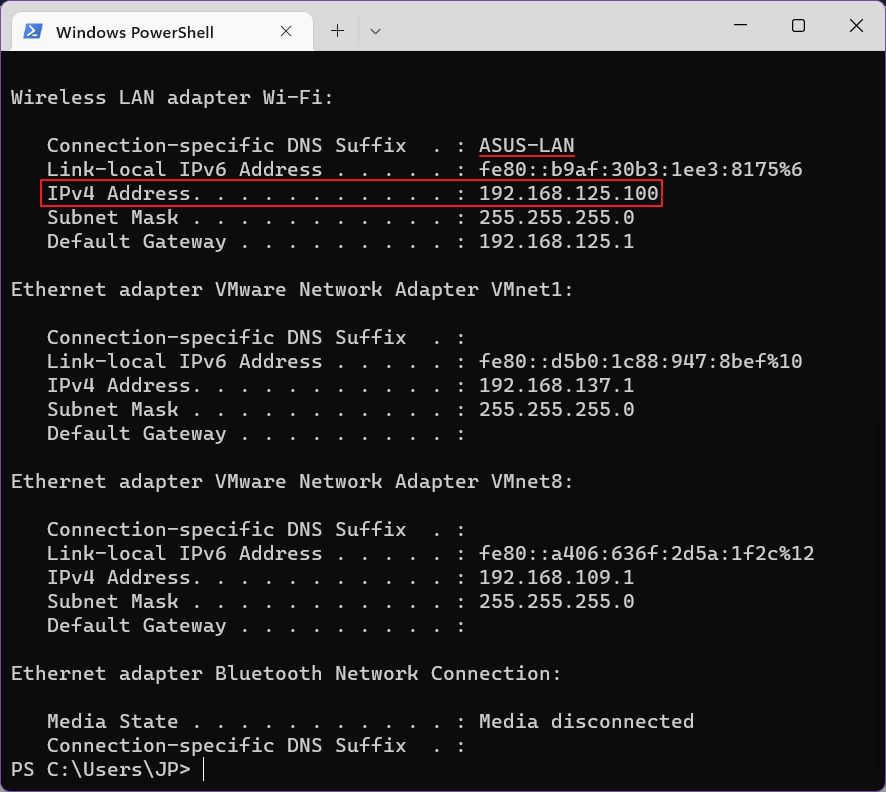
If you have more than one adapter, look for the one that has a gateway and maybe a DNS Suffix. Disconnected network cards are listed as such.
The next guide will let you know which is the currently active connection, so no need to figure it out by yourself.
Find the Computer IP Address in Windows 11 from the New Settings App
1. Open the Settings app (just type Settings in the Start menu).
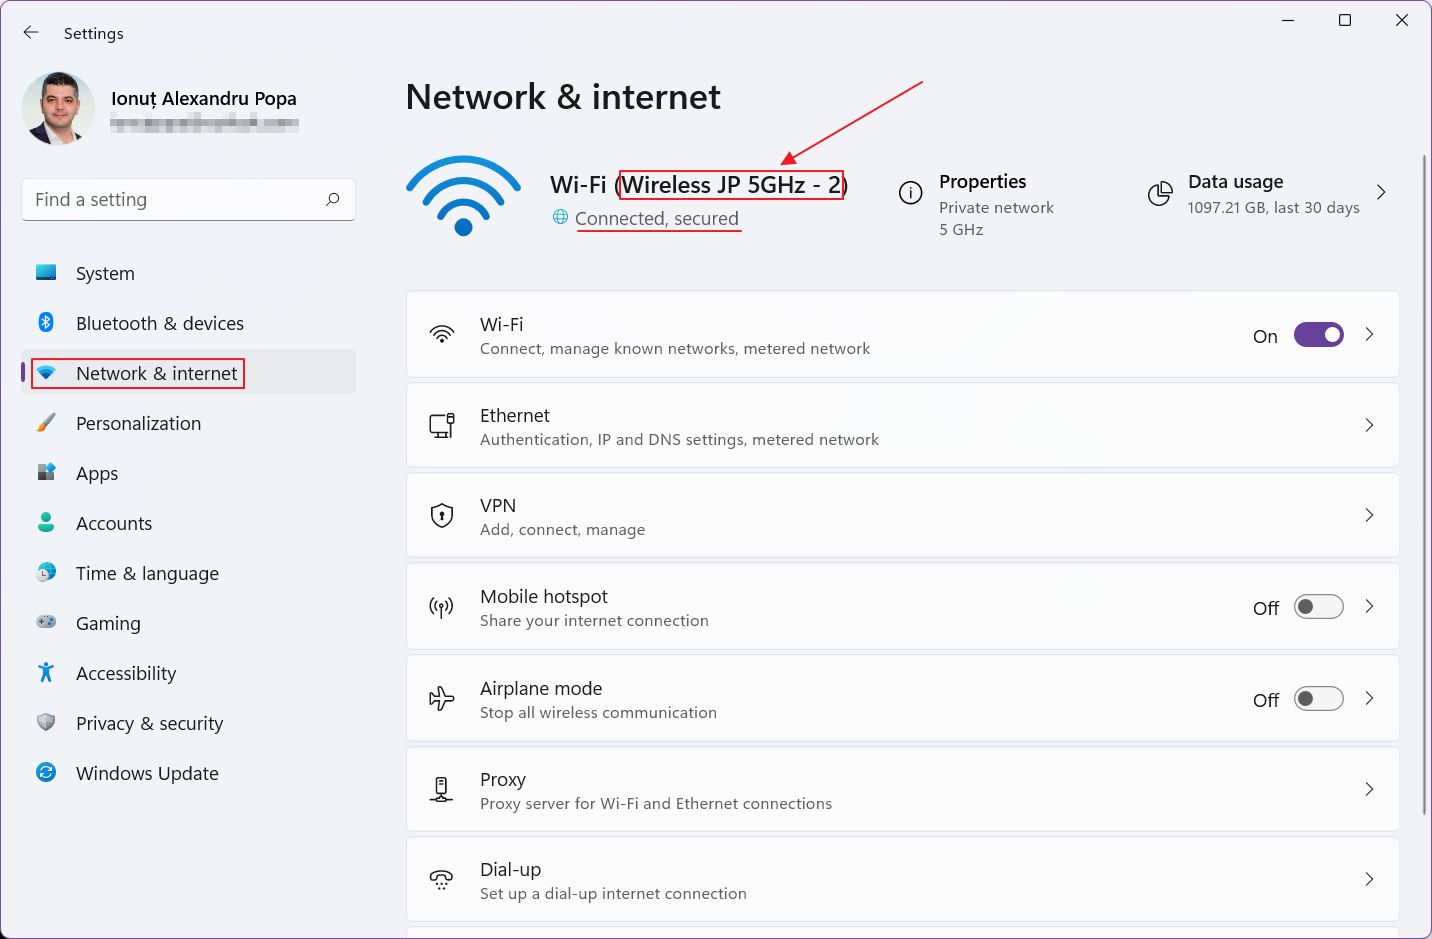
2. Select the Network & internet menu entry from the left.
3. Check the top of the right panel for Wi-Fi or LAN. You’ll see the name of the current connection together with the current status (it should say Connected, secured). Remember the name.
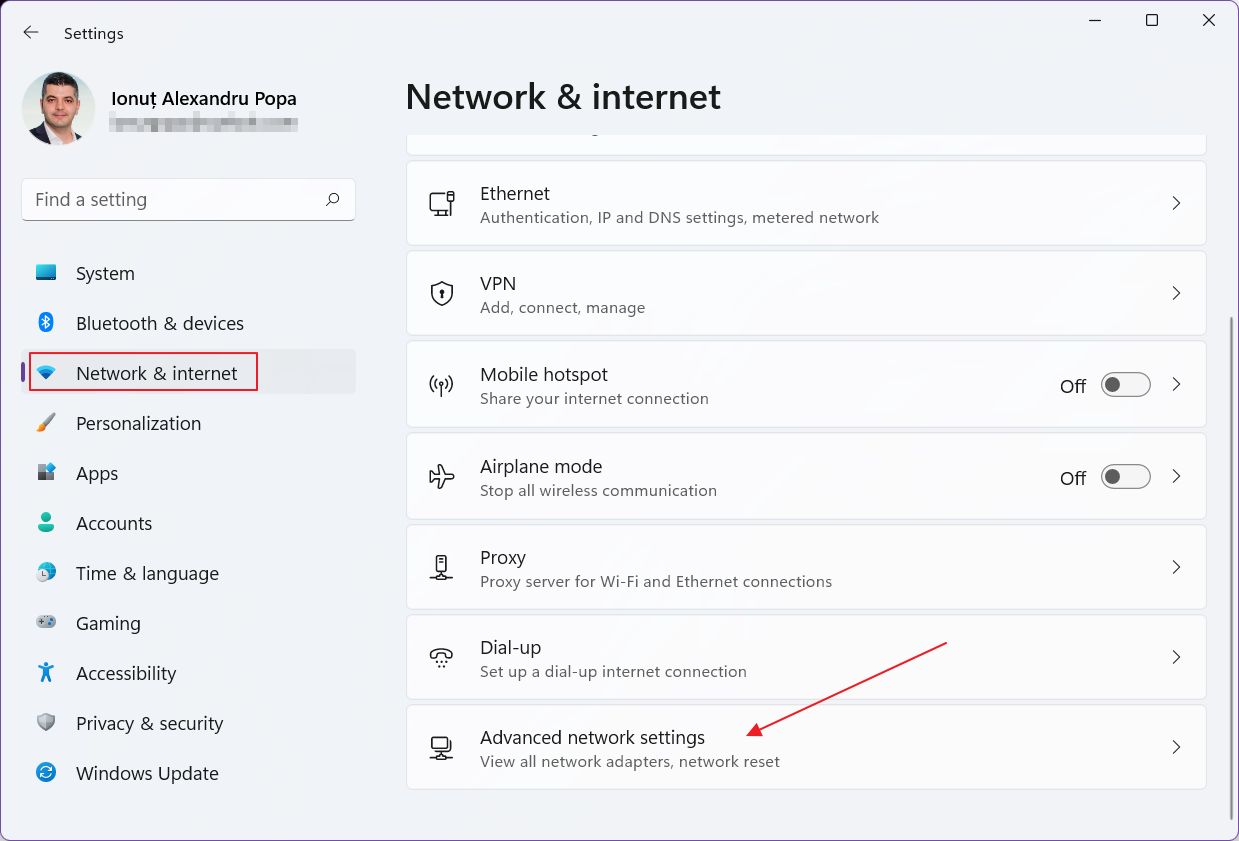
4. Now scroll the right panel until you find Advanced network settings.
5. At the top of the new window you’ll see listed all your NICs. Expand the active one mentioned on the previous screen by clicking on the down arrow.
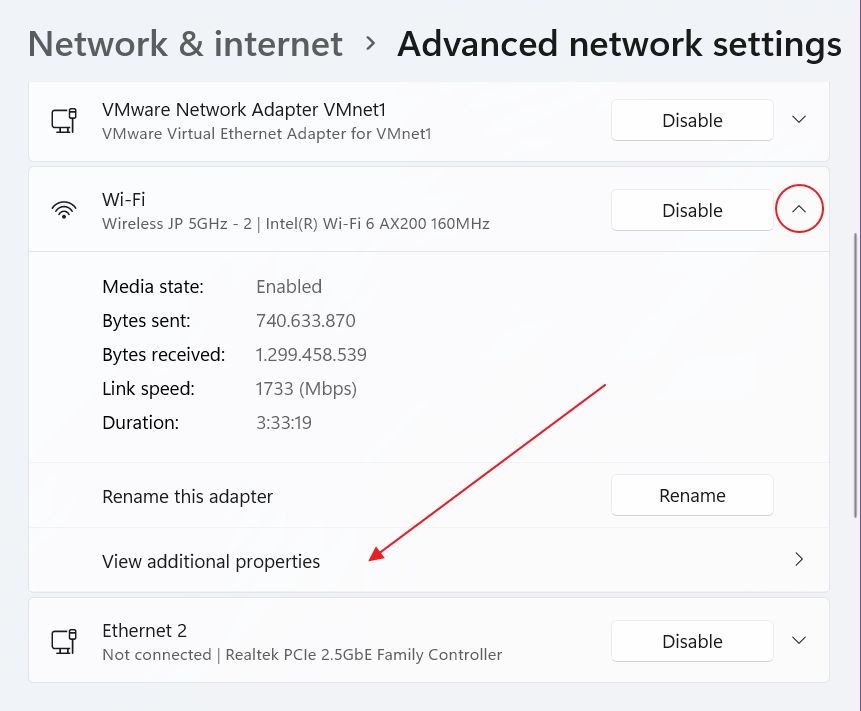
6. Click on View additional properties.
7. You’ll want to find out the IPv4 address and write it down.
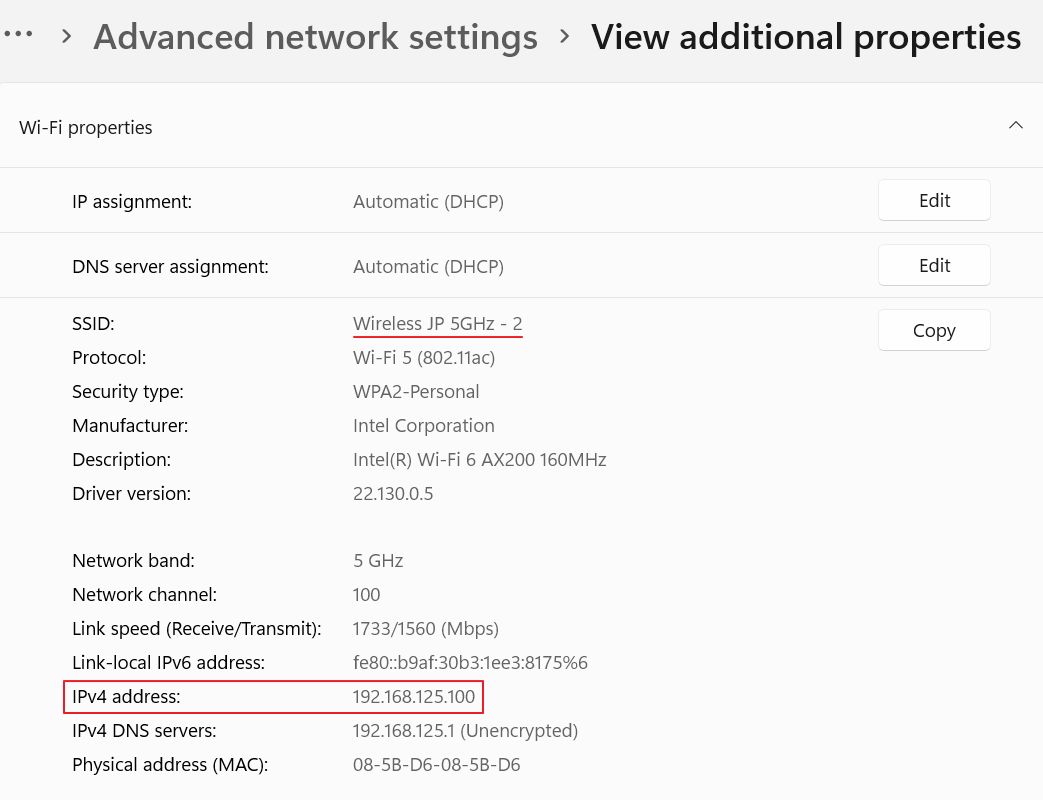
This is the IP address your computer uses to connect to the router. It’s unlikely your computer is connected directly to the Internet, but not impossible.
Do you know any other quick way to find the current PC IP address in Windows 11? I’m curious so leave a comment below.

