- Windows Recovery Environment, or simply RE, is a very useful tool included with Windows.
- Windows RE can be used to diagnose, repair your computer, and restore it to a previous working state.
- There are four versions of Recovery Environment apps, each with small differences between them.
Microsoft includes a plethora of backup, recovery, repair, and troubleshooting utilities in Windows (we covered them extensively). The Center stage is taken by the Recovery Environment aka Windows Recovery Mode, a selection of tools that will increase the chances of fixing your machine in case something goes wrong.
What is Windows Recovery Environment
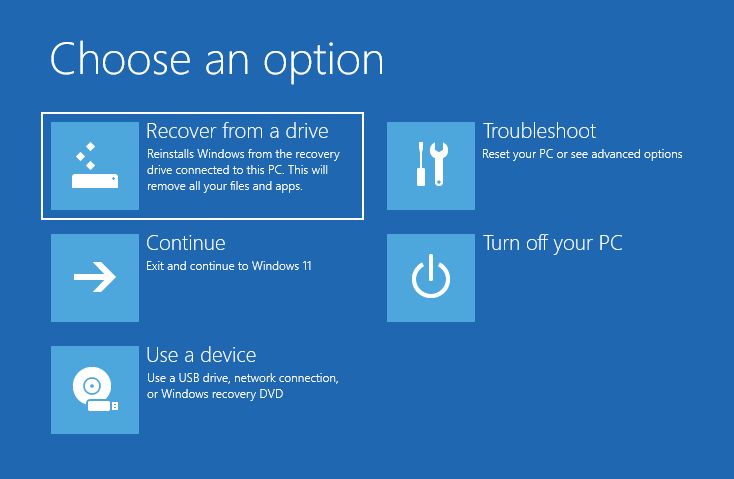
As the name suggests, Windows Recovery Environment is a set of tools that can be used to repair, fix, reset, and reinstall Windows. You can recognize the RE app from the blue user interface.
Windows Recovery Environment is used outside of Windows, so it’s not a Windows native app. That’s why most people say the computer has entered the Windows Recovery Mode, because technically it’s true.
That’s why I’ve added a section about how to launch and enter the Recovery Environment. Confusingly, there are multiple versions of Windows RE. More on that later.
Now, let’s see what Windows Recovery can actually do.
What Can You Do With the Recovery Environment
I like short lists, so here’s a list of the tools included in the Windows Recovery Environment. Depending on the RE version you will use, some of these tools could be missing.
- Boot from another device (select a different local disk, optical drive, network, or USB boot disc).
- Reset a Windows installation with or without the option to keep user files.
- Perform a system startup repair.
- Change startup settings.
- Launch the Command Prompt so you can use several commands and tools.
- Uninstall the latest updates if they cause trouble.
- Open the computer BIOS/UEFI interface to change hardware settings.
- Go back in time to a restore point.
- Use a System Image to restore Windows to its previous state.
Details about how to use the Recover Environment tools to fix your PC are covered in this article.
The 4 Types of Windows RE
One of the most confusing parts about the Recovery Environment is the fact there are no less than four versions, depending on where RE is launched from:
- RE included on your local Windows installation.
- RE included on a Recovery Drive.
- RE included on a Repair Disc.
- RE included on a Windows Installation media disc.
The most packed version is the one from the local Windows installation. This version is included automatically when you install Windows, with no easy option to disable or remove it.
The versions included on Repair Discs, and Windows Installation Media lack the option to reset Windows. On Recovery Drives, the Recover from a drive feature can be enabled depending on the options you’ve selected during media creation.
For most people, the obvious differences are the reorganization of menus on these 4 RE versions. That’s why I’ve included a handy table with all the options below:
| Windows RE | Recovery Drive | Repair disc | Windows Installation Media |
| Continue to Windows | Keyboard layout | Keyboard layout | Continue to Windows |
| Use a device | Recover from a drive (if backup system files were added during Recovery Drive creation) | Continue to Windows | Use a device |
| – NVME / SSD / HDD | – Just remove my files | Use a device | – NVME / SSD / HDD |
| – SATA CDROM | – Fully clean the drive | – NVME / SSD / HDD | – SATA CDROM |
| – Network | Continue to Windows | – SATA CDROM | – Network |
| – Internal Shell | Use a device | – Network | – Internal Shell |
| – USB Drive | – NVME / SSD / HDD | – Internal Shell | – USB Drive |
| Troubleshoot | – SATA CDROM | – USB Drive | Troubleshoot |
| – Reset this PC | – Network | Troubleshoot | – Startup repair |
| — Keep my files | – Internal Shell | – Startup repair | – Command prompt |
| — Cloud download | – USB Drive | – Command prompt | – Uninstall Updates |
| — Local reinstall | Troubleshoot | – Uninstall Updates | – UEFI Firmware settings |
| — Remove everything | – Startup repair | – UEFI Firmware settings | – System restore |
| — Cloud download | – Command prompt | – System restore | – System image recovery |
| — Local reinstall | – Uninstall Updates | – System image recovery | Turn off PC |
| – Advanced options | – UEFI Firmware settings | Turn off PC | |
| — Startup repair | – System restore | ||
| — Startup settings | – System image recovery | ||
| — Command Prompt | Turn off PC | ||
| — Uninstall Updates | |||
| — UEFI Firmware settings | |||
| — System restore | |||
| –See more recovery options | |||
| —System Image recovery | |||
| Turn off PC |
How to Enter Windows Recovery Environment
Windows RE will start automatically when certain triggers are detected. There are also options to launch RE manually. They’re all covered in this part of the article.
Let the Recovery Environment Start Automatically
According to the official documentation, the Windows Recovery Environment included in the local Windows installation will start automatically when the following scenarios occur:
- Two failed attempts to start Windows
- Two unexpected shutdowns occur in a two minutes interval after a successful boot.
- Two consecutive system restarts occur in a two minutes interval after a successful boot.
- Secure Boot error occurs, not related to bootmgr.efi.
- BitLocker error occurs on touch-only devices.
Start RE From Windows
You can also manually start the Recovery Environment directly from Windows. There are two ways to do it:
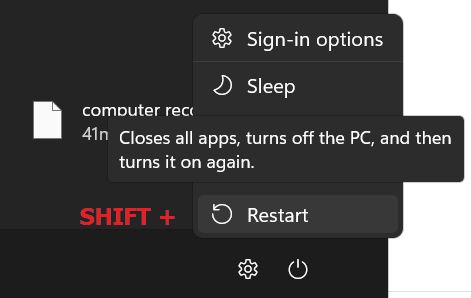
Method 1: press Shift while you click on the Restart button from the Start Menu.
Method 2:
1. Open Settings by pressing Win + I.
2. Navigate to System > Recovery on the right panel.
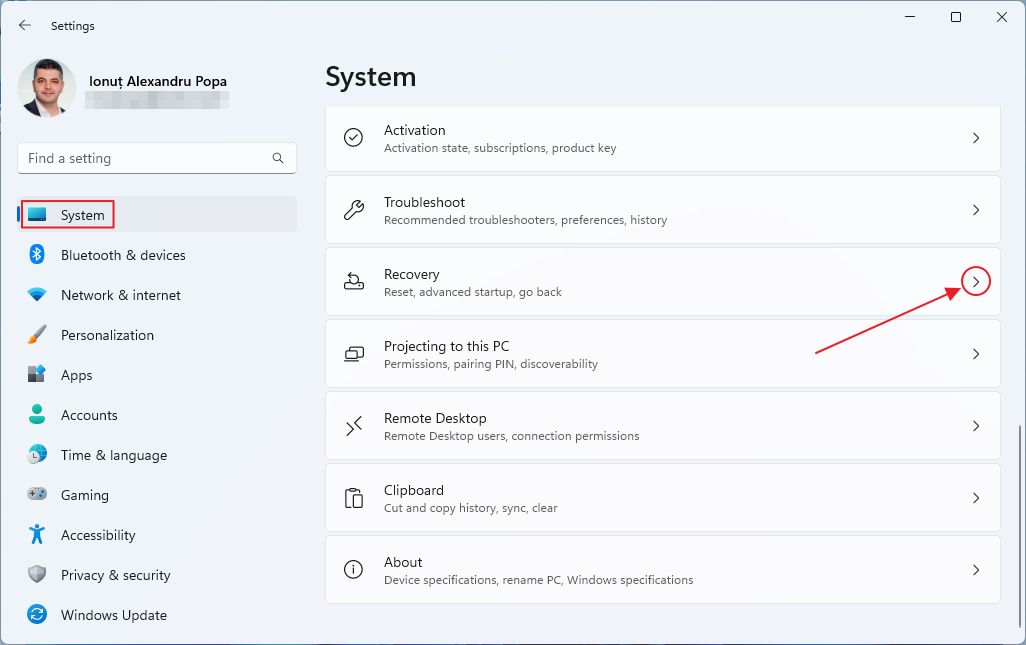
3. Click on the Restart now button next to Advanced Startup section.
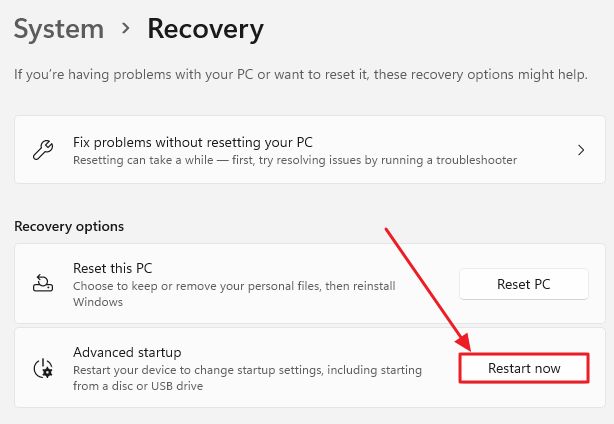
4. Confirm that you wish to Restart now in the following warning popup.
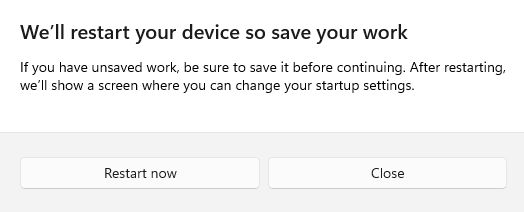
Next, your PC restarts and will boot directly into the Recovery Environment where you can start troubleshooting your computer.
Start From Recovery Drive
1. Insert the Recovery Drive into a free USB port.
2. Start your computer or restart if it’s already on.
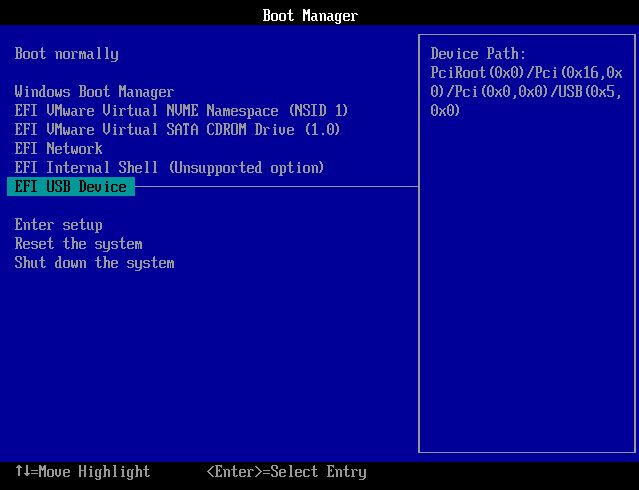
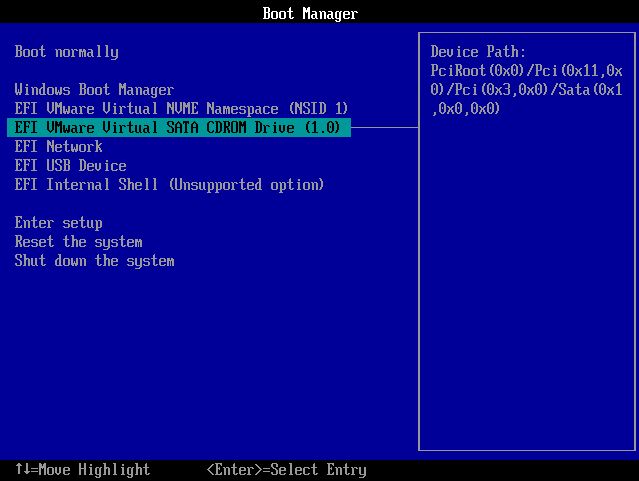
3. Press F8 before Windows starts loading. This will open the Boot Manager.
4. Select the USB drive from the boot menu and wait for RE to load.
Start From Repair Disc
1. Insert the optical Repair Disc into your CD/DVD drive.
2. Start your PC or restart if it’s already turned on.
3. Press F8 right before Windows starts loading (you can just press multiple times so you won’t miss the moment). This will open the Boot Manager selection menu.
4. Select the SATA CDROM option drive from the boot menu and then wait for RE to load.
Launch RE From Windows Installation Media
The last option to enter the Windows Recovery Environment is to use the installation media aka Windows install disc.
1. Keep pressing F8 when the computer starts, before Windows loads up.
2. Select the installation media disk from the Boot Manager. It can be a USB flash drive or an optical disc.
3. In the first step of the Windows installation wizard select the keyboard layout, your region, and language.
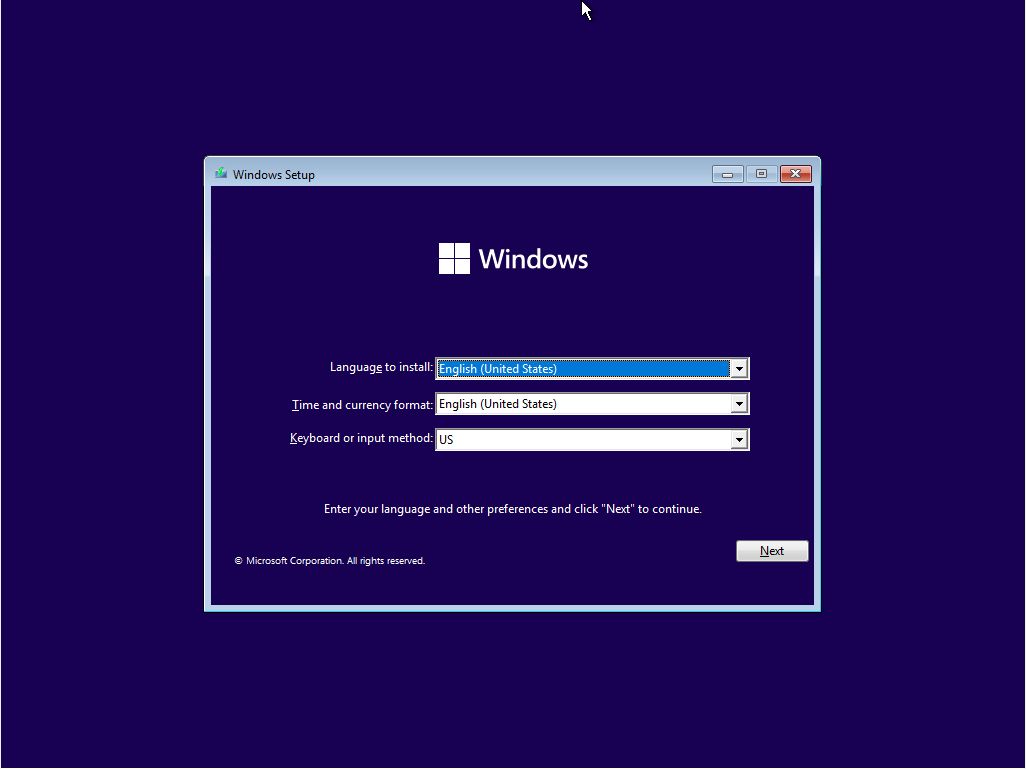
It doesn’t really matter what you select, since you will not be installing Windows.
4. At the next step make sure you click on the Repair your computer link at the bottom left of the Window.
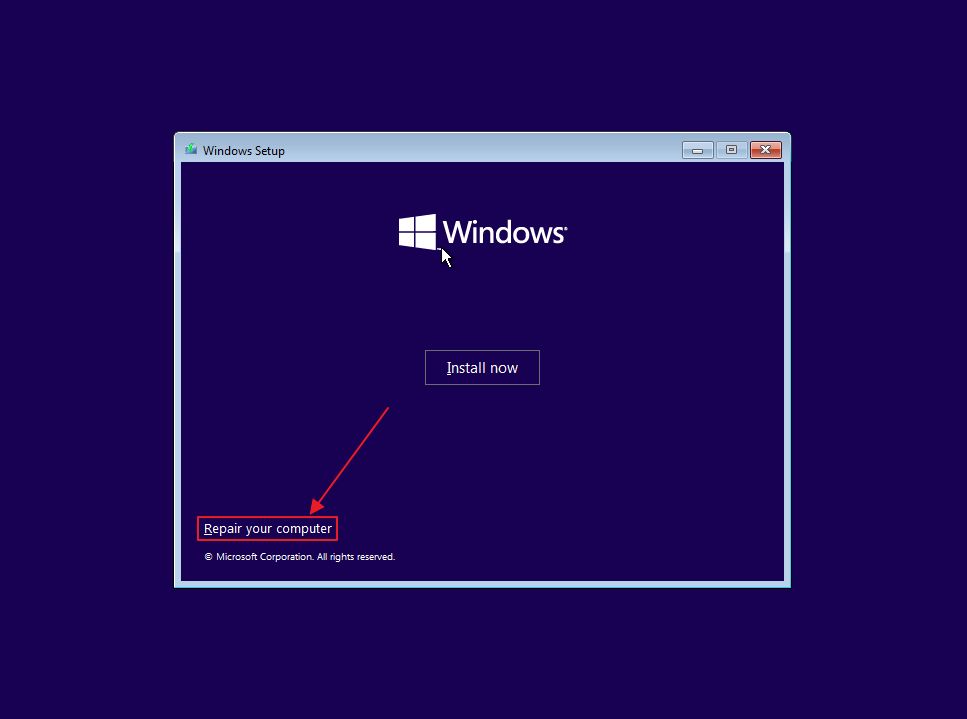
This option will launch the Recovery Environment in a few moments.

How to Create a System Repair Disc in Windows, Why, and How to Use It
There you have it: all the important things to know about the Windows Recovery Environment tool. Follow the links in the article for detailed guides on how to use the many included utilities.
And, as always, if you have questions post them below. I’m happy the help.