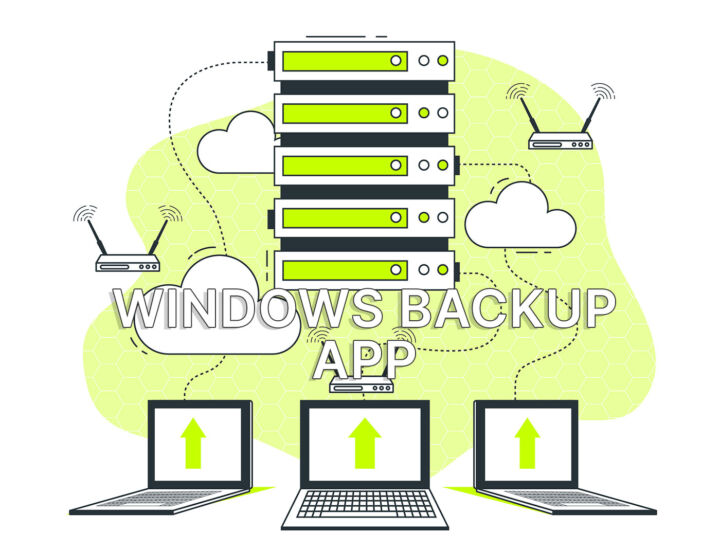
- Learn how to use a System Image in Windows Recovery Environment (RE) to fully recover Windows to a working state.
- Windows can break, that’s the truth and can render your computer useless.
- If you’ve made a System Image using the included Backup and Restore utility you can roll back Windows exactly to the way it was at the time of the last backup.

I’m a fan of backing up my stuff because I’m lazy and I don’t like to do the same work twice if I can avoid it. I had problems with losing data before, but nothing too serious. That was enough to always ensure everything is backed up, before starting to work on anything.
That’s also the reason I’ve started a series of articles about the backup options included in Windows. I strongly encourage you to take a look at the articles linked on this page. They may help you out someday when you least expect it.
The present article will talk about what to do when disaster strikes, meaning how to recover your Windows machine from a System Image when it fails to boot and no other options from the Windows Recovery Environment, the blue “thing”, are working for you.
Requirements:
- Existing System Image made with the Backup and Restore Utility (full guide).
- (Probably) a Windows Recovery Drive if the initial partition layout has changed.
CONTENTS
Restore Windows PC from Recovery Environment with an Existing System Image
It doesn’t matter where you have saved the system disk image with Backup and Restore. This guide works from any of the local disks installed on your machine, from an external drive, or from a local network location.
I’ll go through the longest route possible, the option of selecting a network location for the backup and adding the login credentials. If you’re recovering the System Image from a local disc or external drive (which must be connected beforehand) it’s a bit easier, since you will just browse to the appropriate location.
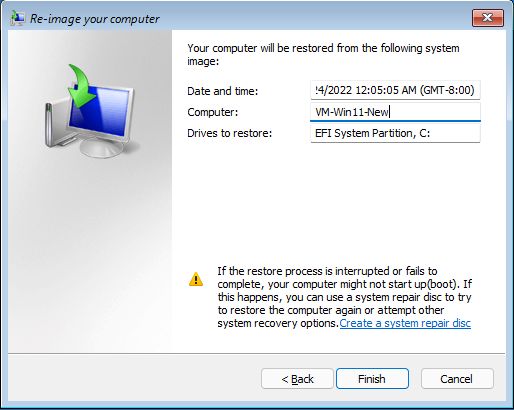
Note: if you have more backups, the best option would be to use the most recent version. Beware that all files and folders added to the system partition since the time of the backup will be lost! Use Backup and Restore on a schedule to restore other important files and folders. This guide will only restore the Windows partition (C:\), basically.
Starting the Windows RE (Recovery Environment)
This could be the tricky part for some users. Most of the time Windows RE will start automatically, if the system won’t boot, for some reason.
If it doesn’t start for you, the easiest options would be to insert the Recovery Drive into a free USB port, press F8 when your PC is starting, then select the USB thumb drive from the boot menu.
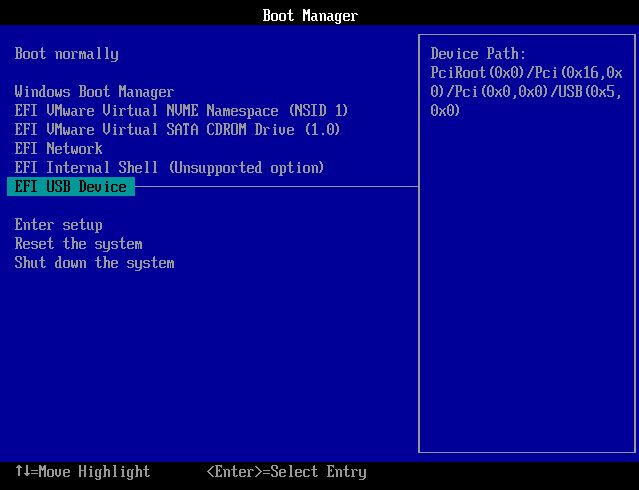
If Windows is still unable to boot, but for some reason, you still want to recover to a previous state, hold SHIFT while clicking on the Restart option. This way Windows RE will start on the next boot cycle, instead of going straight to Windows.
Using the System Image Recovery utility in RE
Once you’re in Windows RE, here’s what you have to do:
0.5. If you started from the Recovery Drive, the first screen will ask you to select the keyboard layout.

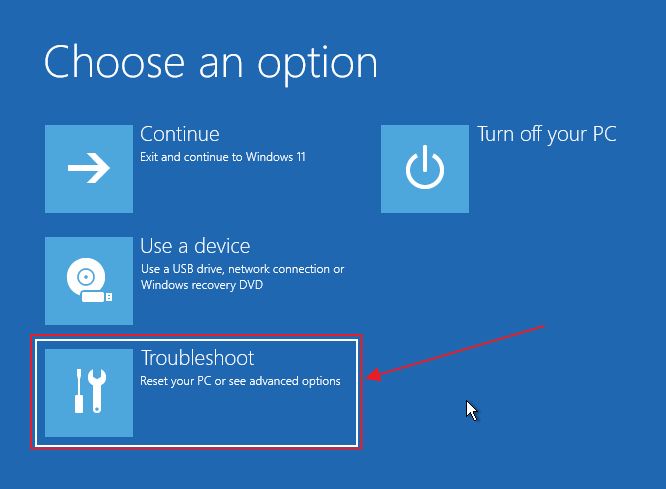
1. Select Troubleshoot from the main RE menu.
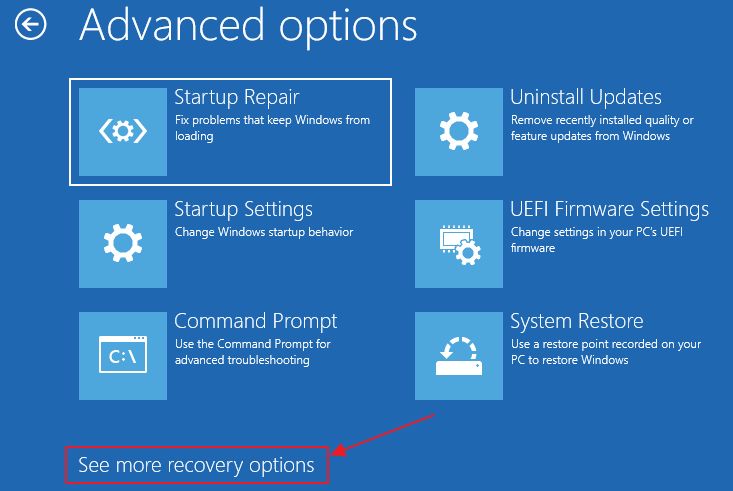
2. You will now have to select Advanced options.
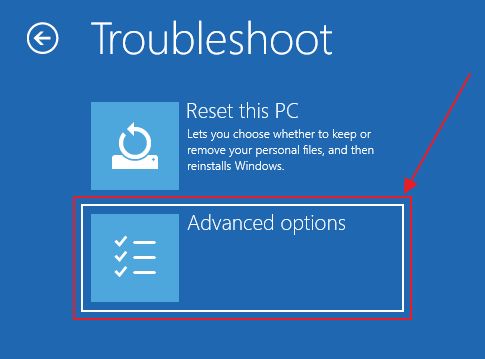
3. Note at the bottom another link See more recovery options. Click on it:
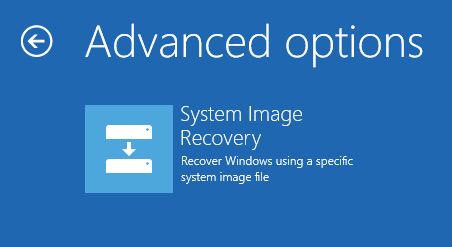
4. Click on the only option: System Image Recovery.
Note: if you’re accessing Windows RE from the Recovery Drive the System Image Recovery option is located directly under the Troubleshoot menu.
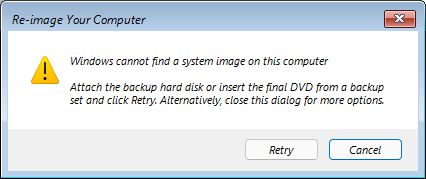
5. If you have your System Image Backup saved on a network location you will see a disorienting message that lets you know no image was detected on this computer. Don’t worry and click on Cancel to get more options.
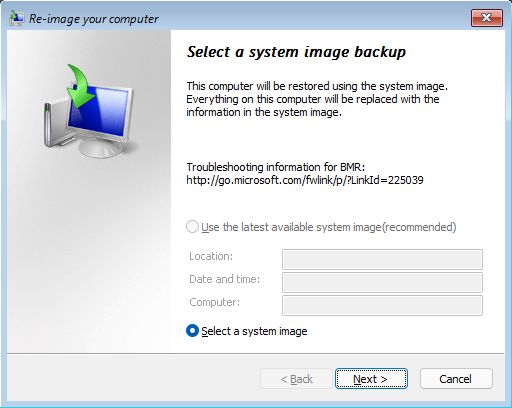
6. At this step click Next, as the Select a system image option is already selected.
If valid backup versions are detected on any of the attached local disks then the latest version would be preselected. In our case, it’s grayed out.
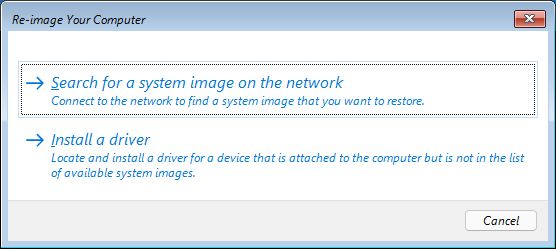
7. A new window will load with another empty list of available backup locations. Click on the Advanced… button to start the selection of a network location.

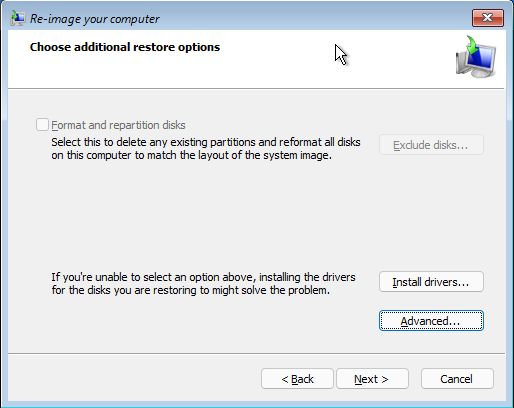
8. Now confirm you want to browse for a local network location. Also here, if you attached an external disk that’s not recognized by the recovery utility you have the option to add the required drivers (they must be stored on a local disk or another USB thumb drive).
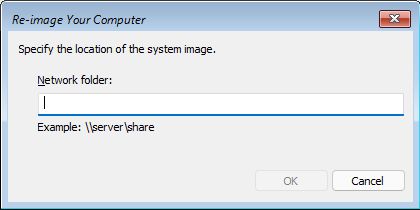
9. Because the Recovery environment lacks serverly in functionality, compared to the fully fledged Windows install, you will need to input the full location path manually.
There’s no option to browse for a location, unfortunately.
10. A Command Prompt window will show up, asking for credentials if the backup location is password protected. Most network shares are so prepare yourself.
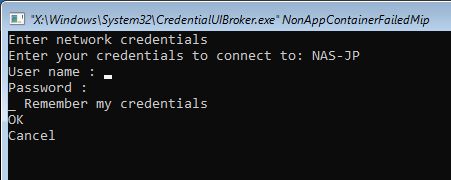
Hint: Navigate between username, password and OK, Cancel options with TAB (Shift + TAB if you need to go back one step).
Important: you need to add the network device name (servername) before the username. Ex: use server_name\username or else it won’t connect to your network share.
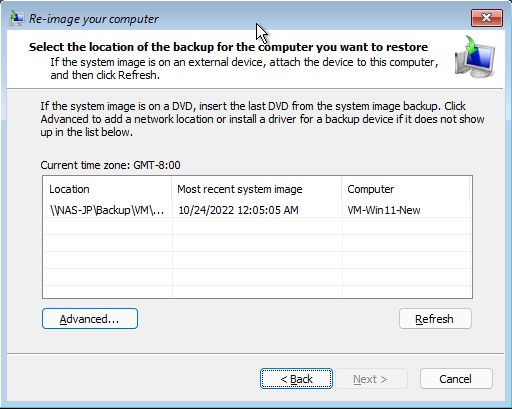
11. If the credentials and path are correct the network location will now show up in the previous window, together with the date of the most recent backup and the previous computer name. Select the location you want to restore from and click on Next.
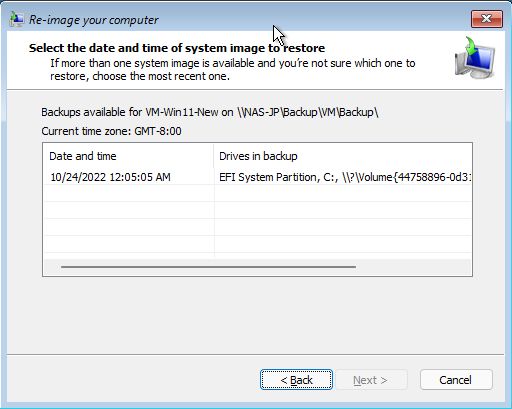
12. If more than one backup is present at the selected location you have to select the one you want to recover from, then click on Next.
13. You’ll get a summary confirmation window. There’s nothing to select/modify, so click Next to move forward.
13.a. If the partition layout you’re restoring from differs from the current partition layout you will see this message, if Windows RE started automatically.
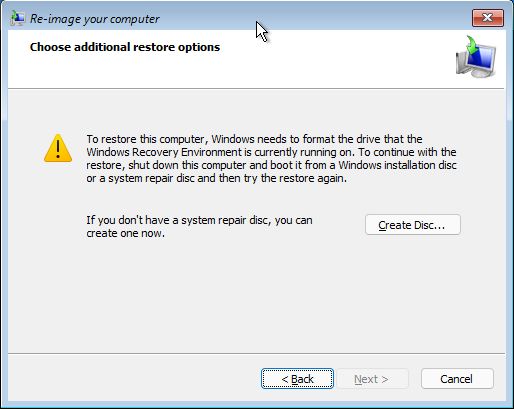
Basically, you need to create a system repair disc. Don’t confuse it with the Recovery Drive. It involves creating a good old DVD.

I was pretty confused at this stop, but then I read the instructions and realised I can skip this by booting directly from the Recovery Drive I’ve created earlier.
This is what I did, followed the same steps from above and, voila, no more error message since the recovery utility doesn’t have to format the same hidden partition it actually resides on.
14. We’re almost at the end, a final confirmation screen with the summary of the backup selected for recovery. Click Finish to begin the actual image recovery process.
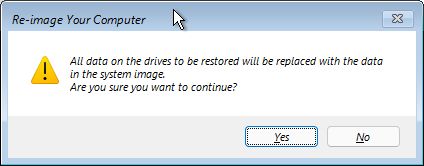
14. Oops! Another warning that all previously saved data will be erased. You knew that already I think.
15. At this point, all you have to do is wait patiently for the system recovery procedure to complete.
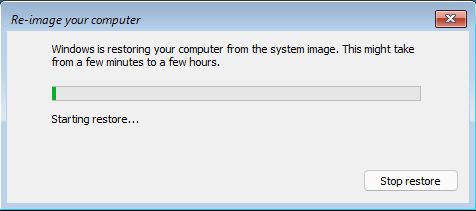
Microsoft calls it the Re-imagine Your Computer process. Cool name for something you don’t want to deal with too often.
After a few minutes, your Windows machine should reboot automatically and greet you with the familiar login screen.

Hope this guide helped you get back into Windows. If you found yourself stuck at any of these steps drop a comment below and I’ll try to help you figure it out.
Looking for a guide on how to restore files and folders from Backup and Restore? Here’s a complete guide for you.
Don’t have a system image handy? You can still try to Reset this PC from RE or from the Settings app, both methods offering the option of keeping user files.
Lastly, I recommend you read my review of AOMEI Backupper, the backup solution I’ve been using for years. The free version is enough for most users, so no need to buy the paid version, if you don’t need the advanced features.