- PowerPoint animations don’t have to be boring because you can insert attention-grabbing elements or even YouTube Videos.
- Learn how to embed a Youtube video in PowerPoint the correct way.
- You can even control when the video starts playing, but other options are missing.

PowerPoint is probably the most popular presentation application out there. It’s included in all versions of Office 365 (actually Microsoft 365) and is the de-facto slide-making app in a lot of places.
You may not agree with presentations in general, but you can’t deny PowerPoint is popular.
In PowerPoint, you can insert a ton of objects, not just images and text. Video certainly is part of the modern Internet, so it should come as no surprise that you can even embed online videos, not just from YouTube.
Learn about the most used PowerPoint keyboard shortcuts and, how to change slide size.
How to Insert a YouTube Video into PowerPoint
This guide works not only for YouTube but also for other online video services. The procedure is identical.
Microsoft PowerPoint compatible online video providers: YouTube, SlideShare, Vimeo, Stream, Flip.
1. Open Youtube and find the video you want to embed in PowerPoint.
2. Copy the clip URL from the browser address bar. You can’t use the video embed code in PowerPoint.
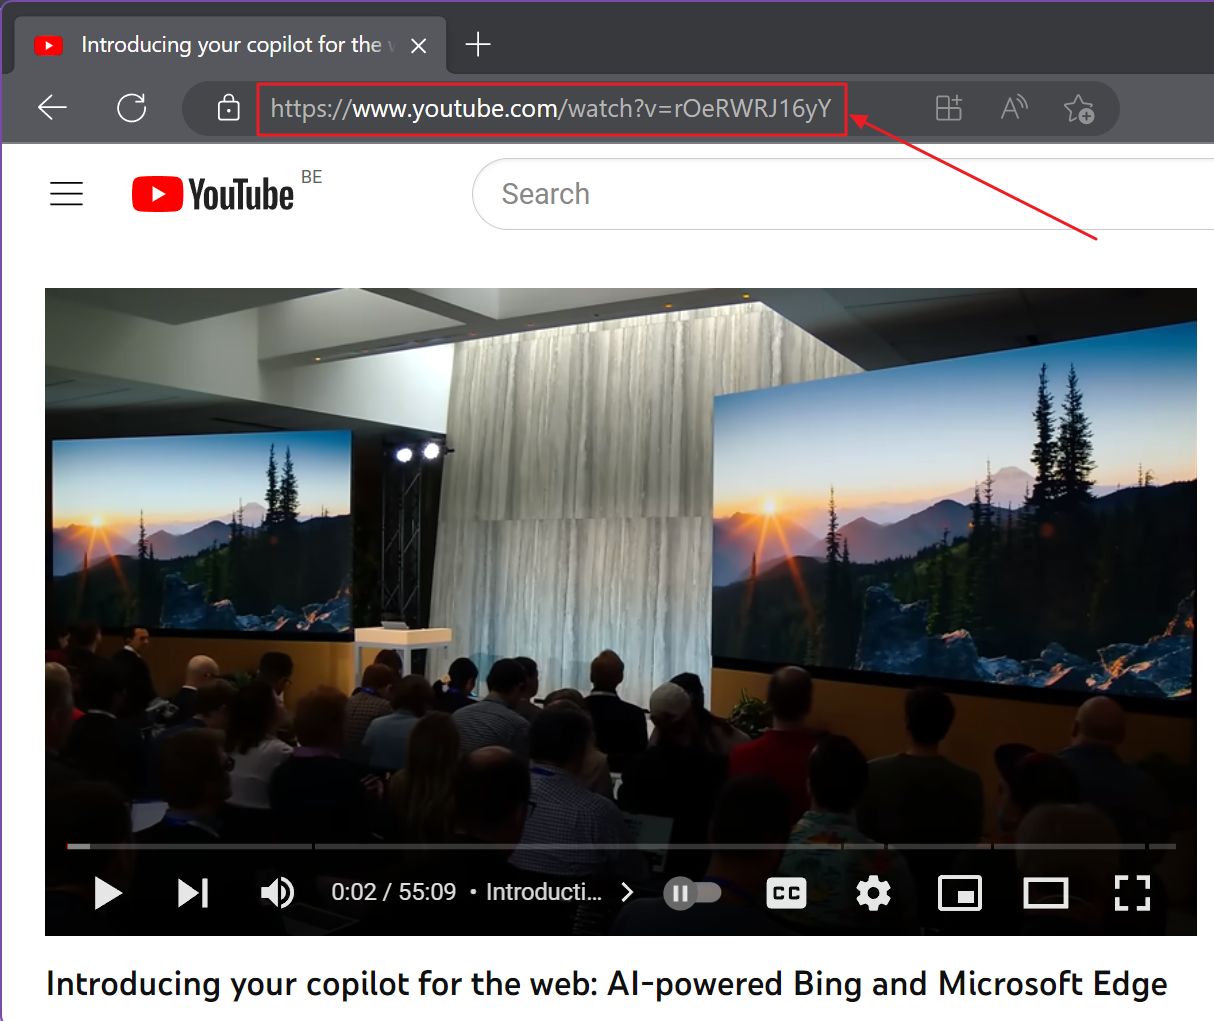
3. Open an existing PowerPoint presentation or create a new one.
4. Select the slide you wish to add a video to.
5. Navigate to the Insert tab in the top ribbon interface.

6. At the right there’s a Video button. Click on it and a new menu will appear. Select Online Videos.
You may need to resize the PowerPoint window horizontally to show the Video button.
7. A new popup window will show up. There’s a long text field at the top.
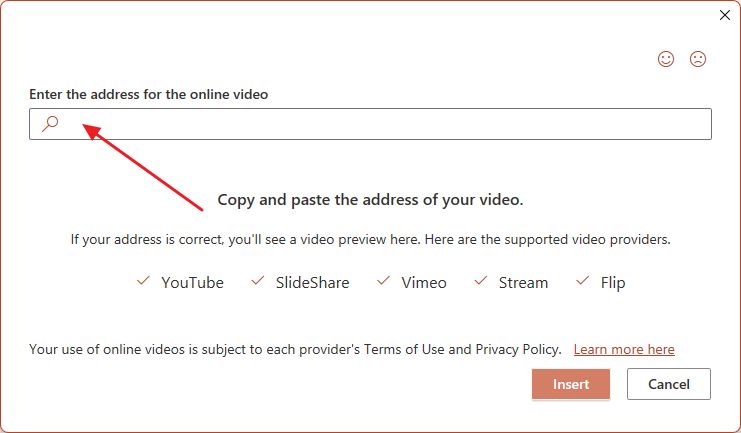
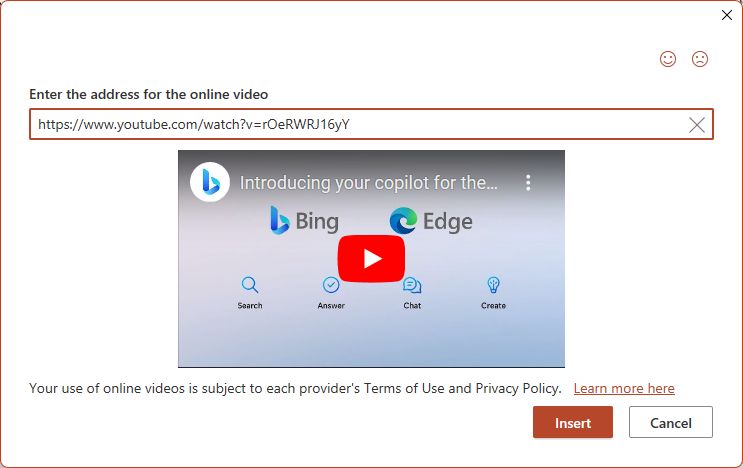
8. Paste the YouTube video URL. Wait a few moments while PowerPoint retrieves the video thumbnail from YouTube. Confirm with Insert.
9. The video will be added to the current slide. If you click once on the video you will select the new object. You can drag from inside to reposition the thumbnail or drag from the round dots to resize while automatically keeping the video aspect ratio intact.
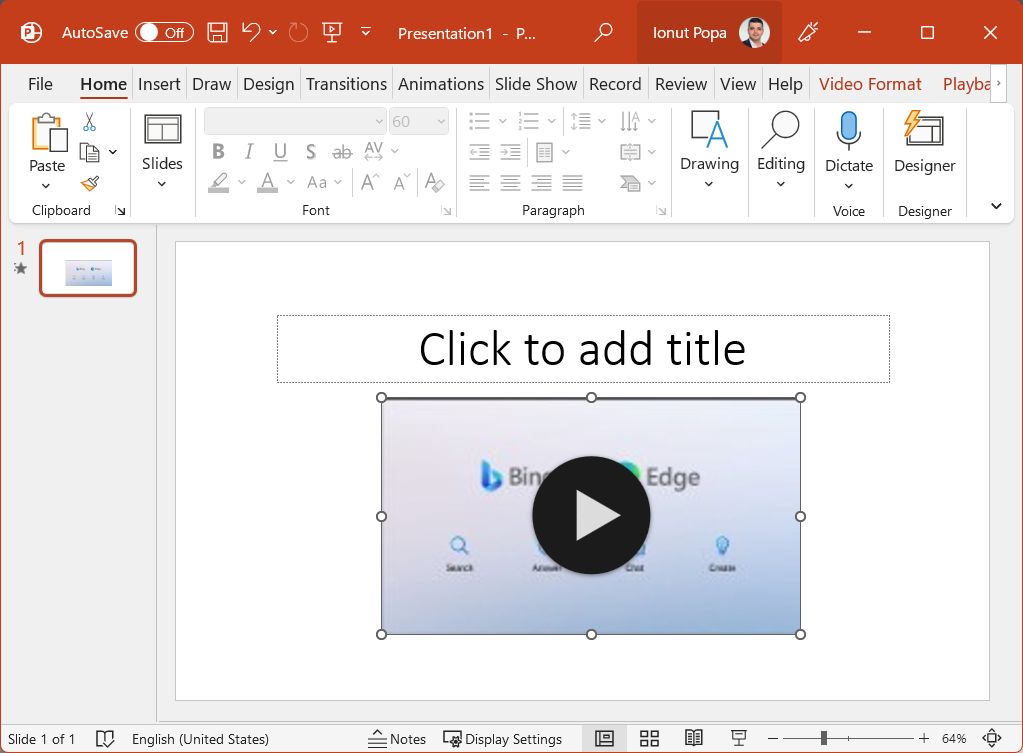
10. Double-click on the video thumbnail to start playback. This action will also add two new red tabs to the ribbon interface at the top.

- Video Format – mislabeled, because these settings only affect the video thumbnail, not the video itself.
- Playback – here’s where you would normally adjust the video playback settings. For online videos, you can only choose to start automatically, on click sequence while you’re in a presentation.
You can’t change the looping options, fullscreen, fade, trip the timeline, or anything like that. These options are working only with locally stored videos, unfortunately.
Downsides of embedding YouTube videos in PowerPoint (vs local video files):
- You need an Internet connection when you are presenting if you want the video to play.
- If the video gets taken down it won’t play inside your PowerPoint presentation.
- You don’t have fine control of volume, looping, and captions as you would with locally stored videos.
- There’s no option to attach the video to the PowerPoint file to ensure playback in any situation.
Keep in mind these downsides. If you really want your audience to view the clip contents it’s best to use locally stored videos. Yes, these will increase the space needed on disk, but it’s the most reliable way to add and play video in a PowerPoint presentation.
