- Windows Memory Diagnostic is one of the many tools included in Windows that help diagnose and troubleshoot problems.
- You can quickly scan your RAM memory for problems with the Windows Memory Diagnostic Tool.
- Learn how to run Windows Memory Diagnostic, how long it takes, and where to find the test results.

Hardware problems are not fun especially if they happen (seemingly) at random. From my experience, problem with the system RAM are the most hard to troubleshoot properly.
If you’re experiencing weird problems with your computer (think crashes, freezes, blue screens) and you’ve ruled out obvious problems, such as overheating components, with one of these monitoring programs, you can run a RAM diagnostic using the Windows Memory Diagnostic utility.
For other ways to fix or diagnose your computer don’t forget to check our dedicated troubleshooting section.
What is Windows Memory Diagnostic Utility and What Does It Do?
Windows Memory Diagnostic is a system utility that comes preinstalled in Windows 10 and Windows 11. Windows Memory Diagnostic runs in an isolated environment outside Windows and will test your RAM memory by running a series of specific tests such as LRAND, Stride6, CHCKR3, WMATS+, WINVC.
A test result will be presented the next time you login into Windows. While Windows Memory Diagnostic is not the most popular RAM diagnostic tool (MemTest86 may be the most known utility), it’s really easy to use and can be your first choice if you believe your RAM my be failing.
How to Run Windows Memory Diagnostic
Let’s see how to start and run a Windows Memory Diagnostic test.
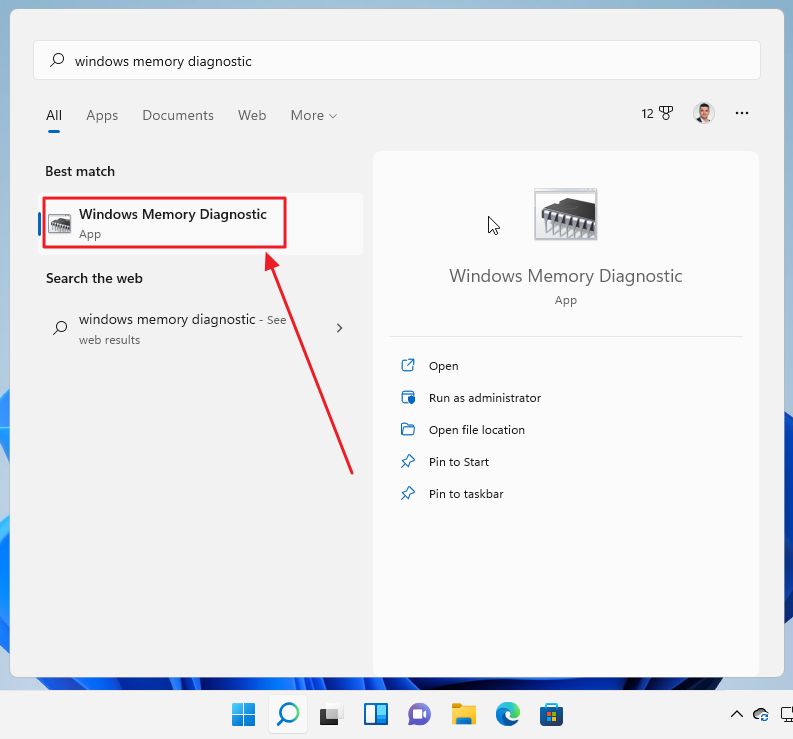
1. First, open the Start menu and type Windows Memory Diagnostic. Select the first result to launch the utility.
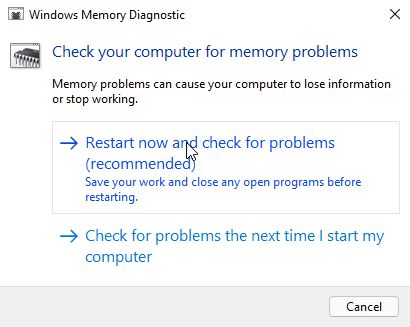
2. The tool offers you just two options options: (1) restart the system immediately and run the check, or (2) perform the check during the next restart. For the purpose of this test we’ll go with the first option:
3. Your PC will restart and before loading Windows will stat the Windows Memory Diagnostic tool automatically. Old folks like me will find this DOS style interface familiar:
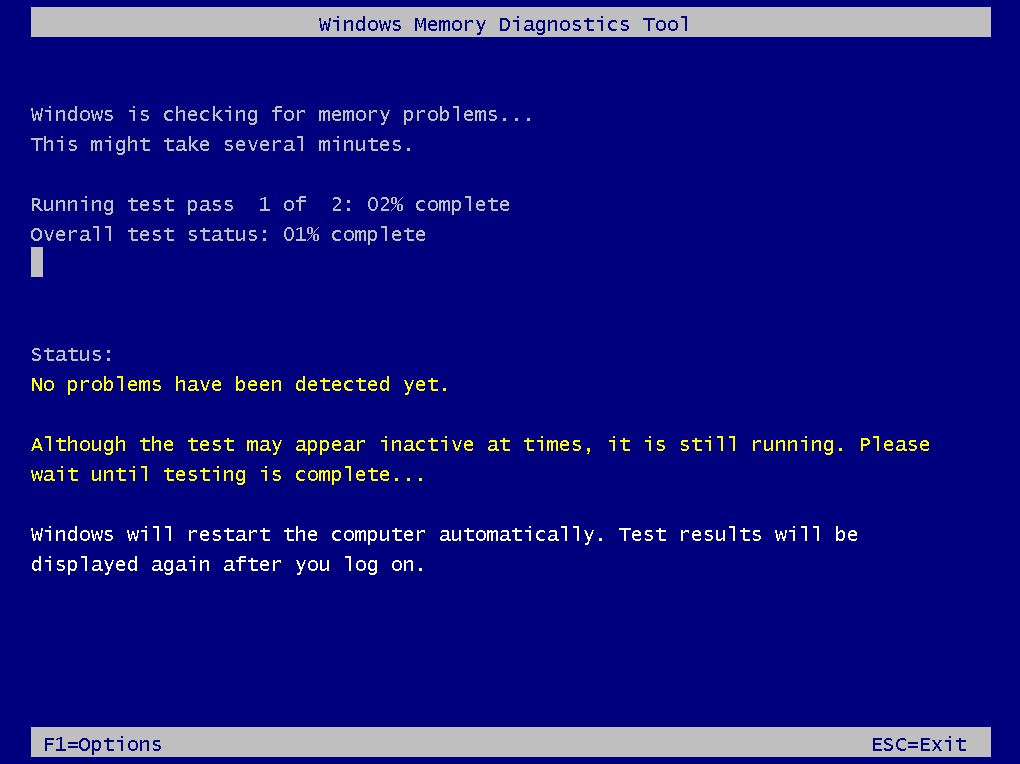
While the test completes, eat something, or drink a cup of coffee, because this check will take 10-15 minutes, at least, depending on how much RAM you have installed in your computer and what settings you choose.
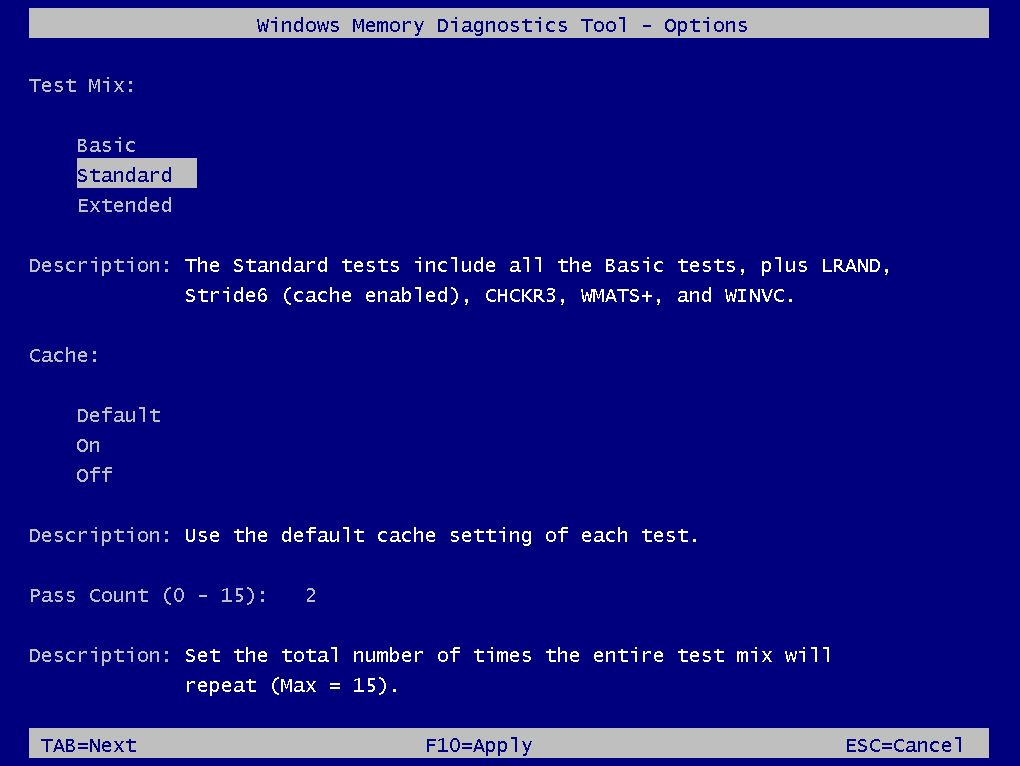
3.a) If you press F1 the moment Windows Memory Diagnostic starts you get to change the default options:
- Test mix: Basic, Standard, and Extended (lets you choose how many different types of tests are run).
- Cache: Default, On, or Off.
- Pass count: choose how many times the test is run (pick between 0 and 15, the default being 2).
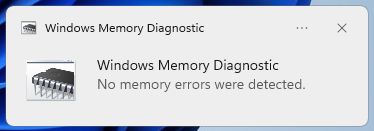
4. The computer will restart automatically, and a few moments after logging in, a simple notification will let you know if the text found any problems. Most of the time you’ll see this small notification.
How Long Does Windows Memory Diagnostic Take
I’ve run Windows Memory Diagnostic with its default settings on a machine with an 8 thread CPU and 8 GB RAM, at default settings (Standard test mix, Default Cache, 2 Passes) and it took about 10 minutes for the test to complete.
A faster CPU may help speeding up the diagnosis, but 16 GB RAM will double the time needed for the test to finish. 32 GB RAM will double the required time again. You get the picture. Also, selecting more than two passes will also increase the finish time.
For serious tests I don’t think two passes are enough.
Windows Memory Diagnostic is not something you can run in a few seconds. And that’s a good thing, because you want a thorough diagnostic that has a chance to actually find problems, if they exist.
Also, if you have two or more sticks of RAM (most computers do), and the first test shows problems you will have to test each stick individually, to isolate the exact stick that’s faulty.
Who said troubleshooting computers if fun?
Find Windows Memory Diagnostic Results with Event Viewer
Now, in case you’ve missed the notification after you’ve run Windows Memory Diagnostic there’s a way to find the results at a later date using the Event Viewer utility. Here’s how:
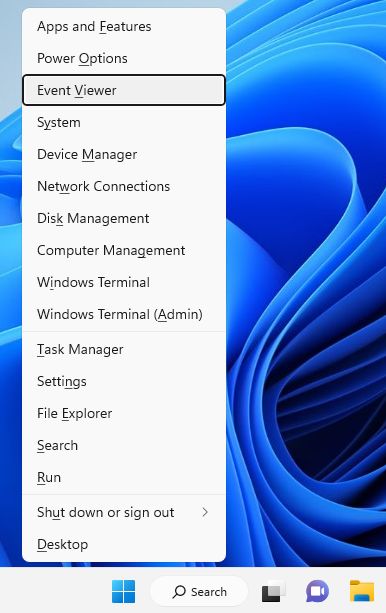
1. Right-click on the Start menu and from the WinX menu select Event Viewer.
2. Navigate now into the left side panel to: Event Viewer (Local) > Windows Logs > System.
On the center panel there’s a scrollable list of various system events. By default they’re sorted by date and time. Look for MemoryDiagnostics-Results in the Source column.
Selecting an event will show details in the bottom center panel. What you want to see is The Windows Memory Diagnostic tested the computer’s memory and detected no errors.
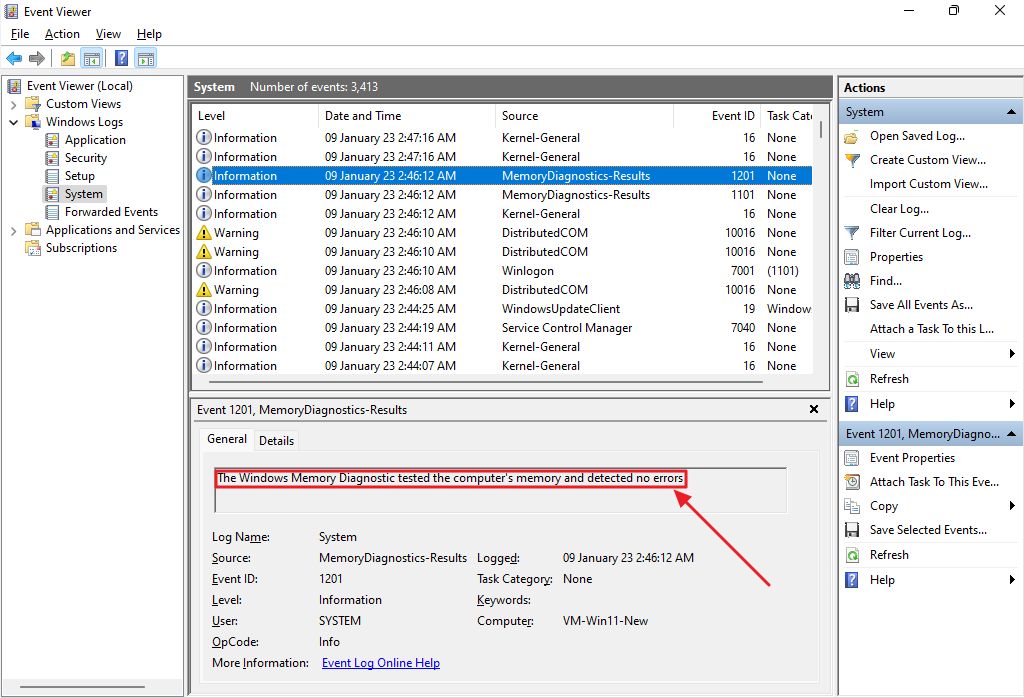
As you can see, there are two events, one for each test pass. If you still can’t find the event press Ctrl + F and search for MemoryDiagnostics with no spaces.
If the Windows Memory Diagnostic tool finds errors don’t jump to the conclusion that your RAM is faulty, especially if you’re overclocking. Being on the edge of stability can easily cause errors, so dial back your overclock, or run the test with RAM at stock settings.
Before ending, I want to emphasize the fact Windows includes tons of small utilities by default.
They may not be fully featured as other dedicated programs, but they’re already included in Windows and can be really helpful, if you take the time to learn how they work. And I’m not talking only about diagnostic tools.