- You can easily check CPU, Memory, Disk, and Network activity usage using the Windows Resource Monitor utility.
- The Resource Monitor app comes bundled with Windows, so there’s no need to install a third-party app.
- Learn how to open and how to use Resource Monitor in Windows to find and close apps that are using too much of your system’s resources.
- Also, find out about the differences between Task Manager and Resource Monitor.
Windows includes quite a few utilities that monitor processes, running tasks, and resource allocation. One of the most underrated ones is the Resource Monitor app.
Unlike other system monitoring utilities, the Resource Monitor hasn’t been updated with Windows 11, so it looks the same and works pretty much the same as it did when it was first launched with Windows Vista.
That’s not really a bad thing actually. I prefer simplicity rather than adding more features to make something look more modern, updated, refreshed, or whatever you want to call it.
Actually, if I’m not mistaken, at some point you could set Resource Monitor in a minimal window mode (no borders and title bar) that you could drag anywhere on the desktop. Since Windows 10, that’s not possible anymore. It’s a shame, because it was quite useful sometimes.
Let’s dig in:
What is Resource Monitor?
Resource Monitor is a Windows system utility that will allow you to check how many resources are currently used by running apps.
You can easily use Resource Monitor to find apps that are taking too many resources and are slowing down your system or killing your laptop battery life.
Resource Monitor is also able to display time based graphs and can even kill rogue processes, just like the Task Manager.
What Information is Displayed by the Resource Monitor Panels?
In total there are five tabs within Resource Monitor:
- Overview – includes the summary of what’s happening with your CPU, RAM, Disks, and Network cards
- CPU – a detailed view of your CPU processes and services, plus graphs for CPU as a total and all CPU cores usage.
- Memory – a detailed view of the RAM usage, split by operating system memory pools: commit, working set, shareable, and private
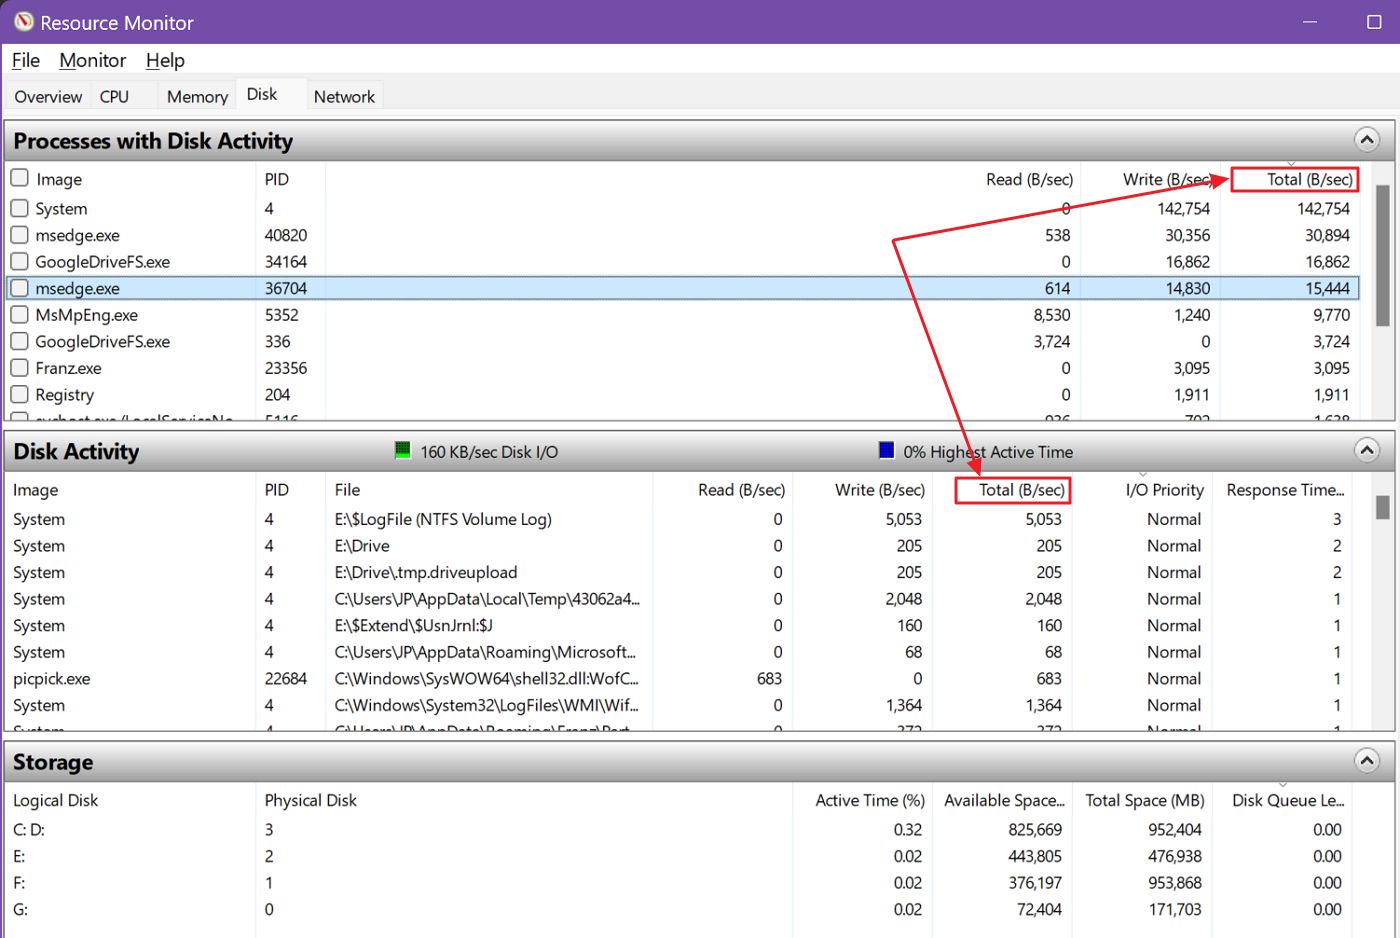
- Disk – current disk activity per process, system services, and physical disks, plus time based graphs
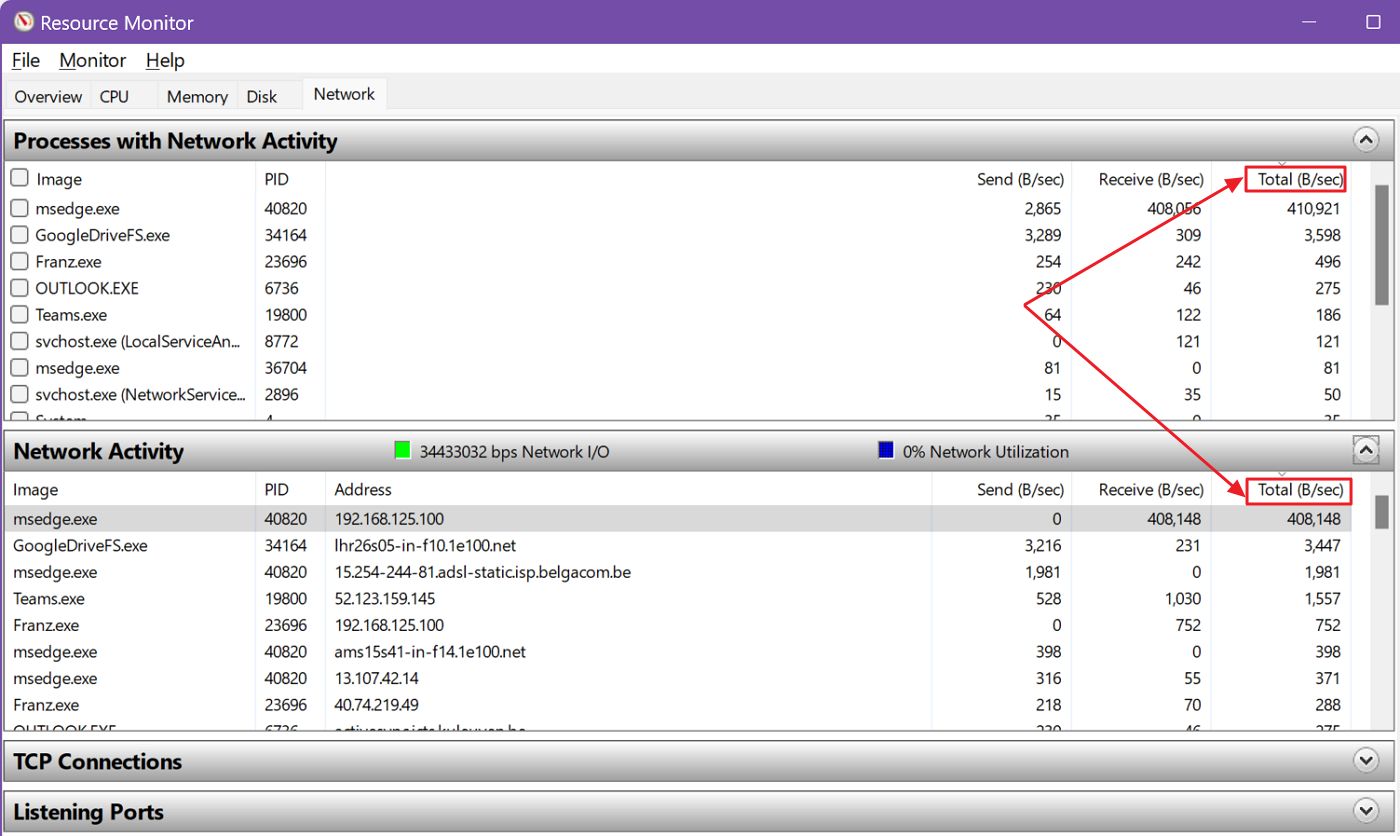
- Network – detailed view of total, received and transmitted bytes per process, TCP connections, and ports used by your apps and processes.
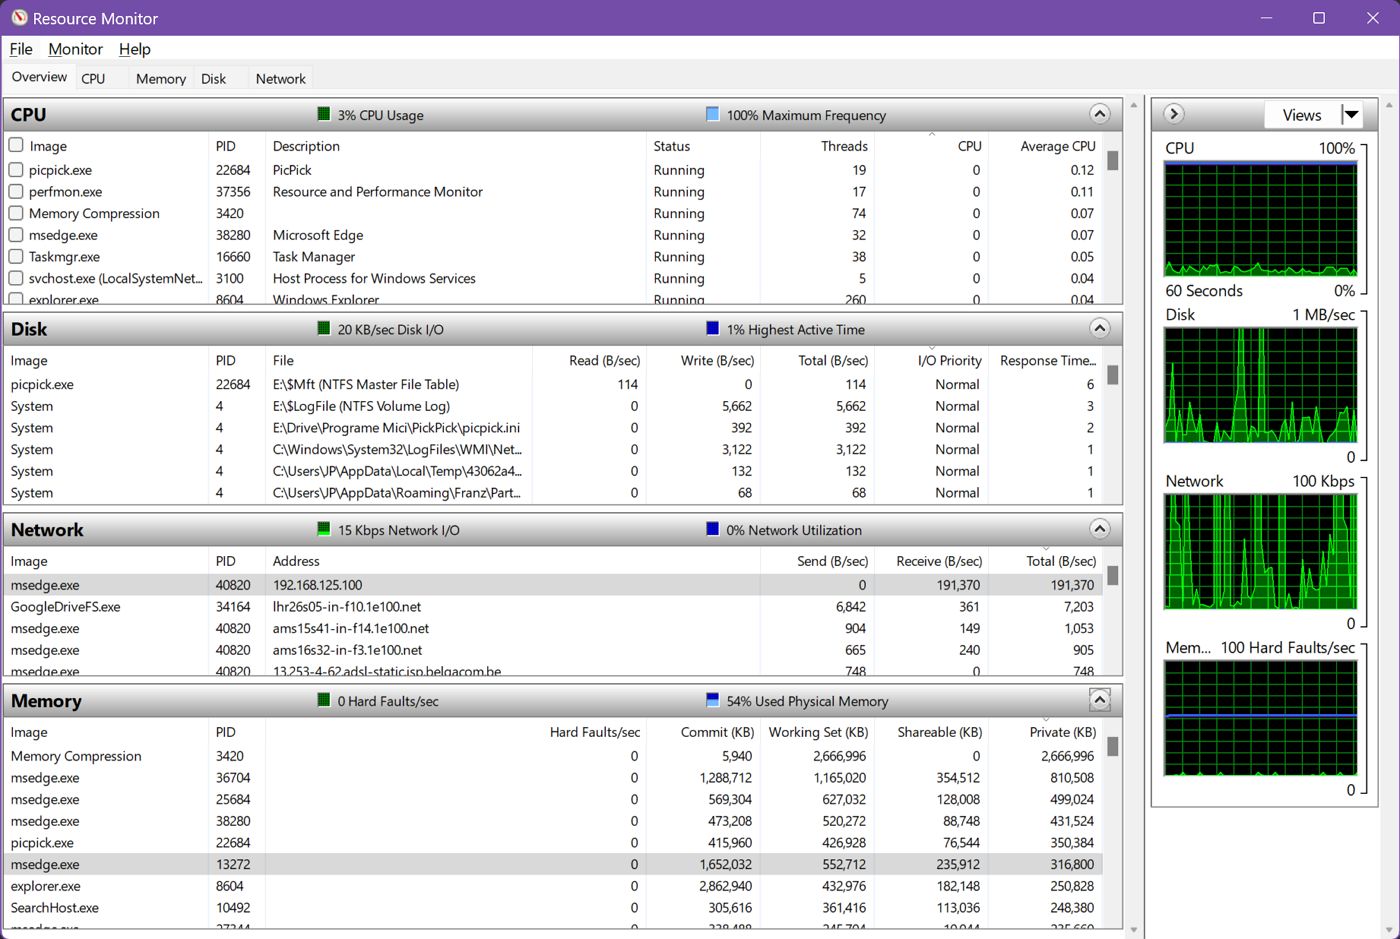
Be default, when you open Resource Monitor for the first time, only the CPU stats is expaned in the Overview tab. Use the down facing arrows to expand the other sections as well.
By clicking and dragging the four sections separators you are able to resize these panels to your liking.
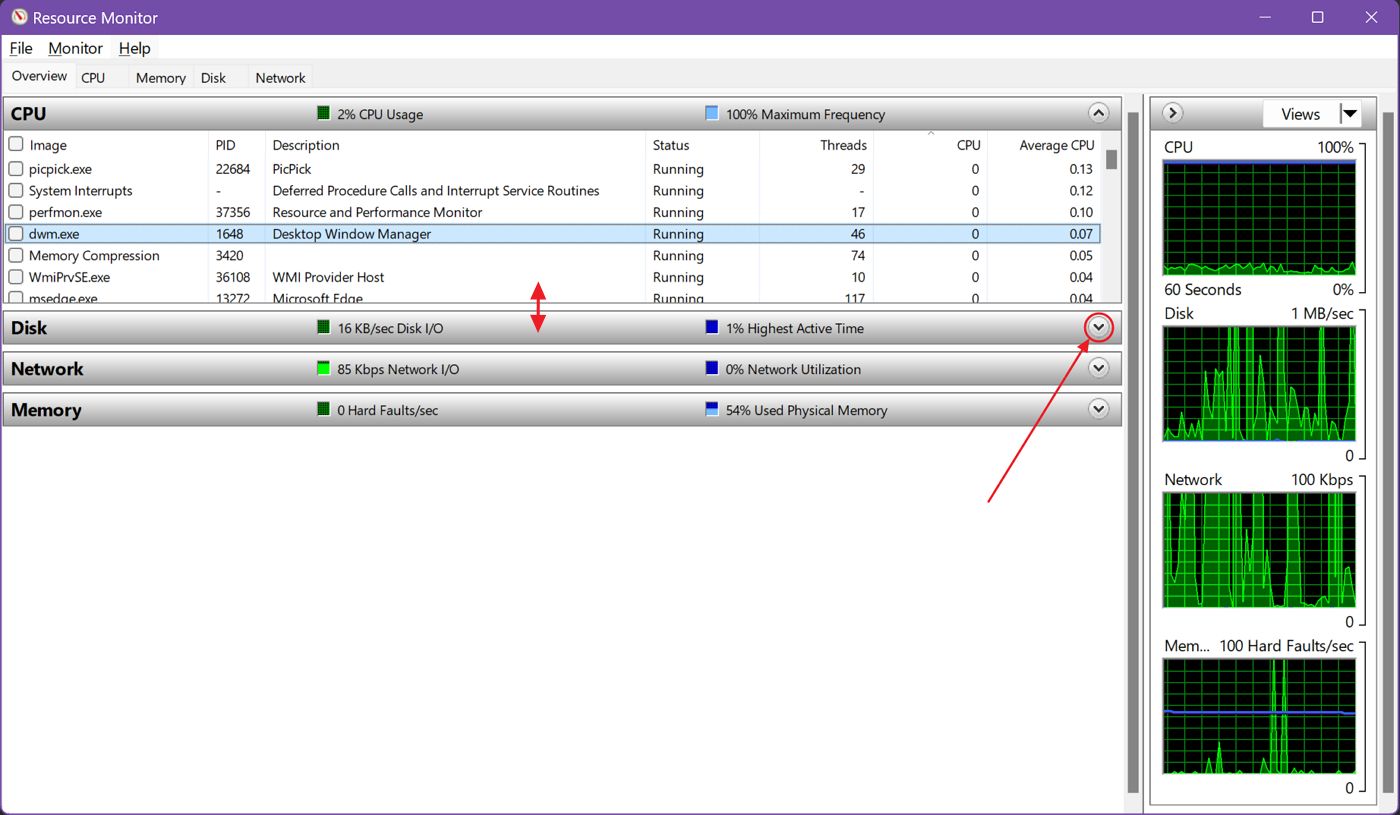
The right hand side column shows graphs for the four resources: CPU, Memory, Disk, and Network.
Click on the View button to select a size for each graph. You can also resize the entire graphs column by clicking and dragging the left side margin.
Resource Monitor vs Task Manager?
At this point you may wonder what’s the difference between Resource Monitor and Task Manager. And you would be right.
On paper both seem pretty similar, but the Task Manager doesn’t include as many details when it comes to the resources used by each app and process. Startup items are also controlled from the Task Manager.
On the other hand, Resource Monitor doesn’t include hardware stats, so you won’t find out here the frequency the CPU is running at, RAM speed, GPU VRAM usage, and similar info.
My take on Resource Monitor vs Task Manager, what to use and when is as follows: if you can’t find the app that’s slowing down your system with Task Manager, it’s time to switch to the Resource Monitor for a deeper dive.
How to Open Windows Resource Monitor
I’m going to show you two very quick ways to open Resource Monitor in Windows:
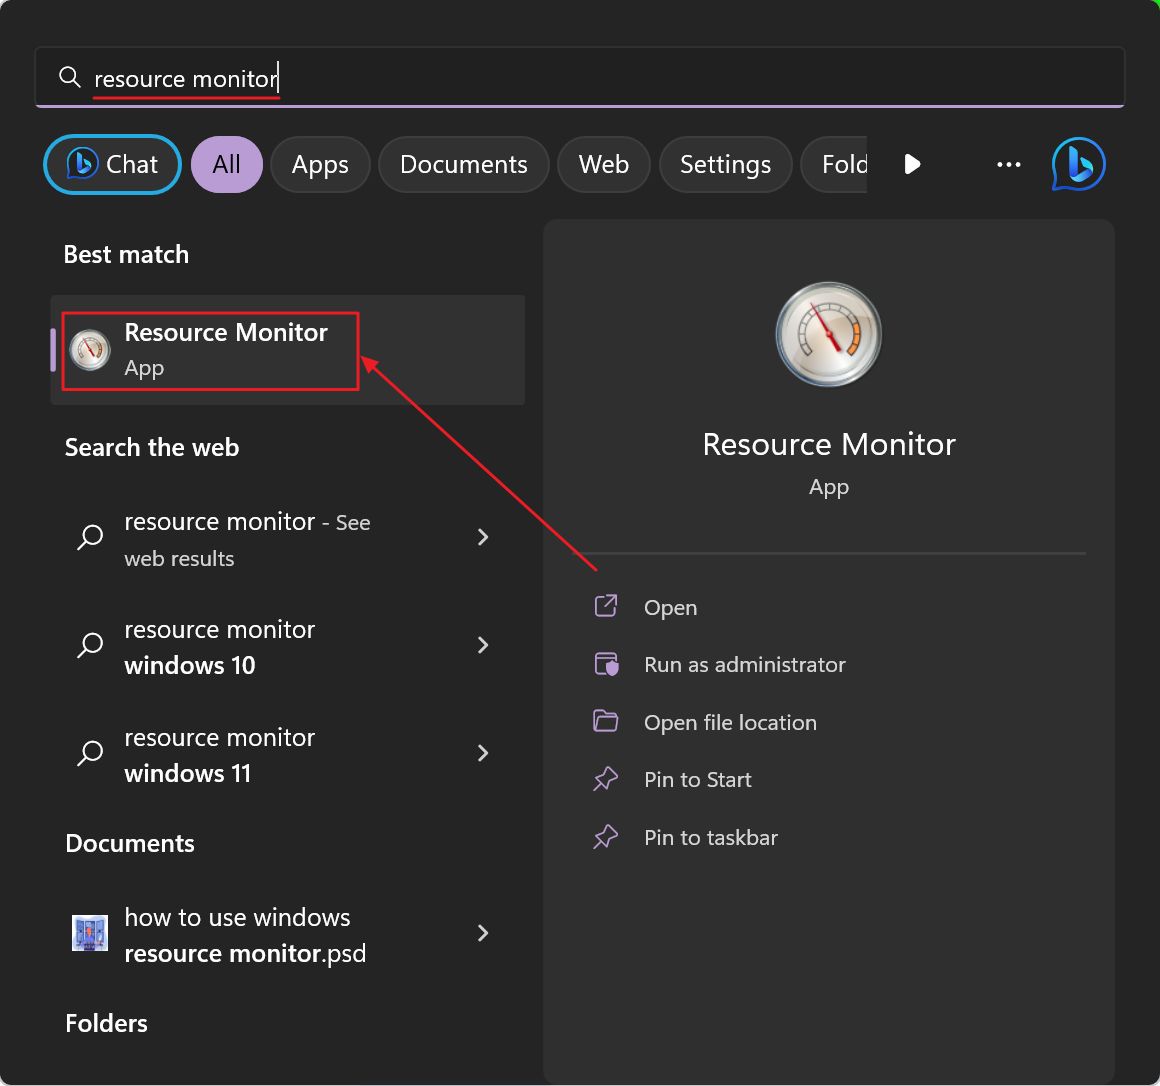
- Open the Start Menu by pressing the Win key.
- Search for Resource Monitor or resmon.
- Open the first result.
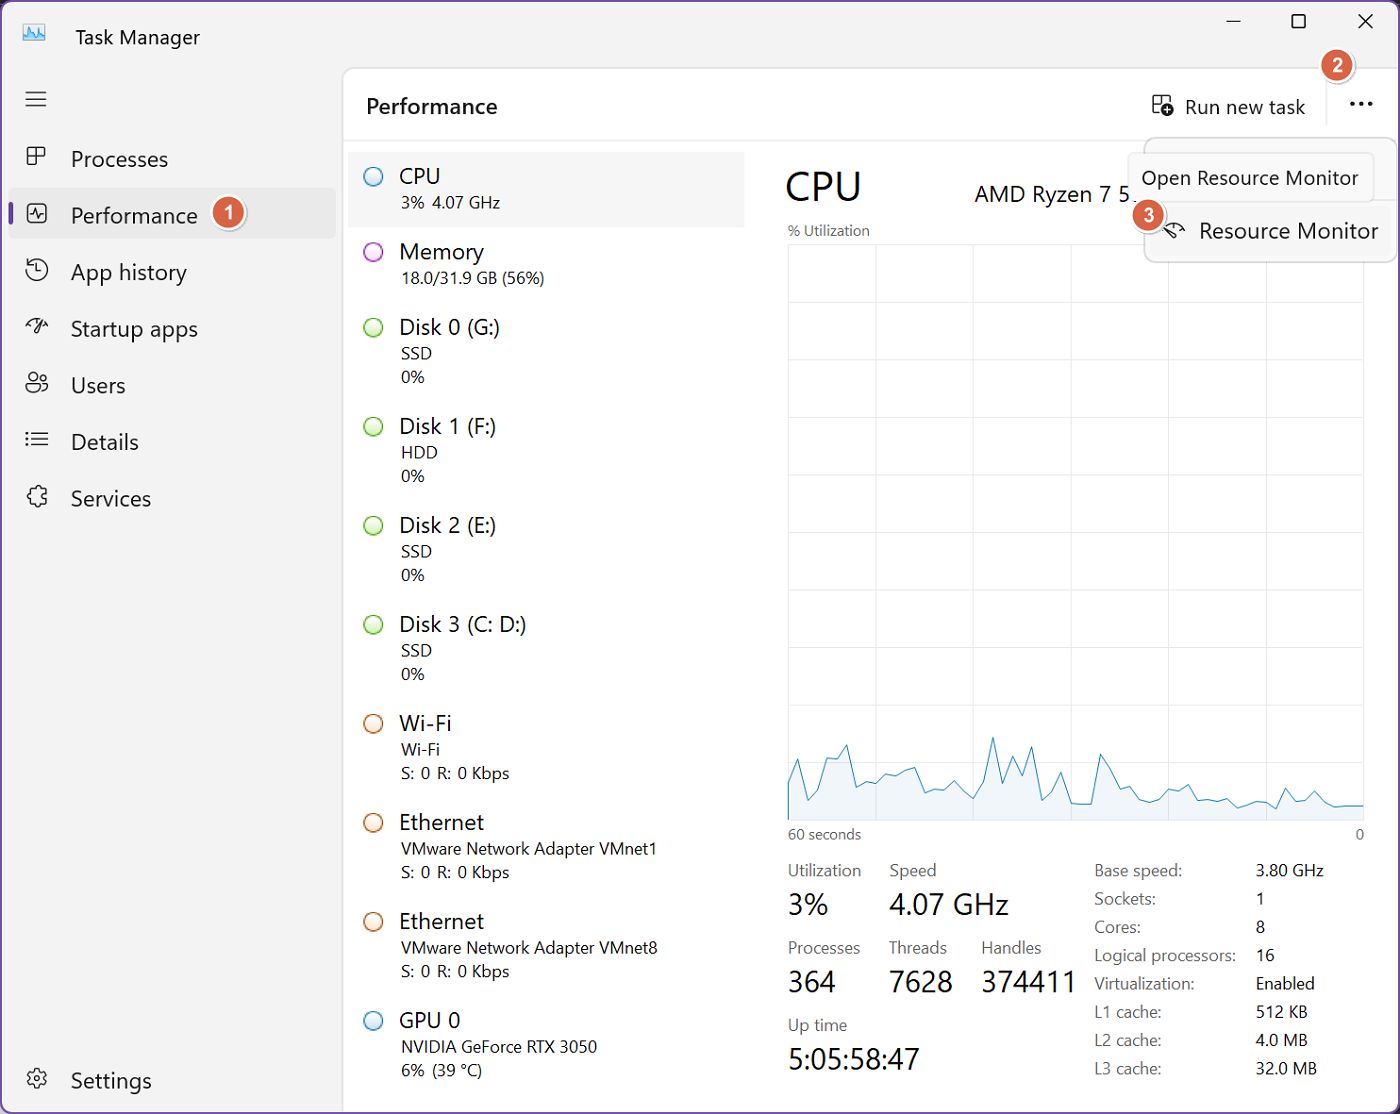
Method 2: Open Resource Monitor from Task Manager
- Press Ctrl + Shift + Esc to open the Task Manager.
- Navigate to the Performance tab.
- Click on the upper-right three-dot menu.
- Select the Resource Monitor link.
Guess what, this method alings with my view on how and when to use Resource Monitor.
How to Use Resource Monitor to Find Apps with High Usage?
For the most part, you can just use the main Overview tab to find out processes (basically apps) that are consuming too many resources, potentially slowing down your system.
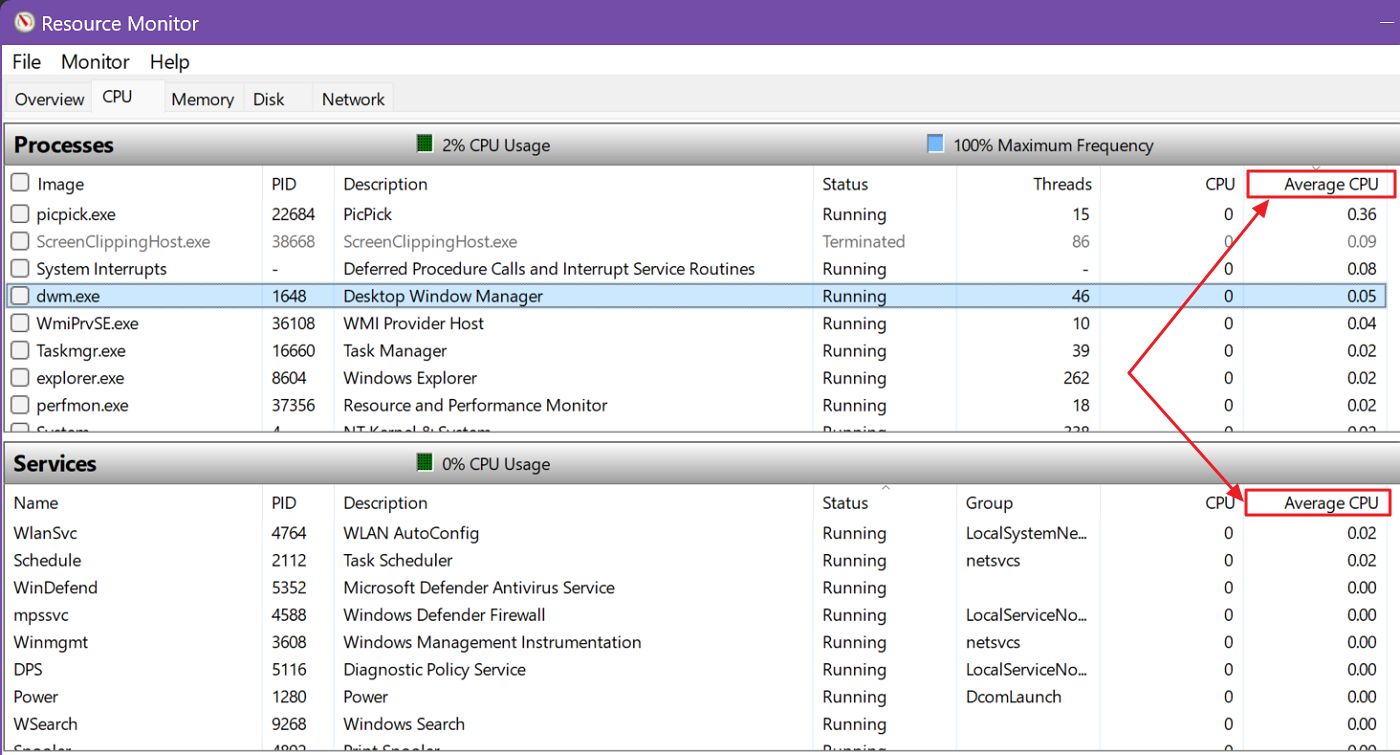
I suggest you go through each individual section, and always select to sort each table by:
1. CPU – use the Average CPU sorting for both Processes and Services.
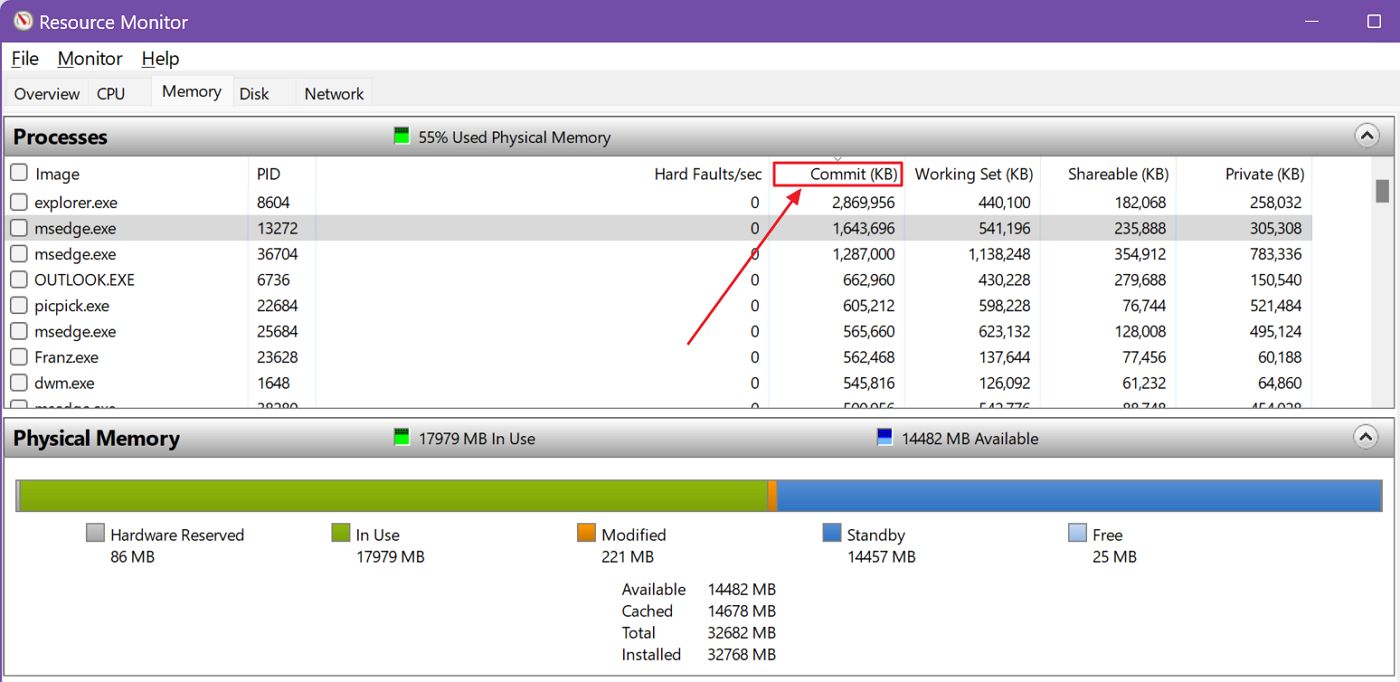
2. Memory – use the Commit or Working set columns.
3. Disk – use the Total (b/sec) sorting method for both Processes with Disk Activity and Disk Activity.
4. Network – use the Total (b/sec) sorting method for both Processes with Network Activity and Network Activity.
This is how I use Windows Resource Monitor when the Task Manager just doesn’t cut it (I’ve shown for example how to use Task Manger to check memory usage). For the most part I don’t need to resort to the Resource Monitor. Resource hogging apps are usually easy to spot with the Task Manager.
Sorting this way, from the most used to least used will reveal the apps, processes and services that either have a problem, a bug that lets you know it’s time to restart the PC or just the problematic task. Or worse, that you should start looking for an alternative that’s more frugal.
How to Use Resource Monitor to Stop Rogue Apps?
Speaking about restarting apps, it’s so easy to just stop any process by using Resource Monitor that you don’t need a detailed guide for that.
Once you locate the process, app, or service that you want to shut down just right click on the entry and select End Process from the contextual menu.
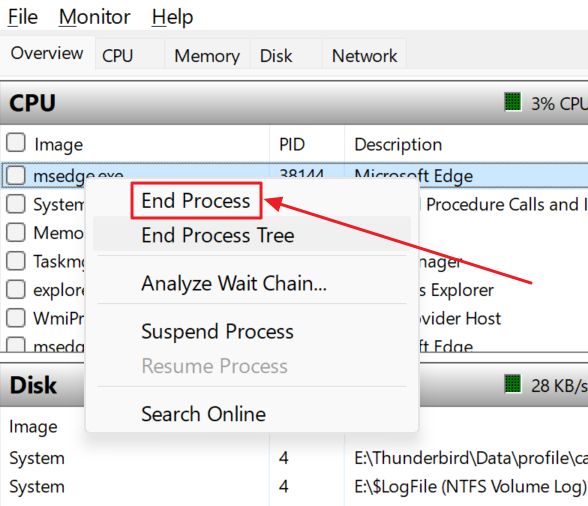
Some processes depend on others (you can see these details if you click on the Analyze Wait Chain), so you could select the End Process Tree option to stop them all at once.
For the most part, End Process does the trick.
If you’re unsure which process name corresponds to which app you can select Search Online, which will perform a Bing search for the executable name (the one ending in .exe).
You may get lucky, or just more confused. Don’t expect a very intelligent search. It’s not the case.
And with this we’ll end this article. I hope you now have a better idea of what Resource Monitor is and how it can be useful for you. Let me know if you have any questions.