- Did you know Windows 11 is capable of converting speech into text, displaying live captions automatically for any audio?
- You can set up Windows to display captions for any app that outputs sound, and optionally enable captions for your own voice input via a microphone.
- Learn how to turn on live captions in Windows 11 and how to tweak the caption appearance and behavior.
Say what you want about Windows, about the direction Microsoft is pushing their operating system, but you can’t deny new features are coming at a very fast pace.
One of the things the latest major update is the ability to turn on Live Captions for any audio input. Intriguing, right?
For more hearing aid options in Windows read our other article.
What Are Live Captions and How They Work in Windows?
Live Captions are automatically generated text to speech transcripts for audio streams playing on your Windows computer. Live Captions will automatically transcribe speech coming from videos and online meetings. It’s even possible to transcribe your own voice input via any microphone attached to your computer.
Live Captions will display transcribed text into a captions window. You can reposition and resize the window however you like.
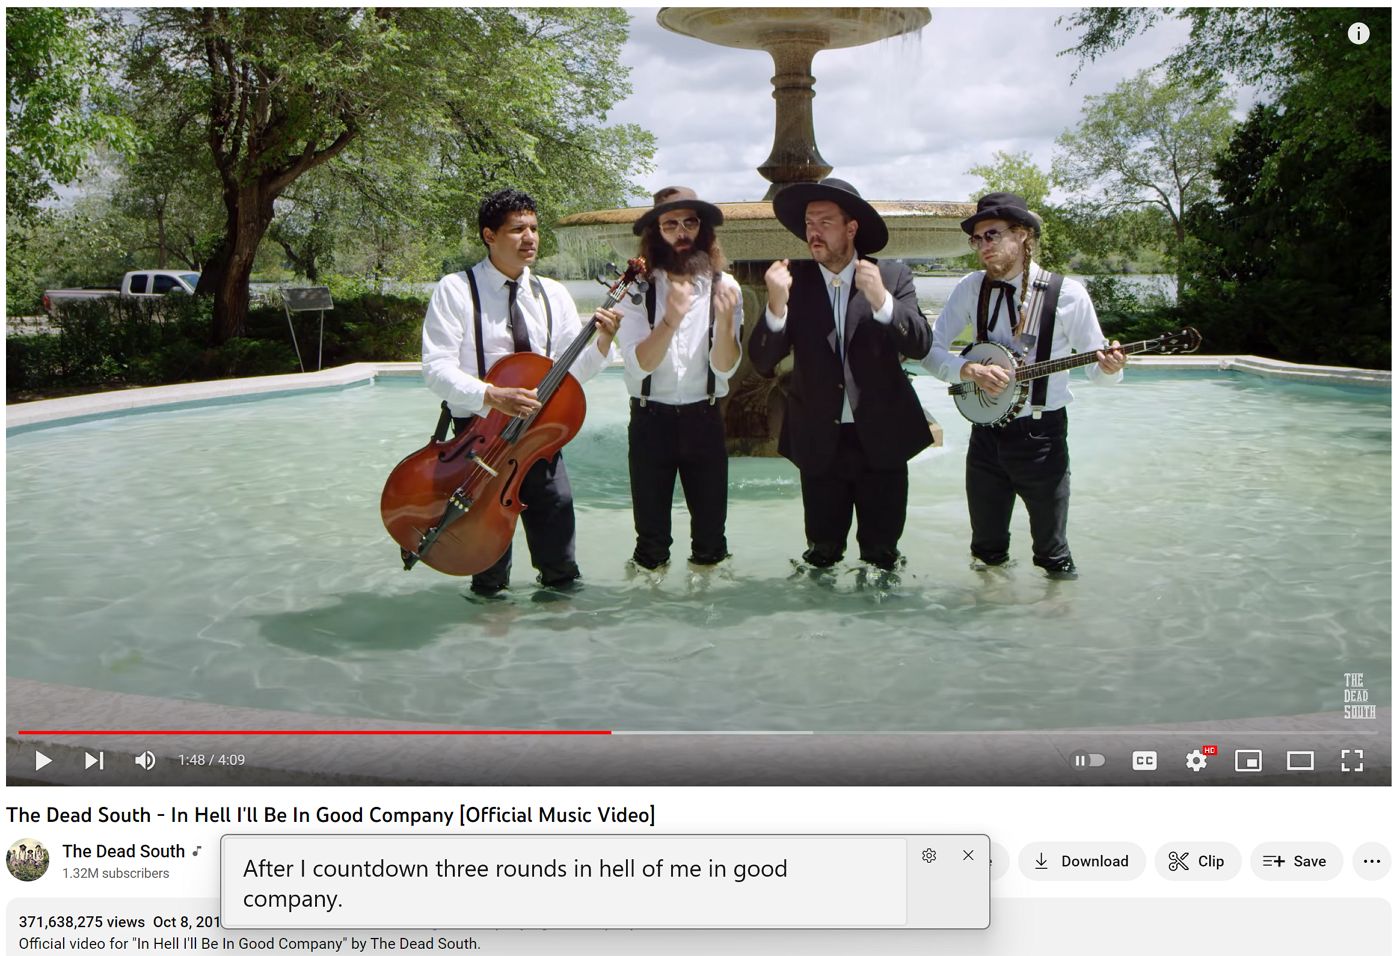
The captioning is done automatically, and works even with songs, not just with regular voice. It’s not always very accurate, but it does the job most of the time.
One irritating thing is that you have to select the captioning language before playing the audio.
There’s no automatic language detection mode. So, if you’ve selected English as caption language and the audio source is in French, which is a supported language, you won’t see any captions. No warning message will tell you what’s (not) happening. The audio language must match the caption language you select.
The second drawback of the current Live Captioning function is there’s no automatic translation option. I don’t know why, but I was expecting Windows to caption all supported languages, then display the text in the language of my choice.
Looking for speech to text? Windows can do that with Voice Typing
System Requirements
For now, Live Captions are limited to Windows 11 22H2 or newer builds. If you can’t see the option in Windows, it means you’re running an older version.
If you want to do a quick Windows version check here’s what you need to do: open the Start menu, type winver and press Enter. A popup similar to this one will show up.
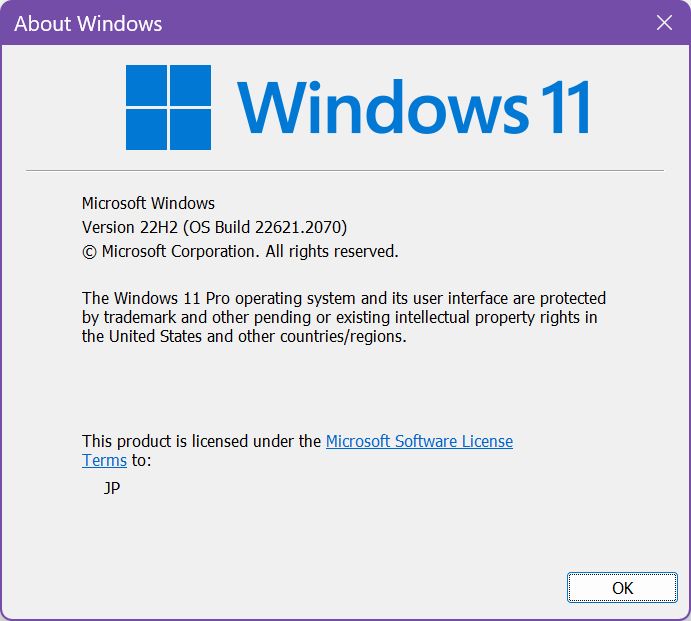
Check the Version. If you see 22H2 (or higher numbers) you’re fine.
Languages Supported by Live Captions in Windows
Live captioning is only available in the languages that support speech recognition in Windows. For now, the Windows 11 live captioning is only supported for some, but not all dialects of the following languages:
- English
- French
- Chinese
- Danish
- German
- Italian
- Korean
- Portuguese
- Spanish
Yes, it’s not a very large list. Support may be extended to other languages in the future, but that’s not a guarantee.
How to Turn on Live Captions in Windows 11
As with many Windows features, there are multiple ways to activate them. The same is true for the Live captions. Here are three methods to turn Live Captions on in Windows 11. Pick the one you like.
Method 1: Windows Settings App
1. Press Win + I to open the Settings app.
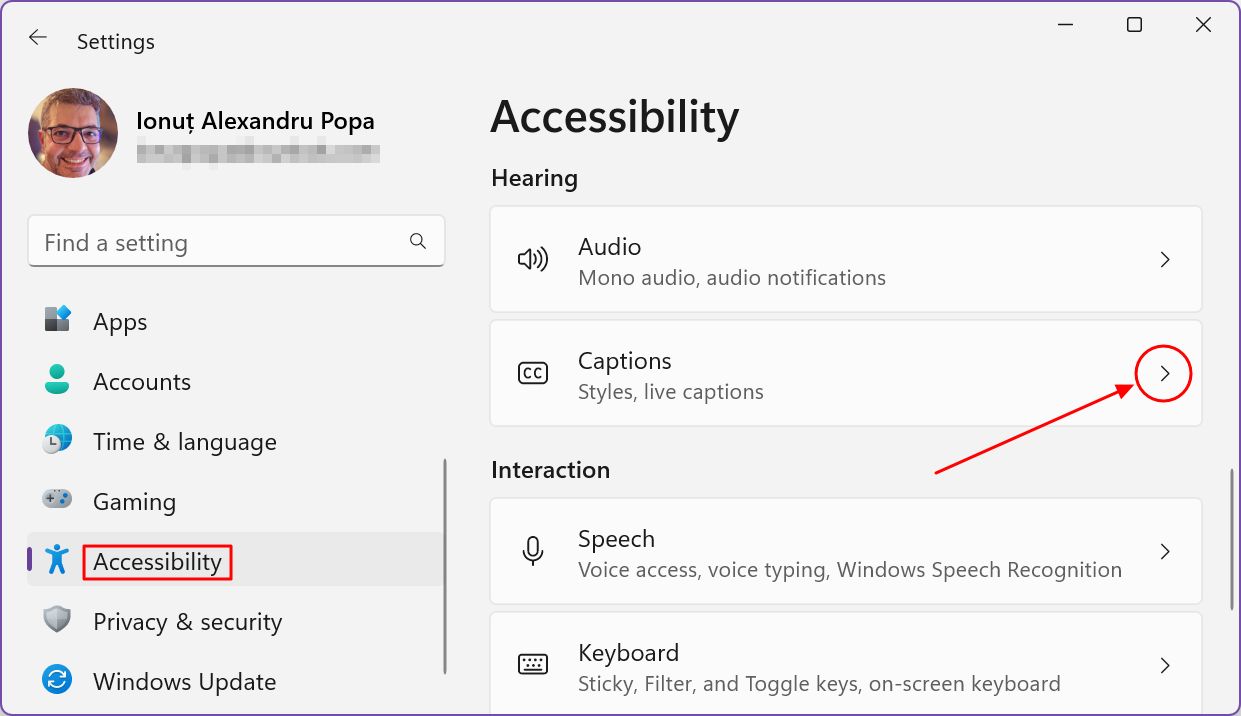
2. In the left-menu, navigate to Accessibility.
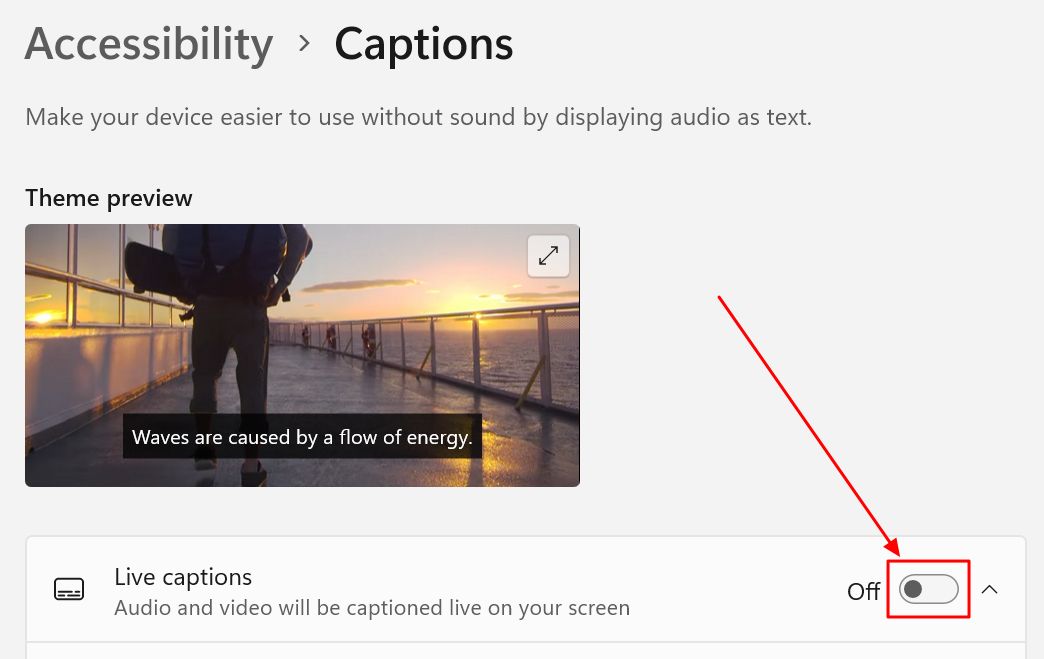
3. Scroll the right-side panel to the Hearing subheading and then click on the Captions option.
4. At the top of the new page, you’ll see a video that plays automatically, highlighting what captions will look like with the current settings.
Scroll past this video and the first option you’ll see is Live captions. Make sure you turn on this toggle to enable live captioning.
5. The first time you open Live captions will display a welcome message. This will let you know that data processing will take place on your machine. Nothing will be sent to the cloud. This is actually great for privacy.
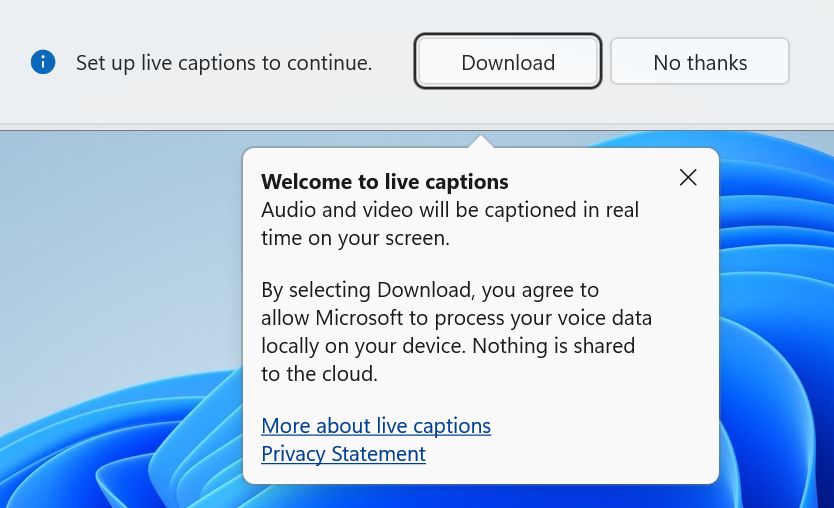
Click Download to let the system download the speech recognition language packs. It shouldn’t take more than a few moments.
6. The Live captions window will show up and will stary displayed captioned text from any audio source playing on your computer. As long as the audio language matches the language you chose for captioning. More on that later.

Method 2: Quick Settings Toggles
A slightly quicker method involves the quick settings toggles from the system tray area.
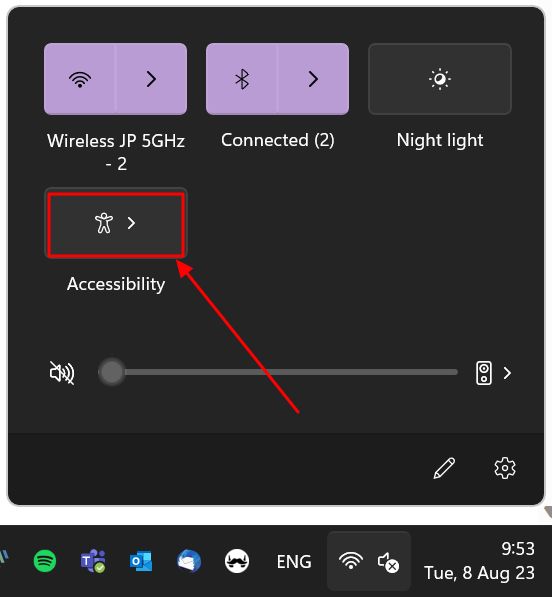
1. Press Win + A to open the quick toggles floating window.
2. Click on the Accessibility icon to expand this section. You may have to add this toggle by clicking on the pencil icon at the bottom-right of this window.
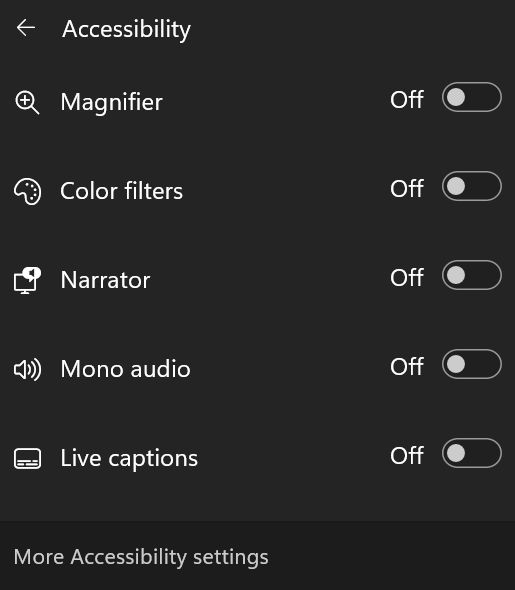
3. You will see a list of toggles for the most important Windows assistive technologies. By default, all are turned off. Near the bottom you’ll find the Live captions toggle.
Enable and you’ll see the captions window pop up on your desktop.
Method 3: Keyboard Shortcut
My preferred method of launching Live captions is, of course, a keyboard shortcut.
The Live captions shortcut is Win + Ctrl + L.
Press the combo once and the Live captioning window will show up once again.
To stop Live captioning just click on the X button at the top-right corner of the window. There’s no option to pause captioning without closing this window. It’s not really needed since a simple keyboard shortcut can toggle it back again quickly.
Live Captions Settings
Out of the box Live captions will work just fine if your default language is one of the supported ones. But what if you want to change some of the default settings?
First, turn on Live captioning. Notice the cogwheel icon at the top-right of the captions window.

Let’s see what it does:
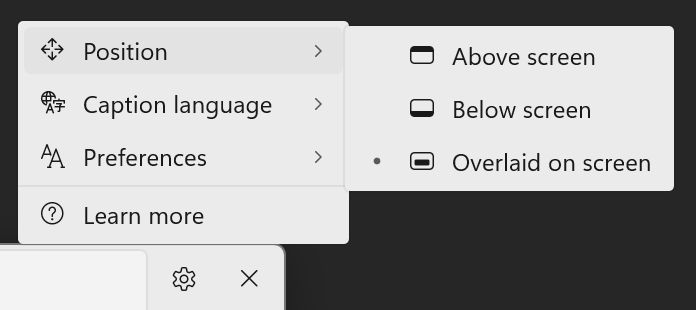
Caption Window Position
The Position option controls the placement of the captions window. There are three options in total:
- Above screen (default) – everything on the main monitor will shift down and the top area of the screen will be filled by the captions window. You can drag from the bottom to resize.
- Below screen – the captions window will be placed above the taskbar, over all active windows. You can drag from the top to resize.
- Overlaid on screen – a floating window that you can reposition on any monitor, and you can resize freely. Note that this window is limited to a maximum size. You can’t make it as large as you wish.
Caption Language Switching
This is where you select the language that will be used for Live captioning. There is no automatic setting for switching between languages.
Even if you have more languages installed in your system, only the ones that support captioning will show up here.
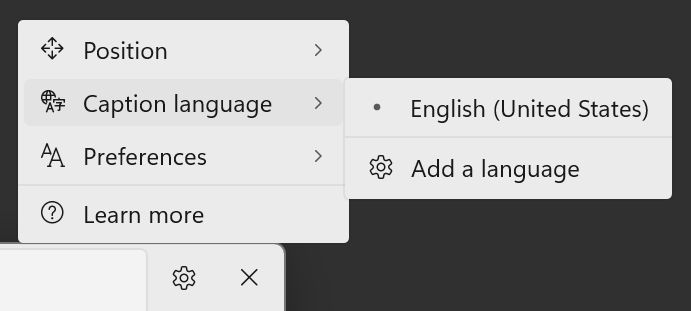
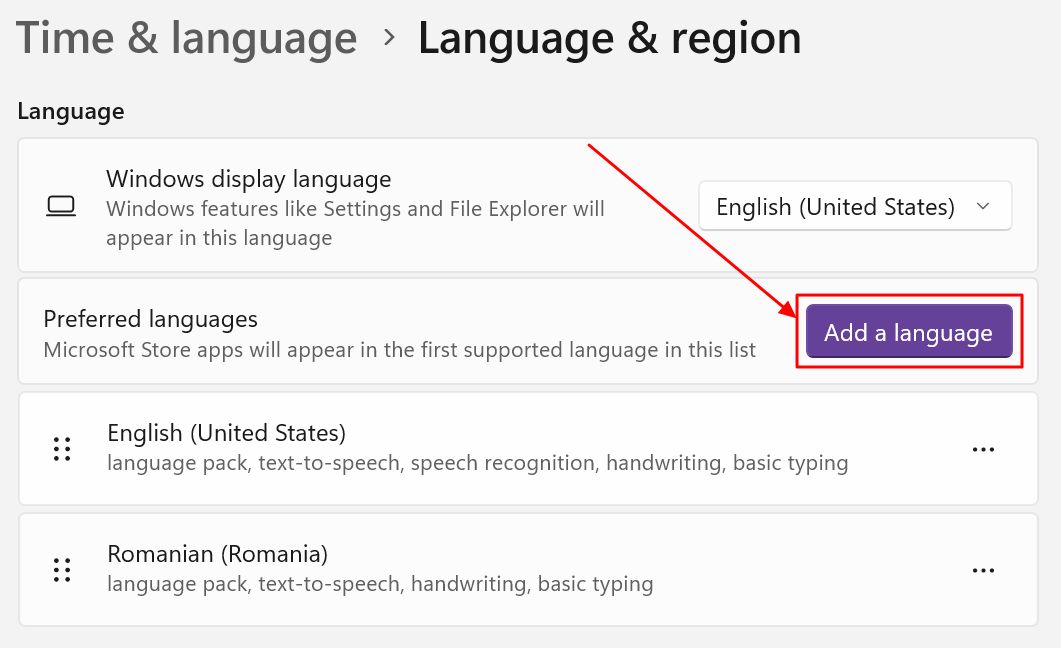
To add other languages, click on the Add a language option. This will open the Settings app to the Language and region section directly.
Click on the Add a language button to add another language.
An overlay will be displayed. Either scroll in the list of all the languages supported by Windows (there are quite a lot) or use the search box at the top.
To select languages that can be live captioned look for the microphone icon next to them. This means Speech recognition is natively supported. I couldn’t find a way to filter languages by capabilities. That would be helpful.
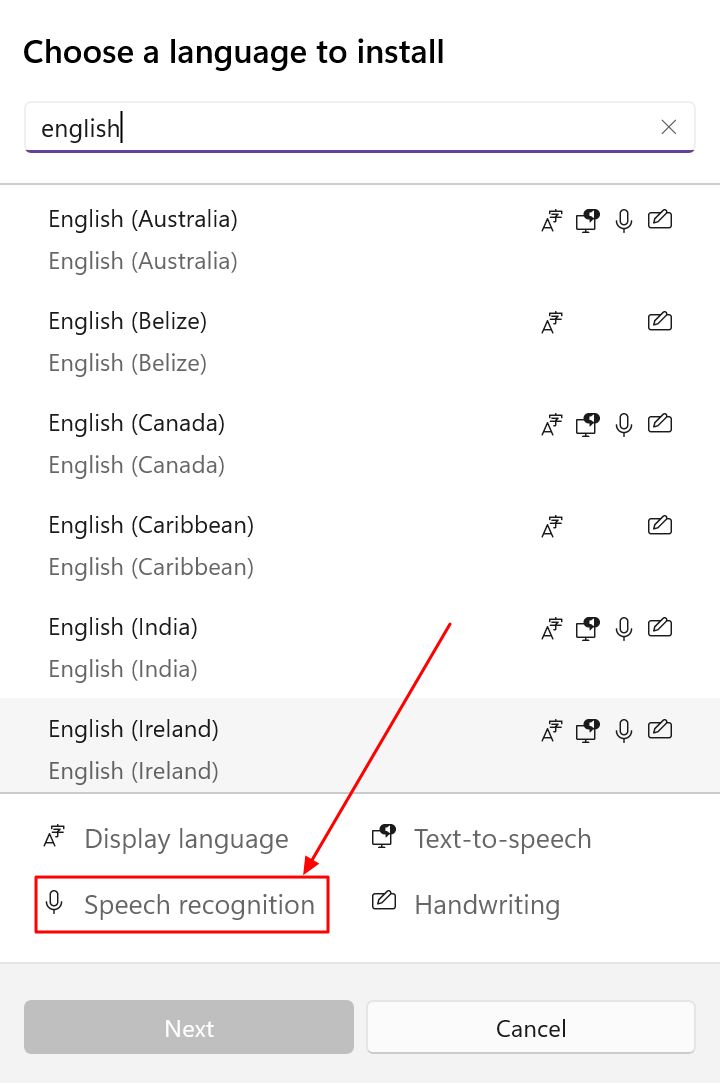
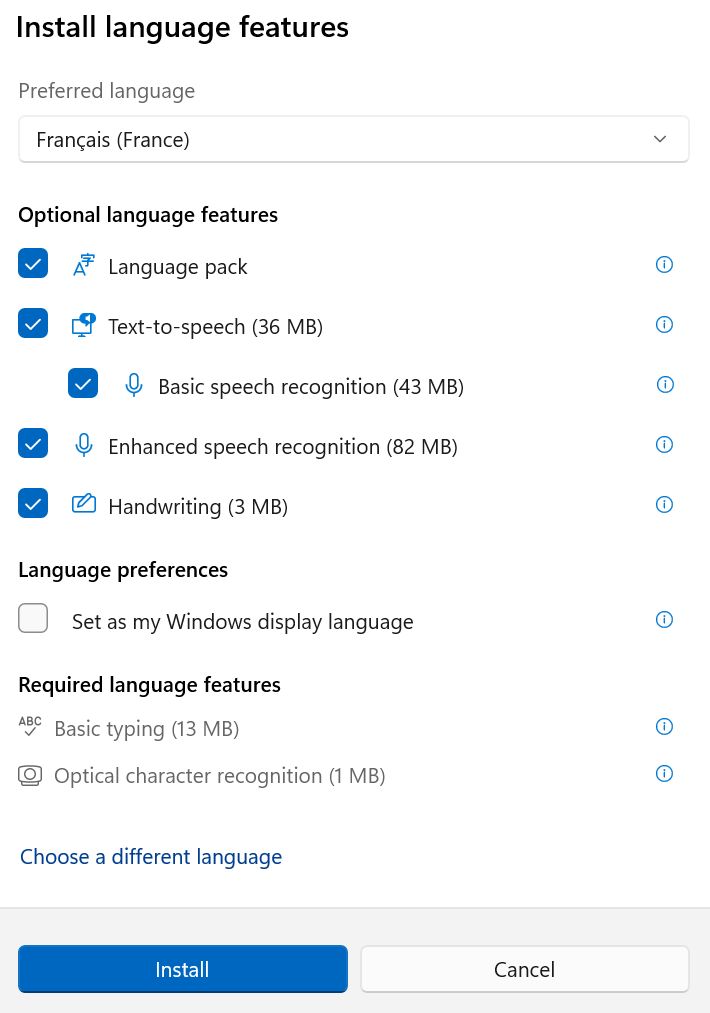
Select the desired language and click Next. Now you have to select what language packs to install. I would install everything because the file size is very small. At a minimum select Basic speech recognition and Advanced speech recognition.
That’s it. Now use the caption language menu to switch between multiple installed languages.
Caption Audio Source and Filtering Profanity
The last menu is the Preferences. Here you have two options you can toggle:
- Filter profanity – will not transcribe trivial language.
- Include microphone audio – this will also transcribe what you say or someone else in the same room as you. I haven’t tested, but i should also work with audio played by other speakers.
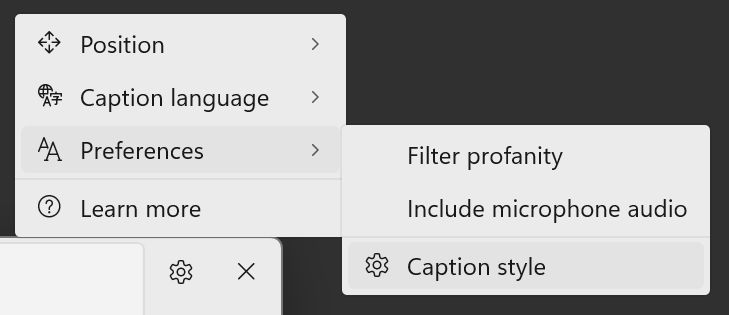
Caption Styling
The last option in the Preferences menu is Caption style. Clicking this option will open the Settings app to the Caption section.
First, you should turn captioning on if you haven’t done it already.
Second, pick from the predefined caption styles:
- Default – black text on white background.
- White on black background
- Small caps
- Large text
- Yellow on blue background
These cover most accessibility needs. You can tweak the settings to your liking.

Select a preconfigured caption style then click on the Edit button. A duplicate style will be created automatically.
You can pick the Text and Background colors from a list of just eight shades. You can format the opacity, text size, add effects, and even select from a few font faces.
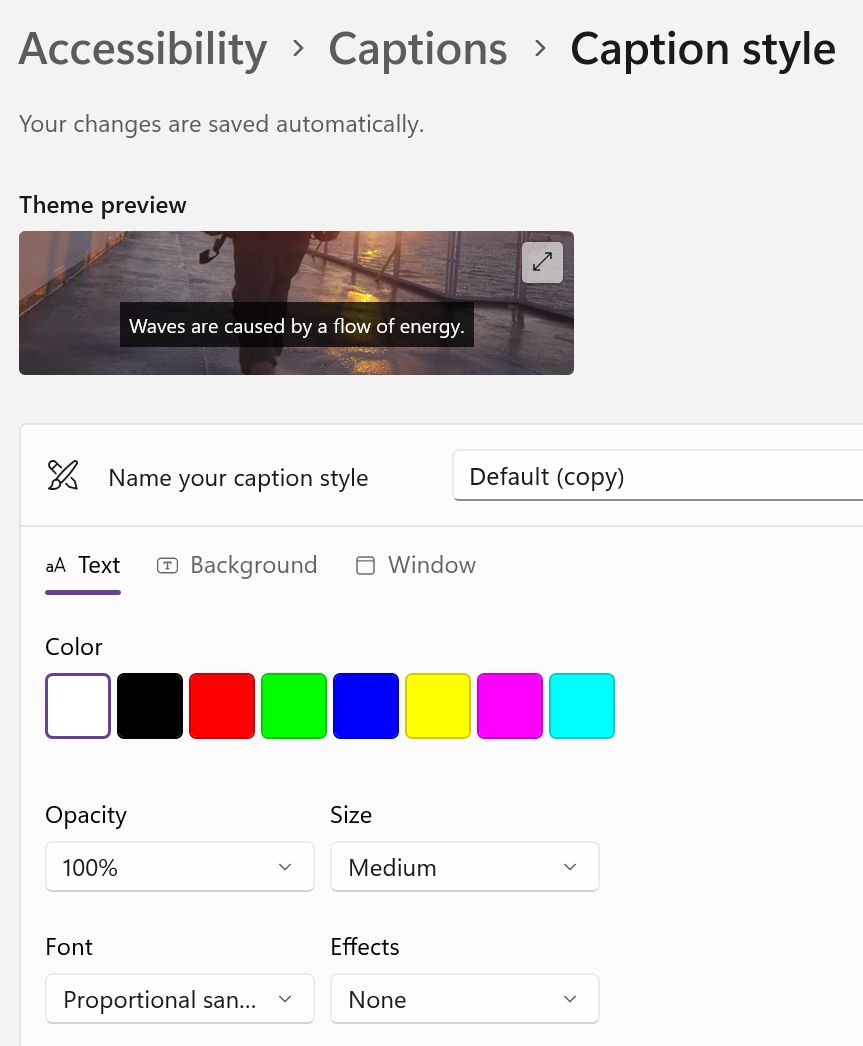

The preview video will update as you make changes. You’ll know pretty quick if you made a mistake:

If you don’t like the style just hit the delete button. If you’re happy you can rename the caption style name from the top of the customization panel.
And this is everything you can tweak when it comes to Live captions in Windows 11.

Windows Magnifier Utility: How to Zoom in on Everything
What I Want to See Next for Live Captioning
I’ll end this article with a list of things I would like to see Microsoft do in the next iterations of the Live Captioning utility. I really like it as it is, but that doesn’t mean it can’t be better.
- Support for automatic translation – this is my biggest gripe, the lack of ability to translate the text. Microsoft offers this in Teams, so I asume it’s coming to Live Captions. When Microsoft?
- Automatic language detection – if translation is not implemented at least Microsoft should auto detect the language, and automatically caption the audio stream. I can swear the utility does detect other languages, starts captioning a few words, then stop.
- Ability to copy and paste the captioned text – this is an edge case, I know, but it would be useful to be able to copy the captioned text and use it in other documents, articles, and such. It would make transcribing a breeze.
- Option to remember windows size – this is a little bit annoying as every time I launch captioning the window size and position is reset. It’s simple to fix, so I hope Microsoft takes notice.
Have you tried Live Captions in Windows? What uses have you found for them? Start the conversation in the comments!