- Modern SSDs are fast, especially NVMe models that can reach speeds over 10 GB/s, but that often comes at a cost of high temperatures.
- It’s important to check the SSD temperature in Windows to ensure it’s operating in a safe temperature range before you put your data in danger.
- Learn how to check SSD temperature in Windows without software and with third-party free utilities that open the door for better monitoring.
Windows 11 now includes SSD and HDD temperature monitoring directly in the Settings app: System > Storage > Advanced Storage Settings > Disks & Volumes > Properties > Drive Health. There are also free utilities you can use for continuous monitoring.
If you care about your data, you should care about the temperature of your SSD. Too high and you may end up with a drive that’s impossible to recover. Sure, you should always back up your data (see our dedicated Windows Backup section), but it’s no fun to replace a broken SSD.
Modern SSDs, be they SATA, NVMe, M.2, or PCI Express, do have mechanisms in place to self-diagnose in case of a problem (the so-called SMART technology), but from experience, I can tell you that a drive failure rarely comes with a warning.
That’s why I recommend you keep an eye on your SSD temperature. I’m not advocating for constant monitoring but check up on what the drive is doing from time to time.
Why?
Just to make sure it’s not overheating, especially if you’re constantly writing or reading to the flash memory on these long hot summer days.
I have three methods for checking the SSD temperature in Windows 10 and 11 for you, one using the included functionality of the OS, one with a free and simple-to-use utility, plus a more complex monitoring solution, also free.
Let’s get started:
CONTENTS
Check the Current SSD Temperature with the Windows Disks and Volumes
Let’s start with the option that doesn’t require you to install any software. This method works in both Windows 10 and Windows 11 and involves the Settings app. The images below are for Windows 11, but follow the same steps in Windows 10 and you’ll be just fine:
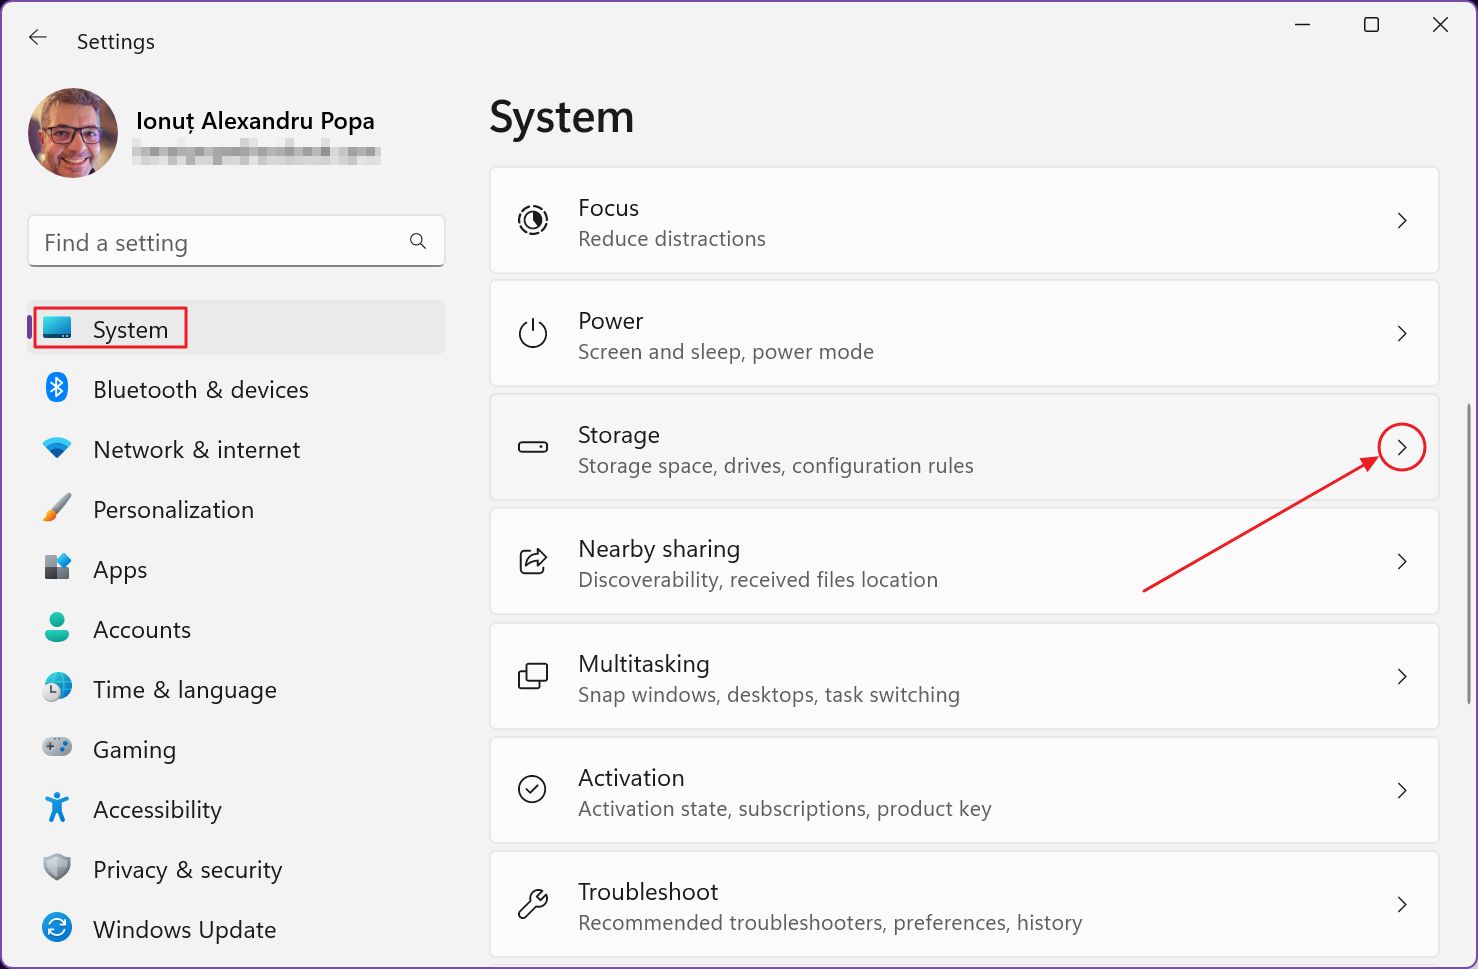
1. Press the Win + I keyboard shortcut to open the Settings app.
2. Navigate to the System section.
3. Find the Storage sub-section and expand.
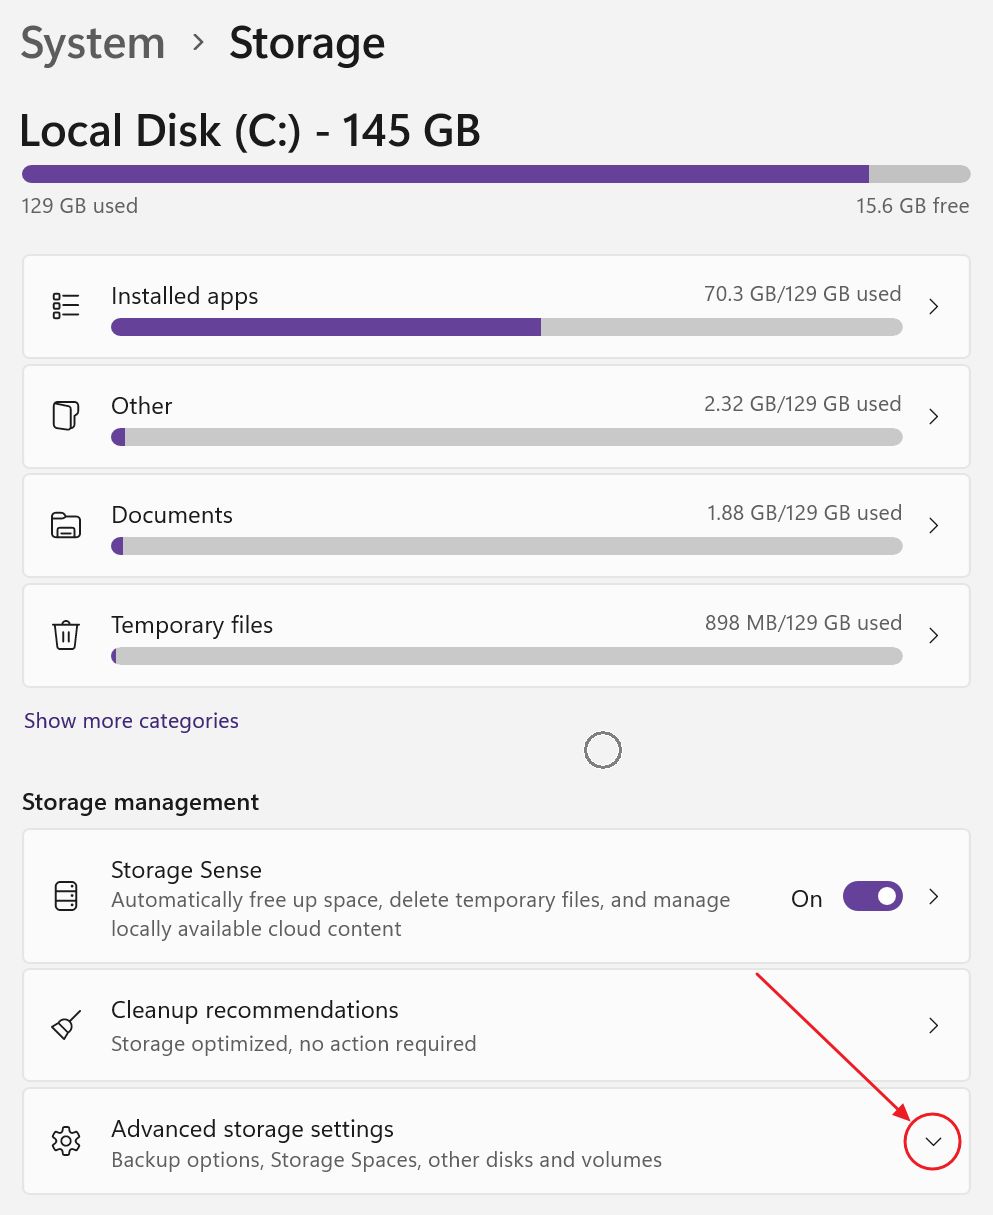
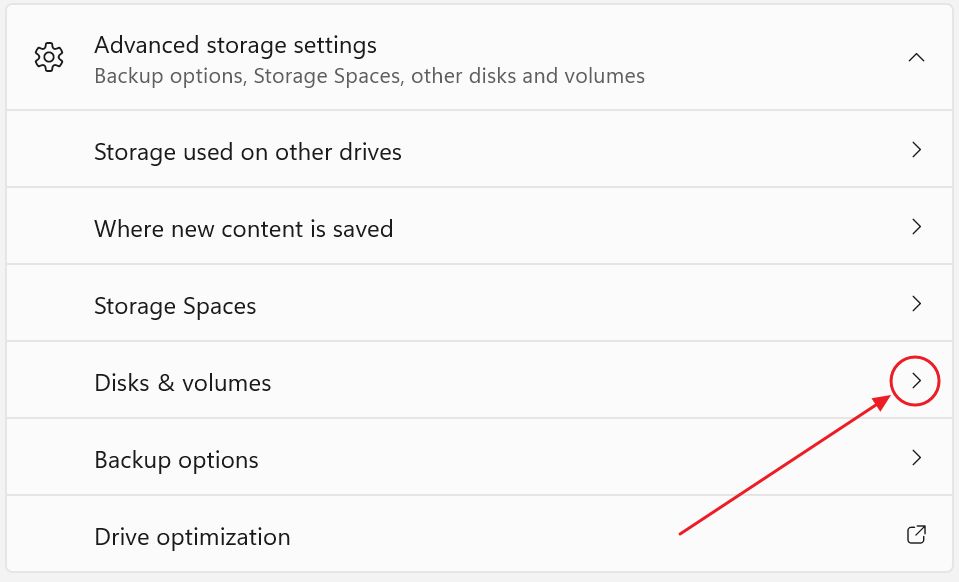
4. Scroll into Storage until you get to the Storage Management sub-heading. Here there’s an option called Advanced storage settings. Expand to show a bunch of other options.
5. Click on the one called Disks & volumes.
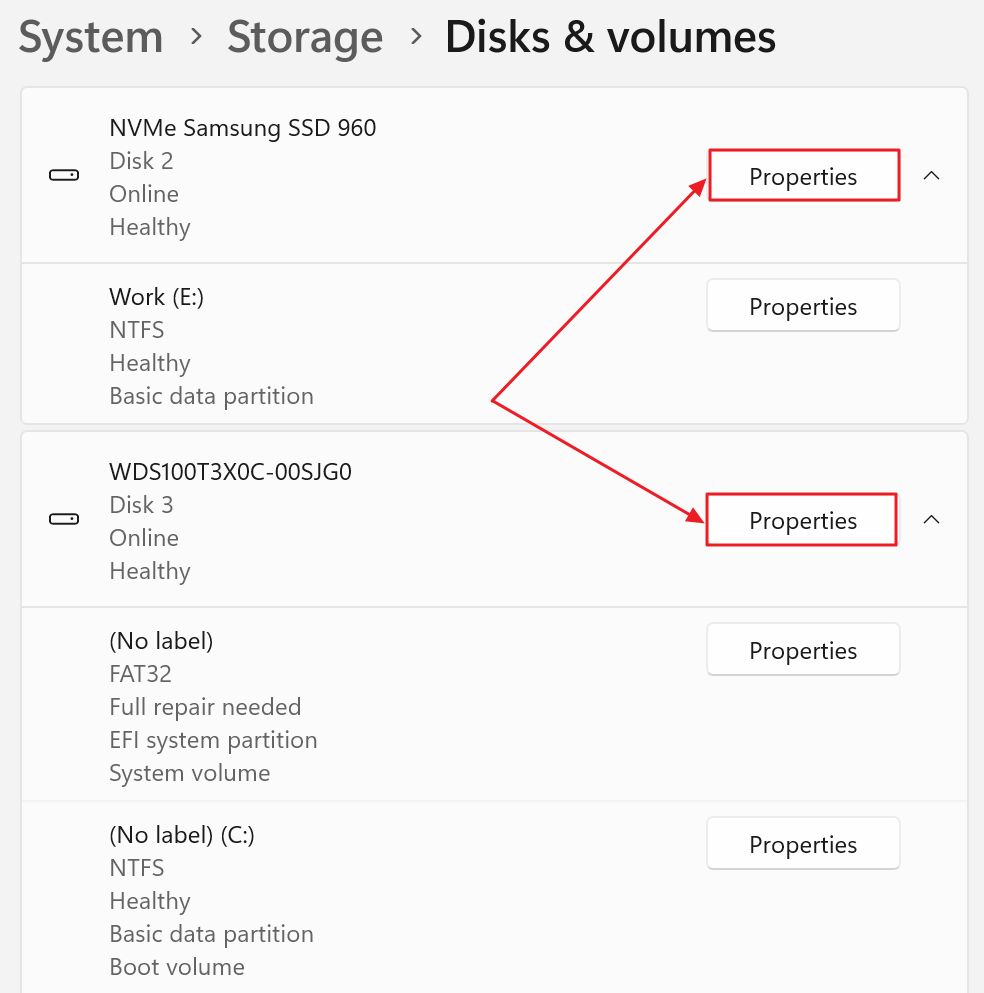
6. You will now see a list of disks installed on your PC (SSDs and HDDs grouped together). Under each disk, there’s also a list of partitions, as you had set them up.
Each entry has a Properties button right next to it. Just make sure you click on the one next to an SSD, not a partition.
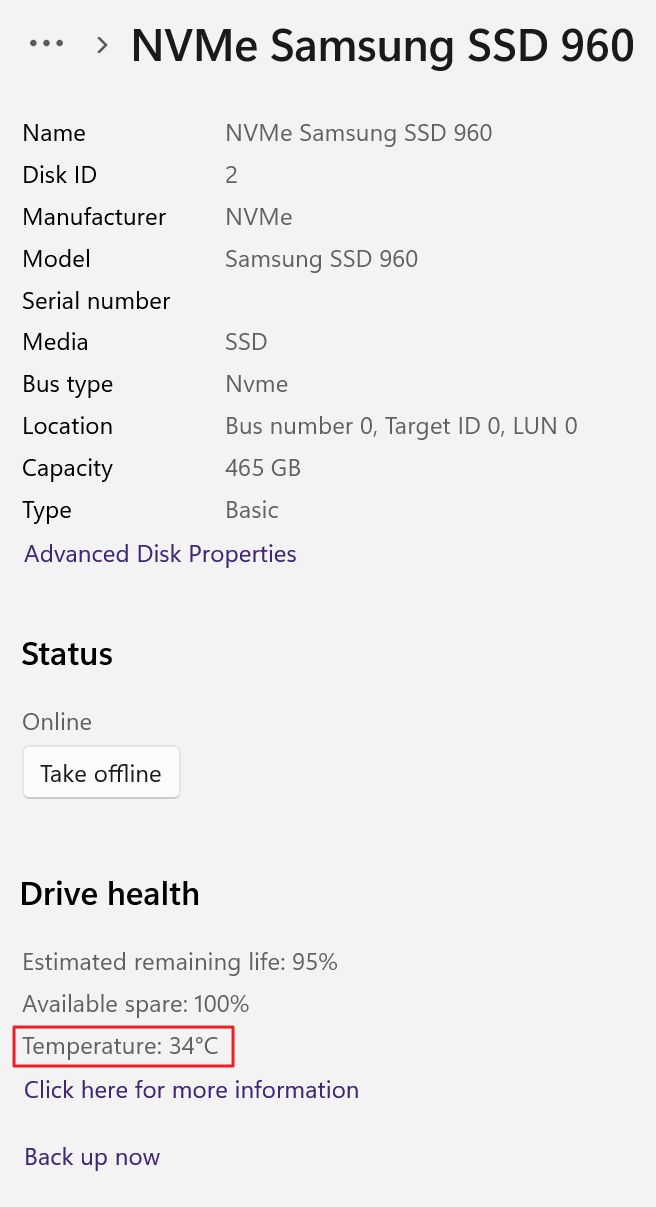
7. Here are the details for my aging Samsung 960 EVO SSD. Under Drive health you can check the SSD estimated remaining life (works only for NVMe drives!). I lost 5% in 5 years, which is not bad.
There’s also an indication of the available saved-up flash space, which is 100%, meaning no flash cells have deteriorated to the point at which they need to be relocated to a different address.
Lastly, there’s the current SSD temperature reading.
This method works but is a bit inconvenient if you want to see all temperatures at the same time. I have four drives in my system, so yeah, clicking each drive in the Settings app is not ideal.
I would have expected to see the temperature reading in the Task Manager, just like you get for your GPU temperature in Windows. This lack of cohesion with Microsoft’s OS is hard for me to comprehend sometimes.
Use HWMonitor to Check SSD Temperatures with Ease
One of the simple free hardware monitoring programs I always recommend is HWMonitor.
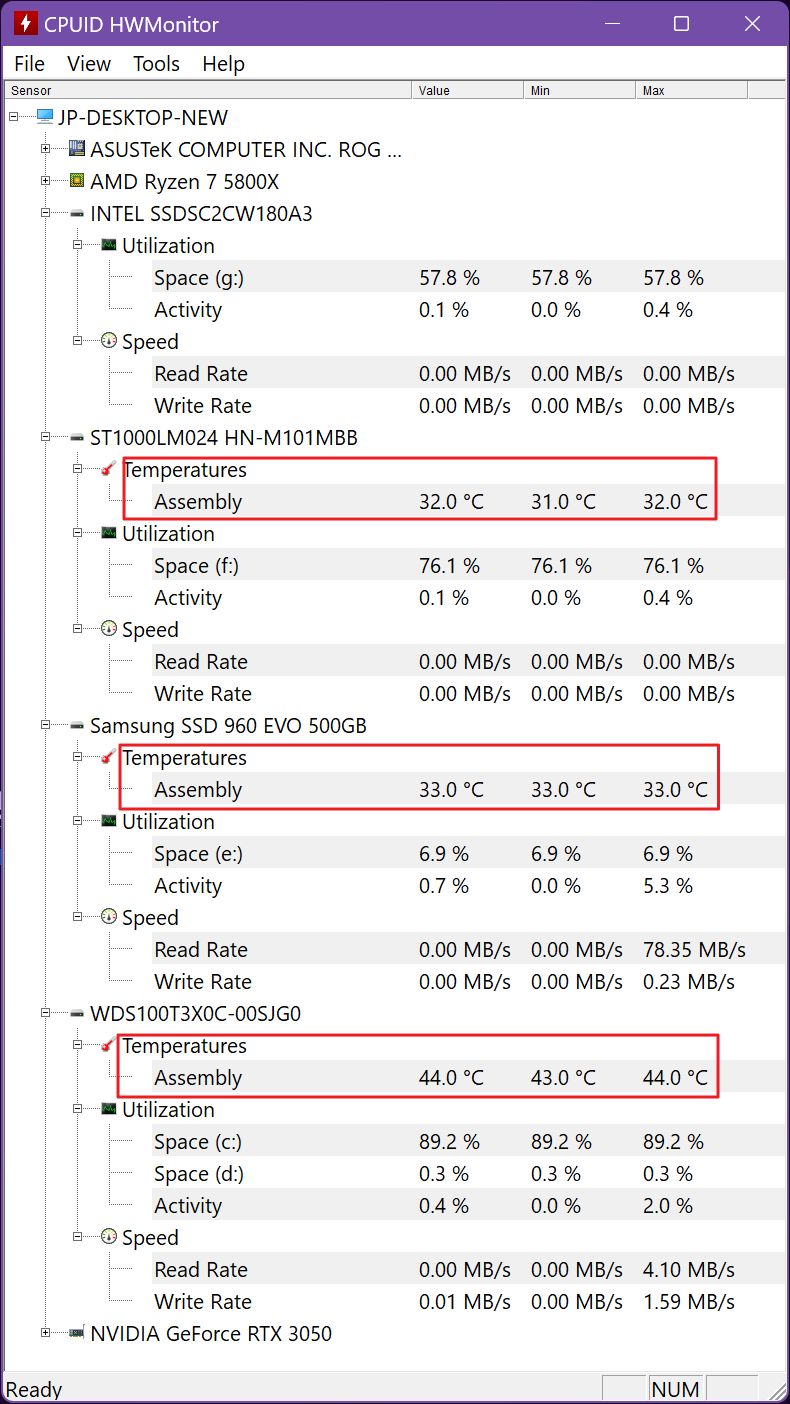
The app can display the most important stats for all major PC components. You get current, minimum, and maximum temperatures for your SSD, together with a bunch of other stats.
What more could you want?
Monitor SSD Temperatures in System Tray and Display Graphs with HWiNFO
If the answer is that you want to have the current temperature shown in the System Tray or you want to check the evolution of your SSD temperature during various tasks, then you need to download HWiNFO.
Let’s say the app is a bit more complicated. But that’s a good thing because it can do a lot more.
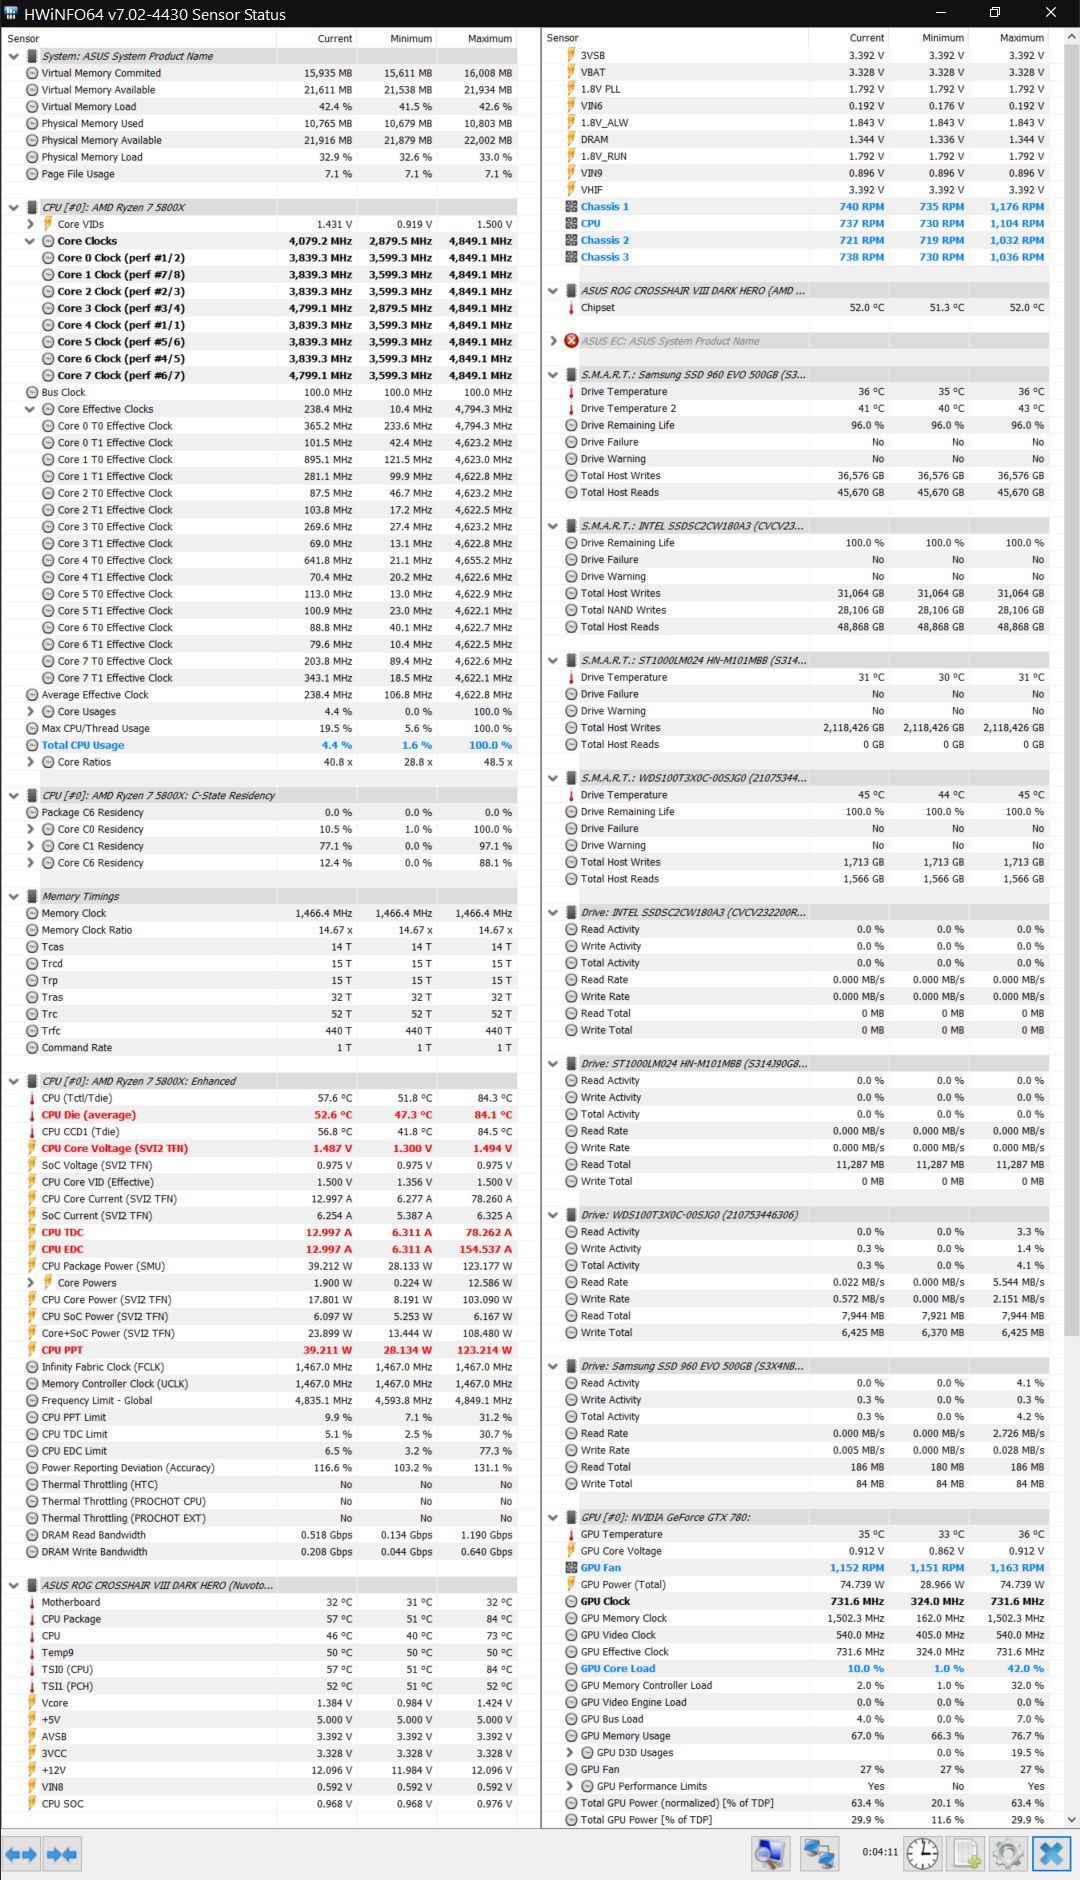
Don’t be alarmed. Just scroll the HWiNFO sensor panels to the S.M.A.R.T. section, where you’ll get a heading with the SSD (and HDD) model name for each disk detected in your system.
For my Samsung 960 EVO SSD HWiNFO is capable of reading not one, but three sensors. Is that cool? Yes. Does it really matter? Probably not.
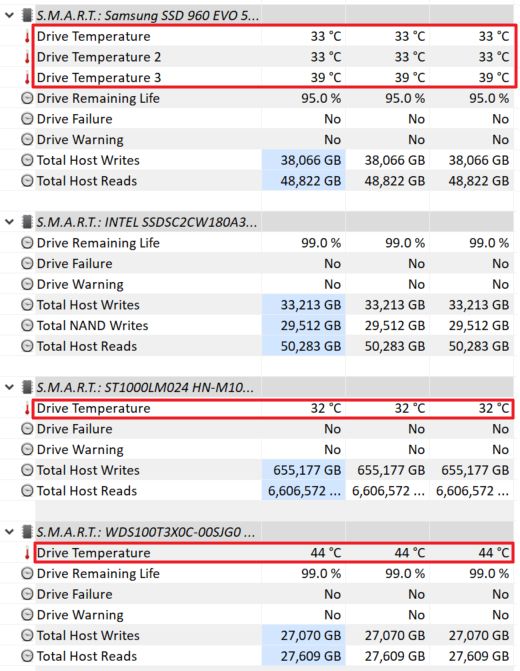
Anyway, just right-click on any of the sensor readings you’re interested to monitor.
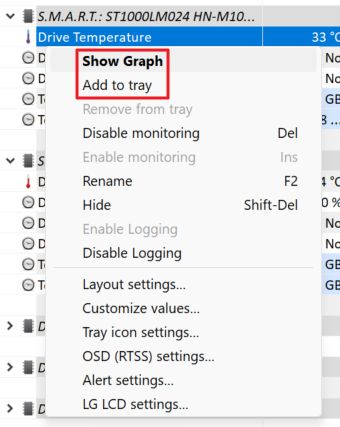
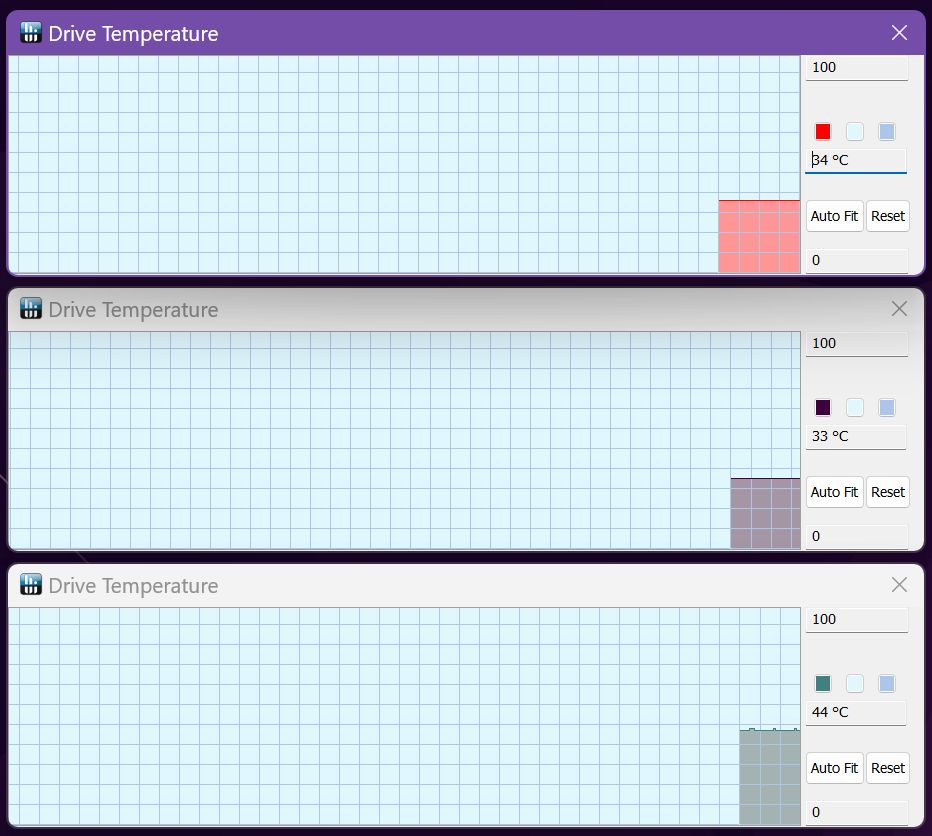
If you choose the Show Graph option you get a floating window that you can move anywhere on the desktop. Repeat for all the sensors you’re interesting to check.
If you don’t want the temperature reading to take that much space (graphs are resizeable though), let’s choose Add to tray, which would put the SSD temperature reading in the System Tray area.

Make sure you don’t add too many sensors there, as it can get crowded quickly. Also, customize the text and background color to easily distinguish between the various sensors you’re showing there.
These are the three methods to check your SSD temperature in Windows. Which one you prefer, and why? Let me know in the comments.
Frequently Asked Questions
For modern SSDs, anything above 70 degrees Celsius (158 Fahrenheit) is considered too much. The SSD will start to throttle down, significantly dropping in speed as it approaches the temperature limit.
Not only that, but high temperatures will deteriorate the memory cells faster, shortening their lifespan.
The actual maximum operating temperature for an SSD varies from model to model, so you should always check the manufacturer’s specifications.
The normal correct temperature range for an SSD is about 30-40 degrees Celsius (86 – 104 F) at IDLE and 55 – 60 degrees Celsius (131 – 140 F) under load. These numbers are a bit higher than what you would see with a mechanical hard disk drive.
SSD temperature ranges vary greatly with the type of load you put on your SSD, how long are you hammering it with reads/writes, and the cooling you have at your disposal.
Also, it’s normal for flash memory chips to run at higher temperatures than the SSD controller. Cooling down the memory chips too much is not optimal in terms of performance and long-term reliability.
The quickest way to lower the temperature of your SSD is to stop copying or writing to it. It’s not practical, of course, so what you can do is ensure proper ventilation is supplied in the SSD area by case fans (if it’s mounted inside a PC case).
Also, adding a small radiator can make wonders in terms of temperature spikes, as I tested with my Samsung NVMe SSD a few years ago. I saw between 15 and 20 degrees C lower temperatures.
Most motherboards now have NVMe M.2 SSD shields that act as heatsinks, which makes SSD overheating a non-issue.
If it’s a laptop SSD you may not have room inside the laptop case to add a radiator, nor would you want to take on this DIY task. In such a case, your only option is to replace the SSD with a better-cooled one. The old SSD can always be used in an external SSD enclosure or in a ventilated PC case.
The SSD Operating temperature is the safe temperature range when the computer is ON and the SSD is powered and active.
The SSD Non-Operating temperature is the range of temperatures the SSD can be stored when non-functioning, not connected, and not powered.
The Non-Operating temperature range for an SSD is typically wider than the operating temperature range, as you can imagine.
Typical operating ranges are between 0 and 70° C (32° to 158° F), while non-operating temperature ranges are -55°C to 85°C (-67°F to 185°F). Always double-check the manufacturer’s spec sheet if in doubt.


