- This is a quick step-by-step guide on how to take ownership of files and folders in Windows.
- Reinstalling Windows and keeping other partitions will require taking ownership of the old files.
- If you don’t do this some programs might not be able to access files from the other partitions.
Reinstalling Windows is not something you have to do as often as you had to with previous versions. Now I usually reinstall Windows when I upgrade my PC. So I basically erase the system partition and keep everything else.
I almost always keep the old drives. Maybe just add a new faster SSD. That’s why my main machine has no less than 4 drives now. A bit overkill, but hey, if I’m not doing it someone else will.
This poses a problem you might encounter too: some apps don’t have the proper rights to access files on the other partitions. This happens because the owner of the older files and folders is an account that no longer exists under the new Windows installation.
Some apps and services have problems dealing with this situation.
Guide: Change File and Folder Owner in Windows
Fear not, because it’s very easy to change the owner of a file or folder in Windows. This guide works for both Windows 10 and Windows 11.
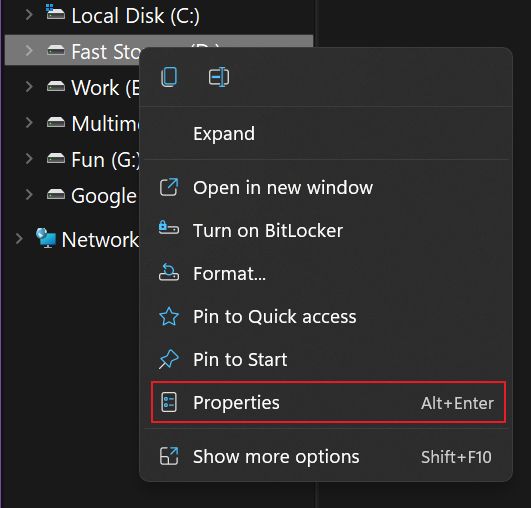
1 – Right-click on the file or folder you want to take/change ownership and select Properties. Note: this works also for system drives and partitions.
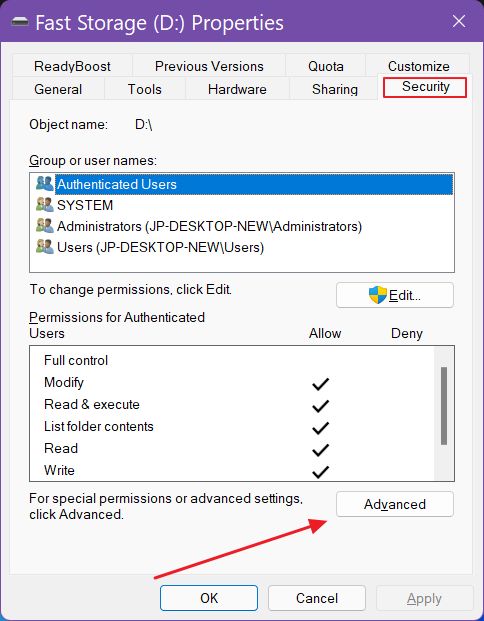
2 – A new window will open. Click on the Security tab and then on the Advanced button at the bottom of the Properties window.
3 – Click on the Change button next to the listed current Owner.

4 – In the Enter the object name to select text area you need to enter the name of the user or group of users (see some examples here) then click on Check Names to validate the user name. Hit OK to close this window.
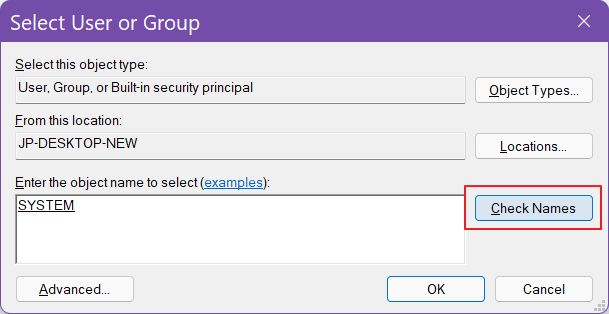
Tip: I usually pick the SYSTEM user, which is a default account with full rights that comes preconfigured with each new Windows install. You can also pick the current user you’ve set up during the installation phase.
If you want to learn more about the default users that are set by Windows here’s a link to the official documentation.
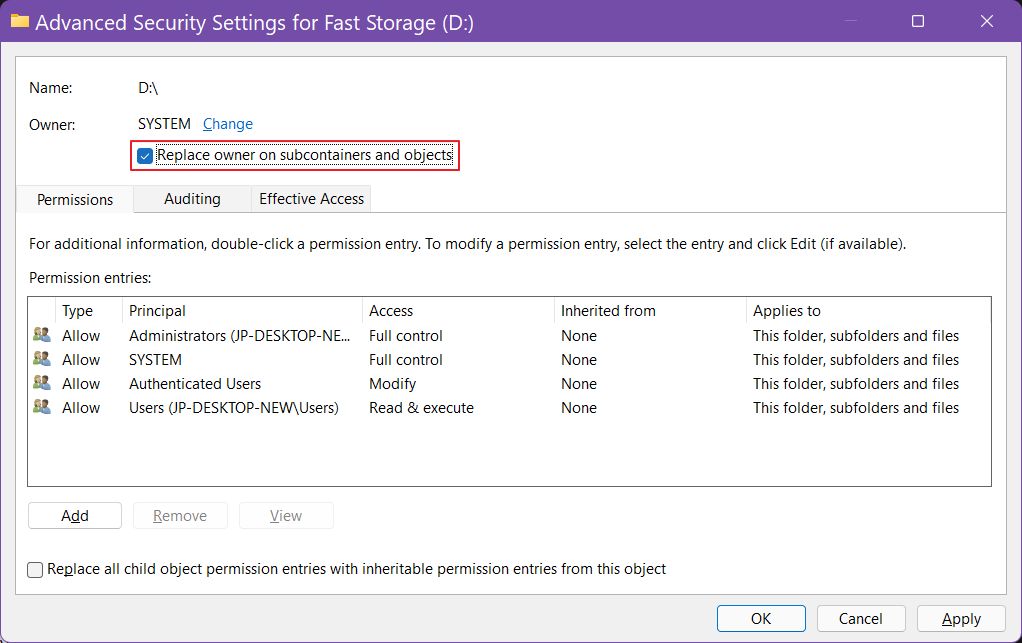
5 – Don’t forget to check the Replace owner on subcontainers and objects so that everything inside the selected partition or folder inherits the same owner. I see no reason not to want this, so make sure you don’t skip this step.
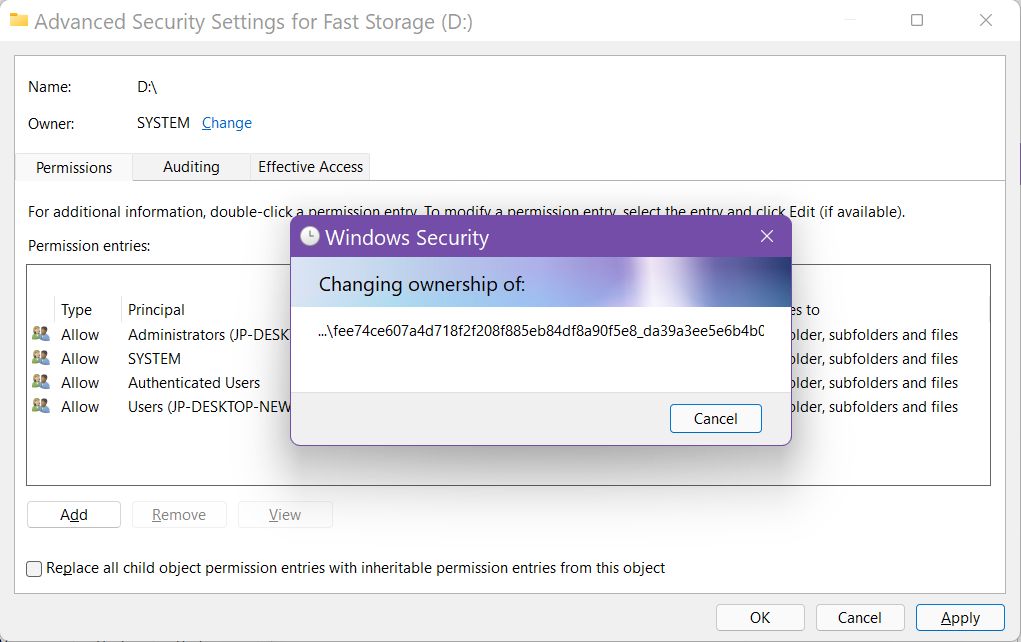
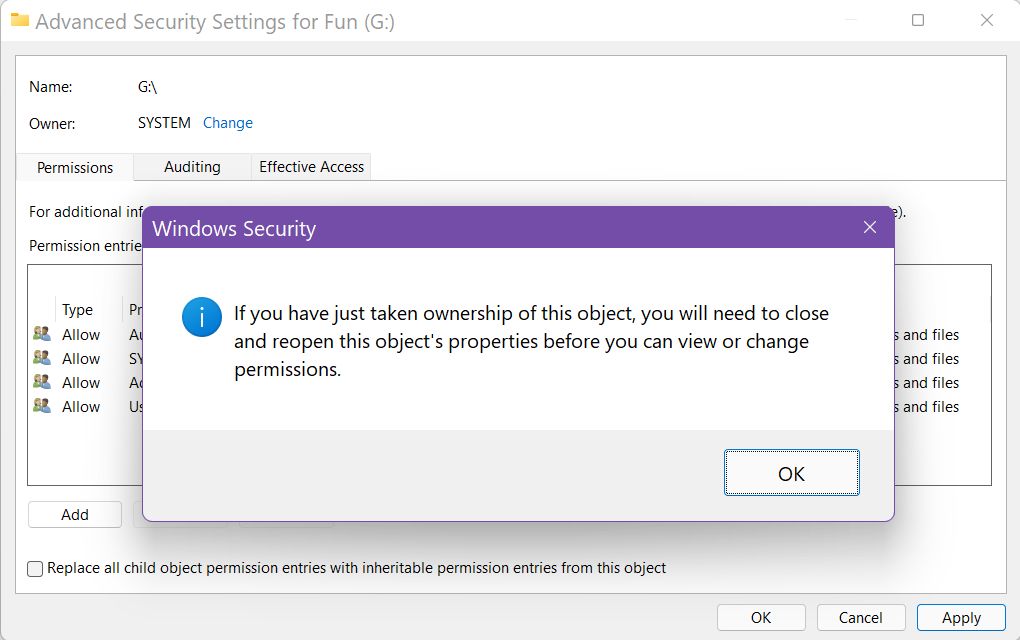
6 – Wait until the changes are applied. If you select an entire drive it can take a while on a slow HDD. When you’re finished a message will inform you to relaunch the Properties window, if you want to see the updated owner.
That’s it, you’re now the proud new owner of the same files you were previously the owner of. Yeah, a bit confusing, but I do hope this guide helps you fix any issues pertaining to file and folder ownership after reinstalling Windows.