- Here are two ways to disable automatic driver updates in Windows for good.
- Controlling when and which updates are being downloaded and applied can solve a lot of system problems in Windows.
- Windows Update will download and apply device driver updates by default.

Windows Update can cause a lot of trouble sometimes. I’m not talking about the moment it chooses to update (this can easily be paused, and even blocked completely), but the fact it can mess things quite a bit if an update goes wrong (i.e. not enough testing), requiring you to go into safe mode or use a restore point (if you had it enabled in the first place).
It doesn’t happen too often with normal Windows Updates, but it can happen with driver updates. Yes, in case you didn’t know already, Windows also downloads updated drivers from its own servers, first validated with manufacturers.
These are almost never the latest version, so if urgency is important, then you should update your drivers manually by downloading them from the manufacturer’s website anyway.
In this article, I’m going to show you two quick ways to disable automatic driver updates in Windows 11 and Windows 10.
CONTENTS
Disable Automatic Driver Updates From Advanced System Settings
The easy way is to use the Advanced System Settings tool to prevent Windows from downloading driver updates together with Windows updates.
This tool looks the same and works the same in both Windows 10 and Windows 11, but getting to it does look different at first since the settings app layout has changed significantly between these two versions of Windows.
Fortunately, the link to this tool shows up in the same sub-section, but in a slightly different place.
1. Open the Settings App by typing Settings in the Start menu and choosing the first option.
2. Navigate to the System section, then open the About sub-section.
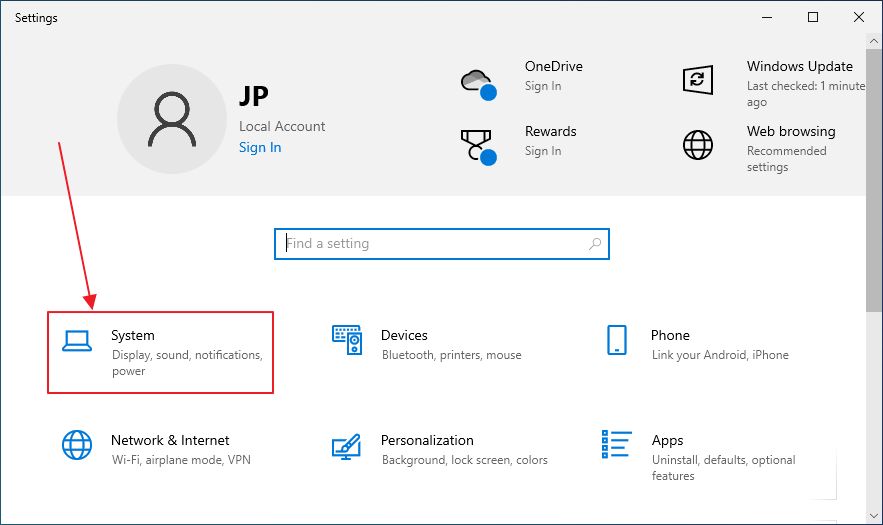
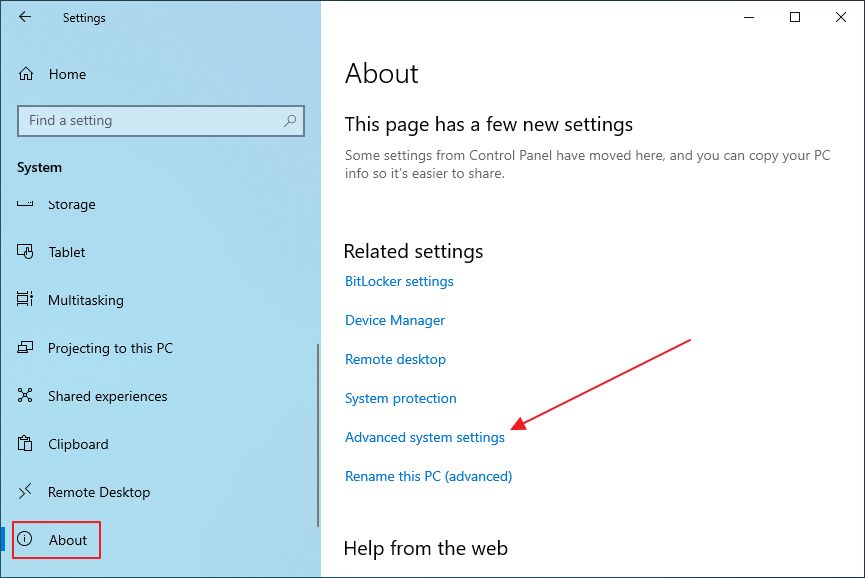
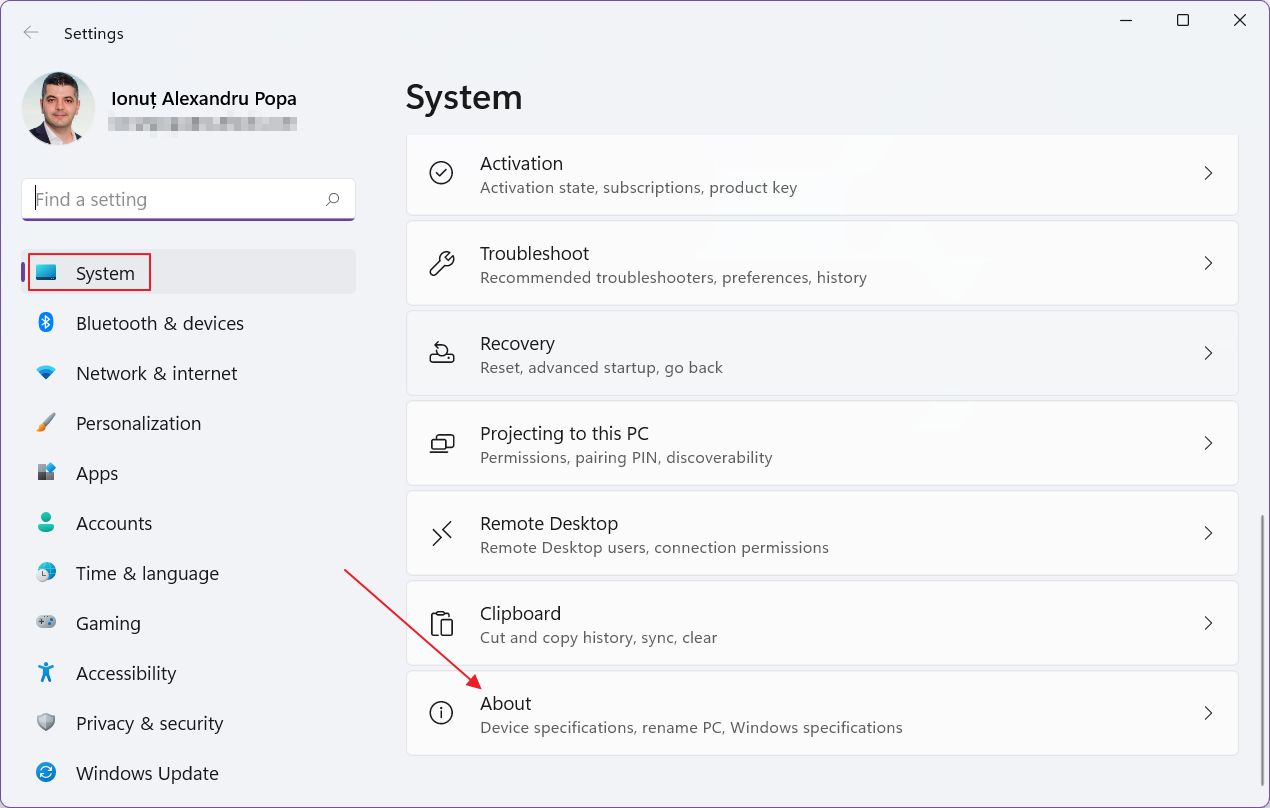
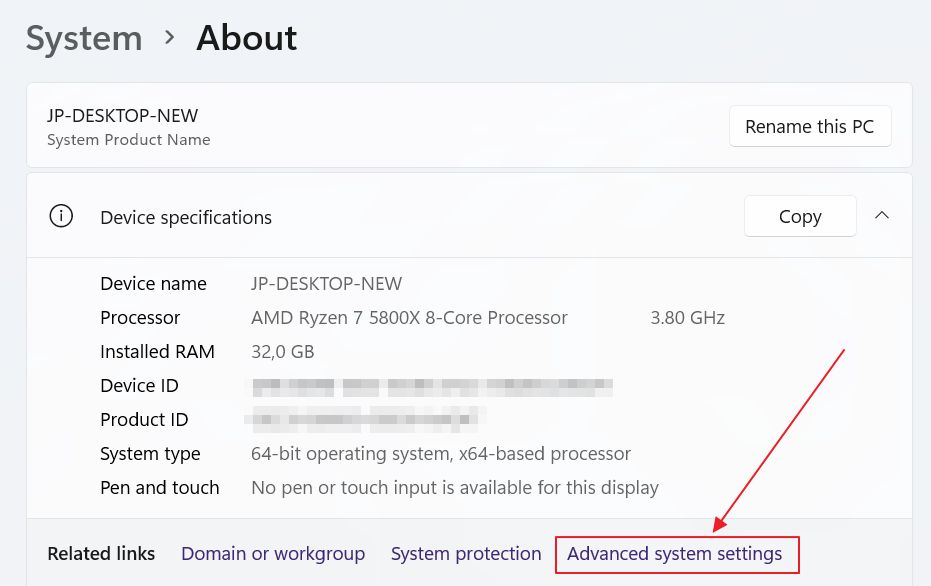
3. Somewhere on this page look for the Advanced system settings link and click to open it.
4. In the new window select the Hardware tab.
5. Click on the Device Installation Settings button.
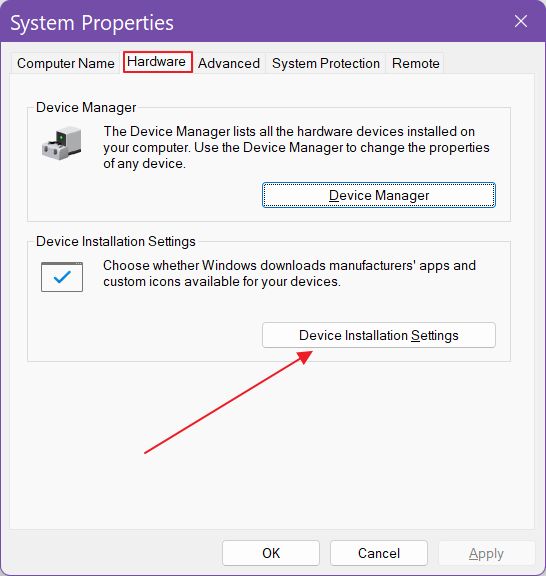
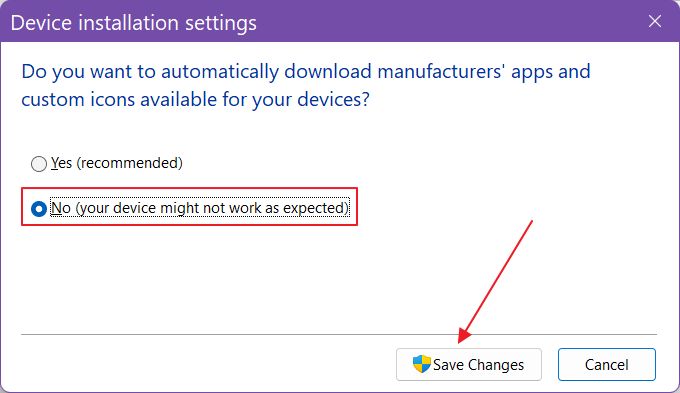
6. In this new pop-up window select No (your device might not work as expected) and confirm with Save Changes. A UAC prompt might show up, depending on your settings. Confirm the action to continue.
Disable Automatic Driver Updates From Local Group Policy Editor
There’s another way of disabling driver downloads by Windows Update, and that is by using the Local Group Policy Editor.
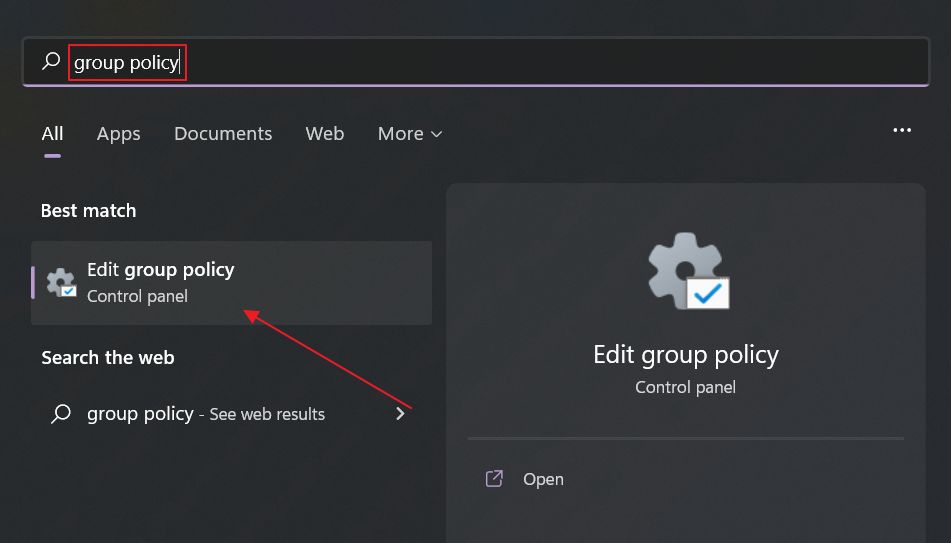
1. Open the Start menu and type group policy, then select the first result.
2. In the new window navigate the left-side panel to:
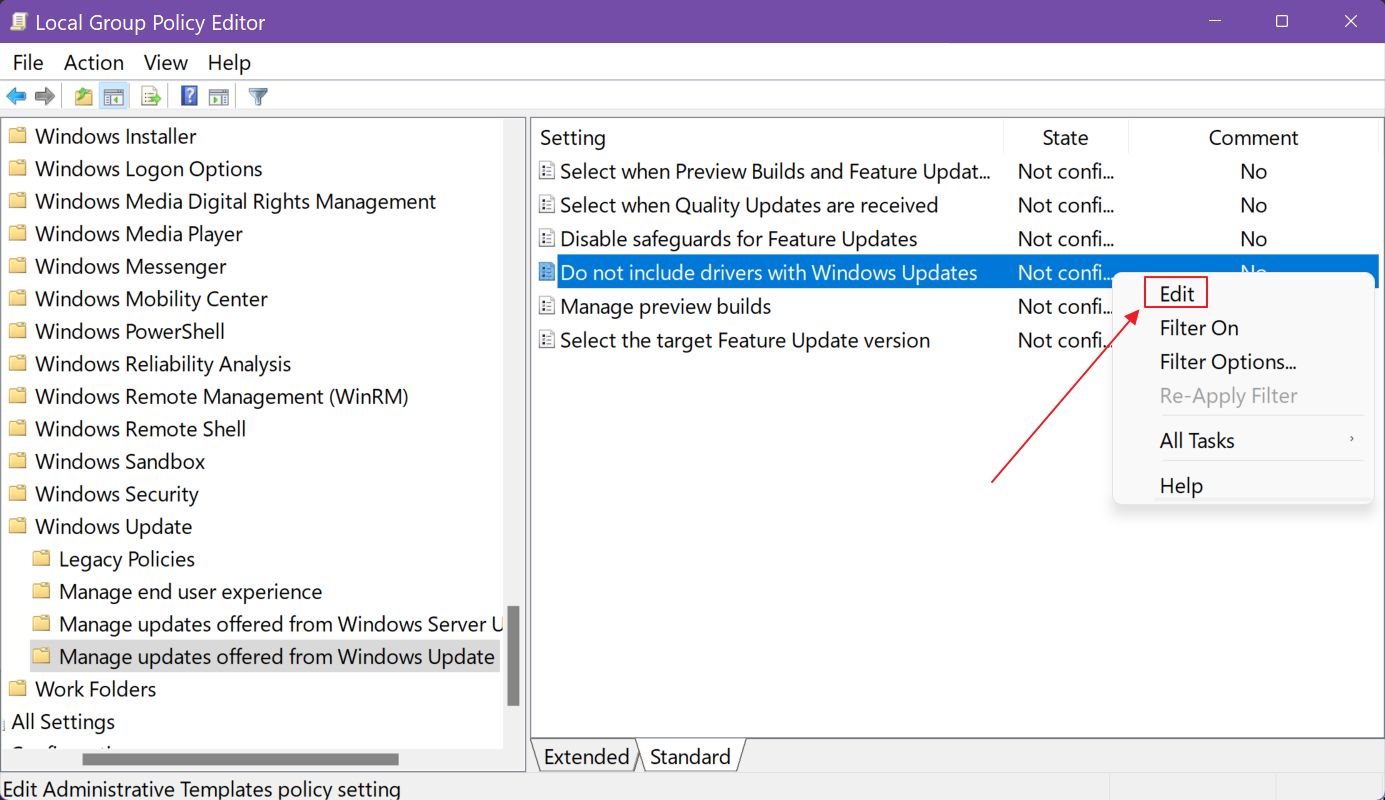
Computer Configuration > Administrative Templates > Windows Components > Windows Update > Manage updates offered from Windows Update
Click to expand all policies in the right-side panel.
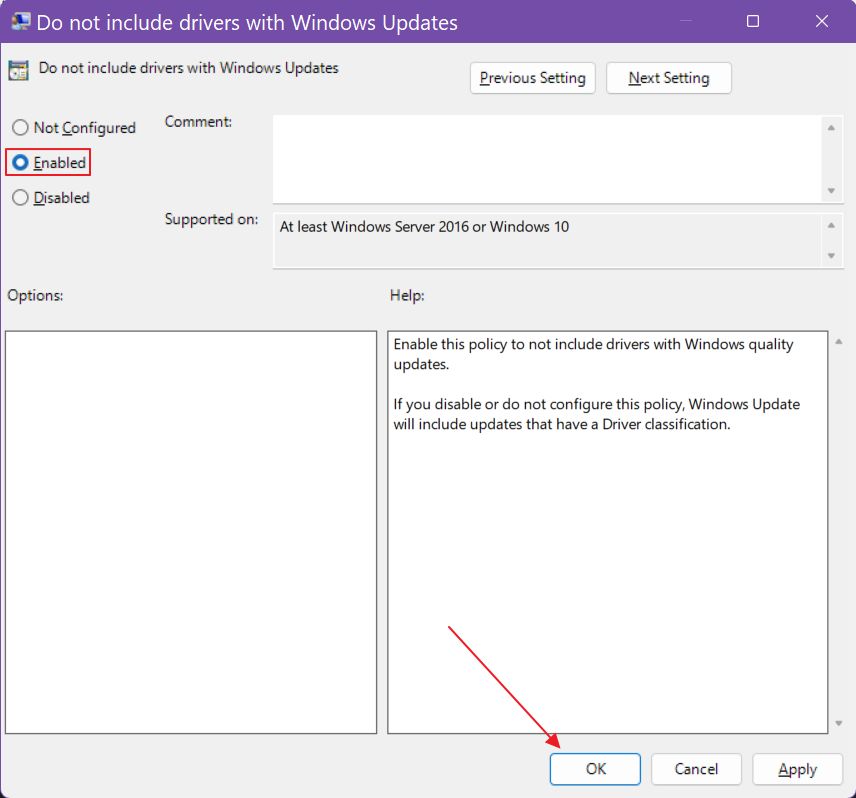
3. Right-click on the Do not include drivers with Windows Updates policy and select Edit.
4. Select Enable and confirm by pressing the OK or Apply buttons.
Note: disabling automatic driver uploads in Windows means when you add a new device, for example, a new graphics card, you will need to download drivers manually and install them, even if Windows detected the new device. The device might not work properly or at all until you do.
From now on Windows Update will not download drivers. You will have to do it manually.
Personally, I keep this setting enabled, which is the default behavior. I rarely had problems, plus I do a complete weekly system partition backup with Backupper, so in case something does go wrong I can restore my PC to a working state in a matter of minutes.
What about you?
Anyway, if you liked this article I recommend you also check out this one about how you can rollback a messed-up device driver update.

