- We’ll show you how to open PowerShell in Windows. You just have to pick the option that’s more convenient for you.
- PowerShell is Microsoft’s replacement for the Command Prompt, a command line tool, dating back to the origins of Windows.
- While you can still use CMD in Windows, PowerShell is much more powerful.
It’s been a few years since Microsoft is pushing users toward using PowerShell (we’ve discussed the differences here) and Windows Terminal, even if most people, or those old timers already familiar would be OK with just using CMD.
If you don’t do any advanced stuff CMD is probably enough for you. Even if you aren’t it’s still a good place to start (you can learn a few commands from our article) if you want to start exploring what’s under the hood in Windows.
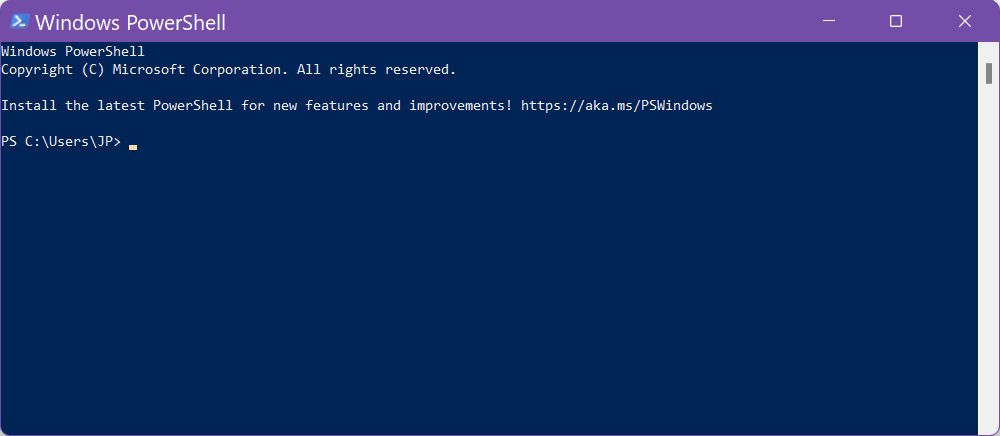
If you want to learn PowerShell instead, you need to learn how to open PowerShell in Windows first. Here are several methods to choose from:
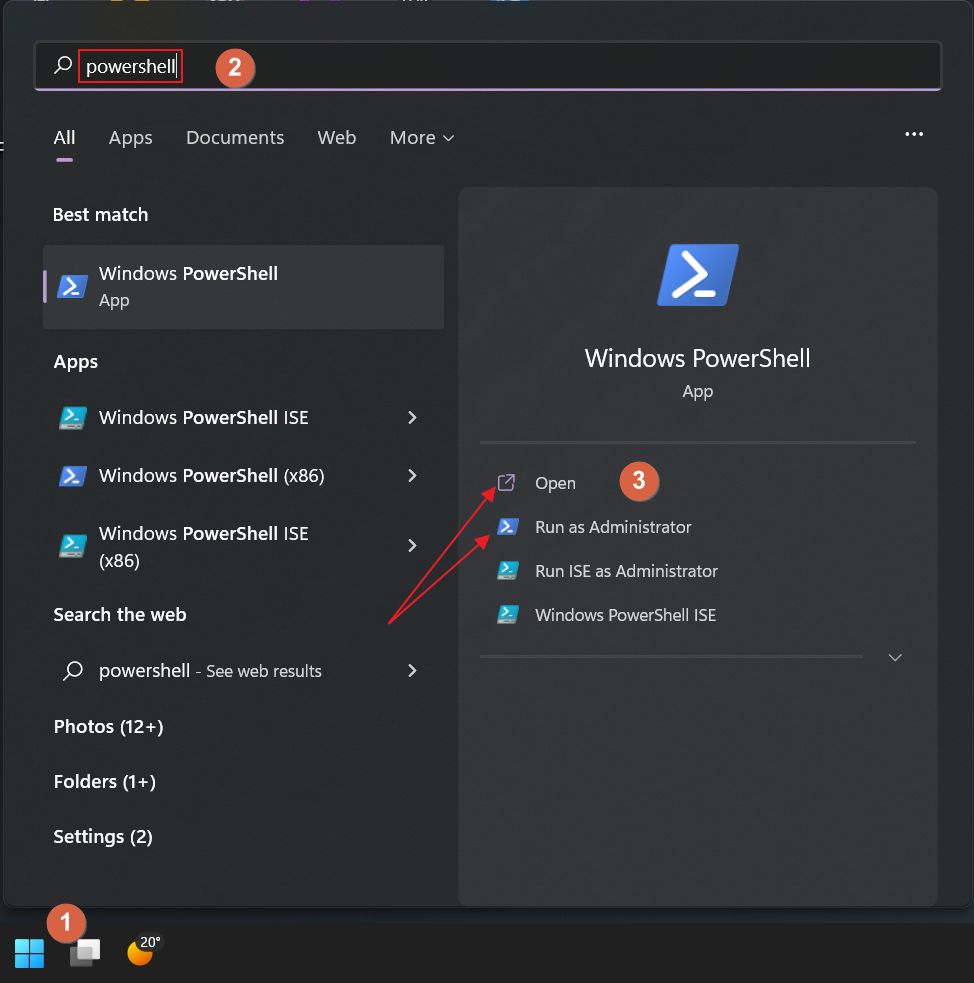
This is my favorite way to launch programs in Windows, not just PowerShell. I instinctively open the Start menu by pressing the Win key, and then I begin typing powershell then I press Enter to launch the first result. Results usually show up way before you finish typing the entire word.
With the first result selected, on the right side of the search menu, which seamlessly replaces the Start, you’ll also see the option to run as administrator this session of PowerShell (if you need to modify high-level stuff that requires elevated privileges).
Launch PowerShell from the Run Dialog Window
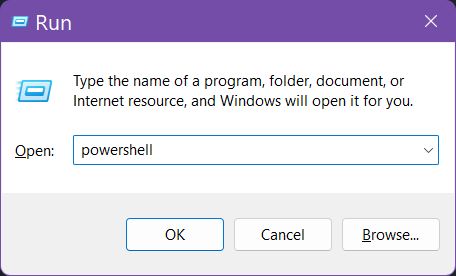
The second method involves the Run dialog window, and is almost as fast as the first one, but requires one more key press. The Run dialog window is basically a command launcher. You type what you want to launch then execute.
So, first press the Win + R keyboard shortcut, in the small window type powershell, and press Enter (or click on the OK button).
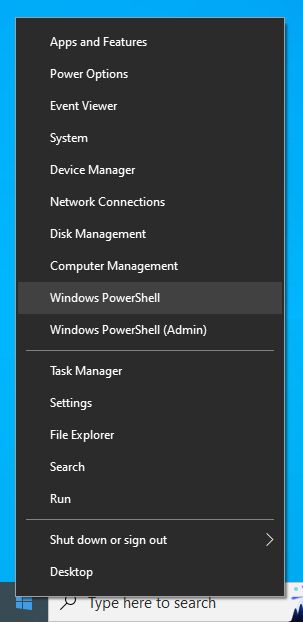
This method only works in Windows 10. That’s because Windows 11 has replaced the Command Prompt from the Power User menu with Windows Terminal. Fortunately, in Windows 10 you can pick what you want to see in this menu: Command Prompt or PowerShell.
To access the Power User menu you have to either right-click on the Start button or press the Win + X shortcut. From the contextual menu that will appear choose Windows PowerShell or Windows PowerShell (Admin) to run with elevated rights.
If in the menu shown above you see Command Prompt instead of PowerShell you have to enable the following option first. Go on and open the Windows 10 settings app, then navigate to Personalization > Taskbar and enable the checkbox next to Replace Command Prompt with Windows PowerShell in the menu when I right-click the start button or press Windows key+X.
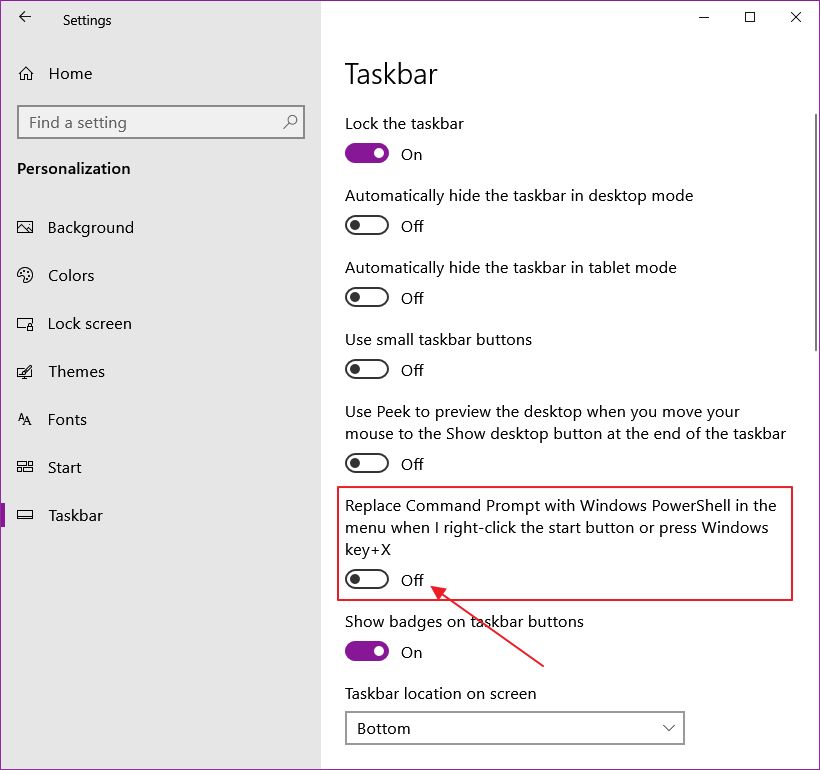
The two power user menu options will now update to PowerShell
Open a new PowerShell Tab from the Windows Terminal
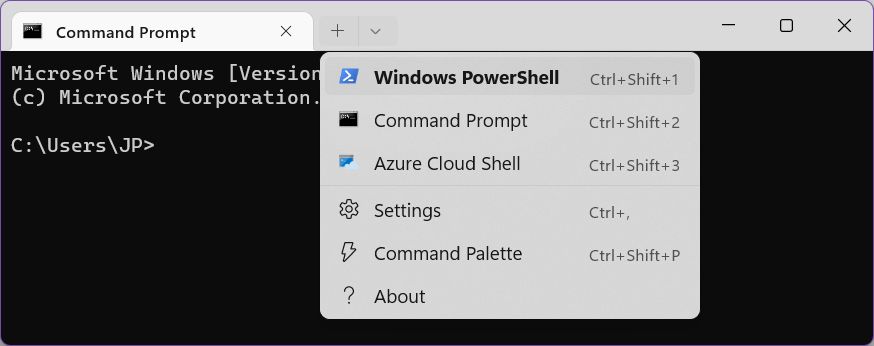
If you’re using the more modern Windows Terminal, which supports more command shells and features even a tabbed interface, you can open a new tab with PowerShell with just two clicks.
First, start the Windows Terminal by searching for wt or terminal in the Start menu and pick the first option.
At the right side of the tabs bar there’s a small arrow pointing down arrow. Click on it to open a contextual menu and choose Window PowerShell, or alternatively press the Ctrl + Shift + 1 shortcut.
Use One of the Control Panel Shortcuts within the Windows Tools Folder
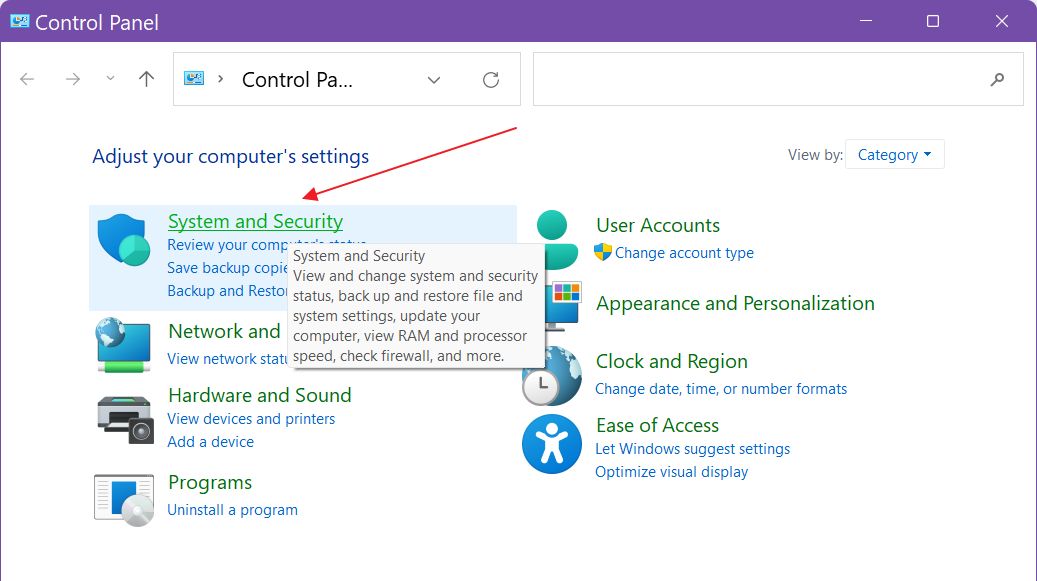
Control Panel is still very much a part of Windows, even if Microsoft hides it pretty well in Windows 11. Make no mistake, it’s still there. Inside the Control Panel, you’ll find a very useful folder with shortcuts pointing to various Windows utilities.
To access this folder you first need to open the Control Panel. Try the first method, searching in the Start menu.
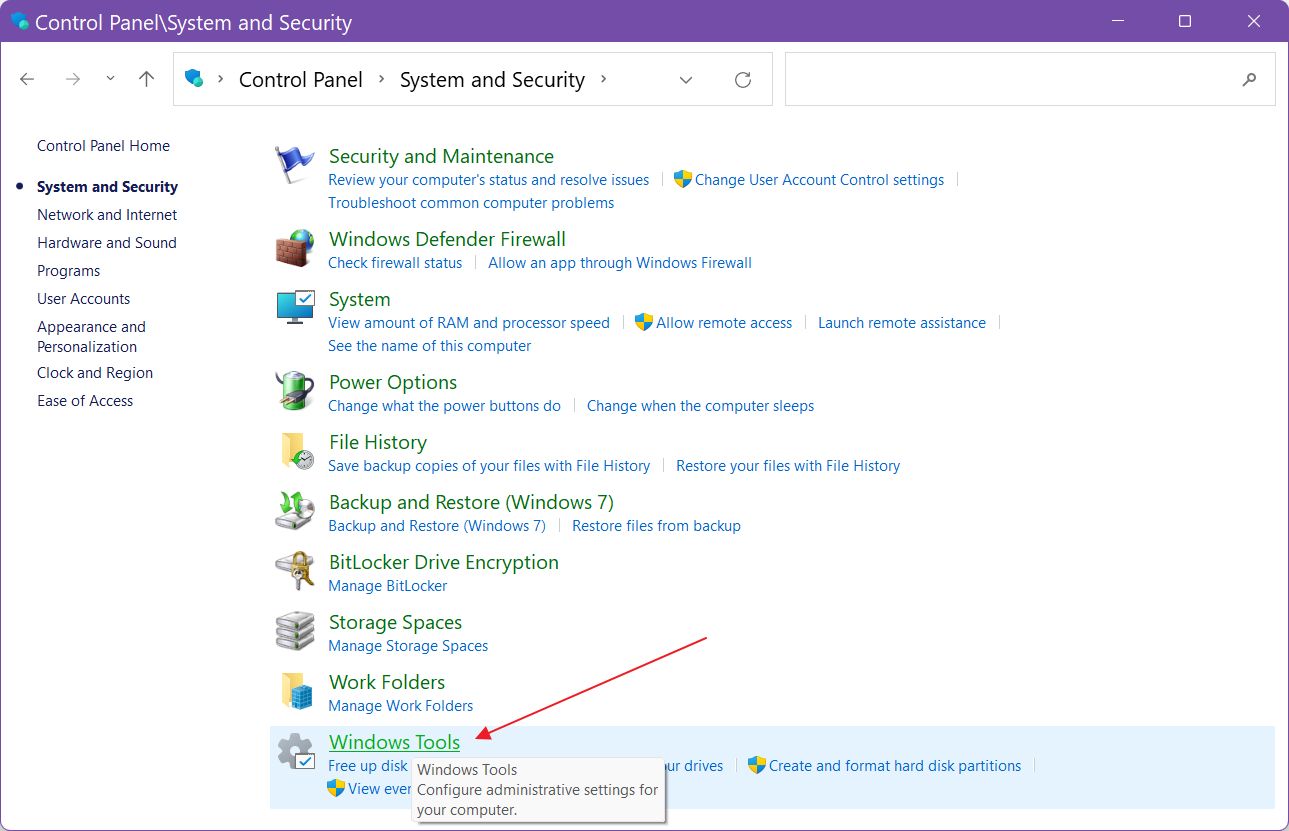
Once launched, navigate to the System and Security section.
In the next window scroll towards the bottom until you see the Windows Tools shortcut. Click to open.
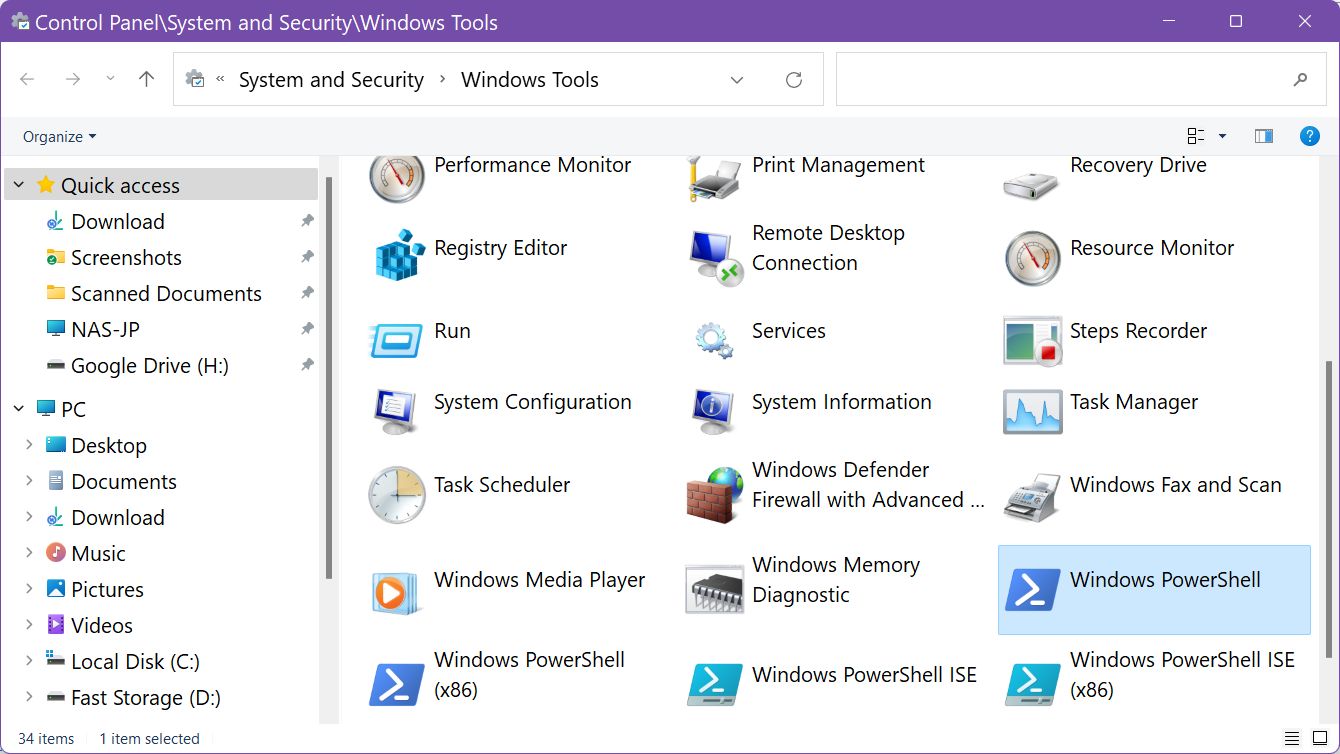
A new window will open this time. Towards the bottom, there are a few PowerShell icons. You only need the first one. Double-click on it to open. You can also right-click and select to run as administrator if you need elevated privileges.
I would like to present you another useful folder in Windows, the goofy named God Mode. It’s not what you think it is!
Create a Desktop Shortcut For Quick PowerShell Access
Another simple way to open PowerShell is from a highly visible desktop shortcut. Here’s how you create one in Windows:
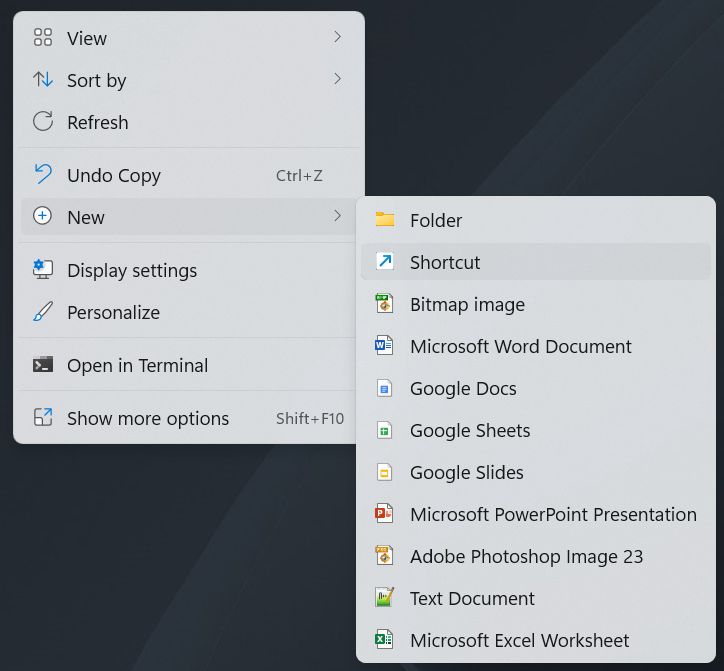
1. Press the Win + D shortcut to minimize all opened windows if they cover the desktop.
2. Right-click anywhere in an empty area and select from the menu New > Shortcut. This will start the shortcut wizard in Windows.
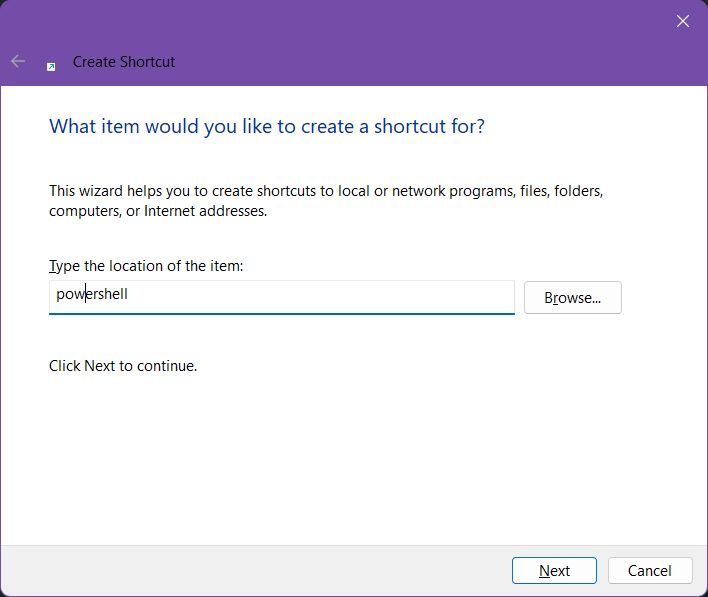
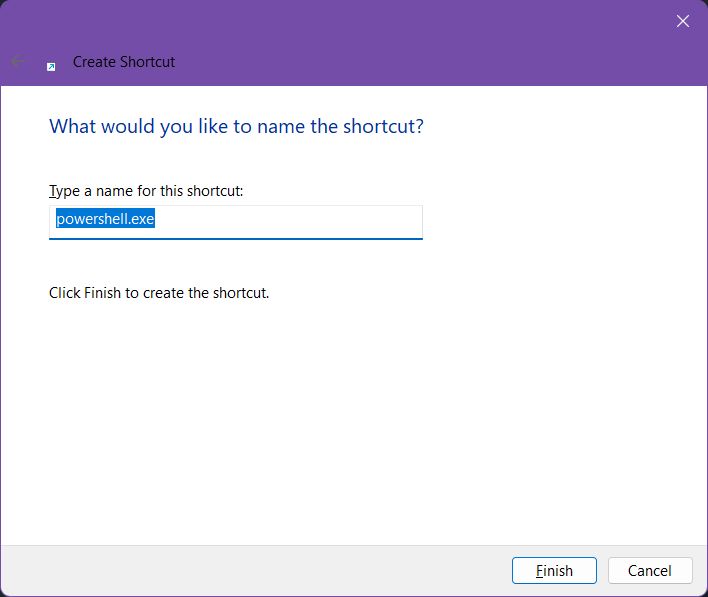
3. In the Type the location of the item: field you only need to input powershell and click the Next button to continue.
4. Now you will be asked to give your shortcut a title. Don’t waste too much time here and click on Finish. You can of course rename the shortcut later, if you choose, by selecting with left-click and by pressing F2 to enter the rename mode. By default, Windows will use the executable file’s full name as a shortcut title, which in this case is powershell.exe.
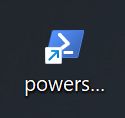
5. Now this is what the shortcut looks like on your desktop. Shortcut titles are clipped if they’re too long. To open a new PowerShell window you must double-click the shortcut.
Note: you copy of move this shortcut anywhere in Windows. It doesn’t have to sit on your desktop.
Long Way: Open PowerShell from its File Explorer Location
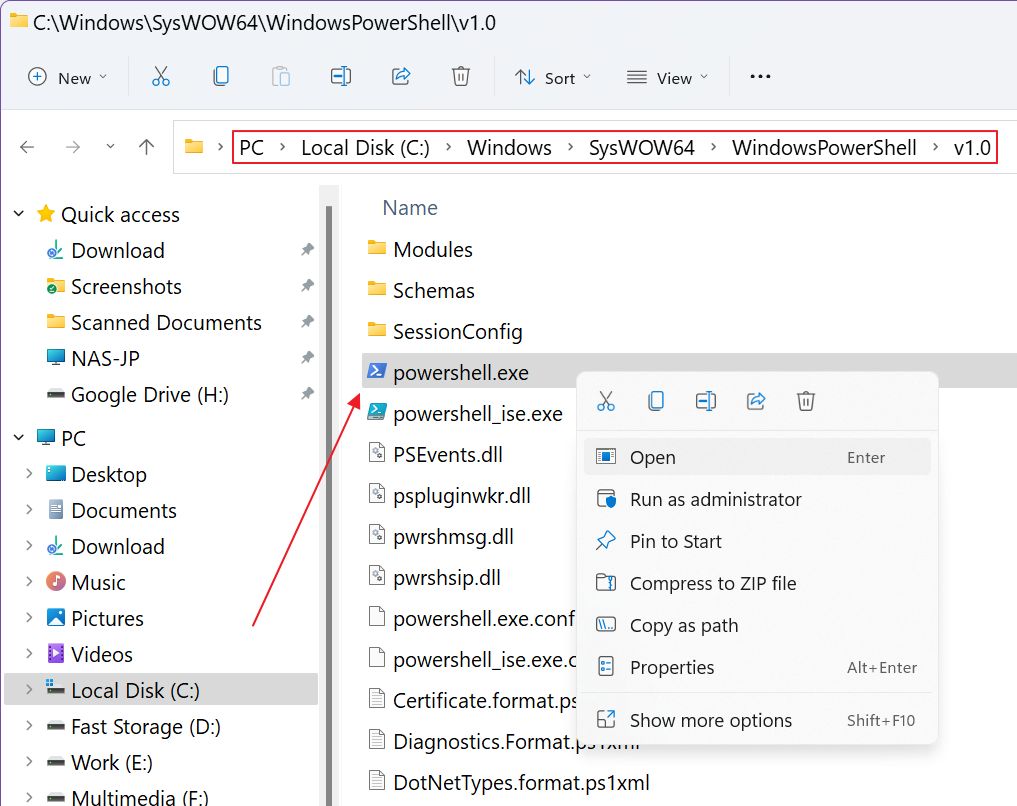
If you want to go the long way you can navigate to the folder where the PowerShell executable file is located. It’s in this folder:
C:\Windows\SysWOW64\WindowsPowerShell\v1.0Open File Explorer (Win + E), or your preferred file manager, and paste the address above into the address bar. Doing so will open the folder location immediately.
Or, you can navigate from the tree menu to PC > C: > Windows > SysWOW64 > WindowPowerShell > v1.0. Once you’re in this folder you will need to scroll a bit until you see the powershell.exe file. Right-click to open or run as administrator, or double-click the file to open directly.
Launch PowerShell From Within Command Prompt: Inception
Here’s a, dare I say, cool way to open CMD by using the old Command Prompt. It doesn’t make sense, as you can imagine, but you can do it if you want.
Open the Start Menu (Win key) and type cmd (or use any other method to open). Select the first result in the list to open the app. Now you have to type one of the commands below, followed by Enter to launch PowerShell:
start powershell.exe
start powershell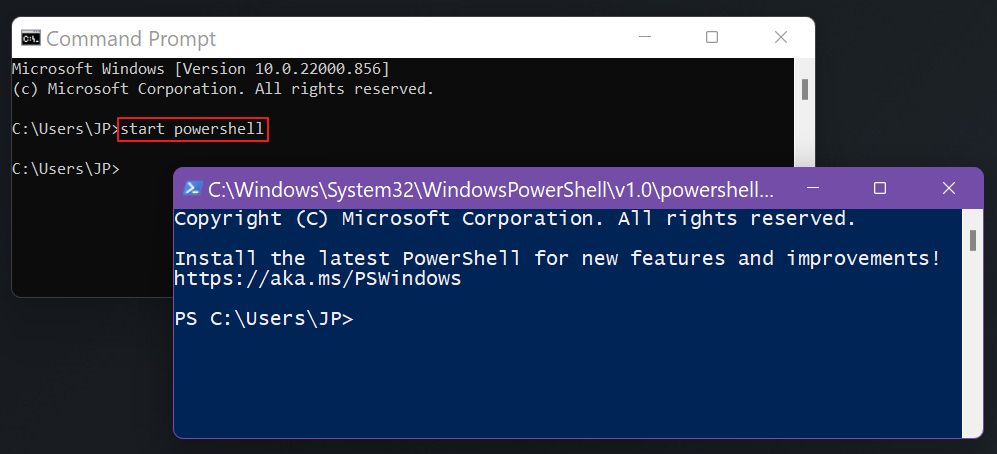
Note: the command also works from a PowerShell window, if you wish to quickly launch a separate PowerShell window.
If you don’t want to fill your memory with the methods shown above the best option is to pin the app shortcut to either the taskbar or your PC Start menu. If you’re a casual user of PowerShell it’s probably a better option to add the link to the Start menu, where it’s not visible all the time
Open PowerShell first, then (1) right-click on the program icon in the taskbar. (2) Right-click again on the Windows PowerShell link (first from the bottom) in the small contextual menu and in the new submenu (3) choose Pin to Start.
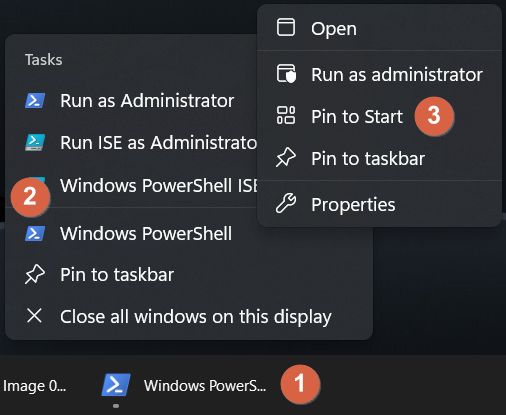
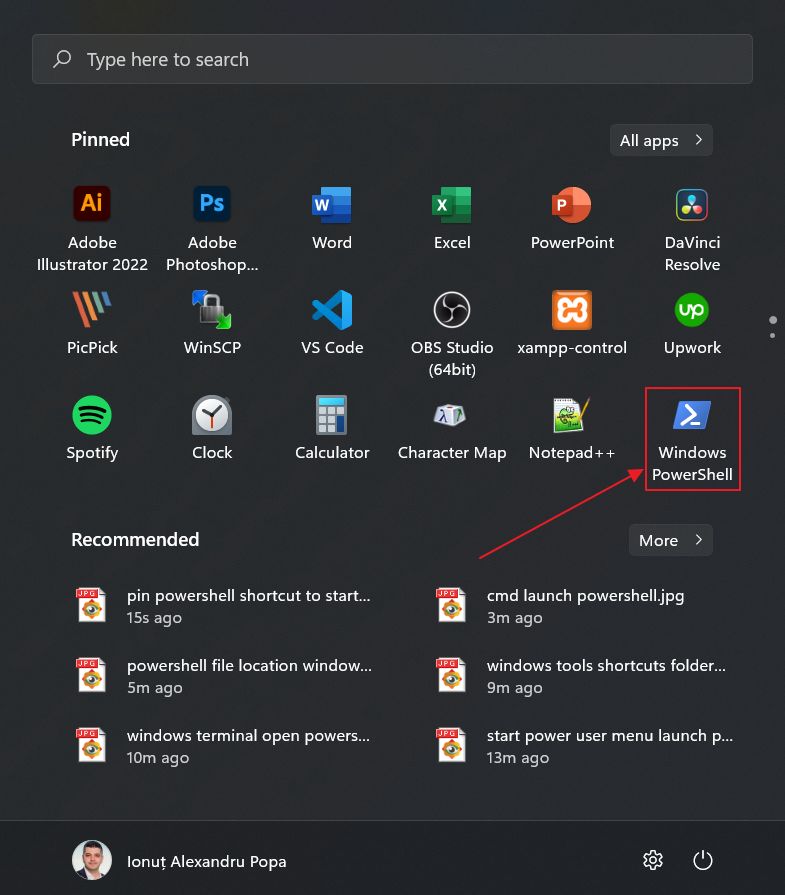
From now on, every time you open the Start menu you’ll see the link to Windows PowerShell. Just click on the icon to open.
Now, what’s your go-to method of opening the Windows PowerShell? Do you prefer using CMD instead? Let us know in the comments.