- It’s easy to add a handwritten style signature to a Word document to give it a note of authenticity or for legal reasons.
- While Microsoft Word doesn’t include a handwritten signature function, you can scan or take a photo of your signature and add it to any document.
- It’s possible to even save a complex signature as a template in Word.
- If you’re using a touch-enabled device with a stylus you lastly have the option to draw your signature directly in Word.

If you need to sign Word documents for whatever reason Microsoft’s most popular document editor doesn’t include any functionality for handwritten signatures. Weird, right?
Yes and no, but mostly no, because there’s a simple way to add your handwritten signature to a Word document as an existing image, anywhere you want in the document. No need really for Microsoft to call this option “Insert a signature”.
It’s easy, you’ll see.
CONTENTS
Prepare the Signature Image for Word: Sign, Scan, or Take a Picture
How do you get your handwritten signature in a form of a digital image? The most accurate way would be to:
- Sign on a piece of paper.
- Use a scanner to scan the piece of paper.
- Crop the image to cover only the signature content and save it to a file.
What if you don’t have a scanner? Most people don’t, but everyone owns a smartphone. So take a picture of your paper signature, but make sure there’s good light and you keep your phone camera perfectly parallel with the signature to eliminate any perspective distortions.
Do these steps and in a few minutes, you will have your signature ready to insert into a Word document.
How to Add a Signature in Word by Inserting an Image
1. Create a new document or open the document you want to sign in Word.
2. Place the cursor at the position where you want to insert the signature.
Note: you can always move the signature to a new position later on, but why waste the time?
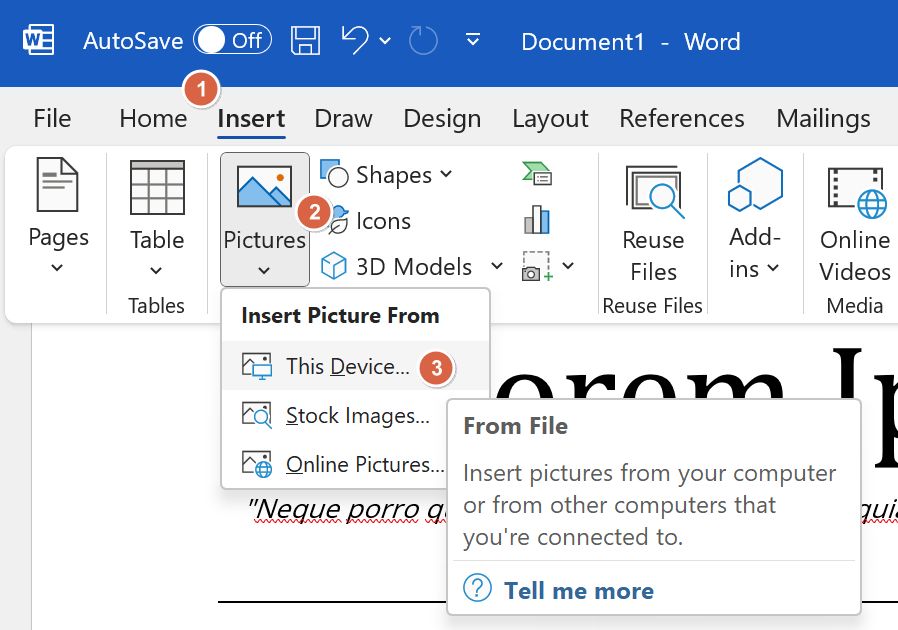
3. Navigate to the Insert tab.
4. Click on the Pictures and select This Device. A File Explorer browse window will let you navigate to the folder where you saved your digitized signature. Select the correct file and confirm.
5. The signature image will be inserted into the opened Word document.
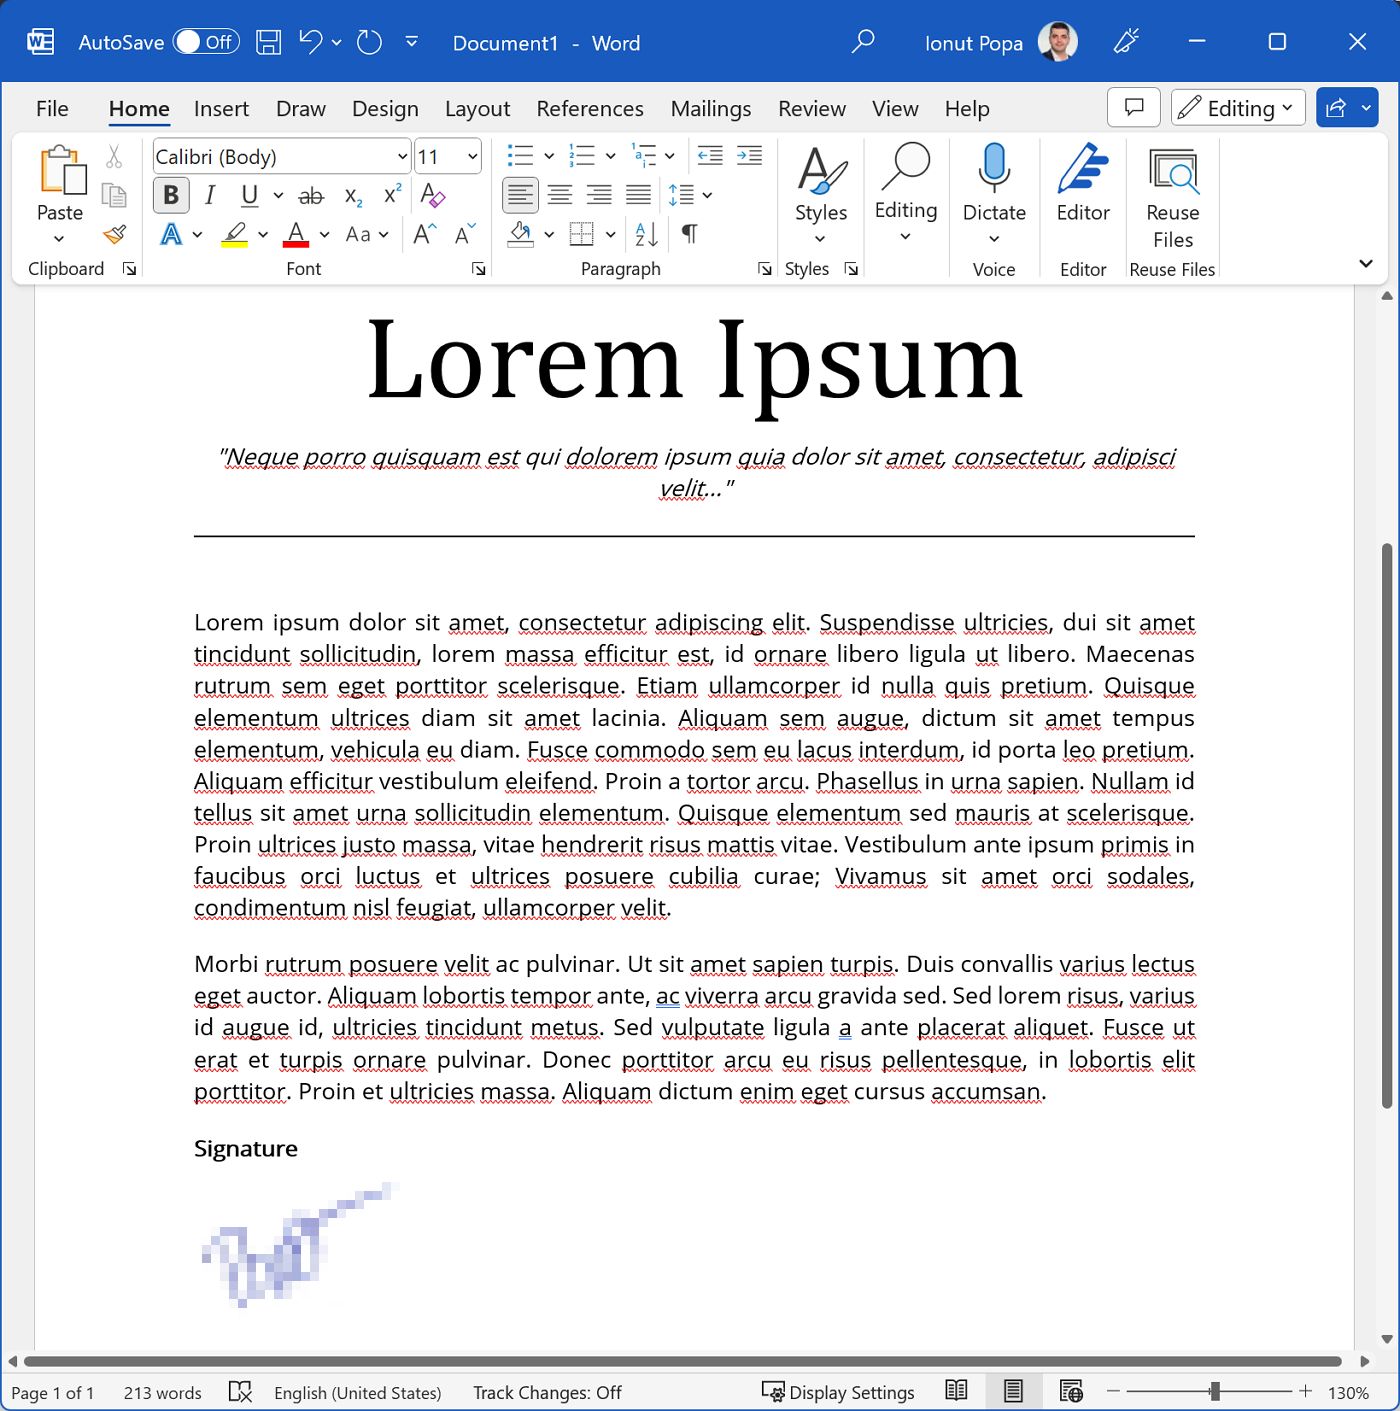
All you have to do at this point is to save the document. That’s the quickest way to insert your handwritten signature in Word.
If you do this over and over again there’s a better way to save your signature in Word for later use. Read on to see how it’s done.
How to Remove Signature Image Background in Word
I would urge you to do one more thing before sending the signed document to the intended parties: remove the signature image background. This way you can overlay the signature image with transparency over any other document element.
Also, even if you sign on a white piece of paper, when you scan or photograph the piece of paper the background won’t be completely transparent, but a light gray, so for aesthetic reasons it’s best to just remove it.
Fortunately, Microsoft includes image background removal functionality directly into Word:
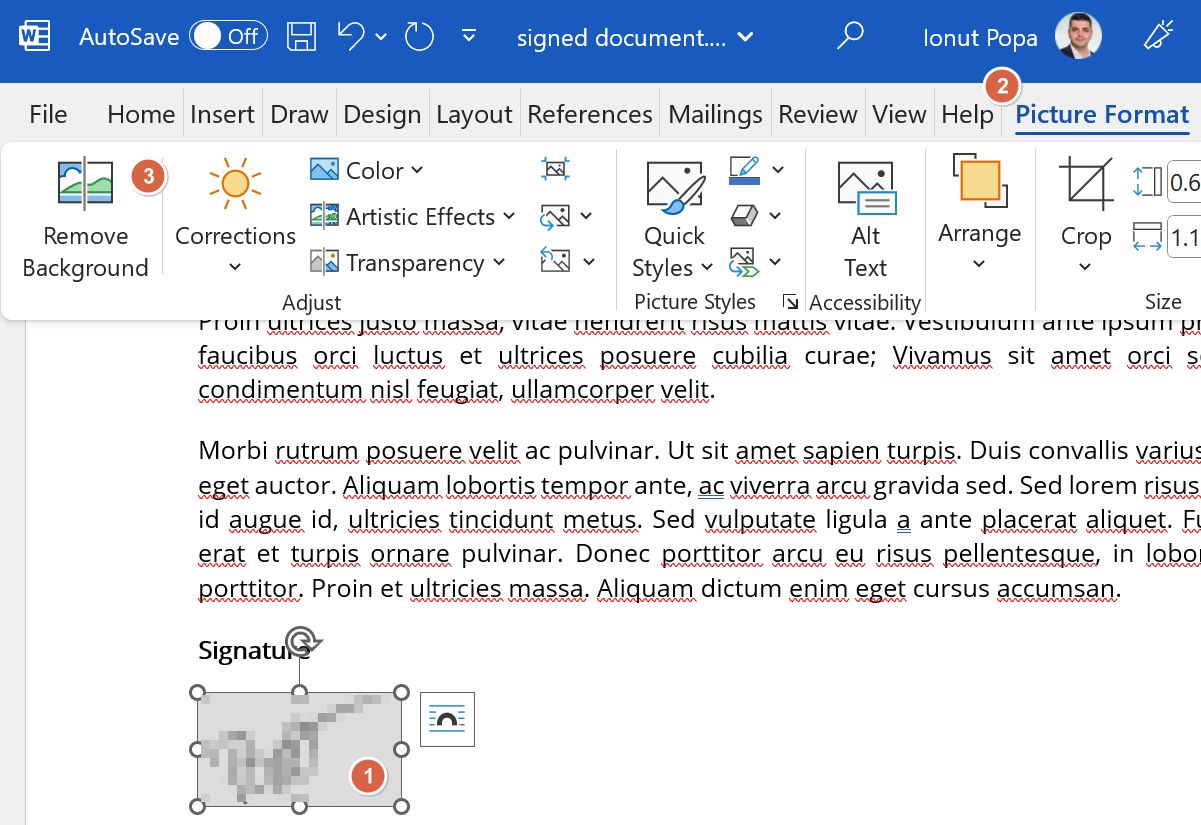
1. With the previous document open click on the signature image.
2. Click on the Picture Format tab in the Word top ribbon toolbar.
3. Click on the Remove Background button.
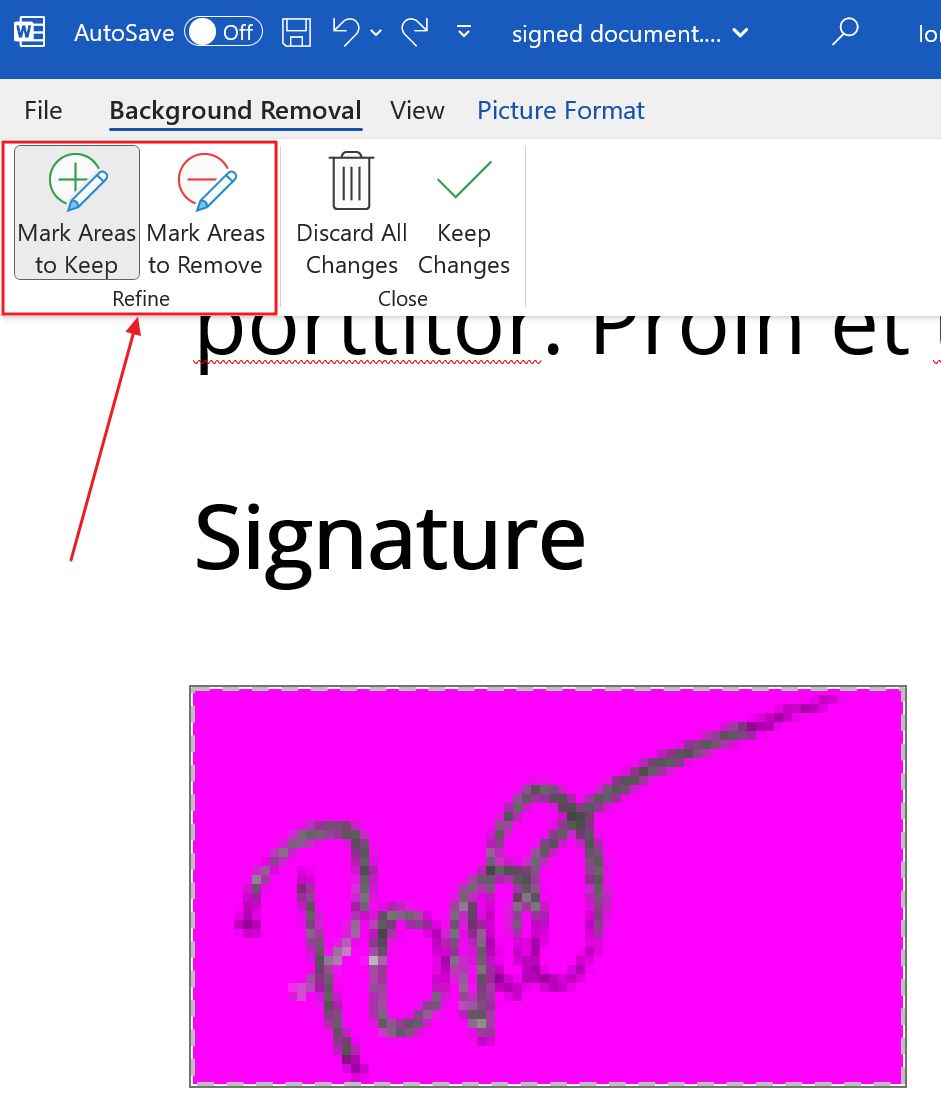
4. The signature object will appear now with a magenta background. Visible elements after the background removal will be displayed with a dark gray shade.
Use the two refine buttons to map areas you want to keep and areas you want to be removed in the final image. When done confirm with Keep changes.
5. Here’s how the signature will look with the background removed. Note that now the signature blends perfectly with the Word document.
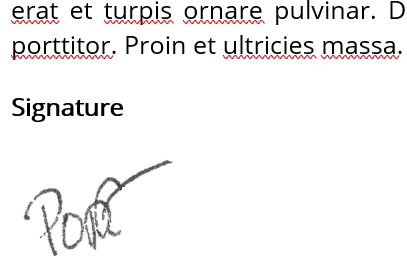
If you messed up the background removal always use CTRL + Z to go back to the previous step, refine once more, and see if your problem is solved. I had to do it a couple of times til I got it right.
How to Create a Reusable Signature Template in Word
Now, if you want to keep your signature stored in Word, maybe with a couple of other pieces of info (your full name, position, contact info maybe?) here’s what you have to do.
1. Arrange the signature area as you want it to look in the signature template.
2. Select all signature elements.
3. With everything selected click on the Insert tab.
4. In the ribbon interface, to the right, find and click on the Quick Parts menu.
5. From the overlay select the Save Selection to Quick Part Gallery option.

6. A new popup will show up. Give the template a name you can easily recognize. In the Gallery selection make sure to select AutoText. Click OK to confirm.
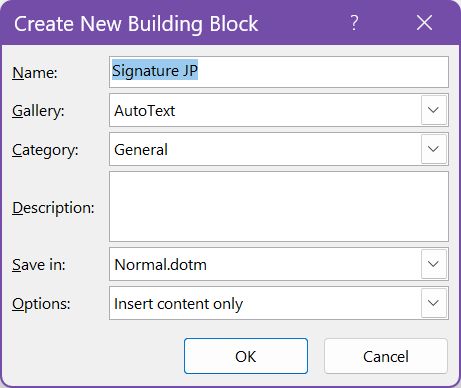
That’s it: you now have your signature saved into Word.
How do you insert the signature template into other documents?
Easy, Go to Insert > Quick Parts > AutoText > select one of the saved templates.
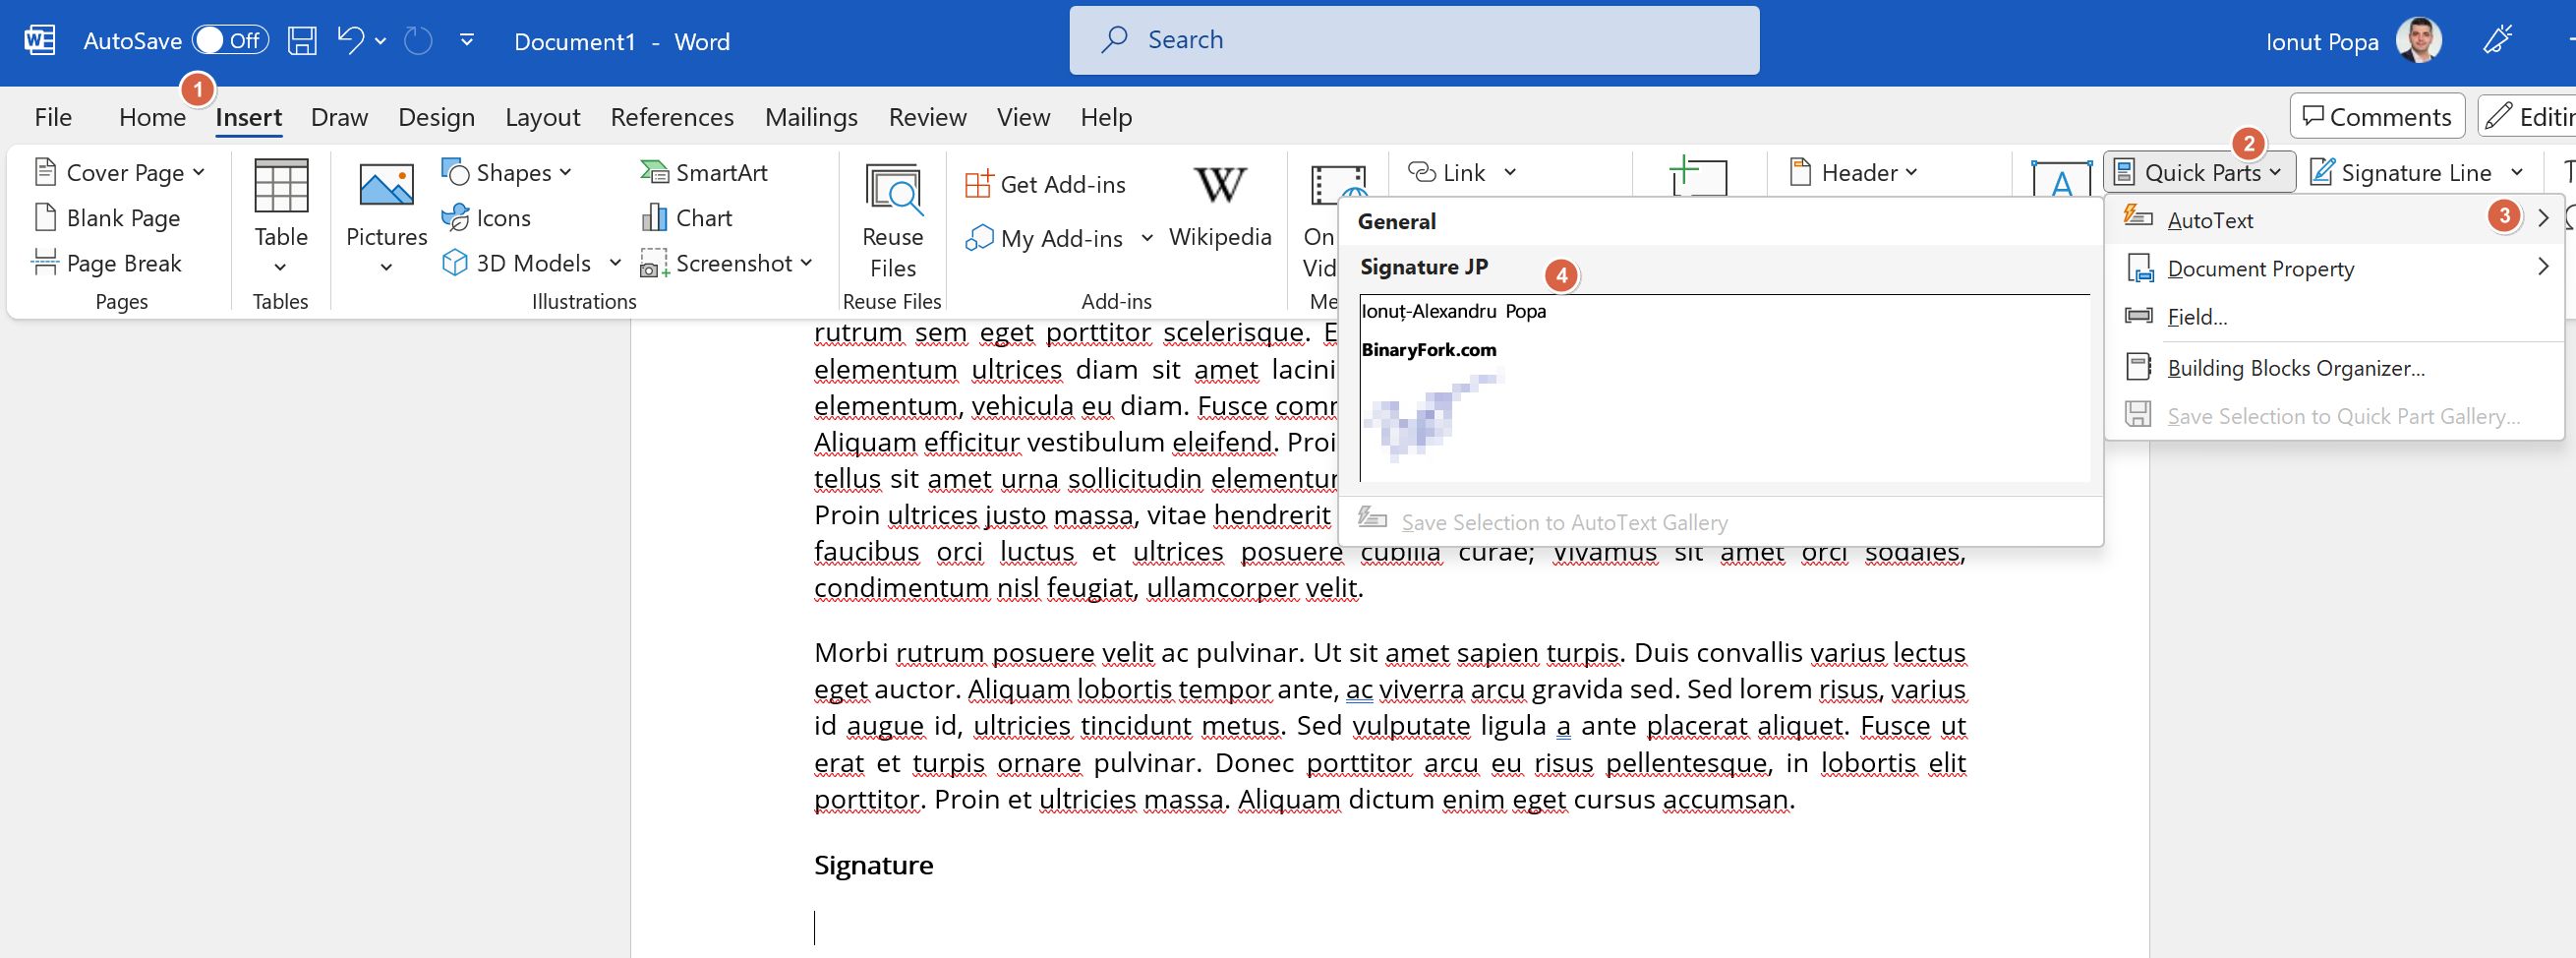
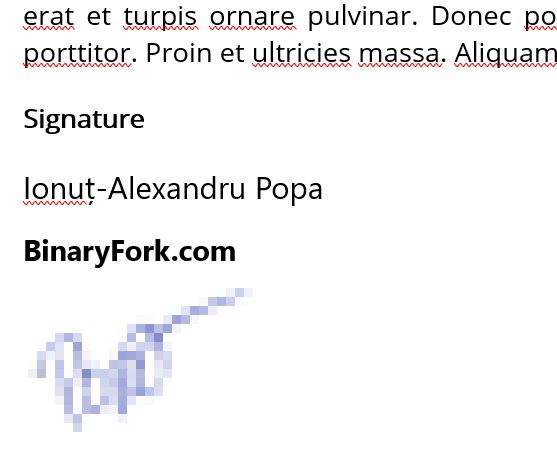
The previous signature block will be inserted at the cursor position. You can reselect the items, correct, edit text, reposition, or do whatever you like.
How to Create a Signature in Word by Drawing Directly in the Document
I want to touch on one more situation: what if you want to draw the signature directly? You may call this a digital signature, but don’t, it’s not the same thing.
Anyway, if you have a touchscreen device and a good stylus you can get a very nice-looking hand signature. You can of course draw with your mouse on a non-touch-enabled device, as I did for the purpose of this article, but it doesn’t look good.
1. Open the document you want to sign and navigate to the Draw tab.
2. Select one of the Pen tools.
3. Play around with the pen settings such as thickness and pen color.
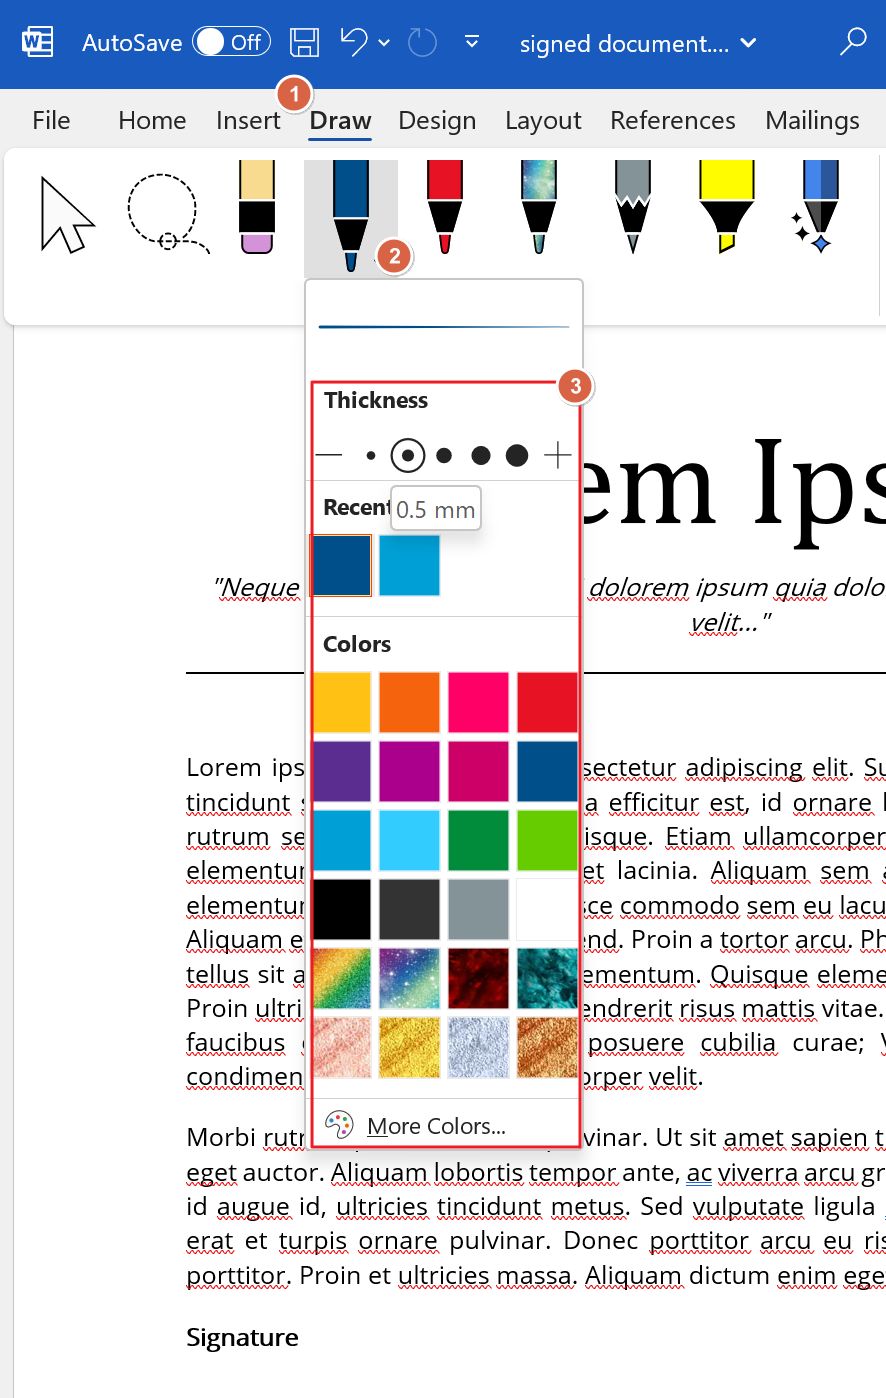
4. Now draw anywhere in the document. When you’re finished click on the Select tool. This will close the draw session.
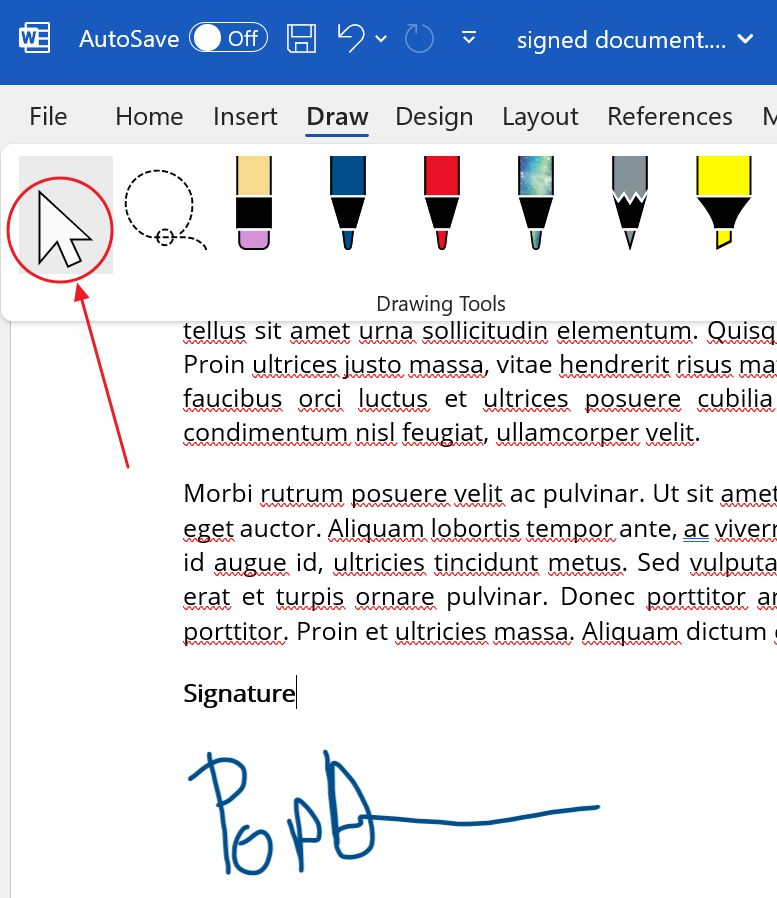
5. Click on the signature drawing.

This is automatically saved as a vectorial object with transparent background. You can resize and move around as you please.
You can even save it as a template, as we did in the previous step. This is what I would do.
Also read about most useful Microsoft Word keyboard shortcuts, learn how to embed a YouTube video in a PowerPoint presentation and change slide size.
And these are all the ways you can insert a signature in Word. Let me know if you find this article useful and I’ll make sure to cover practical topics like this in the future on BinaryFork.
If you need to sign PDFs instead, I’ve shown how to manually sign a PDF with Edge.


