- Learn how to install Windows 11 on unsupported computers by adding just 3 registry keys during the initial setup.
- Want to try Windows 11 on an older PC but you don’t meet the minimum requirements?
- There are a couple of ways to bypass Windows 11 checks, but not all are simple or are simply outdated.

The worst thing about Windows 11 is not the taskbar (it can easily be fixed), but the minimum system requirements, which do make a lot of recent computers obsolete.
Fortunately, there are quite a few methods to bypass these checks, but they’re not very simple. As a recap here are our articles covering this topic:
- Create an ISO image with Rufus that skips all checks
- Use a third-party script, MediaCreationTool to modify an existing ISO image
- Skip TPM checks while upgrading from Windows 10
- Microsoft’s own official bypass guide (you heard that right)
If you don’t fancy these methods, or they just do not work for you, here’s a guide on how to proceed if you’re clean installing Windows 11 and get to his dreaded screen in the early stages.
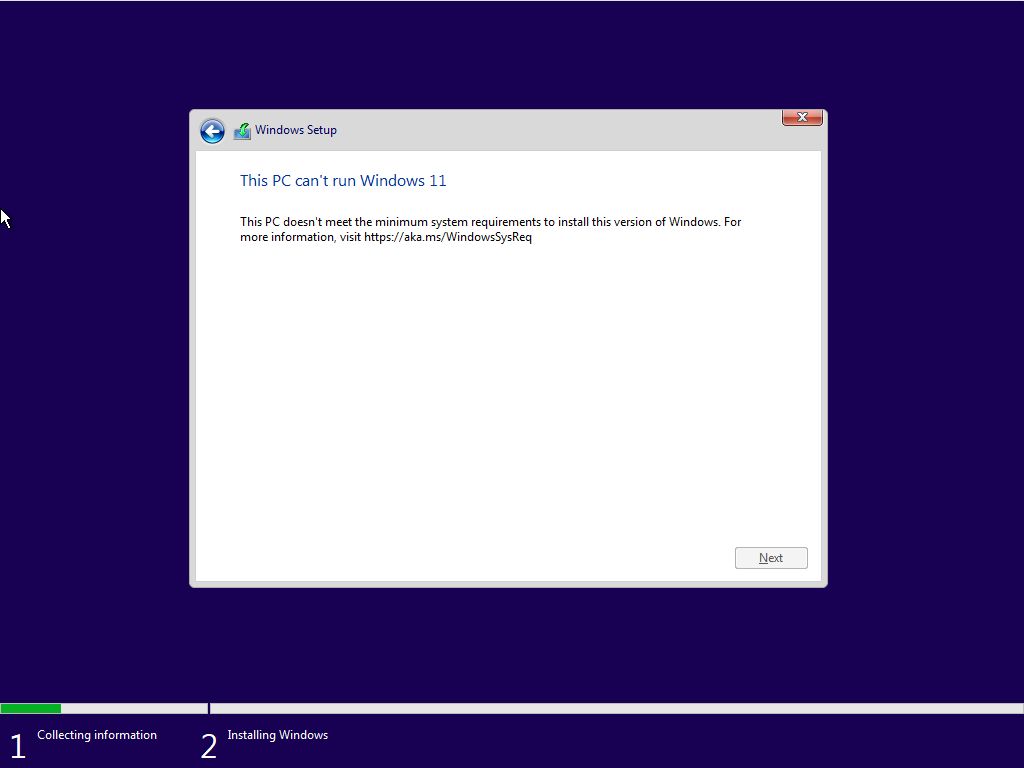
Add Registry Keys to Bypass Windows 11 Checks During Setup
1. Stay at this step and press Shift + F10. This will open the Command Prompt inside the Windows installer.
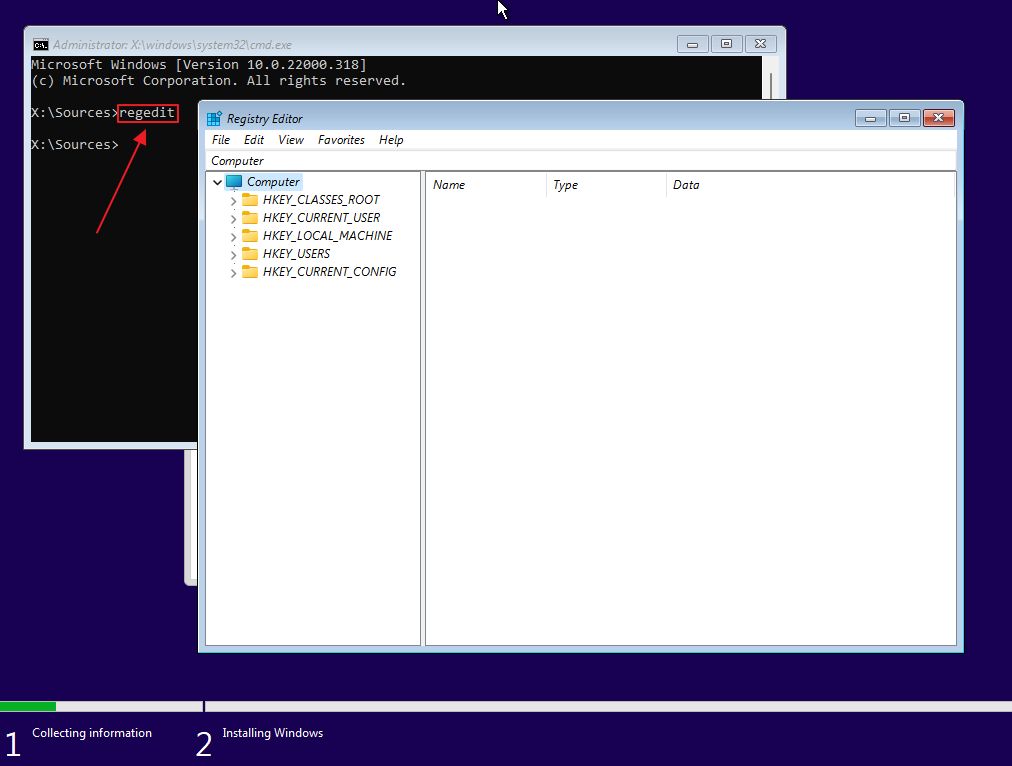
2. Inside the Command Prompt type regedit and press enter to launch the Windows Registry Editor app.
It looks like this, is confusing at first, but what we have to do is simple enough if you follow my instructions.
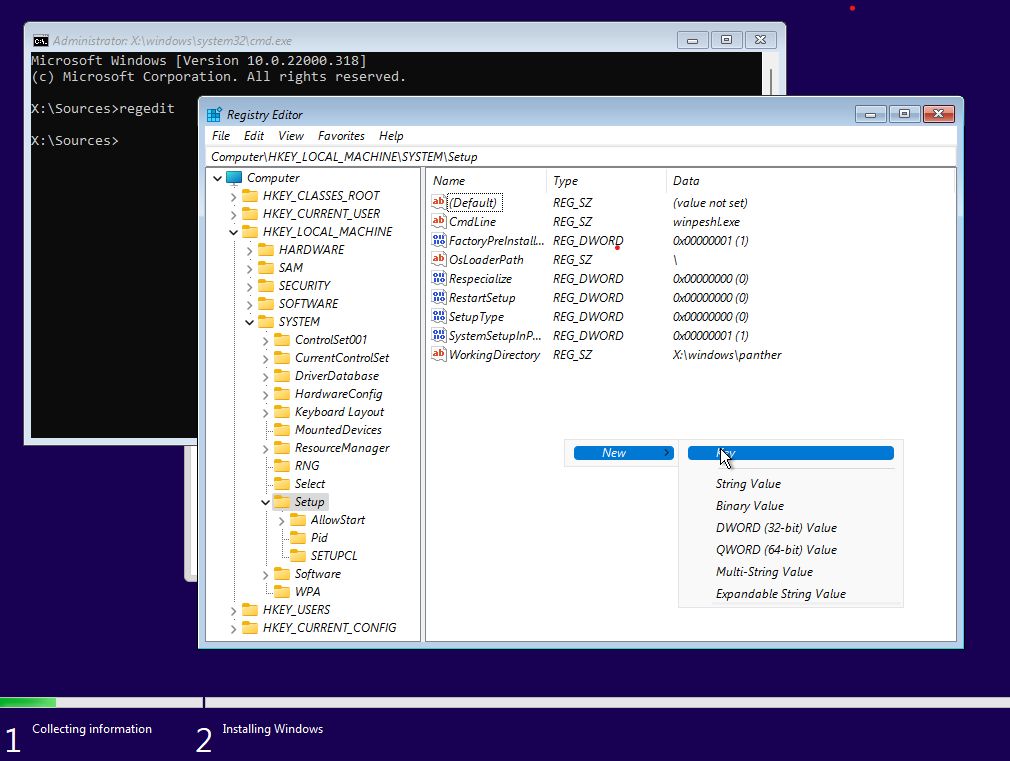
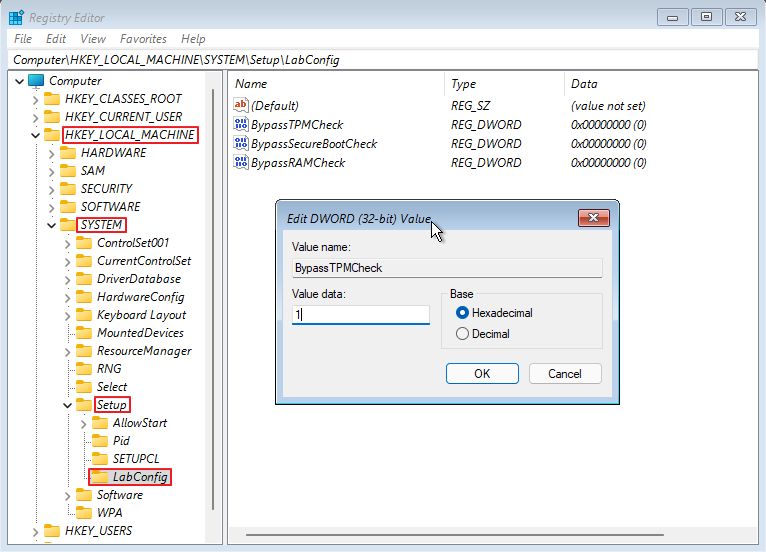
3. In the left-side menu open each right-pointing arrow and navigate to the following section:
HKEY_LOCAL_MACHINE > SYSTEM > SETUP
4. Right-click in the right panel and choose New > Key. Type LabConfig and press enter to confirm.
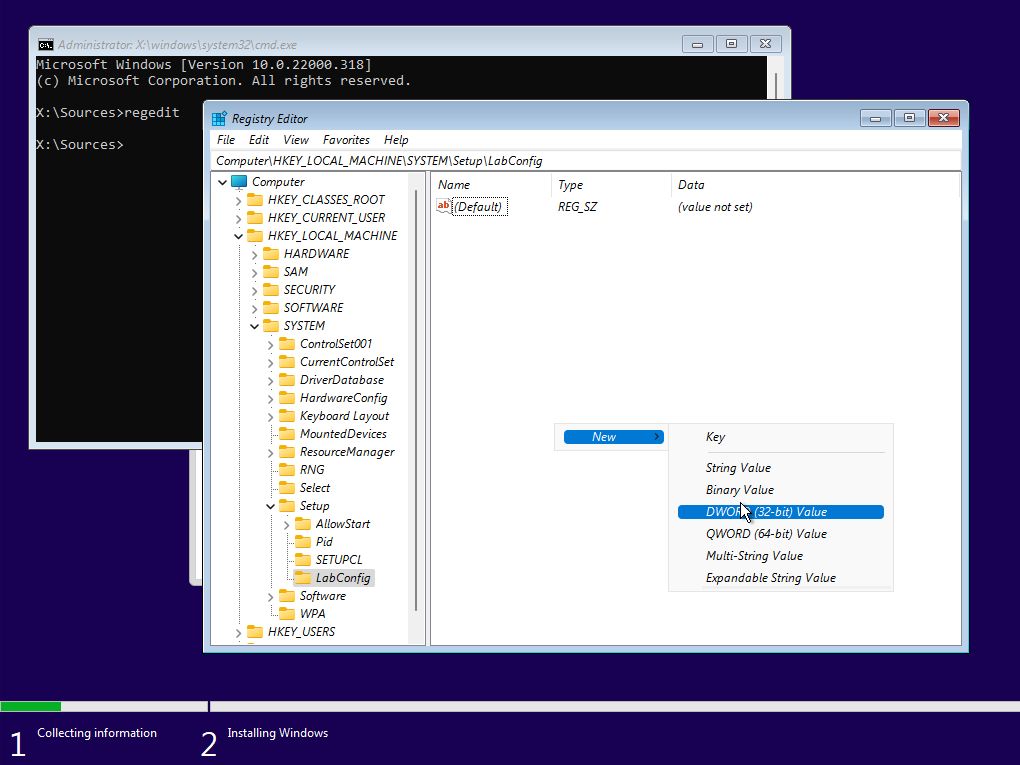
5. Click on LabConfig in the left tree to open. Right-click into the right panel again and select New > DWORD (32-bit) Value. Repeat as you need to add a total of three values:
Registry values:
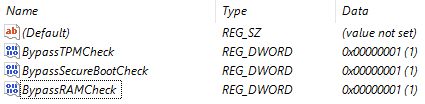
- BypassTPMCheck
- BypassSecureBootCheck
- BypassRAMCheck
6. Double-click each of the three values and change from 0 to 1. Press OK each time to save.
7. At the end you should see these three values inside the LabConfig entry.
8. Close both the Registry Editor and the Command Prompt. Get one step back in the Windows 11 setup and try again. You should finally see the EULA screen.
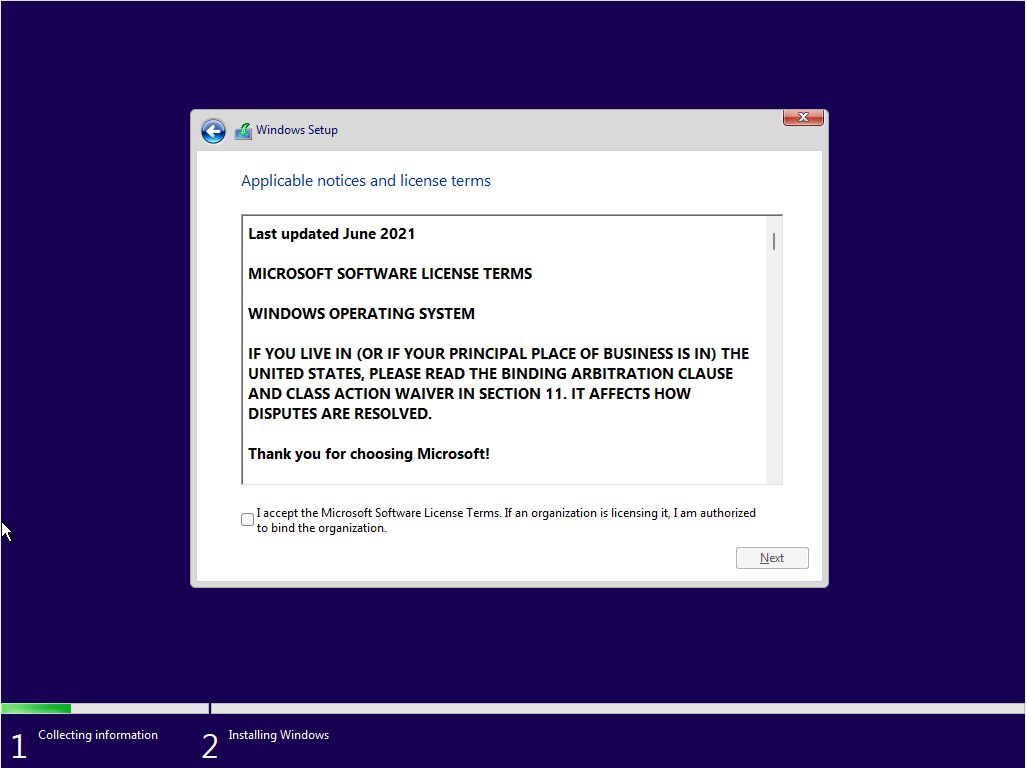
You can now finish the installation on your unsupported Windows 11 machine. Everything should work pretty much OK, but you can expect some updates not installing, or even problems after specific updates that modify parts of the system that have anything to do with the minimum requirements.
You can pause updates or even roll back existing ones, but I’d say you shouldn’t install Windows 11 on your main machine. You could be setting yourself to a world of troubles that you could avoid by simply sticking with Windows 10 or, if the budget permits, by buying a new computer.
Did you try this guide? Did it work? Let us know in the comments.


Steps to by the unsupported PC issue
1. Using ISO from MS Win11_22H2_English_x64v2.iso download 7/14/2023
2. Added Registry keys below per your article
Windows Registry Editor Version 5.00
[HKEY_LOCAL_MACHINE\SYSTEM\Setup\LabConfig]
"BypassTPMCheck"=dword:00000001
"BypassSecureBootCheck"=dword:00000001
"BypassRAMCheck"=dword:00000001
3. Shutdown PC
4. Turned On PC
5. Mounted Windows 11 Image with file explorer and clicked setup
6. Same PC not supported error
Benjamin,
You need to add the three keys during Windows setup. After adding the keys continue setup and it should work. Try Rufus using our other guide (https://binaryfork.com/bypass-windows-11-requirements-rufus-3775/) if this still doesn't work for you.
Thank You batushka Ionut!!! Works every time. Jesus Saves.