- Learn what a MAC address is (physical address of network cards), how to find MAC address on Windows using command-line commands, the Settings App, System Information, and Control Panel.
- The MAC address of your network card is used to identify a network adapter interface (NIC) uniquely.
- While you don’t need to know the MAC address, there are use cases where you would want to know how to retrieve this unique number.
Networks and networking, in general, are complicated things. There’s no way around this, unfortunately. This doesn’t mean you have to deal with IPs, MAC Addresses, routers, and the like too often on a modern computer. But when you do the are tons of guides to help you out, just like this one.
The MAC address is like the serial number of a network adapter/card (NIC) and consists of six groups of hexadecimal digits. It doesn’t have anything in common with Apple Macs.
A MAC address looks like 4D-34-A5-B7-87-E1 and should be unique to each network card, but most interfaces allow users to change the MAC address freely. As long as you don’t use the same MAC for two devices in the same network you should be fine.
If you believe the IP address is the only thing that matters when it comes to sending packages of data online the truth is that networks also use the MAC address for TCP/IP connections. They just work on different levels of the OSI stack.
CONTENTS
- Why Would You Need to Know the Physical MAC Address?
- How to Find the MAC Address on Windows Using the Command Prompt
- Find the MAC Address Using a PowerShell Command
- Two Ways To Find the Physical Address With the Windows 11 Settings App
- And Two Ways To Find the MAC Address With the Windows 10 Settings App
- Use System Information to Get the Mac Address of your Network Adapters in Windows
- How to Find MAC Address on Windows 10 and 11 Using the Control Panel
Why Would You Need to Know the Physical MAC Address?
The MAC address definition doesn’t answer the question “Why Would You Need to Know the MAC Address of a NIC (Network Interface)?”.
A few useful situations I’ve found are:
- You want to filter MACs that can connect to your router to only allow specific devices.
- You change your router and don’t want to talk to your ISP to change the MAC address in their database, so you clone the old router’s MAC.
- You need to troubleshoot Internet access problems with your ISP and they ask for your MAC address.
How to Find the MAC Address on Windows Using the Command Prompt
You know I like using commands as much as possible if it’s faster than clicking the mouse all day long. So naturally, I’m going to start with the Command prompt.
1. Open the Windows Run command window (Win + R).
2. Type cmd and press Enter.
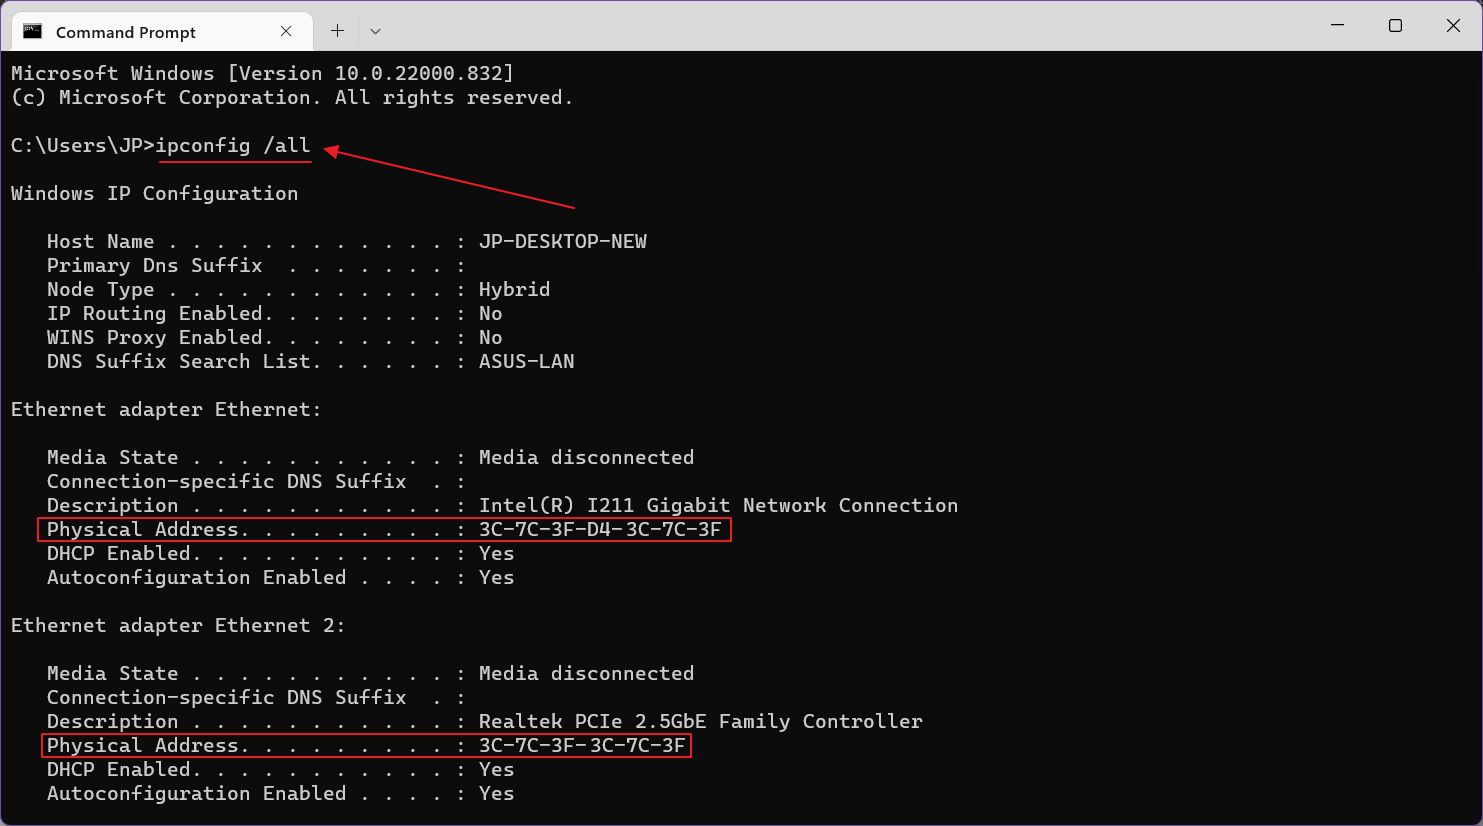
3. In the new window type ipconfig /all and press Enter to execute the command.
4. Scroll through the list of all adapters and look for the Physical Address.
Find the MAC Address Using a PowerShell Command
If you’re a fan of the new PowerShell there’s a command that works there too.
1. Open the Windows Run command window (Win + R).
2. Type powershell and press Enter.
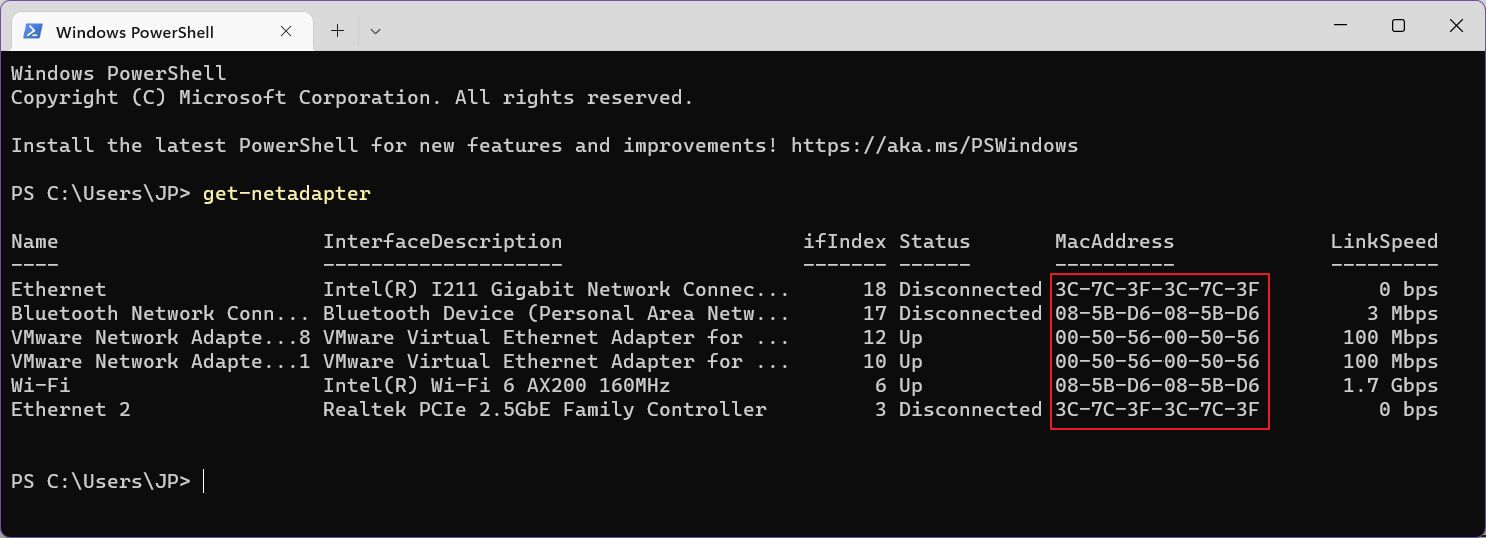
3. Now, enter the following command: get-netadapter.
4. In the new table listing look for the MacAddress column to see the MAC for all adapters installed on your system.
Two Ways To Find the Physical Address With the Windows 11 Settings App
The new Settings app is one of my favorite things about Windows 11, and there’s a way to check the adapter MAC using it (actually two methods).
Method 1
1. Open the Settings app (I always use the Win + I keyboard shortcut).
2. Select Network & internet from the left-side menu.
3. Scroll the right-side panel until you reach Advanced network settings.
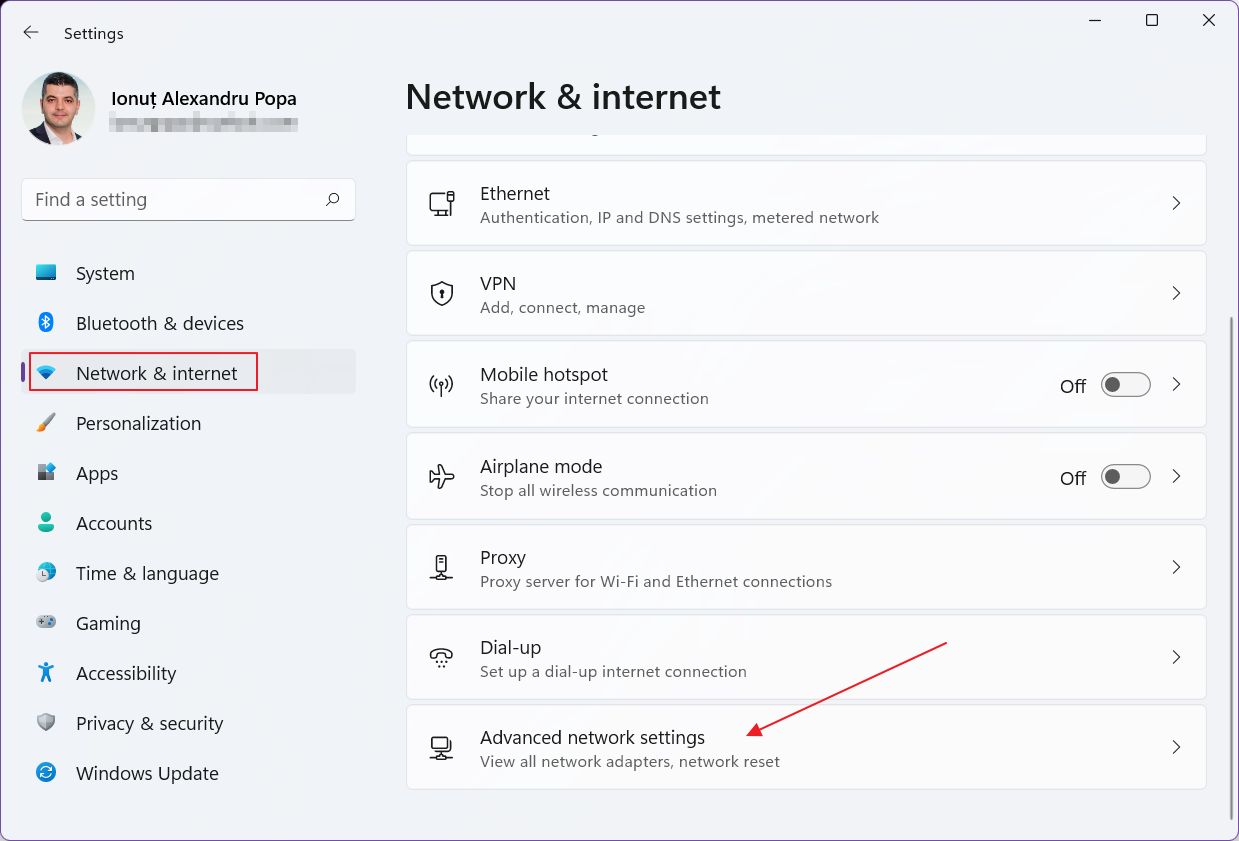
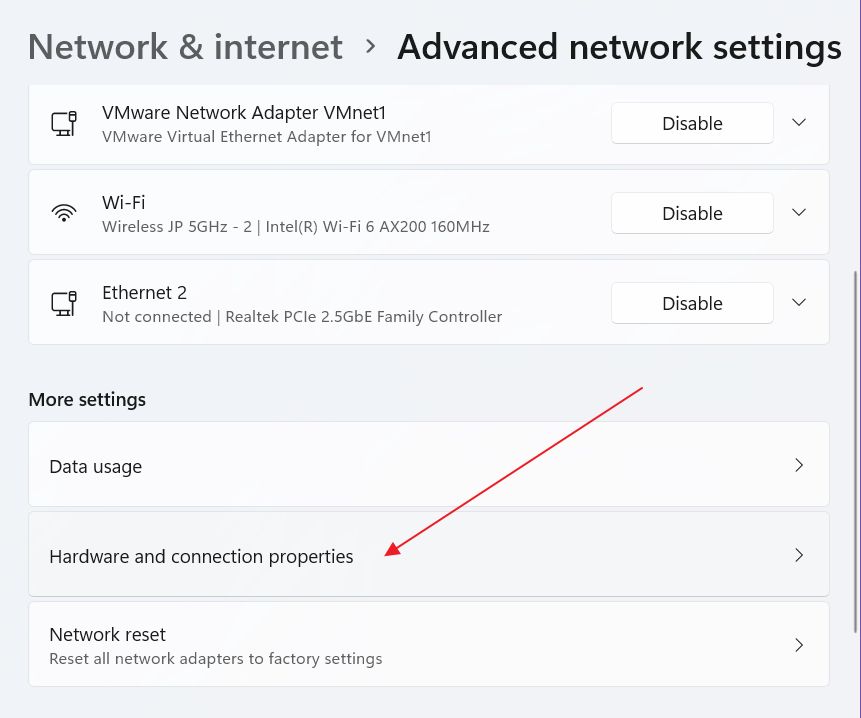
4. The panel will refresh, scroll and click on Hardware and connection properties.
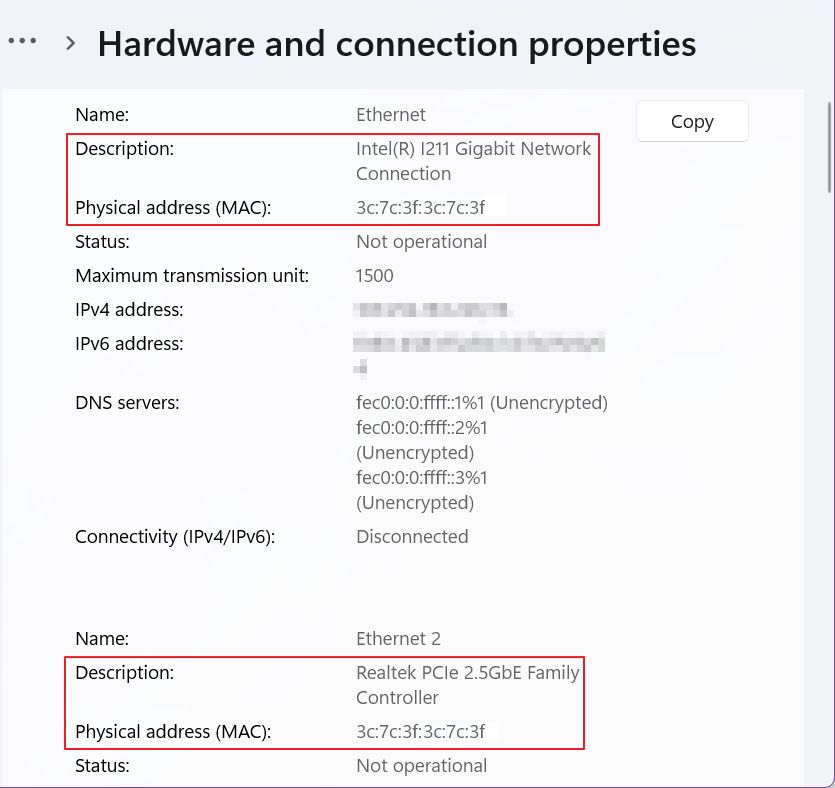
5. You’ll see a list with all detected adapters. Note the Physical address (MAC) for each of them.
Method 2
This does pretty much the same thing:
1. Open the Settings app again.
2. Select Network & internet, again, from the left sidebar.
3. Scroll the right-side panel until you see Advanced network settings. Open the panel again.
4. At the top of the new panel you’ll see a list of all NICs. Expand the one you need by clicking on the down arrow.
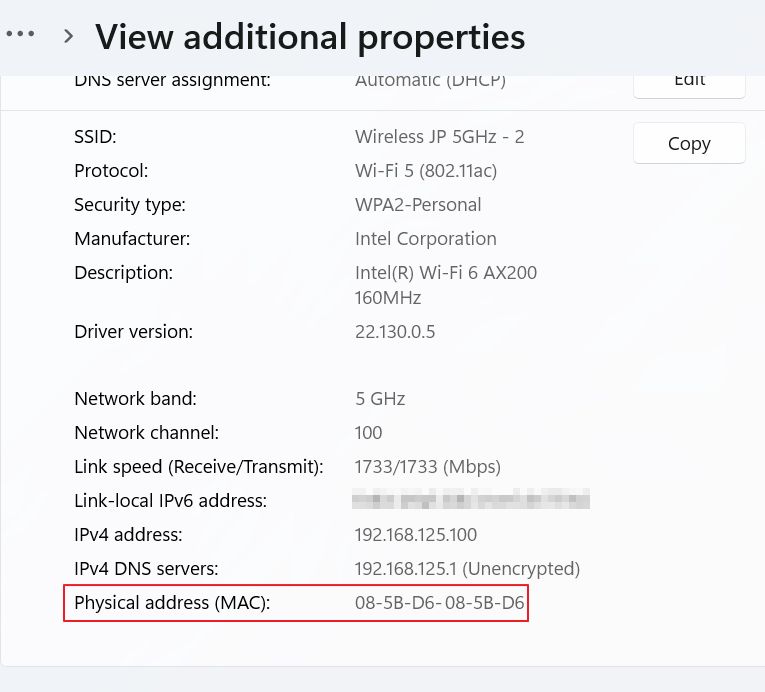
5. Click on View additional properties.
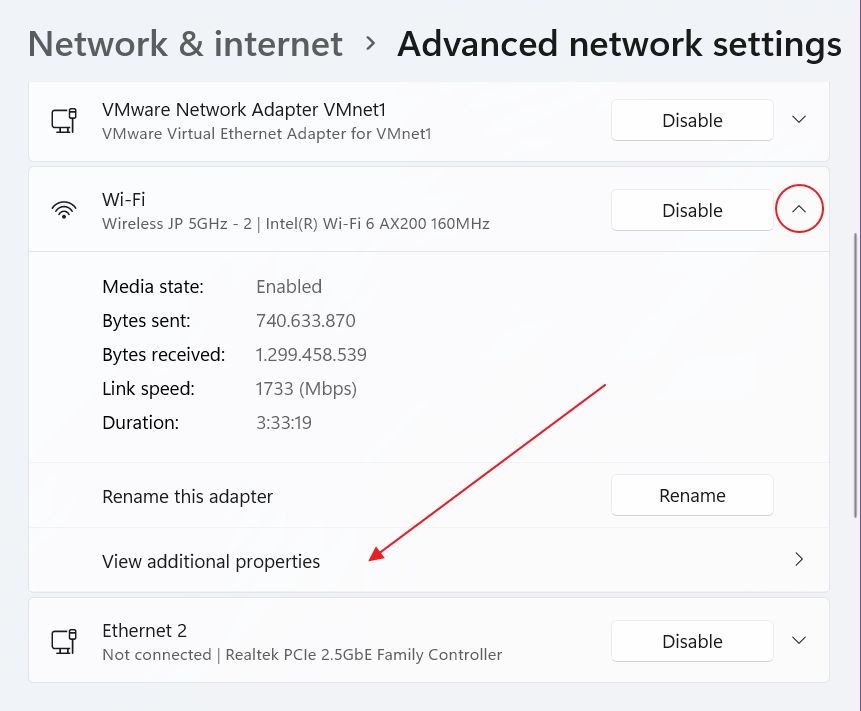
6. Check the Physical address (MAC) line in the new table listing.
And Two Ways To Find the MAC Address With the Windows 10 Settings App
If you’re still on Windows 10 you will use the older Settings app, not as good as the one in the current version of Windows. That’s why the steps differ a bit. There are still two methods at your disposal:
Check MAC Address for All Adapters in Windows 10
1. Open the Start menu (Win key).
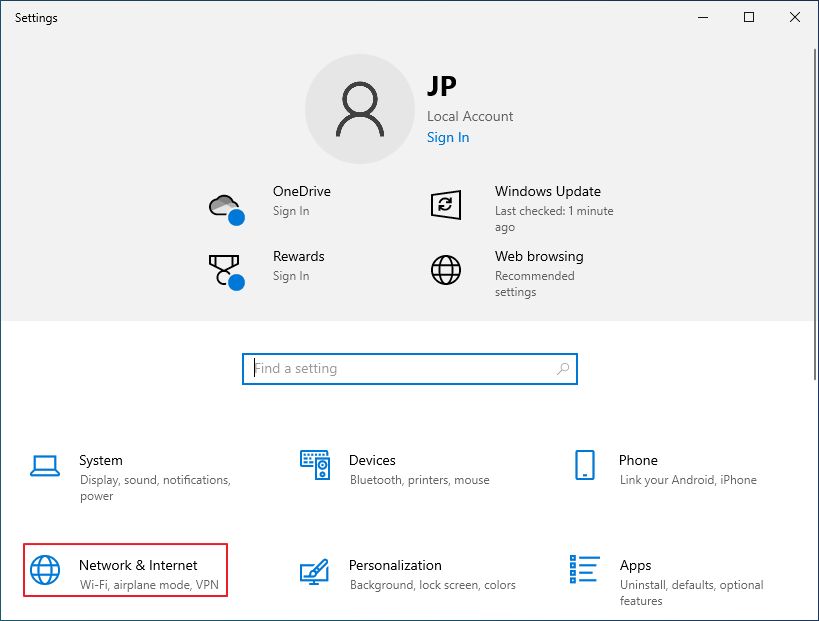
2. Search for Settings and select the first result.
3. On the main settings page click on Network & Internet.
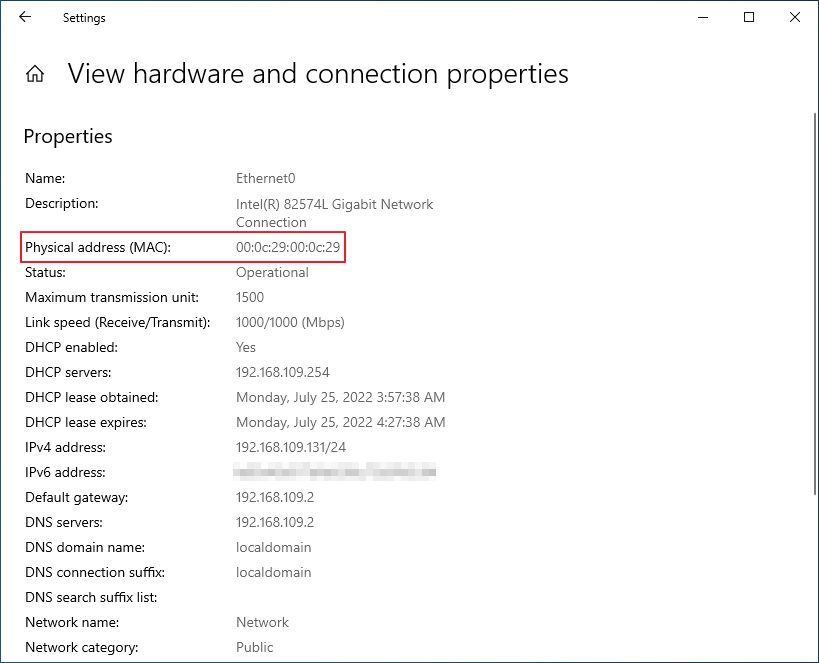
4. In the new Window scroll the right-side panel until you see View hardware and connection properties.
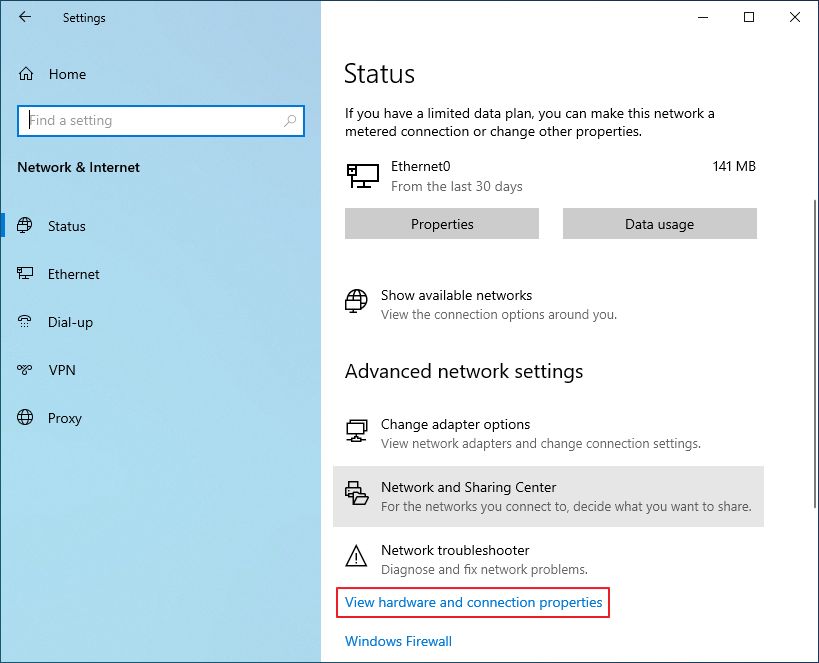
5. Look for the Physical address (MAC) below each Description. The list shows all connected NICs.
Check MAC Address for the Active Network Card in Windows 10
1. Open the Start menu by pressing the Win key.
2. Search for Settings and click on the first result.
3. On the main settings page select Network & Internet.
4. On top of the page you’ll see a network map. Below there are two buttons. Click on Properties.
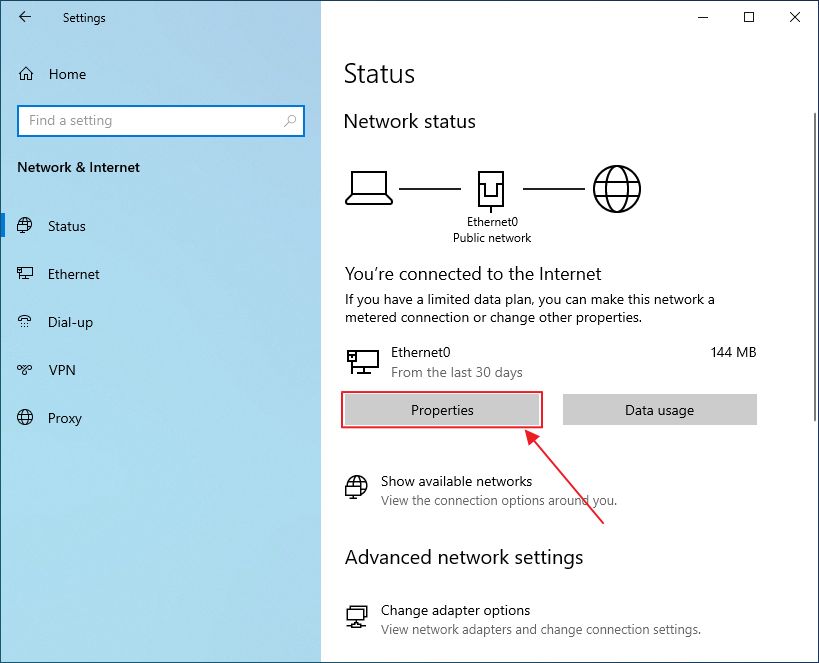
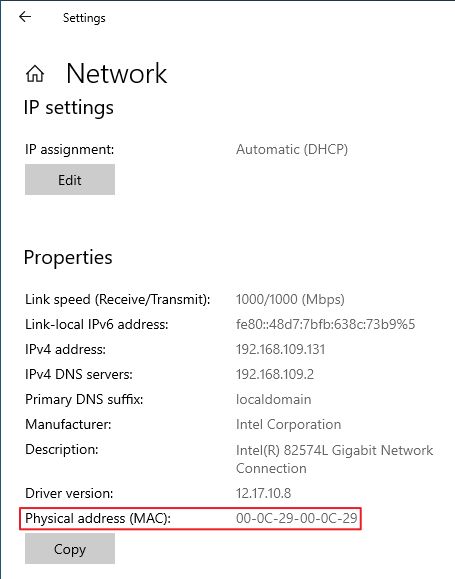
5. The Physical address (MAC) is listed at the end of the list. There’s also a Copy button if you wish to copy all the info displayed directly to the clipboard.
Use System Information to Get the Mac Address of your Network Adapters in Windows
There are tons of ways to get network details in Windows. The next method involves the System Information app. This is present in both Windows 10 and Windows 11.
1. Open the Start menu (Win key).
2. Search for System Information and select the first result to open the app.
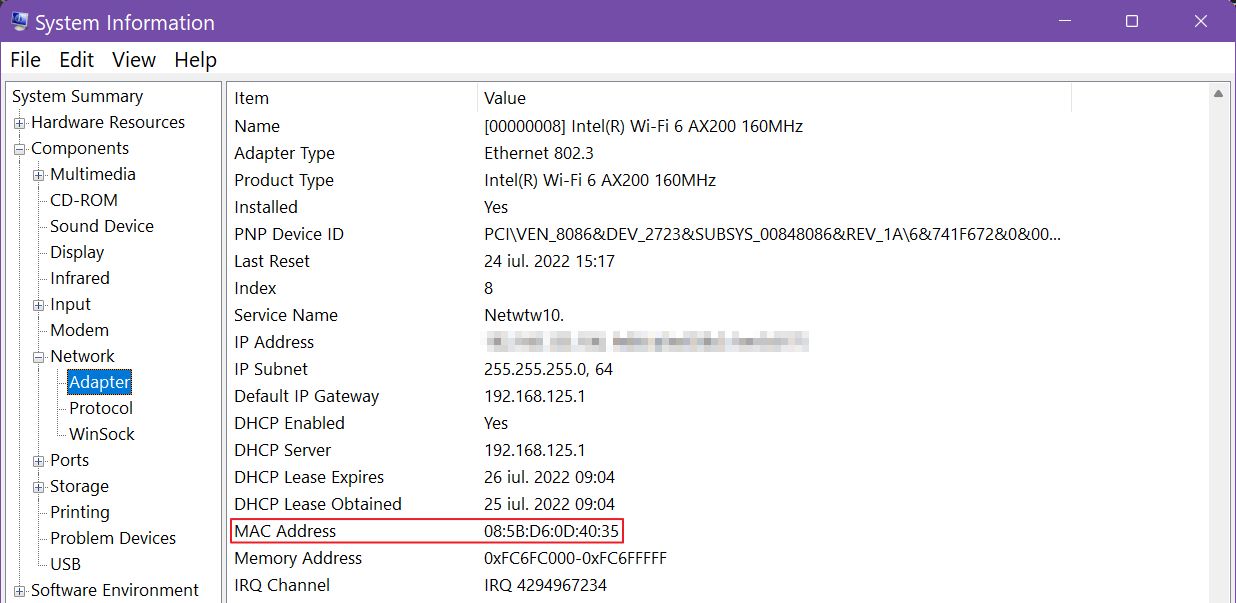
3. Navigate to Components > Network > Adapter.
4. Look for MAC Address. The list shows all available network adapters, so check the Name and Product Type to ensure you’ve found the correct adapter.
How to Find MAC Address on Windows 10 and 11 Using the Control Panel
Despite the fact Microsoft tries to get rid of the Control Panel, it’s still here, in Windows 11, and Windows 10, of course. Functionality is severely limited when compared to Windows 7 and Windows 8, but it can still be used to get the MAC address. It only works for the current active adapters.
1. Open the Start menu by pressing the Win key.
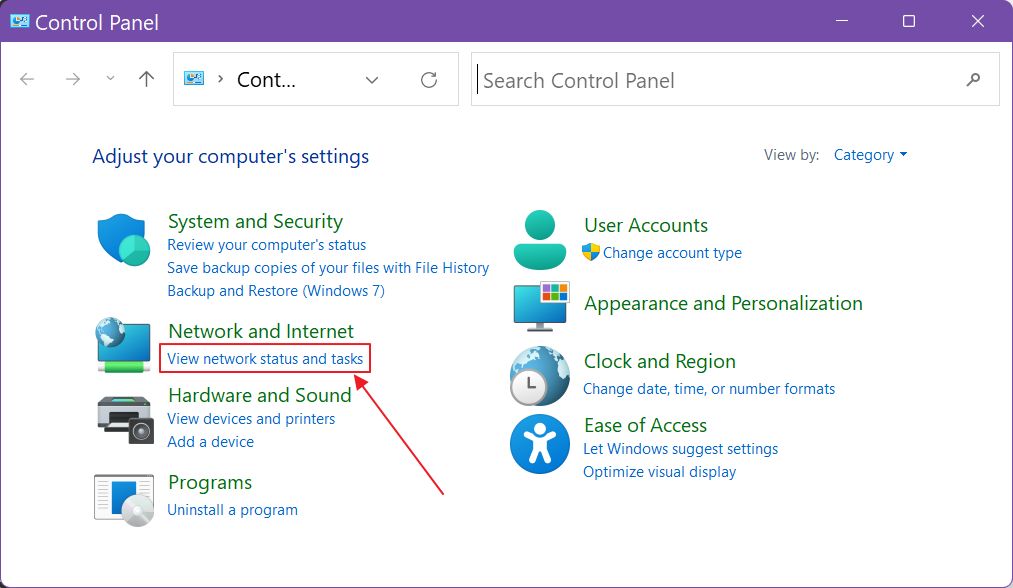
2. Type Control Panel and open the first result.
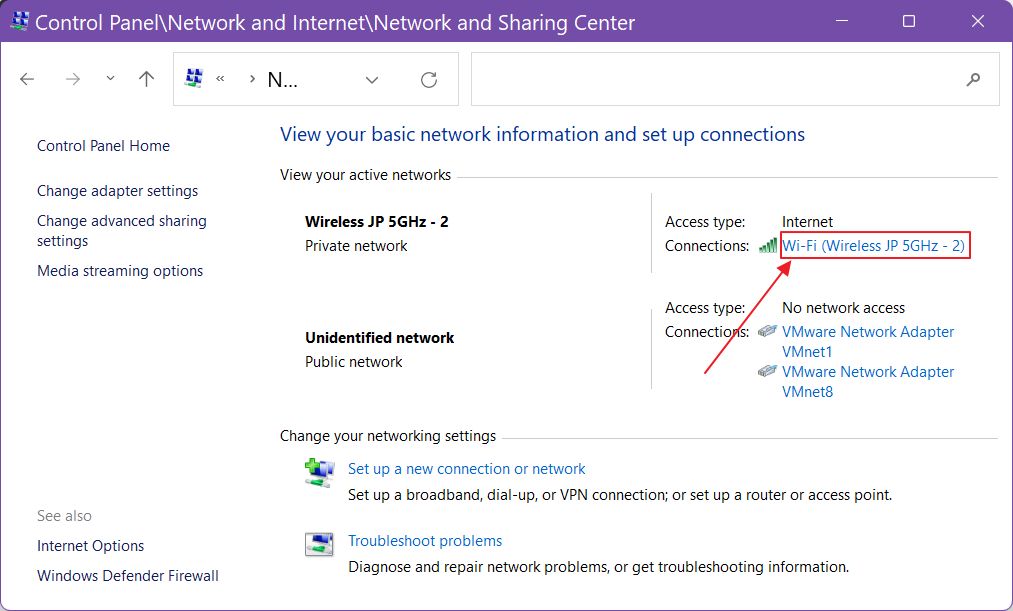
3. In the app click on the View network status and tasks, listed just below Network and Internet.
4. In the new panel you’ll see all connected adapters. You need to know the name of the network you’re connected to. Click on the link to open it.
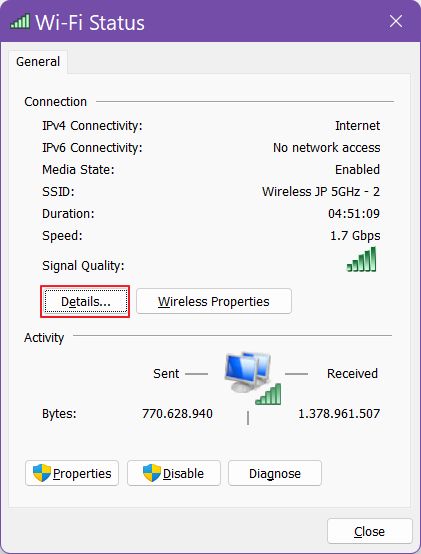
5. A small popup will open, with a bit more details. Click on the Details… button.
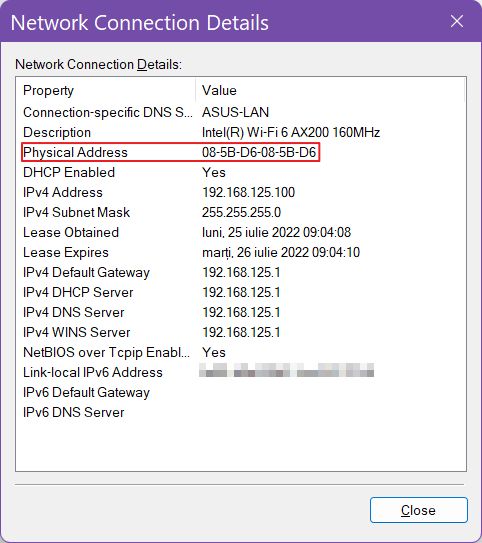
6. In the Network Connection Details view look for the Physical Address.
There you have it: 8 quick ways to find the MAC address of your network card in Windows. Some methods work even in older versions of Windows. Do you know any other ways to get to the physical address of our NICs? Let me know in the comments below.
We also have a similar guide about how to find the ASUS router MAC address, in case you need it.