- One of the most useful utilities included with Windows is the Snipping Tool, which allows you to capture the screen or a portion of it for easy sharing.
- You can even annotate on the screen snip and save everything to a file for sharing.
- What the Windows Snipping Tool lacks in terms of features more than makes up for in simplicity and ease of use.
During a normal day, I use plenty of tools to help with my productivity. I’ve told you about the free apps I like the most, but I also use tons of utilities included with Windows. Some say Windows has become too bloated, but not all recently added apps are bad. The Windows Snipping Tool, used for quick screen captures, is one of the best examples of simplicity and usefulness (another one is the Steps Recorder app).
If you’re like most people, you probably need to take screenshots from time to time, whether to document something, to send a screenshot to a client for approval, just to name a few such situations.
There are tons of apps you can use to capture what’s on the screen, including pressing the PrintScreen key, then paste into your favorite app, but what if you don’t want something this complicated, not covered by the common PrtScr shortcut combinations?
That’s why I think you should look into the Windows Snipping Tool, before going for something more complicated.
CONTENTS
How to Open the Snipping Tool in Windows
First, you need to open the Snipping Tool. The app comes preinstalled, so no need to install it.
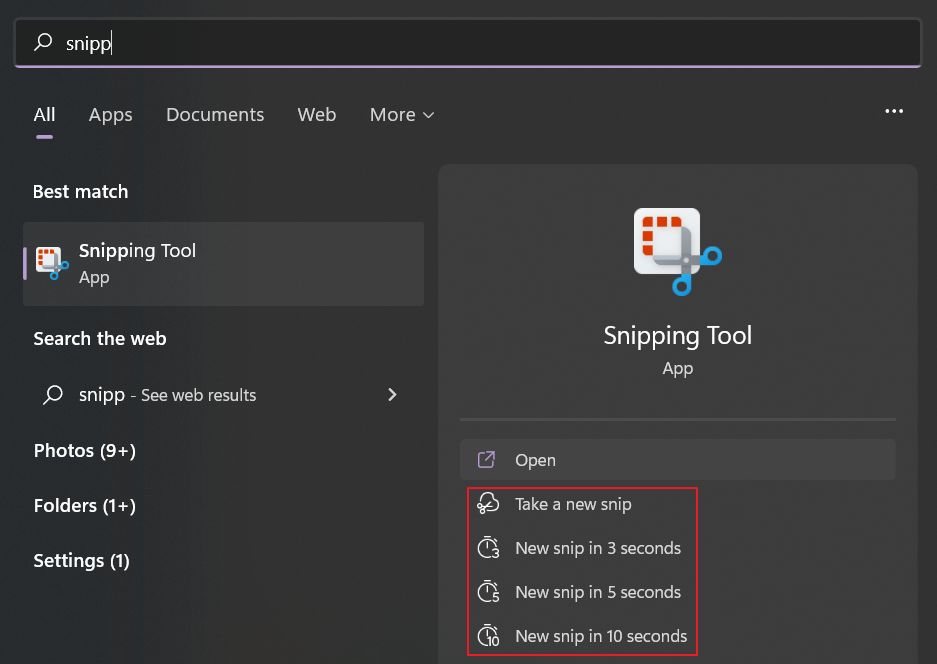
1. Open the Start Menu (Win Key).
2. Type Snipping Tool and select the first result.
3. Alternatively, you can select one of the four predefined actions that will let you start capturing right away:
But this is not the fastest way to open the Snipping Tool.
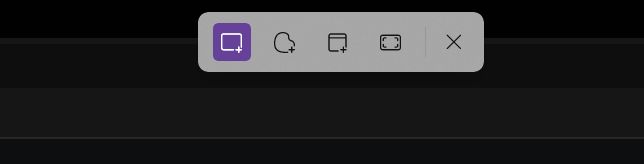
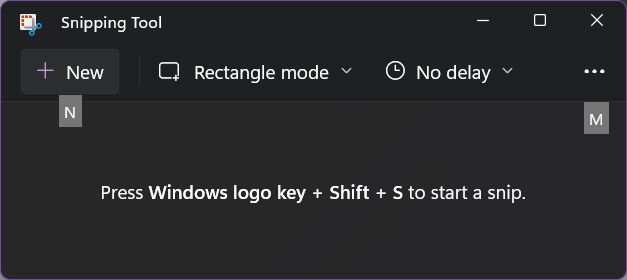
This is the fastest method and my preferred way to open the Snipping Tool: press the Win key + SHIFT + S at the same time and click the mouse to capture the screen immediately.
If you’re using this shortcut method you’ll see the screen getting darker, as an overlay appears as a small menu on top of your monitor.
What Screen Capture Options Do I Have in Snipping Tool?
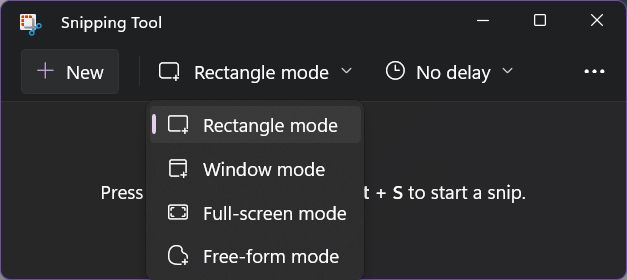
No matter how you launch the app, there are four capture methods available.
- Rectangular snip – selects a rectangular area defined by you.
- Free-form snip – selects a closed free shape area of the screen.
- Window snip – captures the chosen app window.
- Full-screen snip – captures all monitors attached to your computer.
How to do a Screenshot in Windows with the Snipping Tool?
If you want access to all app options you need to launch it from the Start menu, or via a desktop/start menu shortcut. The keyboard shortcut option is just a quick action bar to get a screen capture as soon as possible, with no actual interface. The app interface looks like this:
To capture the screen all you have to do is press ALT + N or click the New button. Then here’s what you do, based on the capture mode you have previously selected:
- Rectangular snip – click and hold the left mouse button to select the desired area of the screen, then release.
- Freehand snip – select a free-form area of the screen to capture, and release the left mouse button when done.
- Window snip – move the mouse then left-click on the desired window you wish to capture.
- Full-screen snip – all monitors are captured as soon as you opt for this option, no need to select anything.
Once you finish the capture, a small notification will appear on the bottom right of your main monitor. If you miss it you can always find it in the Notification Center (WIN + N in Windows 11, WIN + A in Windows 10). The notification will show the last screen capture as a thumbnail.
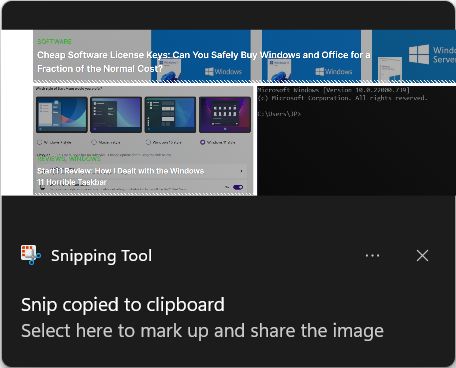
You need to click the notification to access the screen capture together with all other options for saving and sharing.
How to Annotate a Screen Capture with the Snipping Tool
This is the most interesting option if you need to highlight the freshly captured content. You need to open the notification I’ve just mentioned in order to access the annotation options.
Basically, you have two tools at your disposal:
- Ballpoint pen – you can draw a thin red line with the mouse cursor.
- Highlighter – you can highlight a portion of the image just like you would do with a marker. There are quite a few options for the color and size of the highlighter.
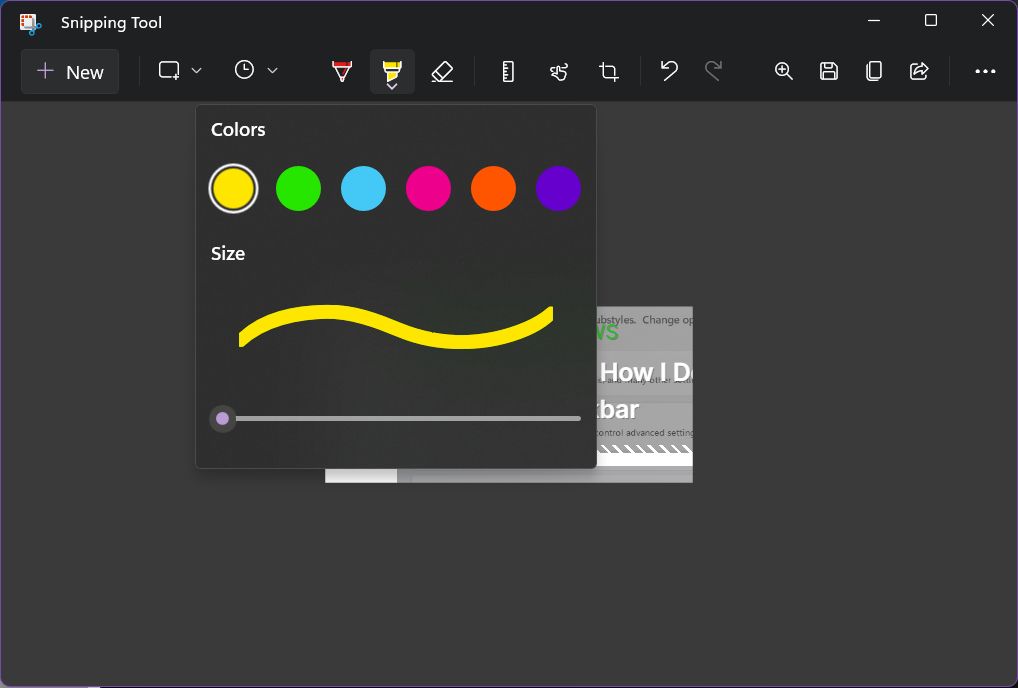
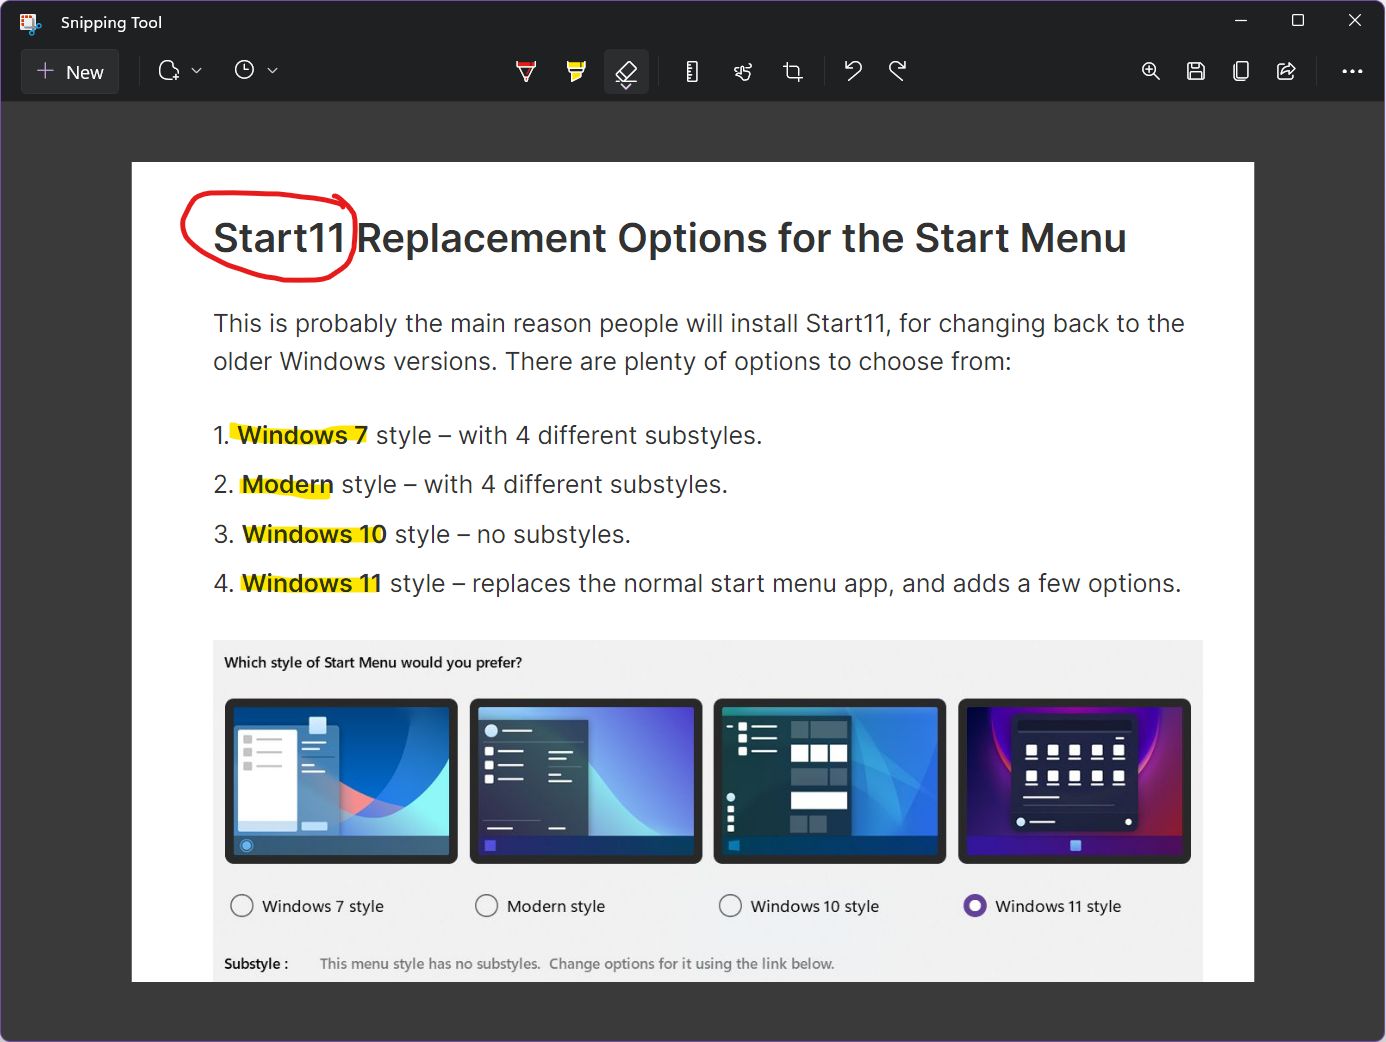
The final result can look something like this:
You can also add a ruler or a protractor over the capture, but it’s not saved on disk together with the image. Honestly, I can’t imagine what they’re for, especially since there are no markings on these rulers, which makes exact measurements a daunting task.
Other options allow you to touch-write if you’re on a touchscreen-enabled device. Further cropping the image is possible, along with Undo/Redo functionality. The Snipping Tool is a sufficiently advanced screen capture app, but it’s not a match for specialized apps.
There’s even a sharing button, but I bet that’s something people don’t use very often. For example, I use Thunderbird as my email client, and there’s no option to use this app: I have to use the Microsoft included email client in Windows. Thanks, but no thanks.
How to Copy Text from Images with the Snipping Tool
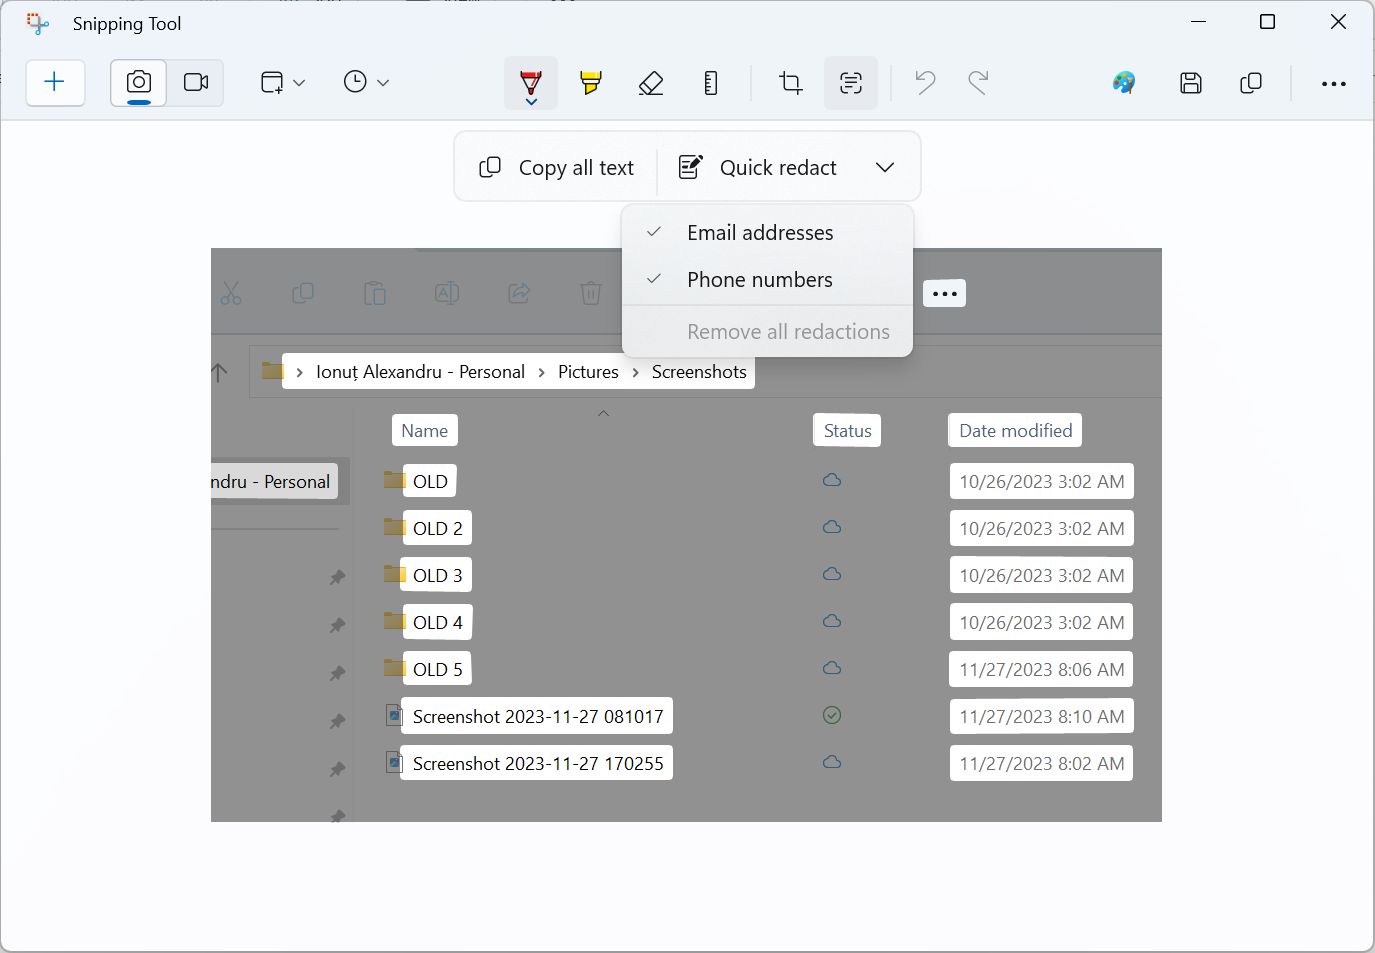
On more recent versions of the Snipping Tool, Microsoft has added a new button, Text Actions, which allows you to copy text from an image.
Press the button once and the app will try and recognize text shown in the screenshot. A Copy all text button will copy all text to the clipboard. All you have to do is paste the text anywhere you like.
If you only need to copy a small portion of the text that’s also possible. Use the mouse cursor to select the text from one of the highlighted boxes and use Ctrl + C to copy. Then Ctrl + V to paste.
If the copied text includes sensitive info, it’s possible to redact email addresses and phone numbers via the Quick redact menu.
This works via OCR (Optical Character Recognition). It’s not a new technique, but the Snipping Tool makes it so easy to use.
If you already use PowerToys, there’s a Text extractor option that allows you to copy text from anywhere on screen, with no need to take a screenshot first.
Windows Snipping Tool Advanced Settings
There are three areas where you can change settings in the Windows Snipping Tool: the (1) capture mode, (2) delay timer, and (3) settings menu under the three dots.


You can even make Windows open the snipping tool automatically, basically replacing the PrintScreen key, but I personally don’t feel the need to do so. I’ve checked the option to copy the screen capture to the clipboard. That’s useful to me.
Beginning with the Windows 11 Moment 3 Update, pressing the PrintScreen key will open the Snipping tool by default. Fortunately, PrtScr key behavior can be reversed easily.
Other options are to remind you to save the screen capture to a file if you want to close the app. You can also allow Windows to open multiple instances of the Snipping Tool, but that’s too overkill for most people. I would let that unchecked. You can also add a nice snip outline, but you can always add that in Photoshop or your image editor of choice if needed.
Hope I’ve convinced you to take a look a the Windows Snipping Tool. It’s one of the gems included in Windows, and it only got better in recent years.
What I would like to see Microsoft adding is an arrow pointer, a rectangular marquee (and other shapes), and maybe a numbered bullet option. What’s on your list?
Currently, video recording is not possible with the Windows Snipping Tools. Only static screen captures are possible.
Unfortunately, it’s not possible to capture the contents of a window that’s taller or wider than the monitor. You can only capture what’s visible at a certain point.