- If you need to quickly take a screenshot in Windows, you can use these keyboard shortcuts.
- Without installing any software, you can take quick screenshots of the entire screen, current app, or any desired portion of the display.
- Learn where the screenshots are saved so you can find them later.

I feel like taking a screenshot in Windows is the kind of task you don’t think you need to know how to perform until you do.
I take tons of screenshots every day. It’s not just for the articles I publish here on BinaryFork, as one may assume. No, I have to take screenshots to send to colleagues when I pinpoint an issue with a website we’re working on, or for various docs, courses, and tutorials I’m working on.
Sometimes I even take screenshots to remember something, like in an online meeting when someone presents their screen and there’s information I need to later. Instead of asking to stop so that I can take notes I prefer to just capture the screen. I can then extract the text later from the image with ease.
The takeway? You need to know how to take screenshots. And there’s more that one way to do it in Windows. The best part? There’s no need to install thid-party software.
CONTENTS
The keyboard shortcuts for screenshots in Windows
- PrtScr (printscreen key): captures all screens to the clipboard, ready to paste
- Alt + PrtScr: captures the current active window to the clipboard, ready to paste
- Win + PrtScrt: saves all screens contents to a file (also flashes the screen)
- Win + Shift + S: opens the Snipping Tool utility for advanced captures
I’ve read mentions that you can use Fn + Win + Space to take screenshots if your keyboard doesn’t have a PrintScreen key.
It didn’t work for me. And I don’t think it’s because all my keyboards have a PrtScr key. It was supposed to be an alternative keyboard shortcut.
How to lock your PC when you’re away to prevent snooping
Types of screenshots: full screen, app window, rectangular selection, freehand
Not all screen captures are the same. Let’s explore each type of screen capture and how you can do it in Windows.
Method 1: PrtScr – Capture the entire screen(s) contents
Taking screenshots in Windows is very easy: you just have to press the PrintScreen key on your keyboard and the entire screen contents are saved to the clipboard.
You can then paste the contents of the screen capture, as an image, in pretty much any type of document.
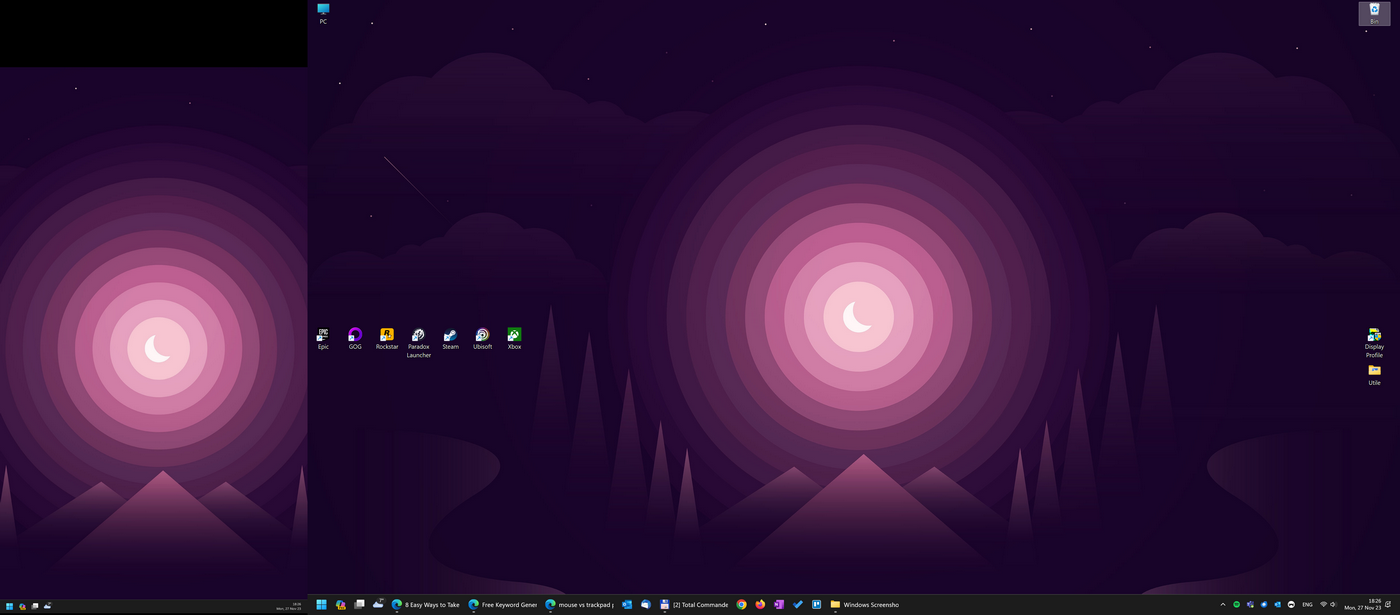
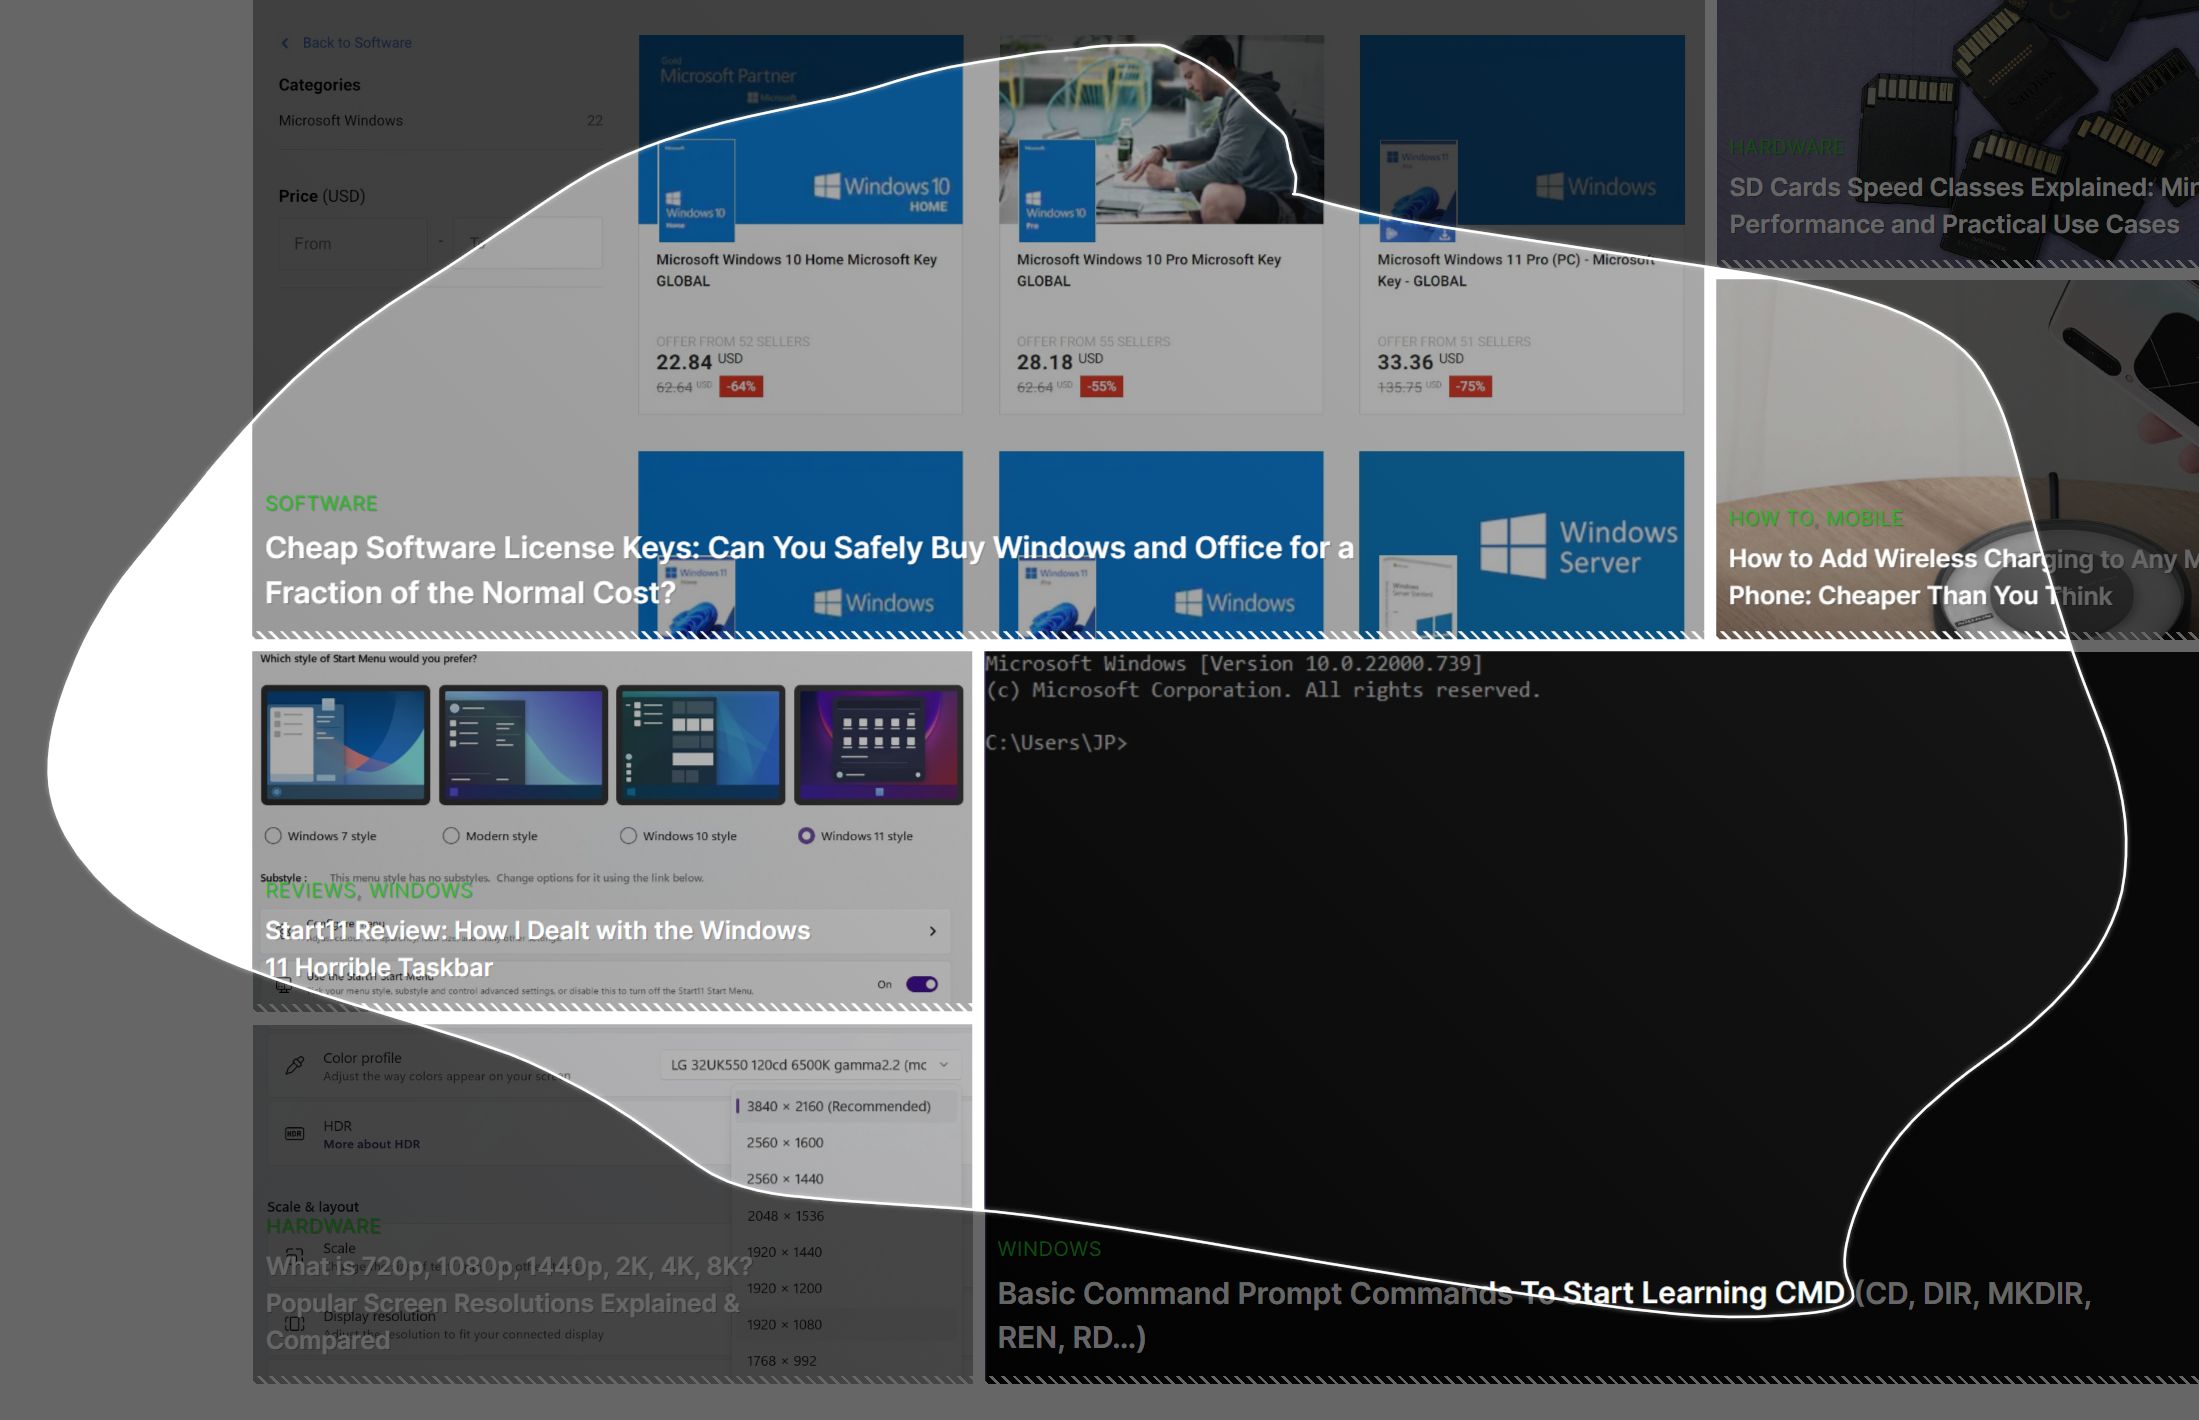
If you have two or more monitors they will all be mashed together into one image. If the monitors are different size, resolution and orientation, like mine are, you will get something weird like this. Notice theblack zones? That’s because an image can only be rectangular.
Method 2: Win + PrtScr – Save screencaptures directly to a file
The problem with the first method is that printscreens are saved into the system clipboard. This means capturing a new printscreen will replace the clipboard.
Fortunatelly, you can access the last 20 clipboard saves (images and text) via the clipboard history, but unfortunatelly it gets reset after every reboot and, most important, the copy paste history must be enabled first.
That’s when Win + PrtScreen keyboart shortcut comes in handy. This shortcut will automatically save all screen contents to the clipboard and simultaneously to a file in your Screenshots folder.
Use this shortcut to take multiple screenshots in succession with no fear of loosing them.
Method 3: Alt + PrtScr – Capture the active app window
If you only want to copy the current window there’s another shortcut you can use. Press Alt + PrtScr and the current active window (must be active, remember that) will be captured and placed into the clipboard.
You can then paste the contents in any document that supports images.
Method 4: Capture a rectangular portion of the screen
What if you just want to capture only a small portion of the screen? It would be easier to share (smaller file size), plus you may not want to edit the screenshot before sending, so you prefer to do it in one step.
You would need to use the Snipping Tool, which we’ve covered extensively. Let’s recap:
Press Win + Shift + S to open the snipping tool overlay:
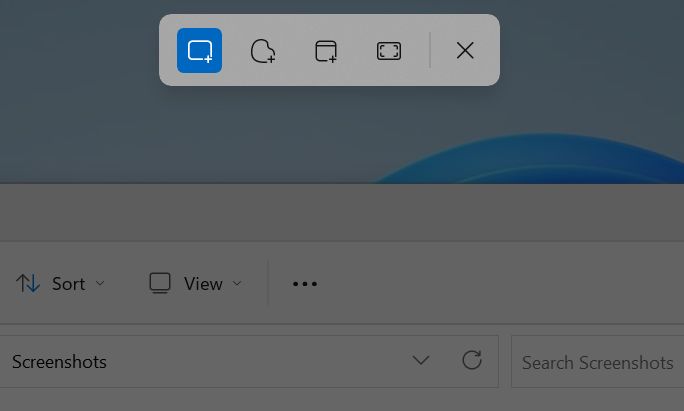
Select the first option, Rectangular mode, and the cursor will change to a cross. Draw a rectangle by keeping the left mouse button pressed. Release when you’re done and the selected area will be saved to the clipboard, ready to be pasted.
Depending on your Snipping Tool settings an image of the capture may also be saved to disk.
Method 5: Capture a freehand portion of the screen (any shape)
It’s possible to even save a hand drawn portion of the screen (for an artsy feel maybe?). Here’s how it’s done with the Snipping Tool, once again.
Press Win + Shift + S to open the utility. Select the second option, Freeform mode, and draw a closed shape. It will be closed automatically for you, you don’t have to be very precise. Release the left mouse button when you’re done.
The contents of the area you have selected will be saved as a PNG with transparent background to the clipboard, and optionaly directly to disk, depending on how you have set up the Snipping Tool.
Where are screenshots saved?
If you use the Win + PrtScreen key or if you have set up the Snipping Tool utility to automatically save your screen captures to disk I think it would be useful to know where the screen captures are saved.
All screenshots are saved in the Pictures > Screeshots folder. You can access them from the Pictures shortcut in File Explorer’s left column.
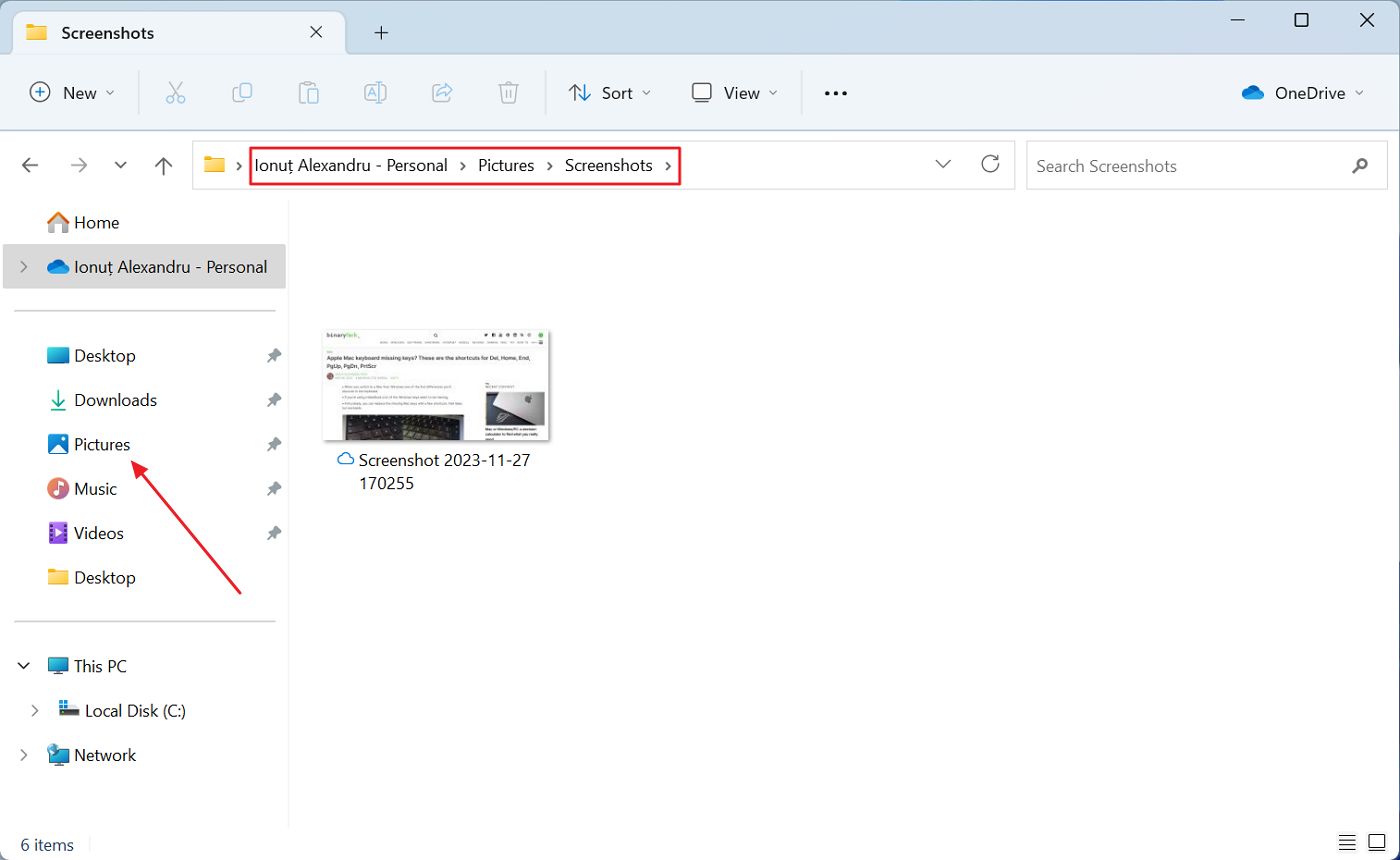
If you want to know exactly where this folder is located on disk there are two possible paths:
- C:\Users\CURRENT_USERNAME\Pictures\Screenshots\
- ONEDRIVEFOLDER\Pictures\Screenshots\ – if you have set up Windows settings sync from the Windows Backup app.
The default location of the OneDrive Folder, if you didn’t change it during the initial setup, is C:\Users\CURRENT_USERNAME\OneDrive\.
I hope you learned something new today. Knowing about the different methods to take screenshots in Windows will help you every time you need to capture the screen. Practice a few times until these shortcuts become second nature.