- Virtual desktops are the best way to organize yourself when you run multiple apps at the same time.
- I’ve used multiple desktops to keep projects separated for a long time and I cannot imagine using just one desktop.
- Continue reading and you’ll learn how to create and move between virtual desktops, how to move apps, and how to use keyboard shortcuts.
- I’ll also show you how I have set up my own virtual desktops.
One of the best ways to organize your workspace in Windows is by using virtual desktops. These basically act as multiple monitors where you place your app windows, but you cannot use more than one “monitor” at a time.
Microsoft calls them multiple desktops, Apple calls them Spaces, but they’re all virtual desktops. Most modern operating systems have them, including Linux.
CONTENTS
- 1 What happens when you use multiple desktops in Windows?
- 2 Do multiple desktops require more resources?
- 3 Creating and navigating between virtual desktops
- 4 Personalizing each desktop
- 5 Changing the order of virtual desktops
- 6 Moving apps between virtual desktops
- 7 Most important keyboard shortcuts to use for virtual desktops
- 8 How I set up my virtual desktops when I work
What happens when you use multiple desktops in Windows?
In Windows each virtual desktop has its own set of windows, its own taskbar that shows the apps running on that desktop and its own list of apps you see when you use the Alt + Tab app switcher.
Everything else remains the same. System tray, notifications, desktop icons are all copied between virtual desktops.
This behavior can be changed from Settings > System > Multitasking, from the Desktops section.
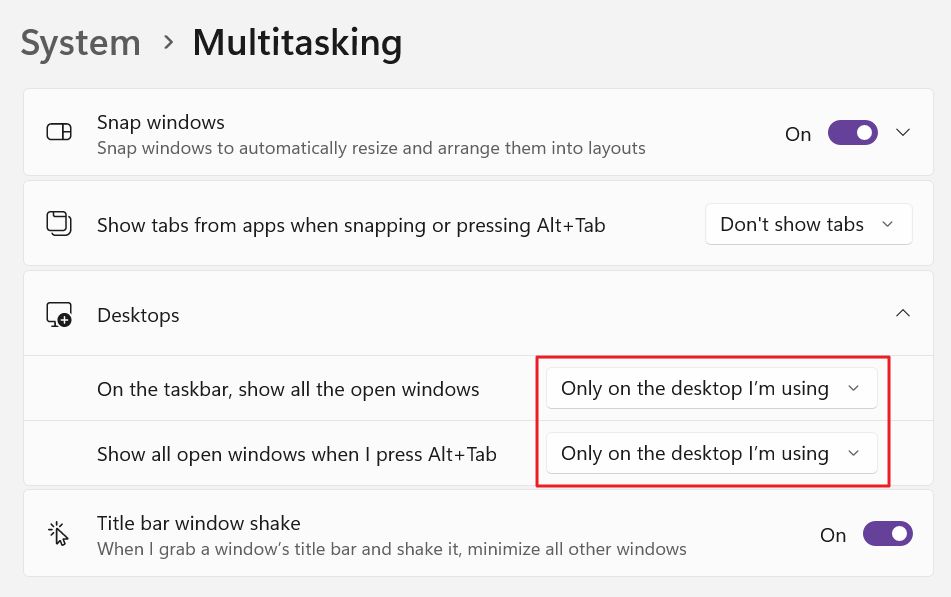
I see no point in doing that. It will only make Windows behave like Mac, where Spaces are just nonsense, if you ask me.
Virtual spaces are not a replacement for multiple monitors (which I still find essential for productivity) that’s why I recommend you use them together.
Do multiple desktops require more resources?
No, in the sense that multiple desktops functionality is very efficient. Yes, in the sense you may forget Photoshop, or another power-hungry app is running on another desktop you haven’t switched to in a while.
Running more apps will always require more resources, no matter if you’re running them on the same desktop or spreading the windows on multiple desktops, like I do.
Let’s start by hovering over the Task View button on your taskbar. It’s near the Start menu button and looks like two overlapping rectangles.

If you keep your mouse over the icon, without clicking, you will see a list of all your virtual desktops with the last option being the one that lets you add a new desktop at the end of this list.
Each virtual desktop icons shows a thumbnail view of all the app windows on that space. Each desktop has its own name, displayed on top.
Clicking on these icons will switch to the clicked desktop automatically. On hovering over a desktop icon, you will see a close button that will let you delete/close that virtual desktop.
When you chose a virtual desktop app the apps open on that desktop will move to another desktop automatically. The apps are not stopped.
If you click on the Task View icon, you enter a special mode that shows apps from the current desktop and a list of all desktops at the bottom. Hovering over the bottom list briefly will select that space.
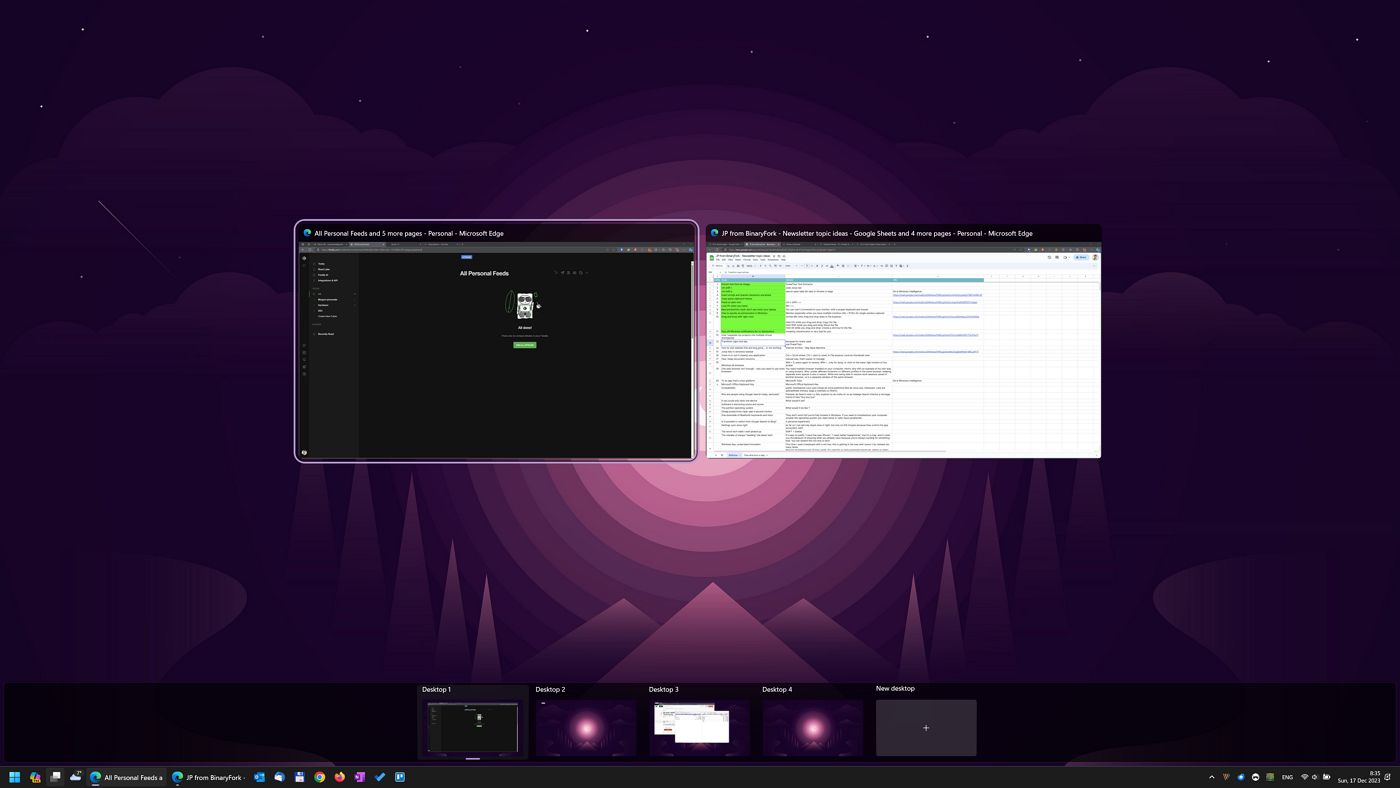
If you click on a virtual desktop from the bottom list or on an app window from the top Windows will automatically switch to that app/desktop.
Pressing Delete when you hover over a virtual desktop icon will close that space without a warning. As I said before, you can also click on the X icon which is displayed on hover over the virtual desktop icon.
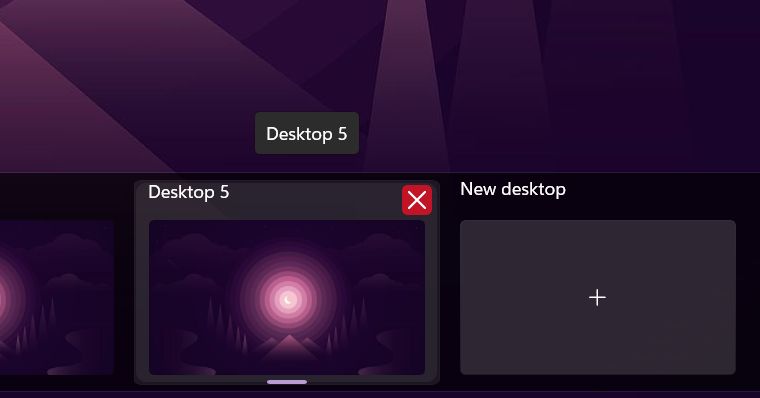
Personalizing each desktop
You should consider making your virtual desktops easier to identify by renaming them and picking a different background.
This can be done by right-clicking on the virtual desktop icon in the Task View mode.
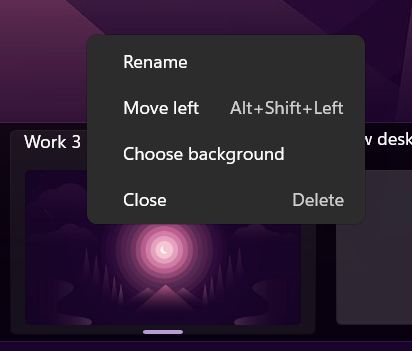
When you switch to another virtual desktop Windows will display its name at the bottom of the screen for a couple of seconds and will automatically display the correct wallpaper set for that particular desktop.

This can make identifying the current virtual space a bit easier.
Changing the order of virtual desktops
In both Task View mode or when you hover over the multiple desktops taskbar button it’s possible to change the order of the virtual desktop by dragging and dropping them in the list.
Right-clicking on the desktop icon will also display Move left/right options in the contextual menu.
Moving apps between virtual desktops
If there’s one thing I really miss in the current implementation of multiple desktops in Windows, it is a keyboard shortcut to move apps between desktops.
Moving apps between multiple desktops can still be done via drag and drop, as you can see below:
You just have to open the Task View mode, select the desktop with the app you want to move, then drag the app window and move it on the destination desktop on the bottom list.
Alternatively, you can right-click on the app window in Task View mode and select to move it to the correct workspace.
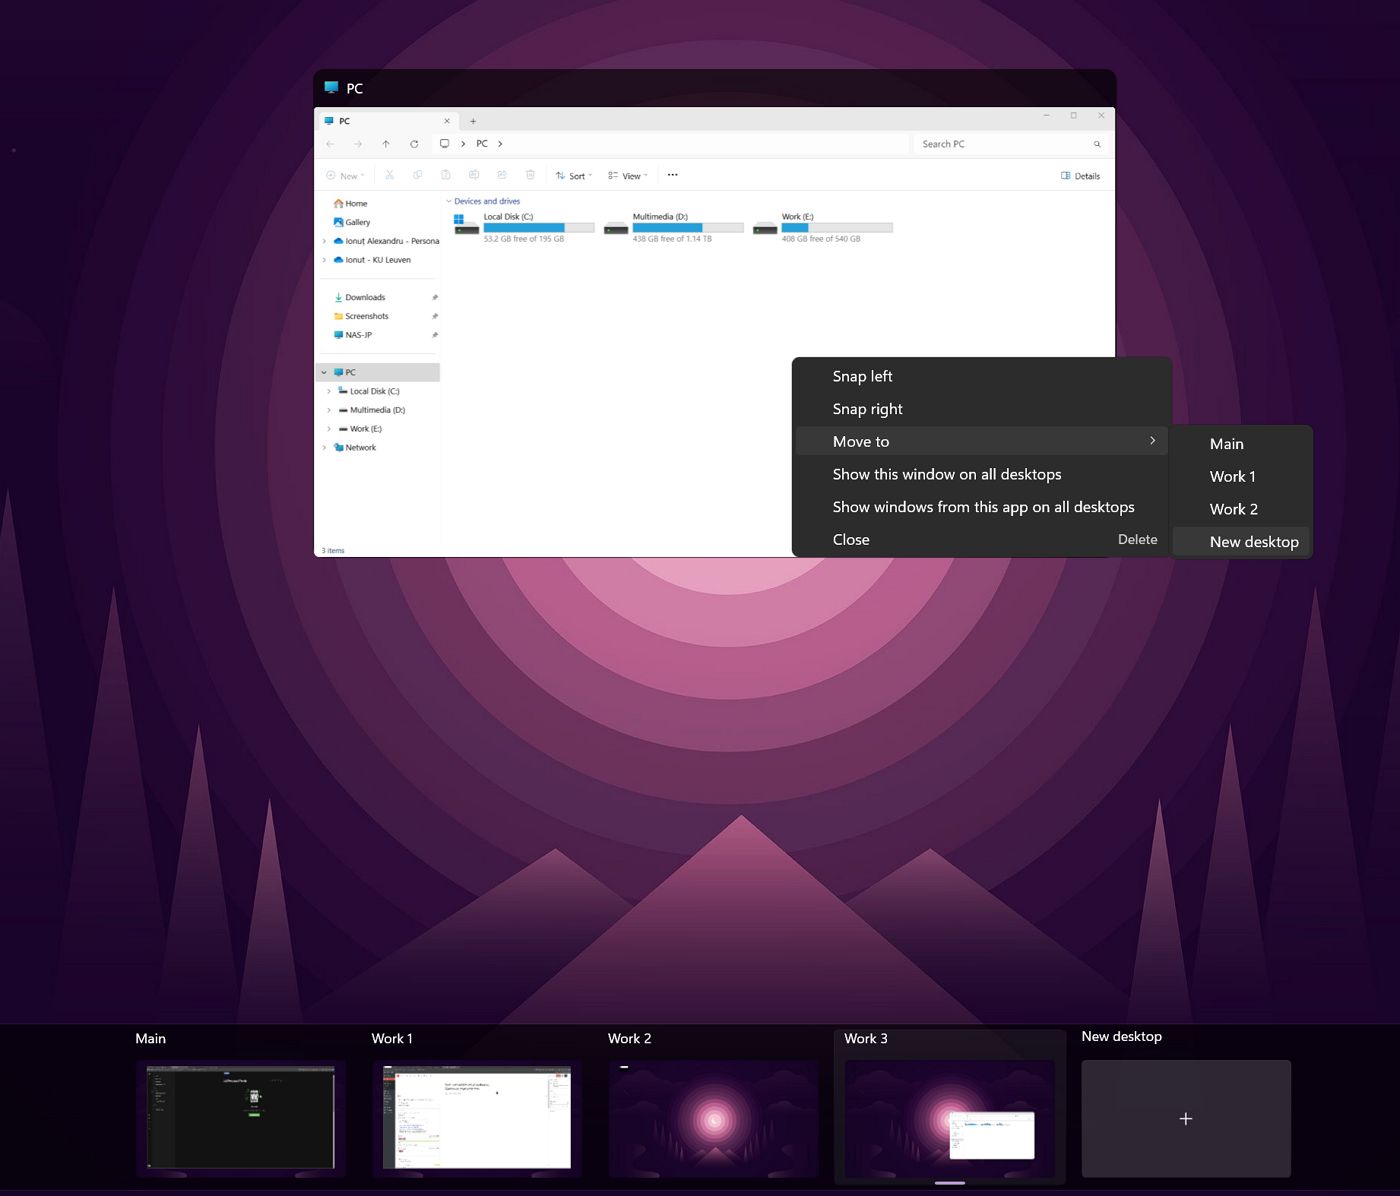
Notice there are two more options in this menu you can choose that basically let you bypass virtual desktops functionality for specific apps:
- Show this window on all desktops – will display the selected app window on all your current desktops.
- Show windows from this app on all desktops – will display all windows from the same app on all desktops.
You can use these options in specific scenarios, I guess. I personally haven’t found a use for them.
Note: if you are using multiple monitors, you cannot move an app to another virtual desktop on a different monitor when you are in Task View mode. First move the app to the correct virtual space, exit Task View mode, then move the app by dragging it by the title bar.
Most important keyboard shortcuts to use for virtual desktops
Since I like to use keyboard shortcuts whenever possible I’ve compiled below a list of all the important shortcuts for virtual desktops.
I think the first four are the ones you should try to remember. For moving apps between desktops and for rearranging virtual desktops you can just use drag and drop.
| Win + Ctrl + D | Create a new virtual desktop |
| Win + Ctrl + F4 | Closes the current virtual desktop |
| Win + Ctrl + Left/Right arrow | Go to the left or right virtual desktop |
| Win + Tab | Enter the task view mode |
| Esc | Exit the task view mode |
| Navigational arrows | Move selection in task view mode |
| Enter | Open selected app or virtual desktop |
| Delete | Closes the selected app or virtual desktop in task view mode |
How I set up my virtual desktops when I work
Finally, I’m going to give you a breakdown of my current multiple desktops I’m using. This is the setup I’m currently using on my desktop and laptop.
For consistency and muscle memory I keep everything the same on all my computers.
- Main – This is for personal stuff. It’s where Gmail and YouTube happens.
- Work 1 – This is for BinaryFork and PC is Dead, Again, my two hobbies.
- Work 2 – This is for freelancing projects.
- Work – This is for my day job, here’s where I keep Outlook, Teams, and all the other work-related stuff.
Depending on how many projects you’re working on at one time and how complex these projects are it may make sense to create more (or less) virtual desktops.
And this is how I take advantage of multiple virtual spaces in Windows to organize my windows. It’s much easier than having dozens of app windows open on screen at the same time.
I’m curious, have you tried virtual desktops in Windows? Do you use them differently? I’m curious to learn from you so drop a comment below with your own experience.
