- Windows offers a native way to show your mouse cursor when you press Ctrl.
- For more advanced options to highlight the cursor position and mouse clicks you can use PowerToys, a free utility full of cool modules.
- Learn how to highlight the mouse cursor in Windows with ease, on demand, or as an always visible option.

If you’ve never lost sight of your mouse cursor in Windows, this article is not for you. Sometimes it’s really hard to quickly find your mouse pointer, even if you only have only one screen.
I have two monitors and it’s easier that you would think to lose your pointer when you need it most. This is especially true if you have a large app with a white background on screen and the cursor is set to its default appearance, which you guessed it, also uses a white background.
There are multiple utilities out there that can help you, but I’m going to focus on two mouse cursors highlight options: native Windows properties and PowerToys, one of my favorite modular utilities.
Before you do use any of the highlight options below, I think you can try either increasing the pointer size or change the cursor styling to make the pointer more visible. Maybe you don’t need the highlighter after all.
If you’re looking to make the text cursor more visible we have a separate guide.
CONTENTS
Native Windows Cursor Highlight When You Press Ctrl
Did you know Windows has a native cursor highlight option? It dates back to Windows 7, maybe even older, and is hidden from view in Windows 10 and 11. It’s actually part of the Mouse Properties utility from the old Control Panel.
Here’s how to access it.
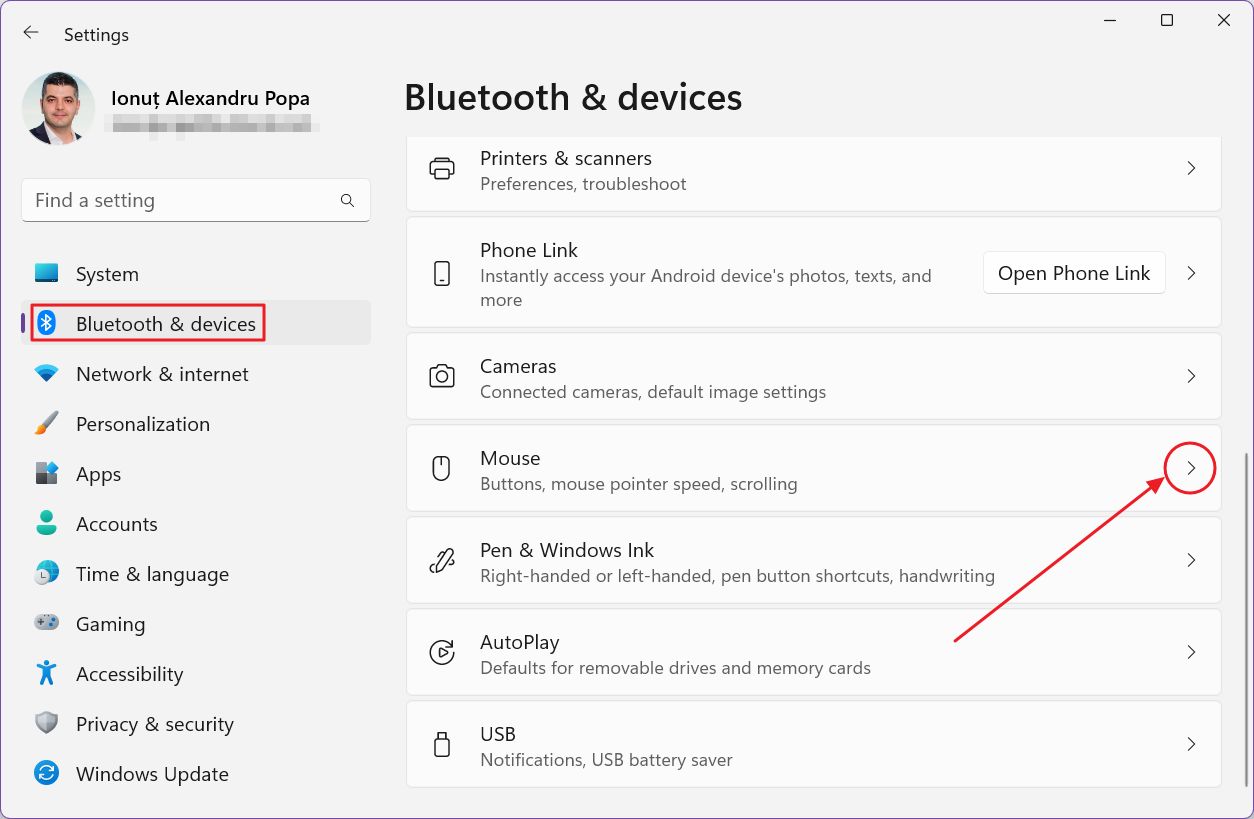
1. Open the Settings app by pressing Win + I (the quickest method).
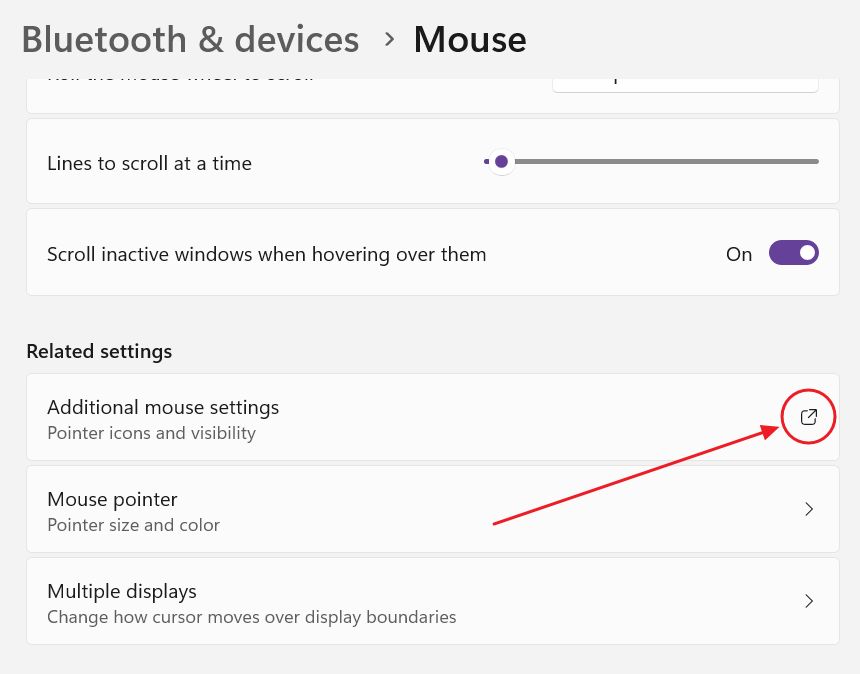
2. The second option in the left side menu is Bluetooth & devices. Click to select.
3. The right panel will refresh. Select Mouse and click the right-pointing arrow to expand the selection.
4. Scroll to the bottom and under Related settings you’ll see Additional mouse settings, with an external link icon. Click to open.
5. In the Mouse Properties window navigate to Pointer Options.
6. The last option you will find is Show location of pointer when I press CTRL key. Make sure the option is checked. Confirm with OK or Apply.
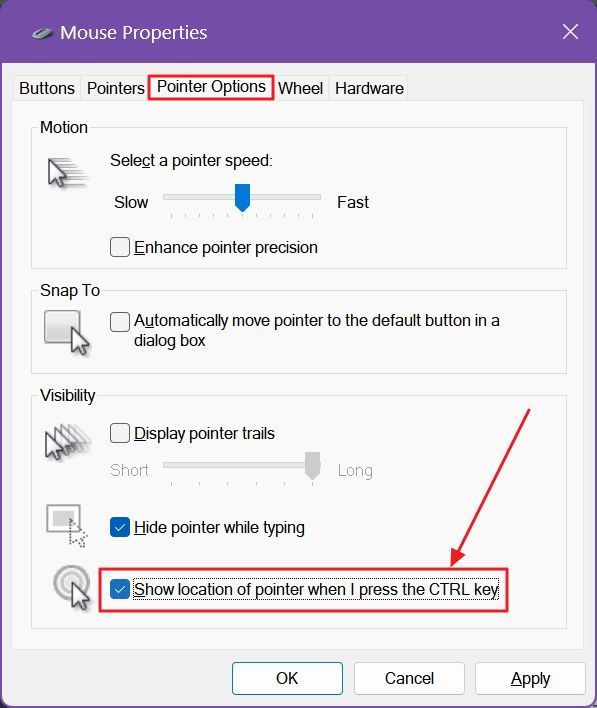
7. Now, every time you press the Ctrl key on your keyboard the mouse cursor will automatically highlight its location, only once, with a very old looking circle graphic.
For most people this highlight cursor option is good enough.
But what if you want more? Read on.
PowerToys Mouse Utilities
PowerToys is not worth installing only for the cursor highlighter, but there are multiple modules you may be interested in, so make sure to check my PowerToys review.
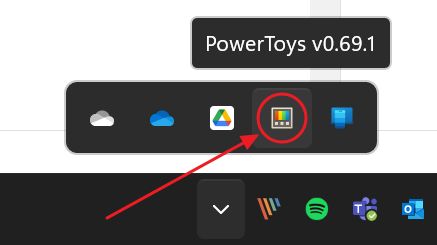
1. Double-click on the PowerToys icon in the Windows System tray.
2. Find Mouse utilities in the left side app menu. Click to expand.
3. On the right side there are several options you can use for highlighting the mouse cursor and actions. We’ll go through the most important ones below.
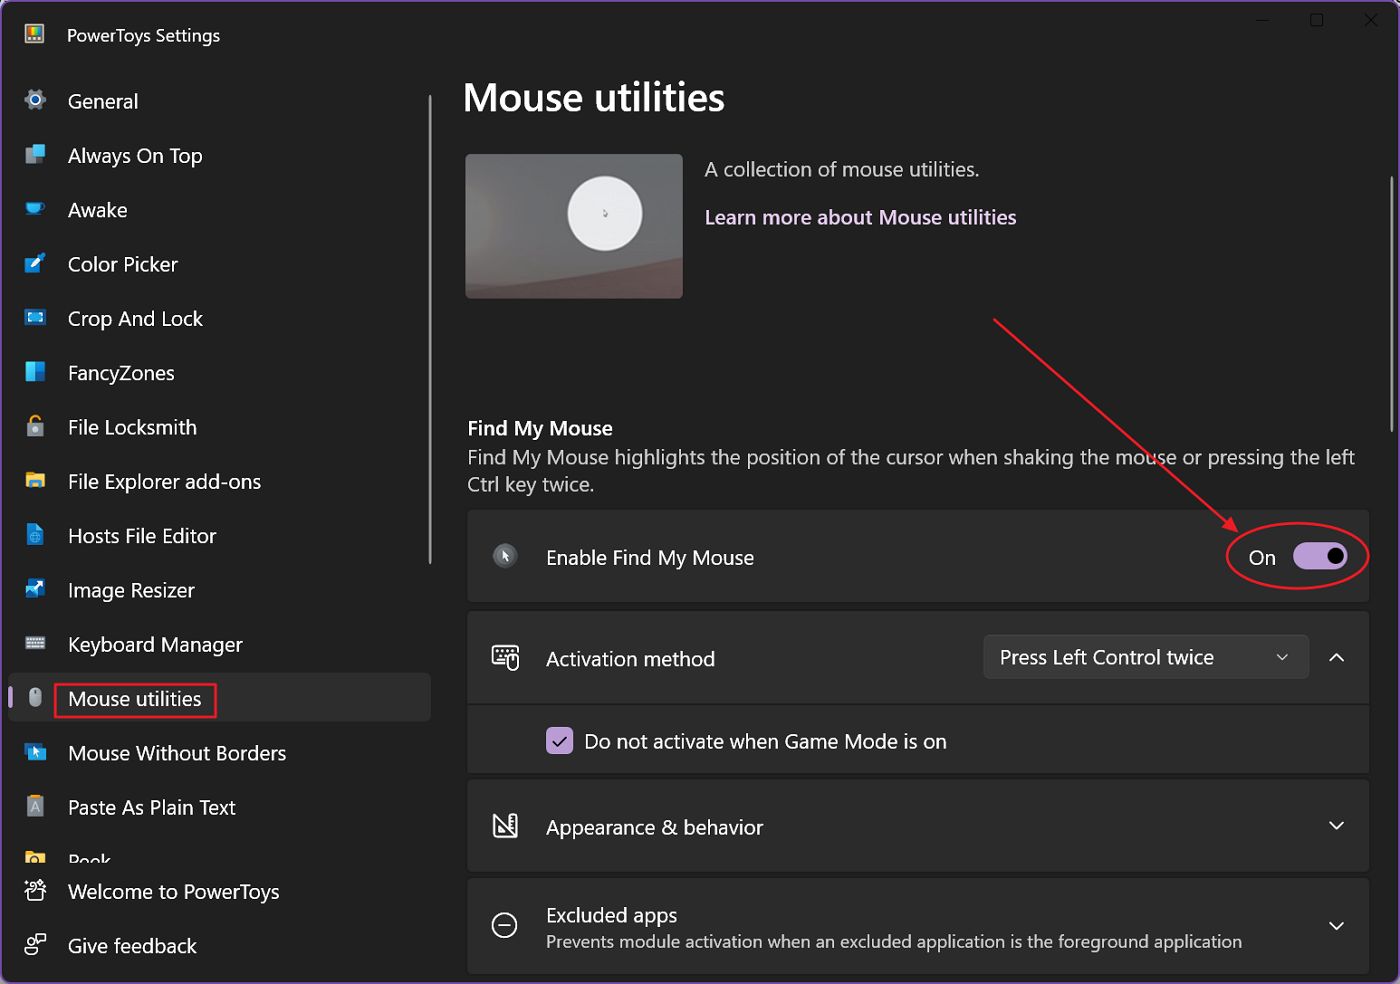
Find My Mouse
The function that’s best described as a cursor highlighter is Find My Mouse. Once you enable the module with the toggle above, you’re presented with a bunch of options.
Activation method will ask you how you want to enable the highlighter: when you press Ctrl twice, or when you shake the mouse rapidly more than X pixels. I personally prefer the first method.
To turn off the highlighter you have to press any key or click once. There is no option to disable this behavior and keep the highlighter on at all times.
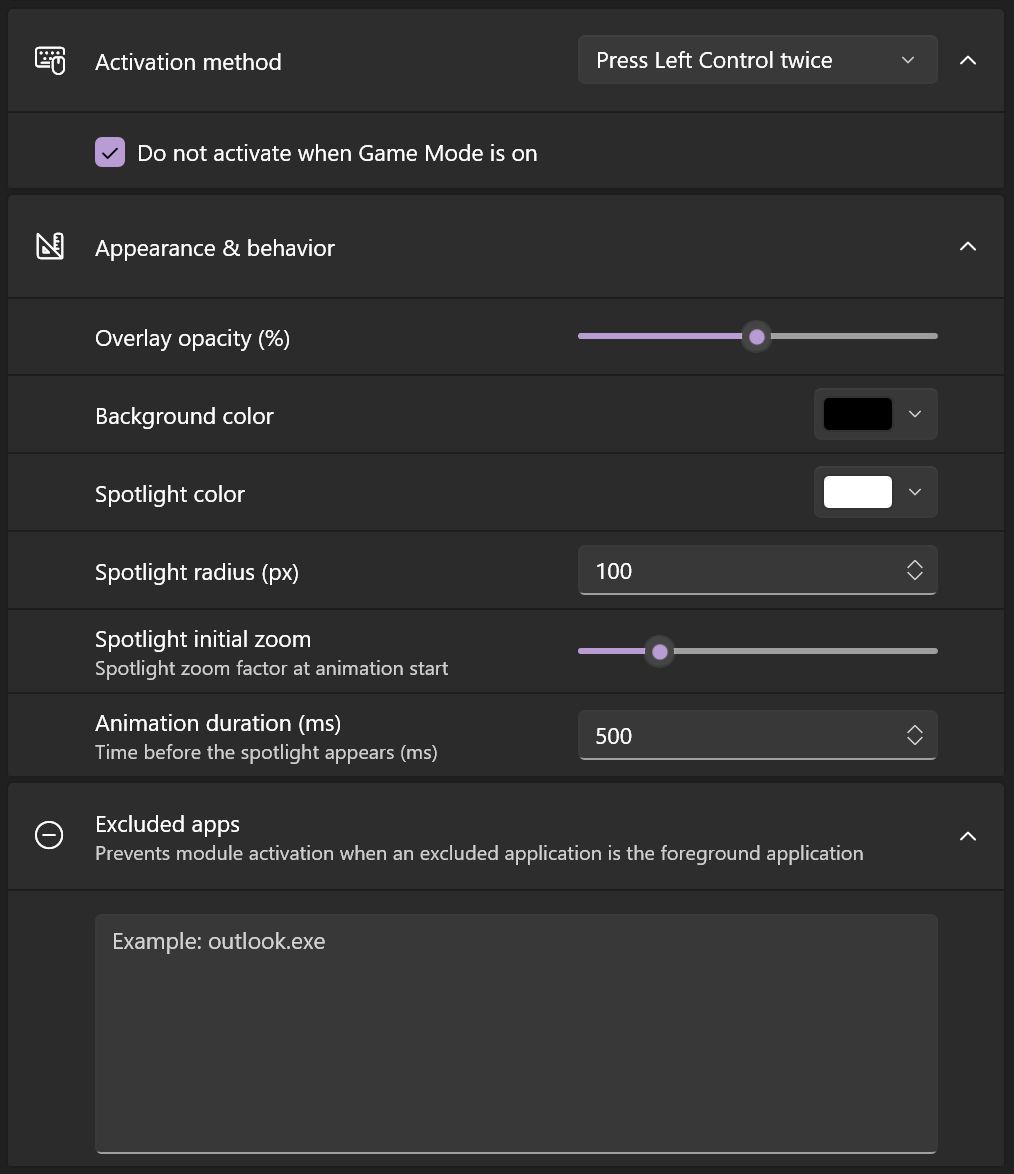
Other options include the appearance of the highlighter. Be default a circular area around the cursor will appear brighter, while the rest of the background will be displayed with an overlay dark shade.
At the bottom you can enter a list of apps (their executable name) that will be excluded when the highlighter is on.
Here’s how Find My Mouse looks like when in use:
Mouse Highlighter for Clicks
The second option is to only highlight clicks, not the cursor itself. This option has to be activated by a keyboard shortcut: Win + Shift + H, unless you click the option called Automatically activate on utility startup.
Doing so will automatically turn on the click highlight when you toggle Mouse Highlighter on.
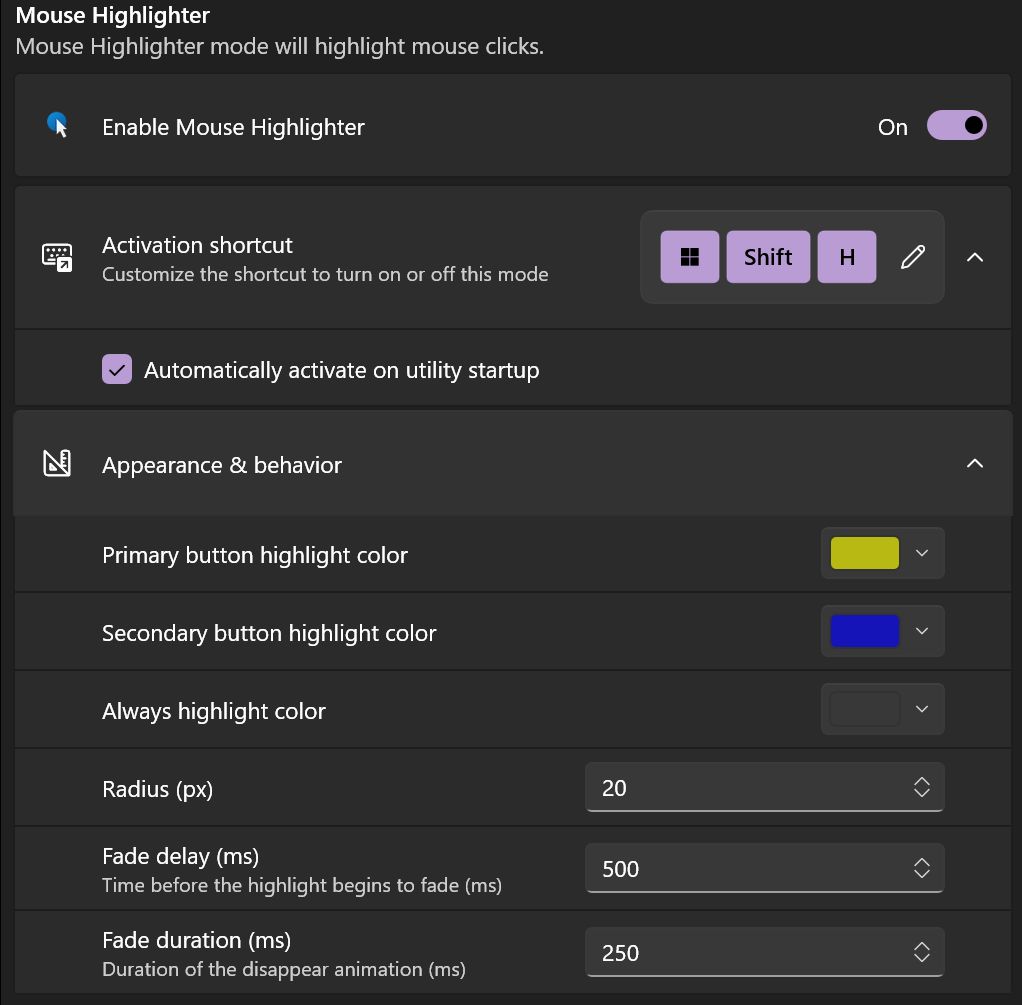
The rest of the options will allow you to configure the size and color of the circles shown around the cursor when clicking. It’s possible to have different colors for left and right click.
Here’s a demo with how it works in practice:
Mouse Pointer Crosshairs
One last option I want to show you are the Mouse Pointer Crosshairs. You will also have to enable this module, then activate either automatically by checking the Automatically activate on utility startup or by presing Win + Alt + P.
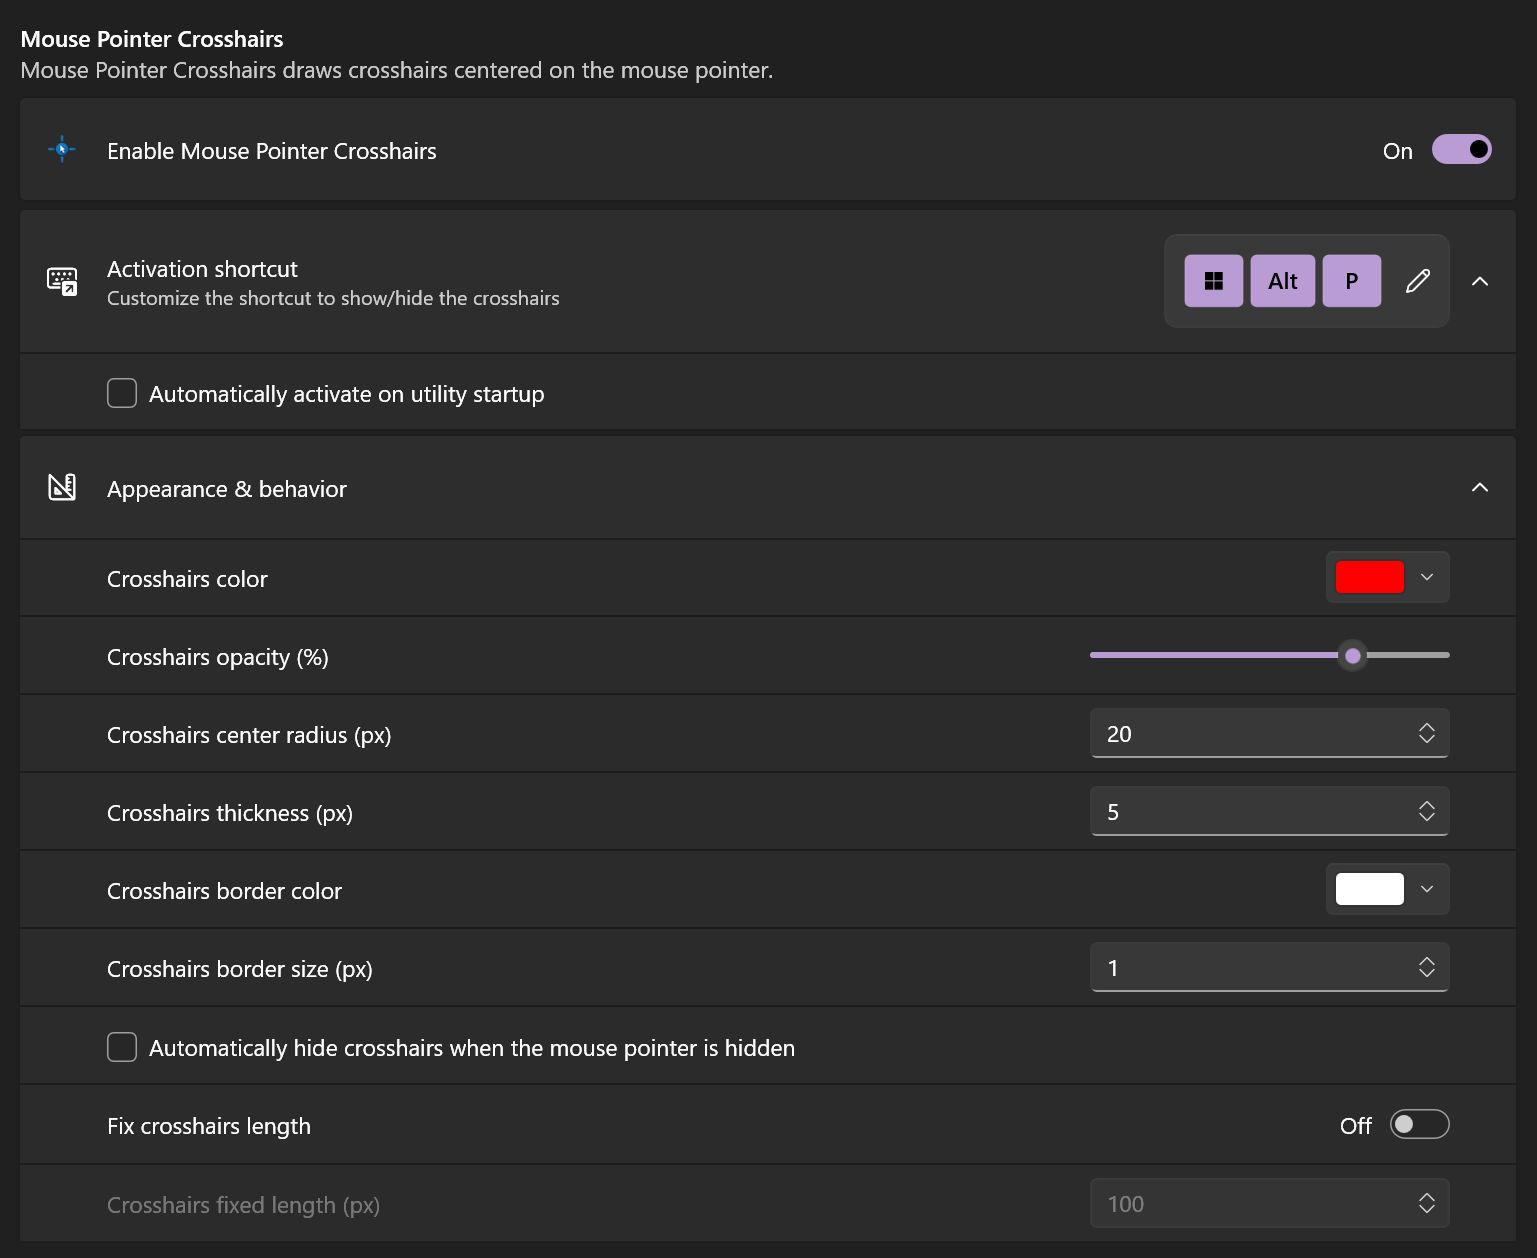
Unlike the Find My Mouse option, once turned on, the crosshairs turn on, until you disable them.
Options include crosshair color, opacity, center exclusion zone (don’t know how else to call it), thickness and border size.
By default, the crosshair will extend to the screen borders, but I recommend you opt for a fixed crosshair length, which you can specify in pixels.
When the crosshairs are enabled the Find My Mouse option will not work. I don’t know if this is by design, or if it is indeed a bug.

3 Ways to Change Text or Font Size in Windows to Make Everything Bigger
And there you have it, four quick options to highlight the mouse cursor in Windows. The one I’ve used for the past couple of weeks is PowerToys Find My Mouse. It looks modern and it doesn’t get triggered every time I press Ctrl, which happens with the native Windows option.
Which one do you like?