- If you need to quickly launch a program in Windows one option is to create an app shortcut on the desktop.
- In Windows 10 and 11 it is not intuitive to add an app shortcut to the desktop, but it can be done in a few steps.
- Follow our three guides for creating convenient desktop shortcuts for your favorite programs.
Windows 11 and Windows 10 can display shortcuts in the Start Menu, Taskbar, and on the Desktop. It’s nothing new here.
If I were to rank the three locations by how easy it is to launch an app, I would say the taskbar is just one click away, but it can’t hold too many apps, due to space constraints. I prefer to keep only the bare minium of icons on the taskbar.
On the second place comes the Start Menu. Once you open it there are a few apps that are shown here. Windows 11 does a pretty good job in allowing me to customize what I see.
You can now even show more pinned apps, or more recommended files and apps, so there’s a bit of freedom.
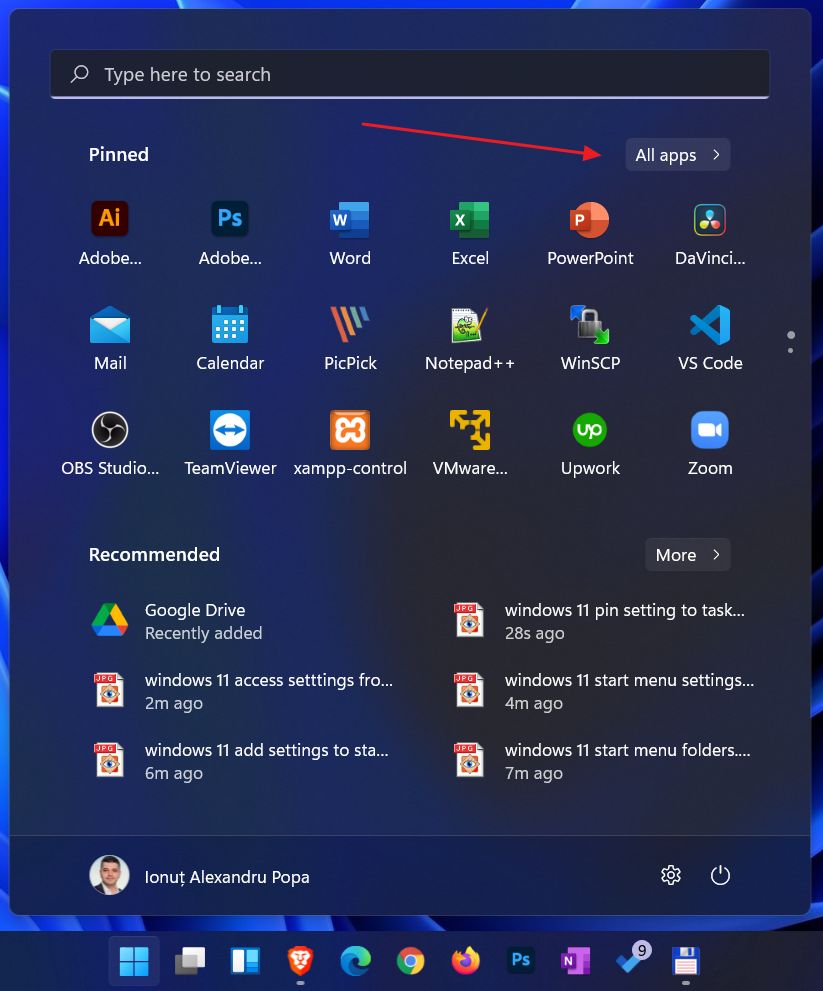
If I want to access apps that are not shown here I can either type to search, or click on the All apps button, then start scrolling. Not ideal.
That’s why I also use the desktop to keep shortcuts for some of my favorite apps, those that I don’t necessarily use all the time.
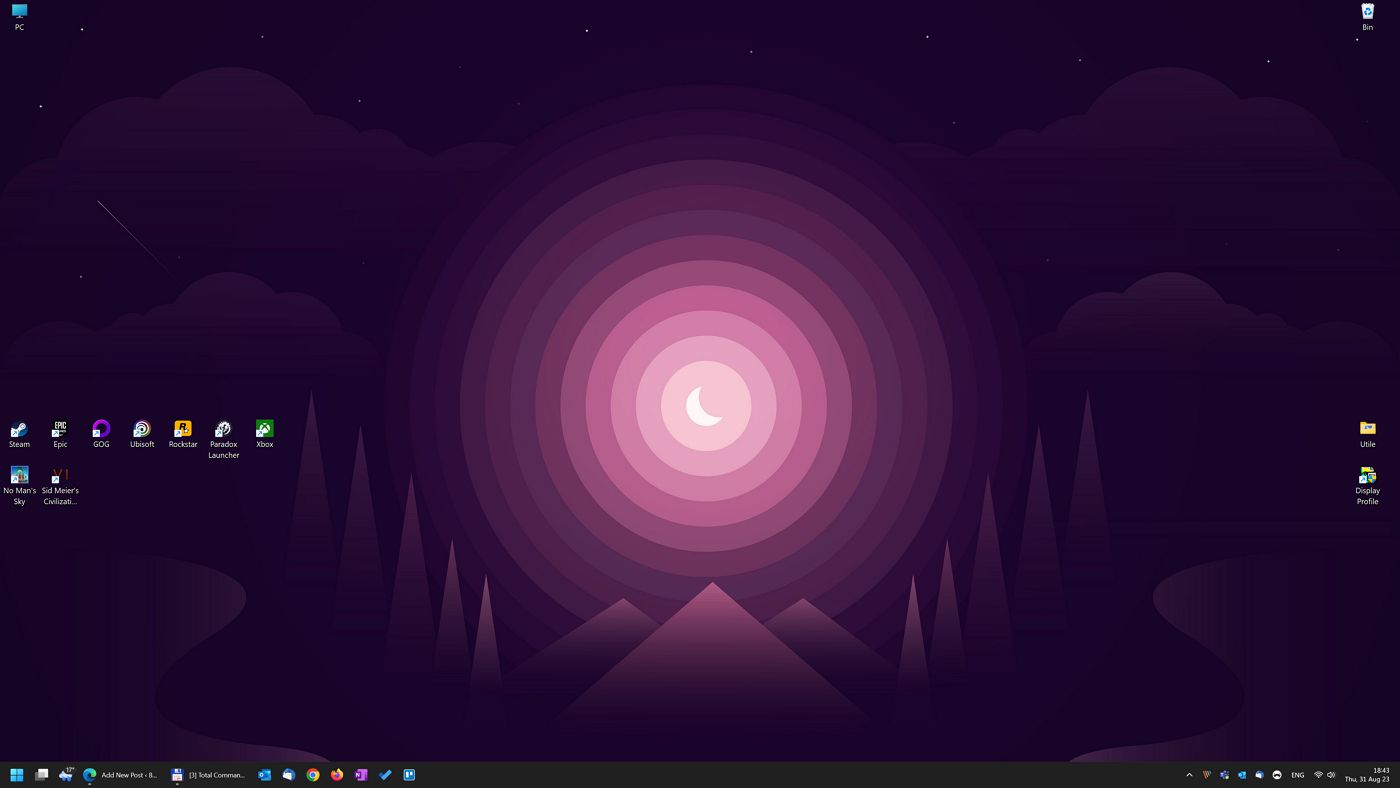
The desktop is a convenient way for many of us to keep shortcuts just a few clicks away. Ctrl + D to show the desktop, then double-click, and the app starts.
But you know what’s weird? While you can easily pin apps to taskbar and the Start Menu from the right-click contextual menu it’s not that easy to create app shortcuts on the desktop.
I didn’t say it’s difficult. Just unintuitive.
Let’s fix this. I’m going to show you three ways to create desktop shortcuts for the programs you want, but also for other types of files and folders.
Why three methods?
The first one is for the programs you download from the Internet, from outside the Microsoft Store. The second method is for Microsoft Store apps. The third method is the best way to create a desktop shortcut for anything you want, not just apps.
CONTENTS
This is the typical scenario for most people: you install an app, and it shows up automatically in the Start Menu, either in the Pinned area or All apps list.
If you want to create shortcuts for these apps here’s what you have to do.
1. Press the Win key to open the Start menu.
2. Find the app you want to create a shortcut for (select from Pinned area, from All apps list, or just type to search for it).
3. Right-click on the app icon. If you don’t see the Open file location option in the menu it means it’s a Windows Store app, so you need to follow the second method.
If it’s there, click on it to get to the next step.
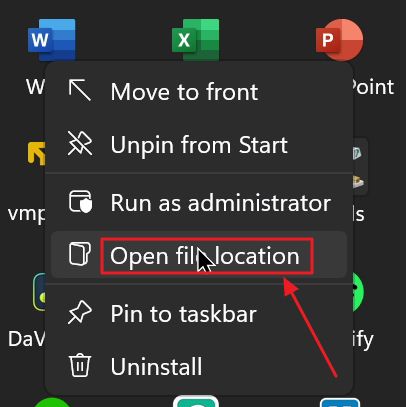
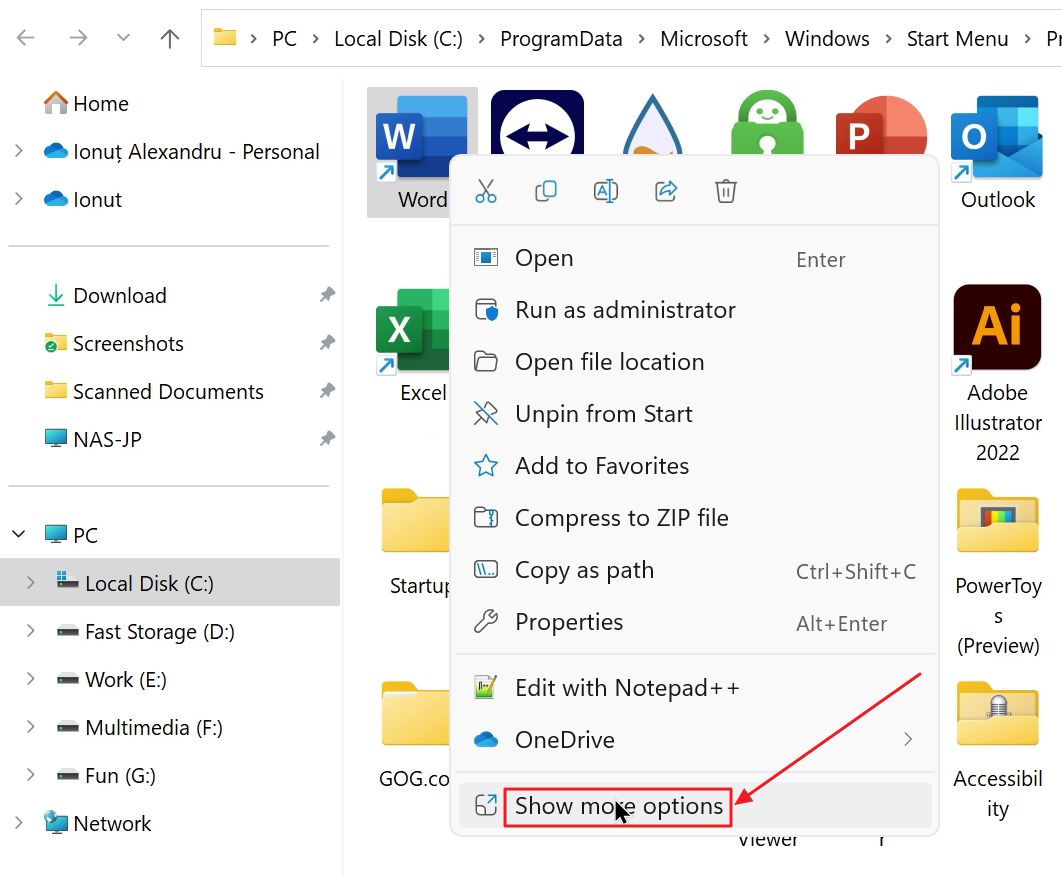
4. The folder which contains either the app executable (or a shortcut to the executable) will now open.
The app will be automatically selected, so you can right-click on it and select the Show more options entry, the last one, to open the old-style Windows 10 contextual menu.
5. From here select Send to > Desktop (create shortcut) option.
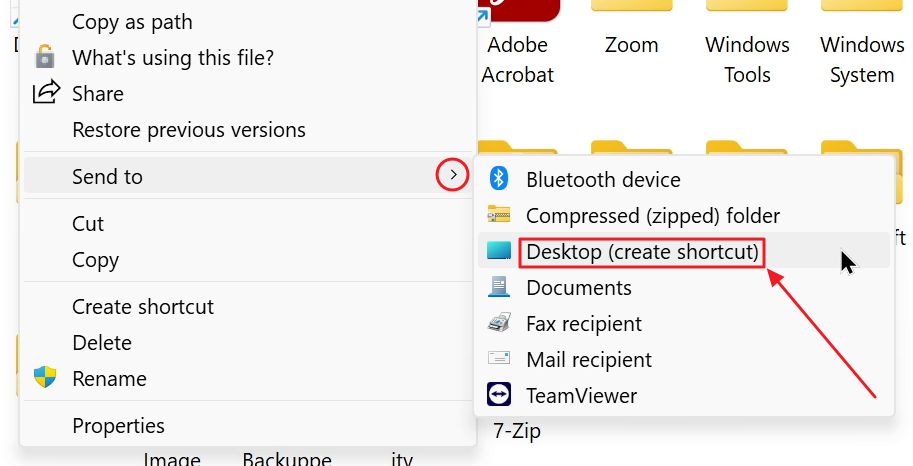
You can now press Win + D keyboard shortcut to show the desktop. You’ll find your newly created icon there, most likely in the top-left area.
You can move it around, if you’re like me and want to arrange everything on the desktop, in the “correct” position.
How to Create a Desktop Shortcut for Microsoft Store Apps
First, why don’t we use the same method to create shortcuts for Microsoft Store apps? Well, because you just can’t. These apps are installed from the Microsoft Store, and you won’t find them in the Program Files or Program Files (x86) folders, where typical programs and their executables can be found.
How do you tell a Microsoft Store App apart from one you’ve downloaded and installed from the Internet?
Well, there’s no easy visual clue to help you with that. If you right-click on an app icon from the Start menu and don’t see the Open file location option in the contextual menu it means you’ve selected a Microsoft Store app.
What do you do from here?
1. Open the run dialog window menu by pressing Win + R.
2. Type the following command and press Enter to execute:
shell:AppsFolder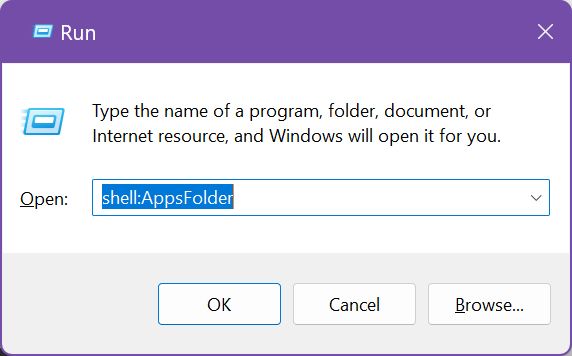
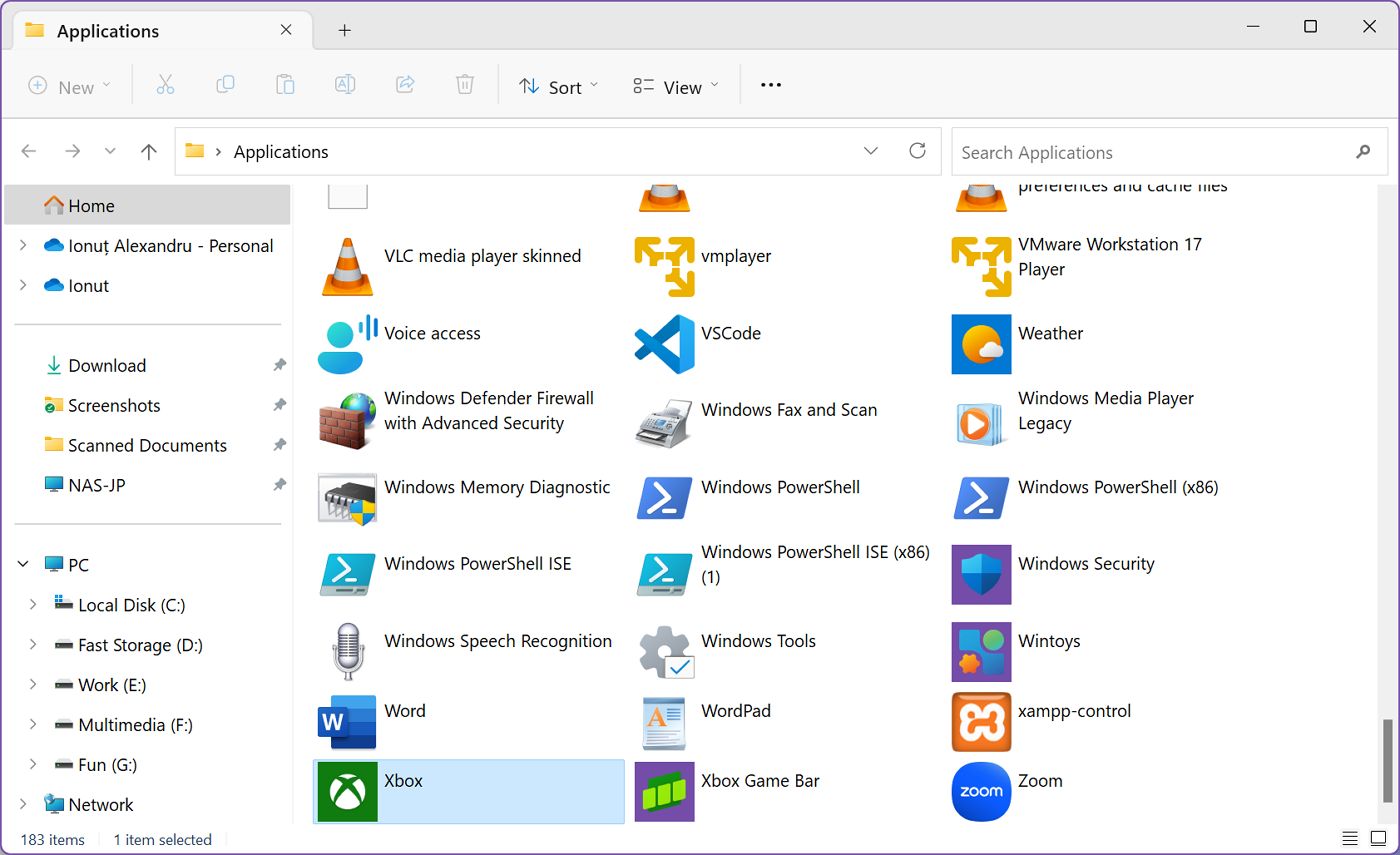
3. This will open a File Explorer window with some app icons. It’s a weird window, in the sense it doesn’t have a physical location on disk. Check the address bar. It only says Applications.
Now find the Window store app you want to create a desktop shortcut for and right-click on it.
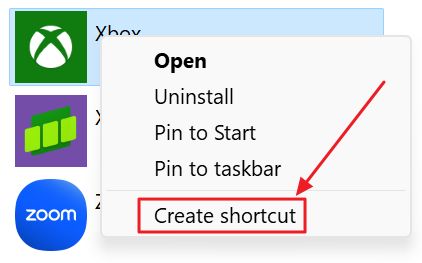
4. From the contextual popup select Create shortcut.
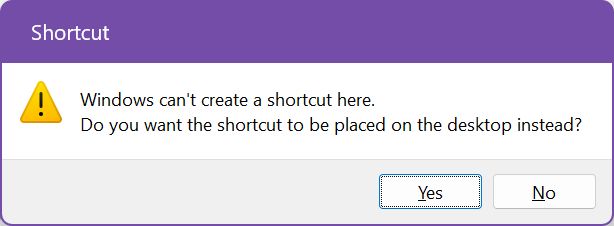
5. A warning popup will let you know that “Windows can’t create a shortcut here.
Do you want the shortcut to be placed on the desktop instead?”. Confirm with Yes.
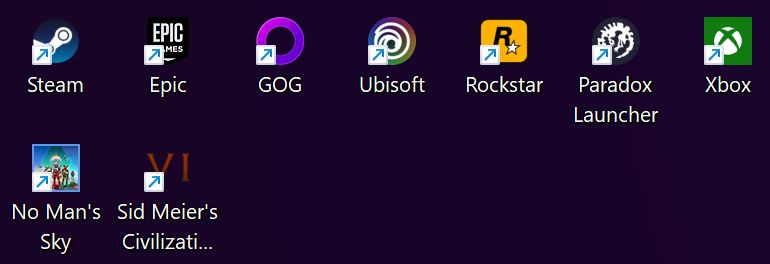
6. You should find the shortcut on your desktop now. I followed the steps for the Xbox app and, as you can see, it’s no different than other app icons.
How to Create a Manual Desktop Shortcut for Everything in Windows
If you’re not afraid of a few more steps, here’s a guide to create a manual shortcut on your desktop. A desktop shortcut can point to anything you wish, not just an app. So, you could have shortcuts to most used documents as well as favorite folders.
Keep in mind this guide works in any other folder you open in File Explorer, not just on the Desktop (which is also a subfolder in your current user folder on the C: disk partition).
Once the shortcut is created you can copy/cut and paste it to other folders as well.
Here’s how it’s done:
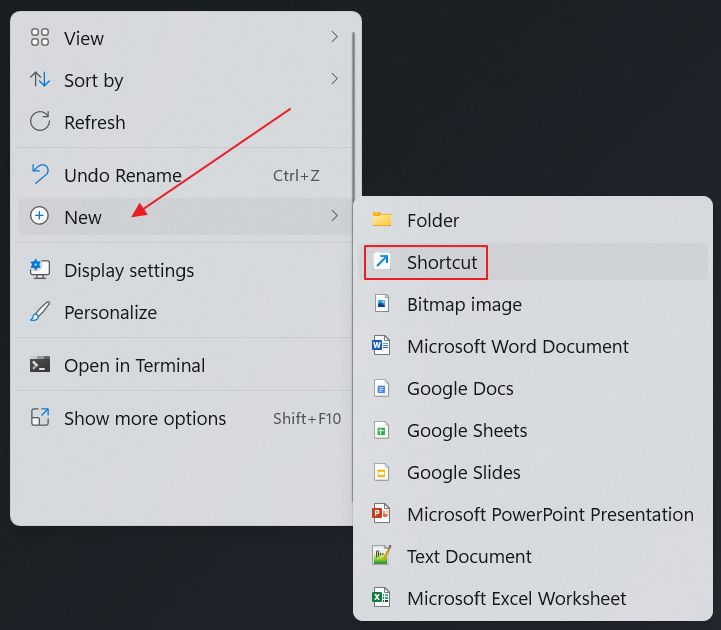
1. Right-click on any free Desktop area or inside a File Explorer folder and select New > Shortcut.
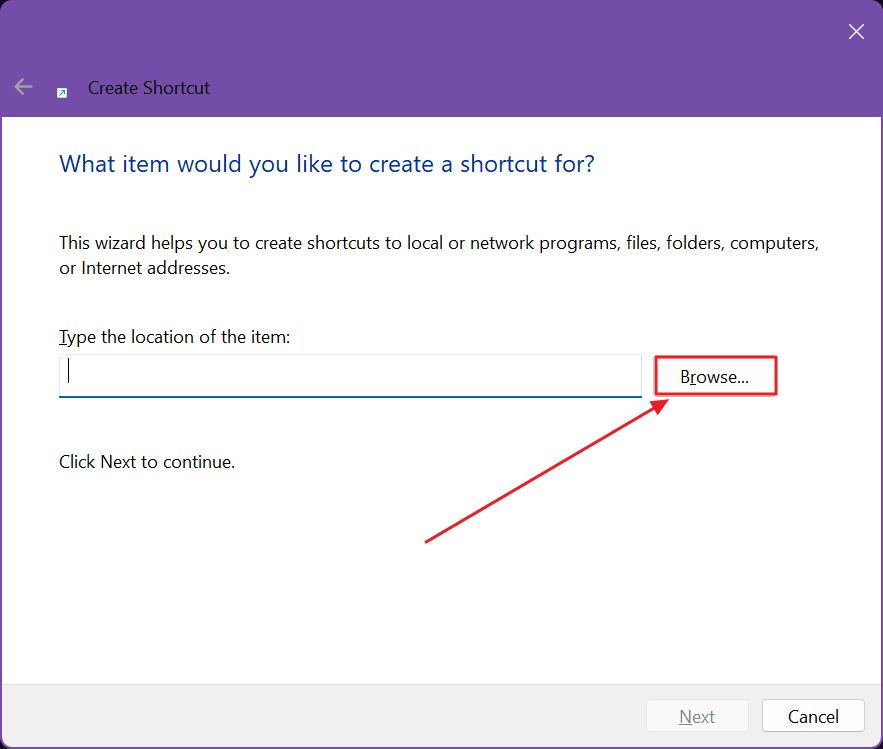
2. This will open the Create Shortcut window.
You probably don’t know the Path of the file by heart, but you can definitely Copy as Path any folder or file, then paste in the Type the location of the item field.
Most users will just click on the Browse button.
3. Another popup with a tree structure will show up. Navigate by expanding the desired location with the right-pointing arrow. Select any file or folder you want and confirm with OK.
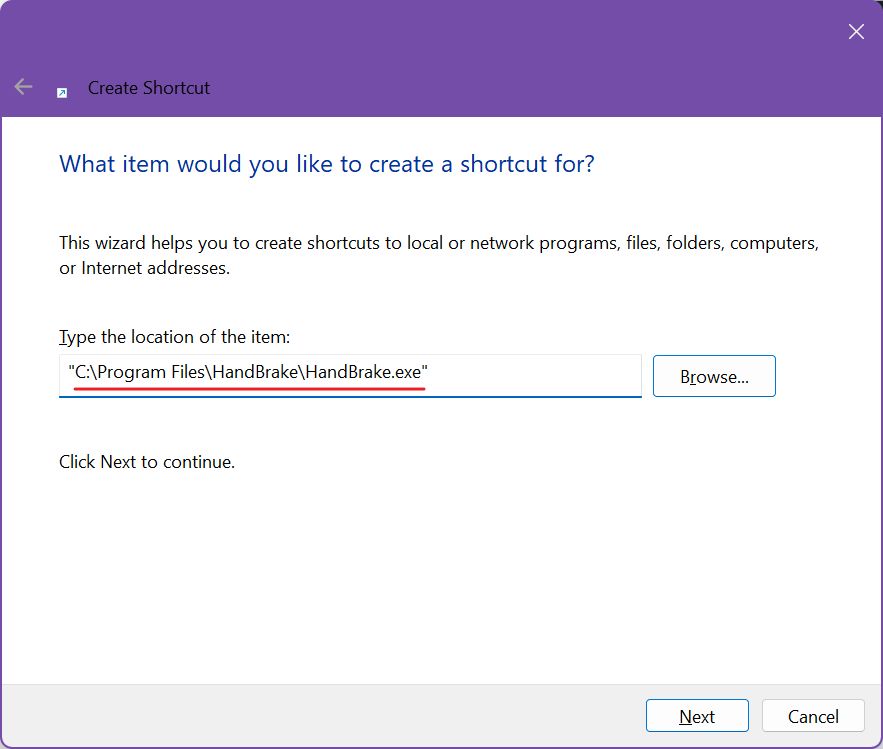
In this example we’re going to select the Handbrake.exe executable file.

4. The file path will be automatically filled in the previous window. Select Next to continue.
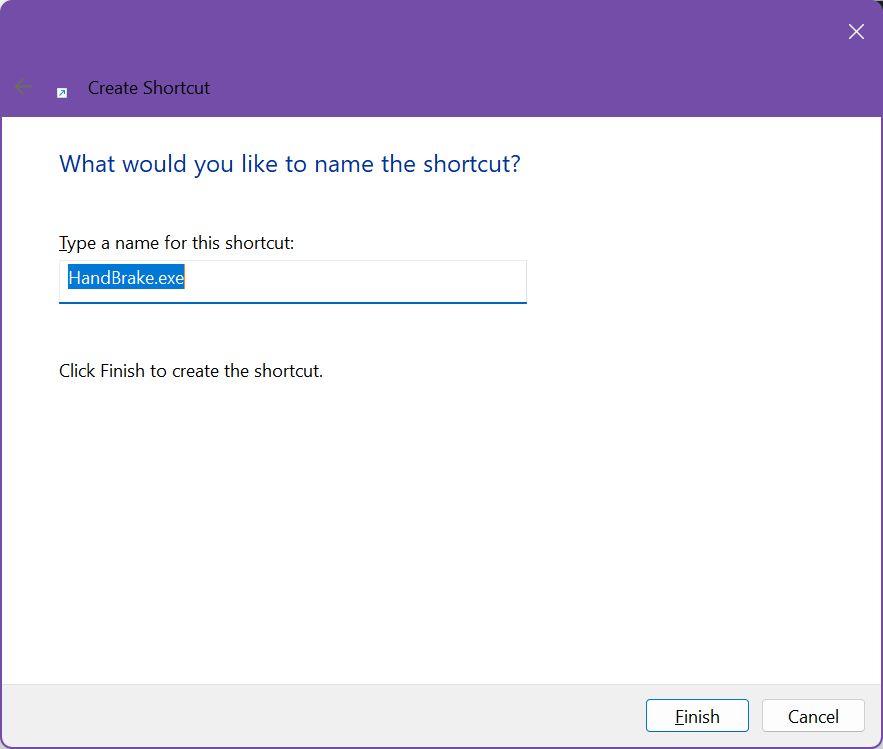
5. At this last step you are required to add a name to your new shortcut. By default, the field is auto filled with the filename and extension. You can type anything you want here.
Click Finish to continue.
6. The new manual shortcut will show up on your desktop.
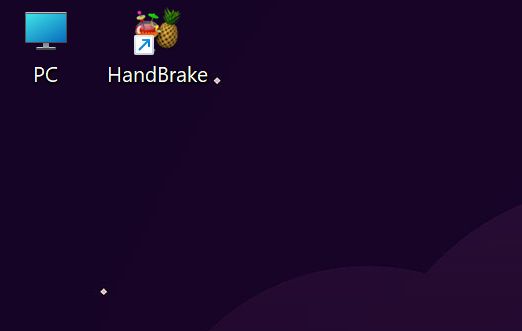
If you want to change the appearance of the shortcut you can do it by following this guide for changing Window icons. If you select the icon and press F2, you can rename the shortcut in just a few seconds.
And there you have it, three ways to create app shortcuts on your Windows desktop. I didn’t know about the second method until doing the researching for this article. Here’s your proof that sometimes Windows is just not user friendly.
