- There aren’t many audio accessibility options in Windows, but that doesn’t mean the existing ones are not helpful for hearing impared people.
- Learn about the two audio accessibility settings found in the Settings app and what they do.
- I’ll also briefly mention a third somewhat related option.
I knew about Microsoft’s efforts to make Windows accessible to everyone, but I was not aware the extent of this effort until I started writing about assistive technologies here on BinaryFork.
Today we’re going to take a look at the audio options from the Windows Settings Accessibility panel. These are meant for people with hearing imparements of any degree.
There aren’t many options to speak of, as you will see, but I think the existing ones do a good job of making Windows a little bit more accessible.
CONTENTS
How to access the audio accessibility options in Windows 11
First, let’s see how you get to the audio section of the accessibility options in Windows 11 (by the way, you can use same steps in Windows 10).
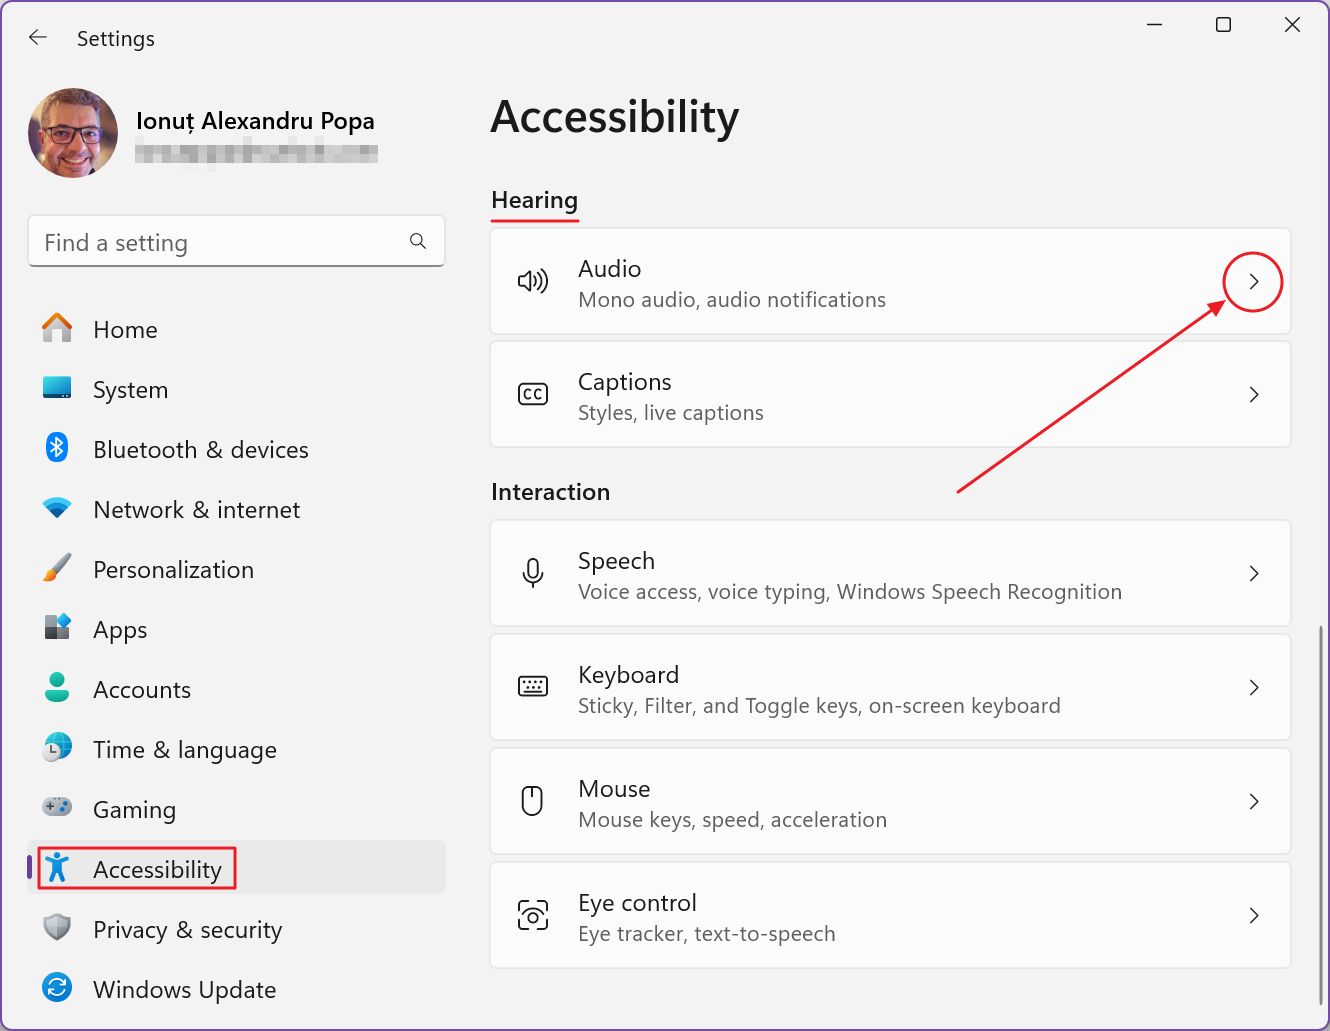
- Open the Settings app first. You can press the Win + I shortcut to launch the app from anywhere in Windows.
- Use the left side navigational menu to find Accessibility and click to open.
- The right side options will now load. Scroll to the Hearing sub-heading.
- Click on the Audio entry to open the hearing related assistive options.
Mono audio: combine stereo and surround channels into one
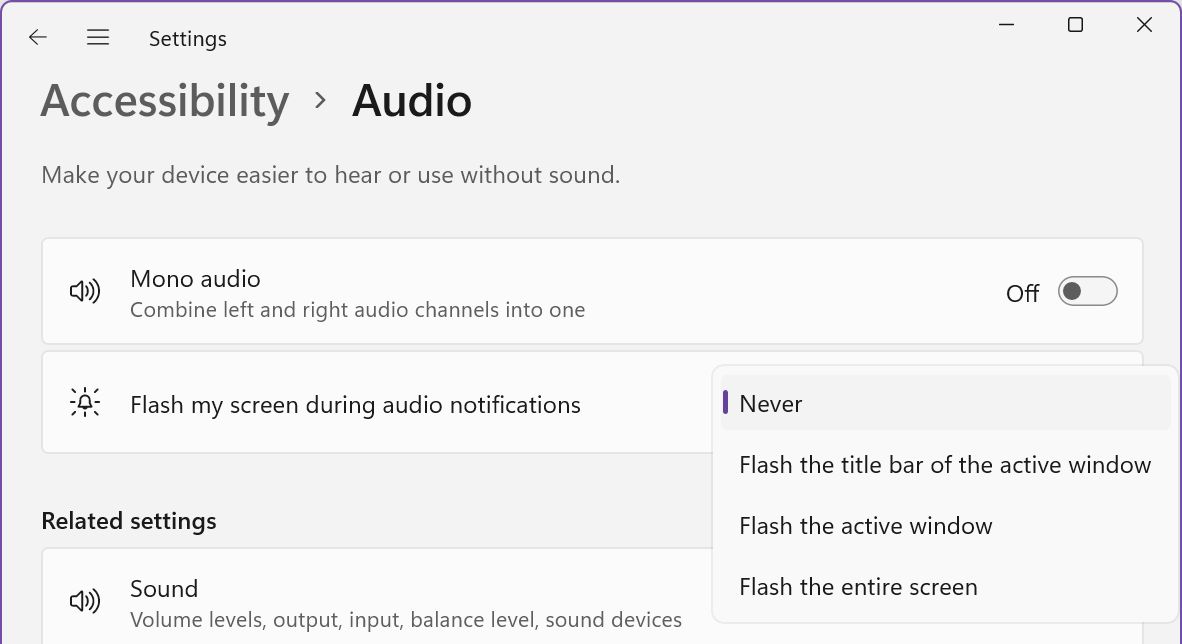
The Mono audio toggle is the first option. It’s a simple on/off switch. If it wasn’t already obvious, if you toggle Mono audio on all the audio channels will be combined into a single channel. This means each desktop speaker you use or headphone speaker will play the same audio.
This is especially useful on headphones if you have troubles hearing with one ear. Combining audio ensure you don’t miss any sound.
Flash the screen when an audio notification arrives
I suspect this option is best used for those with serious a hearing impairment.
This option is a select form with four options:
- Never
- Flash the title bar of the active window
- Flash the active window
- Flash the entire screen
Basically, when an audio notification arrives you will get a visual indicator instead of just the audio sound. Depending on Windows settings you may also get a small visual notification in the bottom-right panel of the screen.
Chose depending on your desired level of intrusiveness. You can choose to flash only the active window title bar, the entire active window (more intrusive), or the entire screen(s), the latter being the most intrusive option.
What about Live captions?
I have written a detailed article about Live Captions, which is basically an automatic caption generator, similar to the one you find on YouTube. The difference is that the one included in Windows works in every app.
I understand why Microsoft included the Live Caption options in the Hearing section, separate from audio, so if you need more help with the hearing options make sure you read the article linked above.

It explains how to set up Live Captions to translate everything that plays through your spakers. That includes also music, but it doesn’t do a very good job, as expected.
