- Windows 11 offers not one, but two virtual keyboards which can help you with input text.
- The On-screen keyboard is a legacy virtual keyboard while the Touch keyboard is the modern version with multiple layouts and personalization options.
- Learn how to enable these two virtual keyboards and how to use them on touch enabled or normal non-touch devices.
The more Microsoft manages to make everything more coherent in Windows 11 by moving everything in the Settings app the more it becomes evident there’s still work to be done when you stumble upon a legacy utility.
CONTENTS
The legacy On-Screen Keyboard
I had one of these out-of-place moments recently, while documenting for the keyboard accessibility options in Windows. That’s when I found this “gem”, the on-screen keyboard:
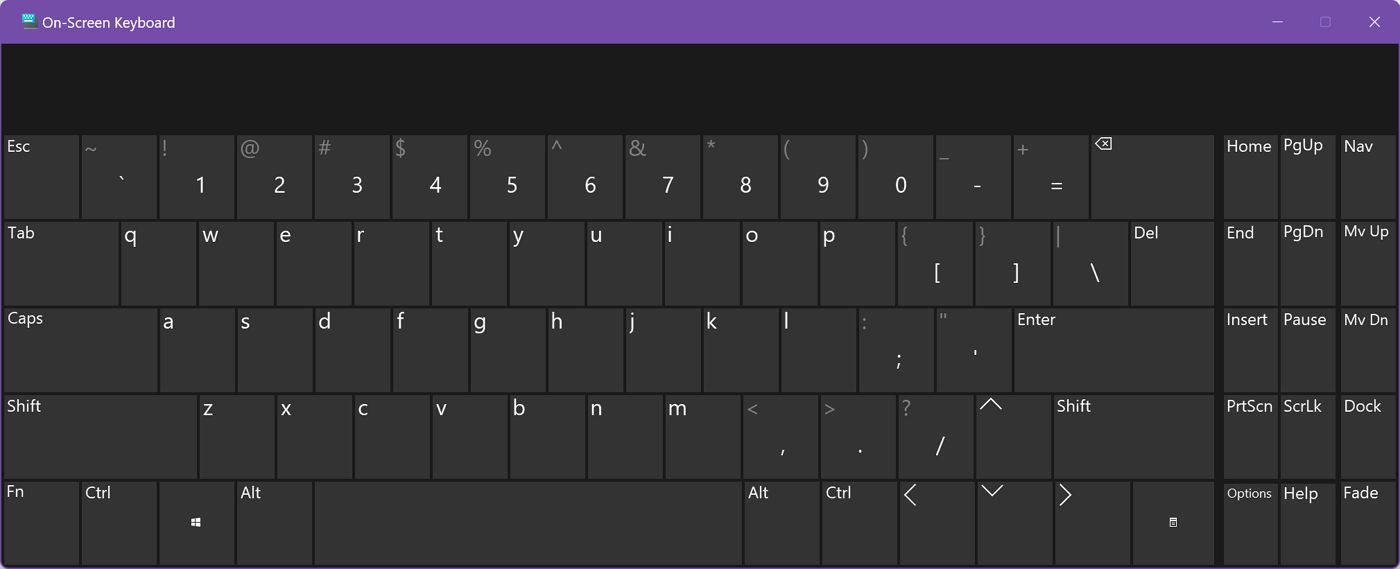
That’s one ugly looking keyboad. It dates back to Windows XP, if I’m not mistaken. I’m not sure why Microsoft kept it adound, but I belive it will be phased out soon.
For some reason, Microsoft decides this is the default accesibility keyboard. It can be turned on with a keyboard shortcut, Win + Ctrl + O, or directly from Settings > Accessibility > Keyboard, if you toggle on the On-screen keyboard option.
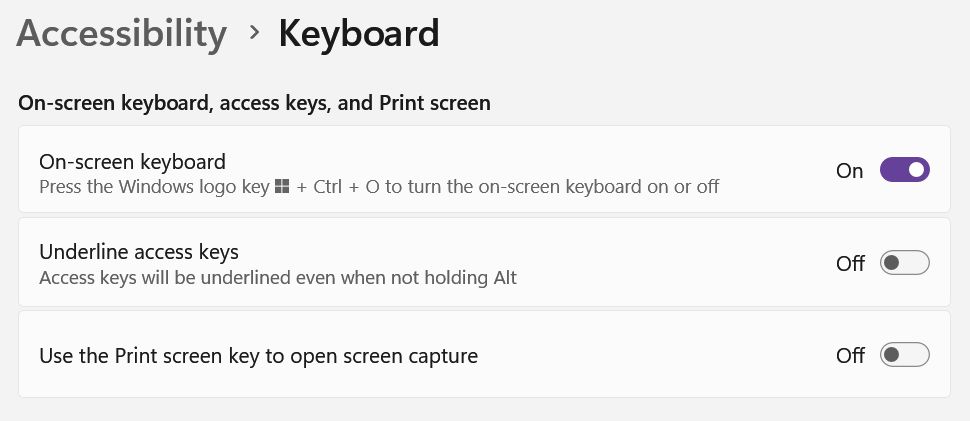
You can launch the on-screen keyboard by typing osk in the Windows Run dialog box (Win + R). It’s also possible to pin the application shortcut to the taskbar for easy access.
There aren’t many options for this keyboard to choose from, except one: if you click on the Options key you can add a numeric pad to the already crammed layout. It looks something like this:
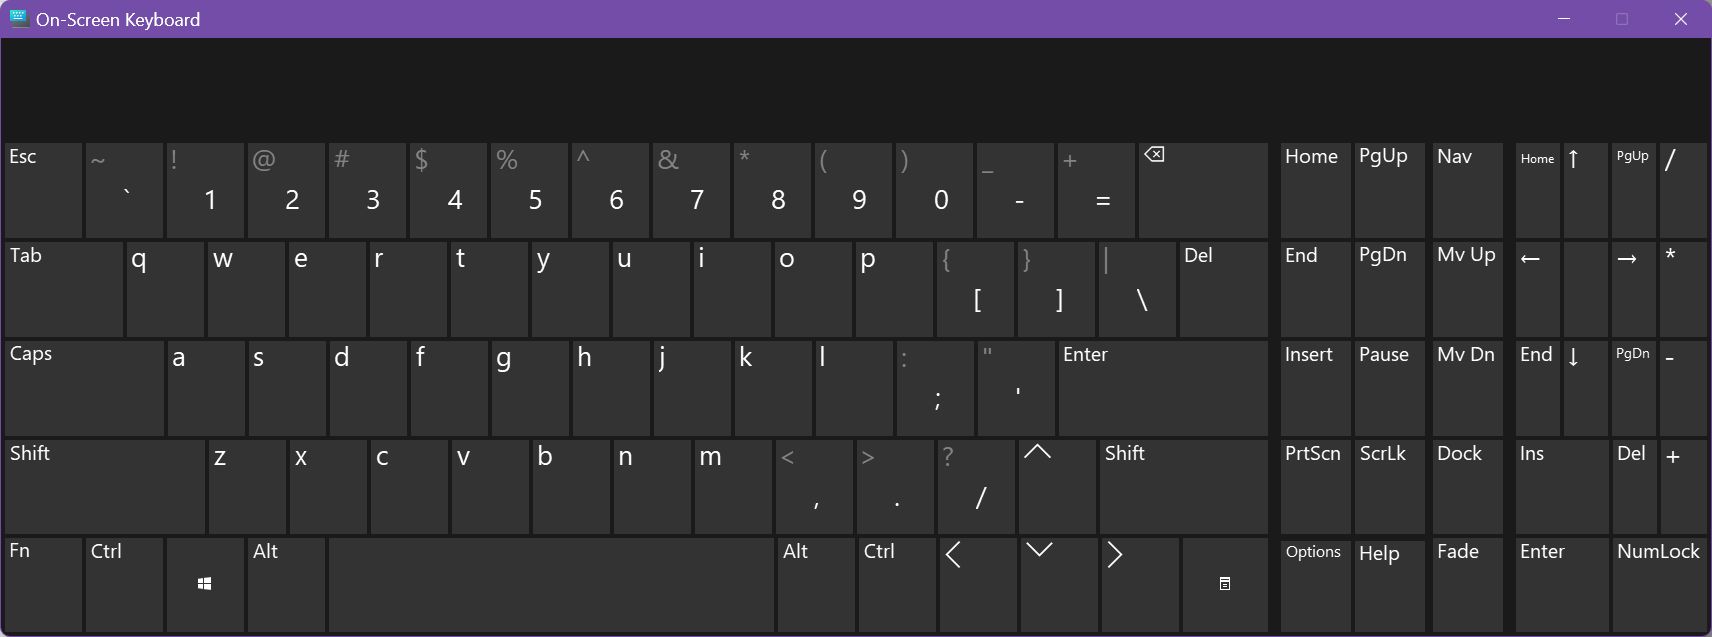
My assumption is that sooner rather than later the On-screen keyboard will dissappear completely and the Win + Ctrl + O shortcut will be used to open the much improved touch keyboard.
The modern option: the Touch keyboard
The replacement makes sense because Windows already has a modern touch keyboard that can be used for typing on touch enabled devices, it works with non-touch computers, and also supports handwriting input, with surprisingly good accuracy.
The new touch keyboard integrated into the existing Windows desktop and is now part of the taskbar, so it’s no longer a separate app you can launch.
Let’s see how you get to use the touch keyboard. The default behavior is for the virtual keyboard to be displayed automatically on screen when there’s no keyboard attached. This makes sense if you use something like a Microsoft Surface tablet.
The full list of Keyboard shortcuts for Windows Accessibility tools
How to launch the Touch keyboard
Fortunately, you can add a touch keyboard icon in the System tray, so you can launch the keyboard anytime you wish, on any kind of device.
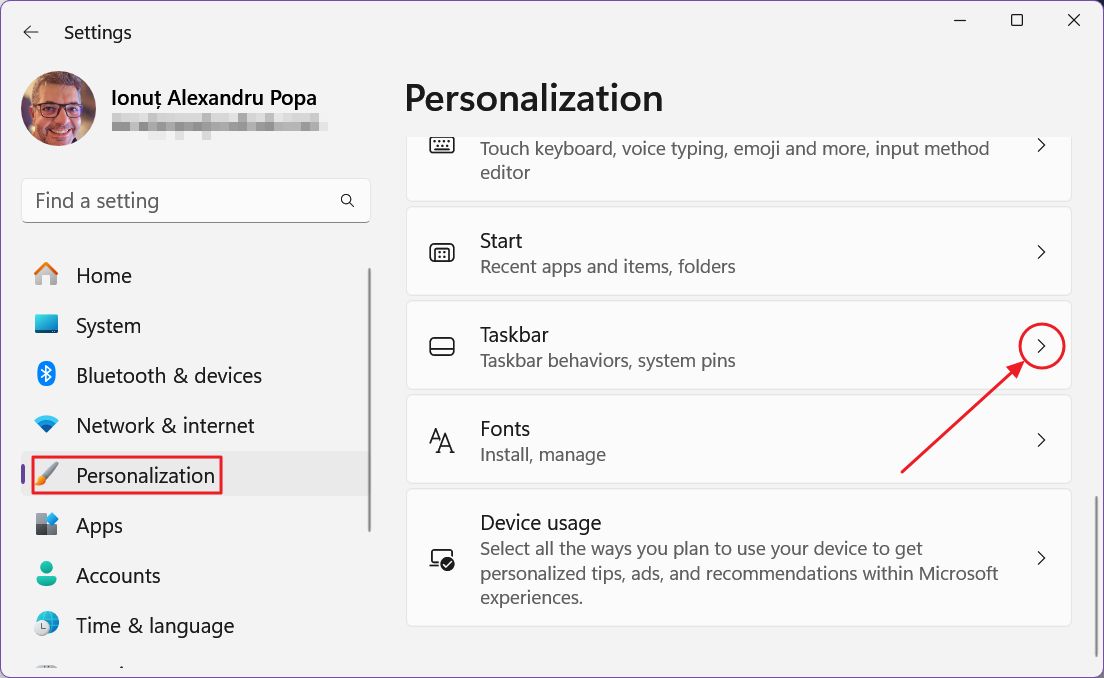
1. Open the Settings app. You can use Win + I for quick access.
2. Select Personalization from the left side menu.
3. Click on Taskbar in the right panel.
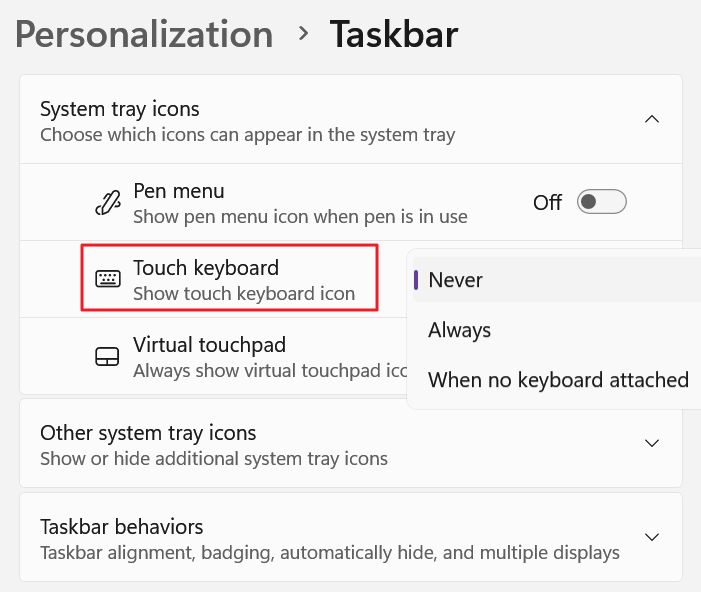
4. Scroll to the System tray icons section, expand if needed, then select a behavior for the touch keyboard icon. Your options are:
- Never – do not show the icon.
- Always – always display the icon in the System tray.
- When no keyboard attached – only show the icon when there is no physical keyboard connected to your PC.
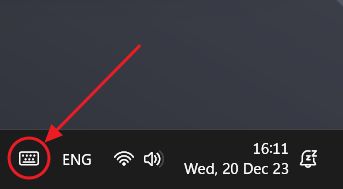
Once you make your selection you should see the following icon in the lower right corner of your screen.
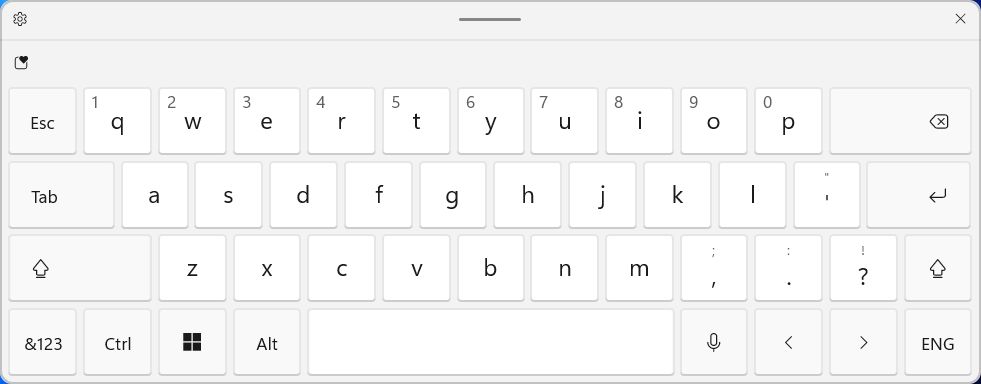
5. Clicking or tapping the icon will bring the touch keyboard on screen. This is the default layout and theme. The numbers are accessible via a long press.
6. In typical Microsoft confusing fashion, there’s one more Settings menu where you can control the automatic appearance and disappearance of the touch keyboard: Settings > Time & language > Typing.
Here you can choose the same three options as before: Never, When no keyboard attached, and Always.
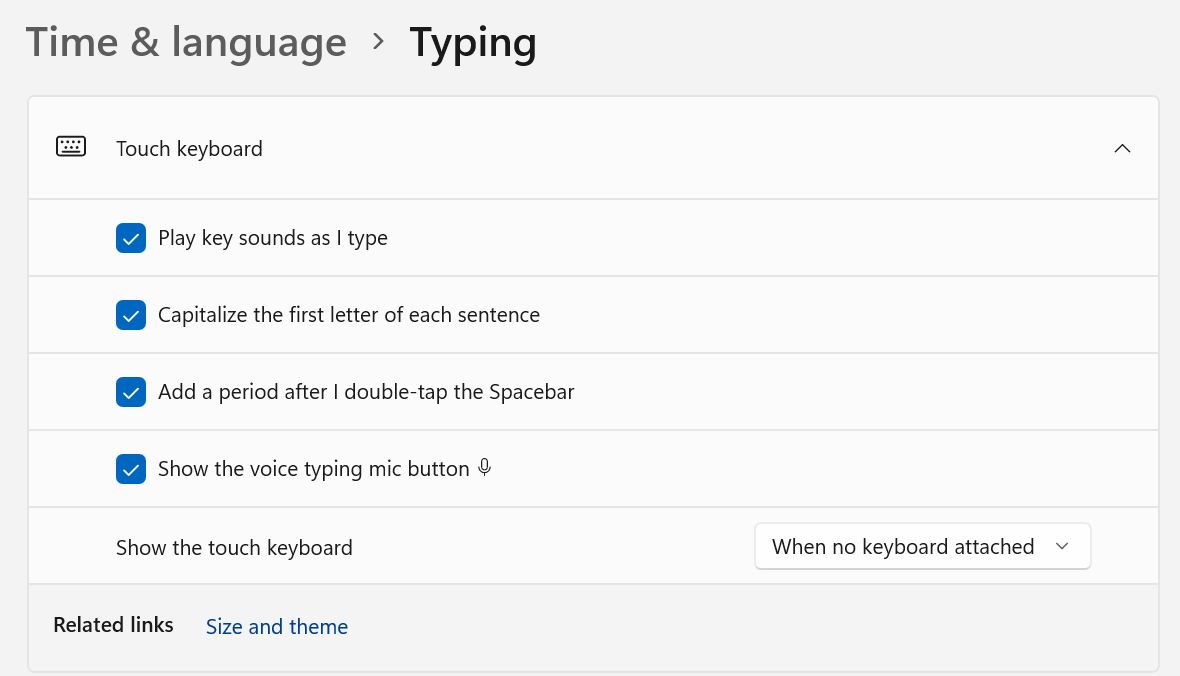
On my non-touch enabled desktop this settings doesn’t seem to work. So I suggest you just use the system tray icon method instead.
The touch keyboard layouts and handwriting mode
If you click on the gears icon in the top left corner of the touch keyboard you get access to a few keyboard layouts.
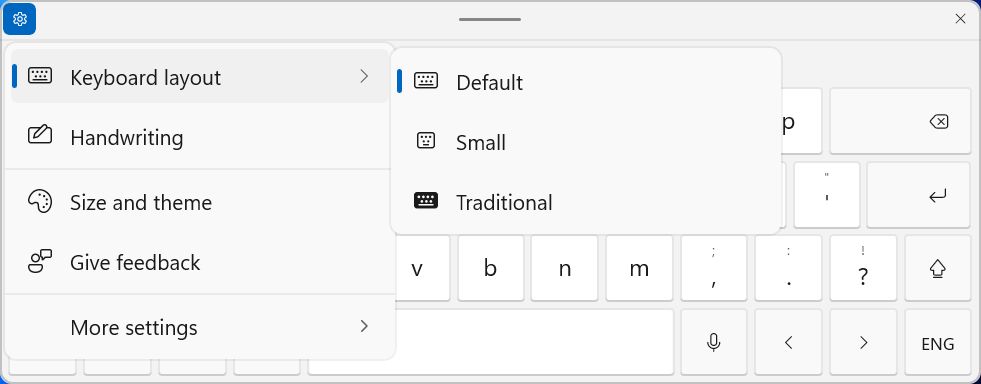
From the image above there’s one layout missing, the Split keyboard. I assume that’s because I don’t use a touch enabled device. But I do have access to:
- Default – looks like a 60% layout.
- Small – Similar to the Android/iOS phone keyboard.
- Traditional – similar to the 75% layout.

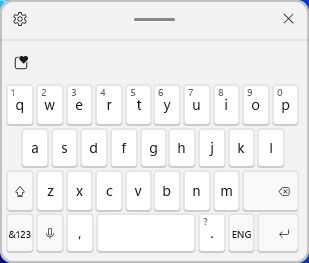
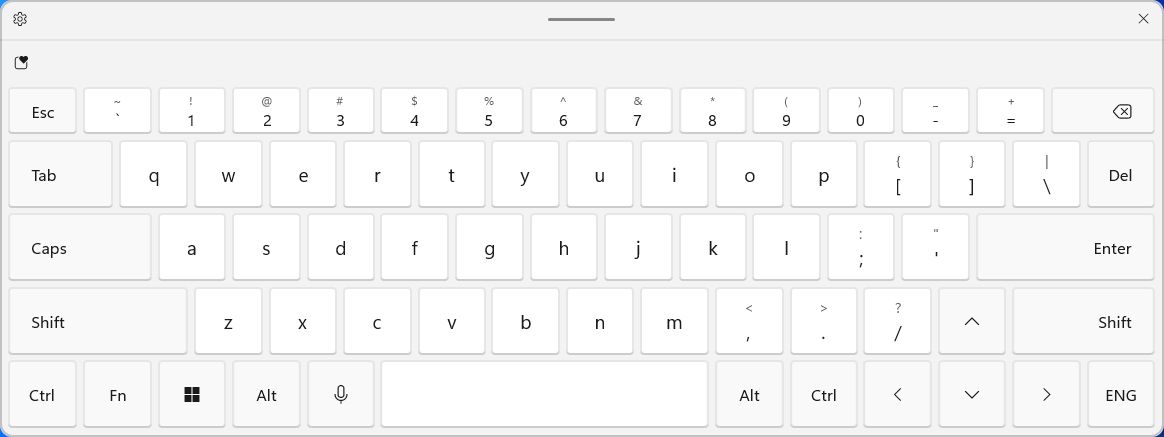
I prefer the Traditional layout, but it’s the only one who doesn’t show accented characters when you long press on a key. Bummer!
Another layout option you get, even if it’s placed outside the normal layouts menu is the handwriting mode.

I’ve tested the inking capabilities of Windows 11 with my mouse, which is already a worse case scenario. I’m surprised how well it works. Maybe my next Windows computer will be touch enabled.
Note the icon at the top-right of the handwriting mode. Clicking it will dock the keyboard at the bottom of the screen, completely covering the taskbar and system tray.
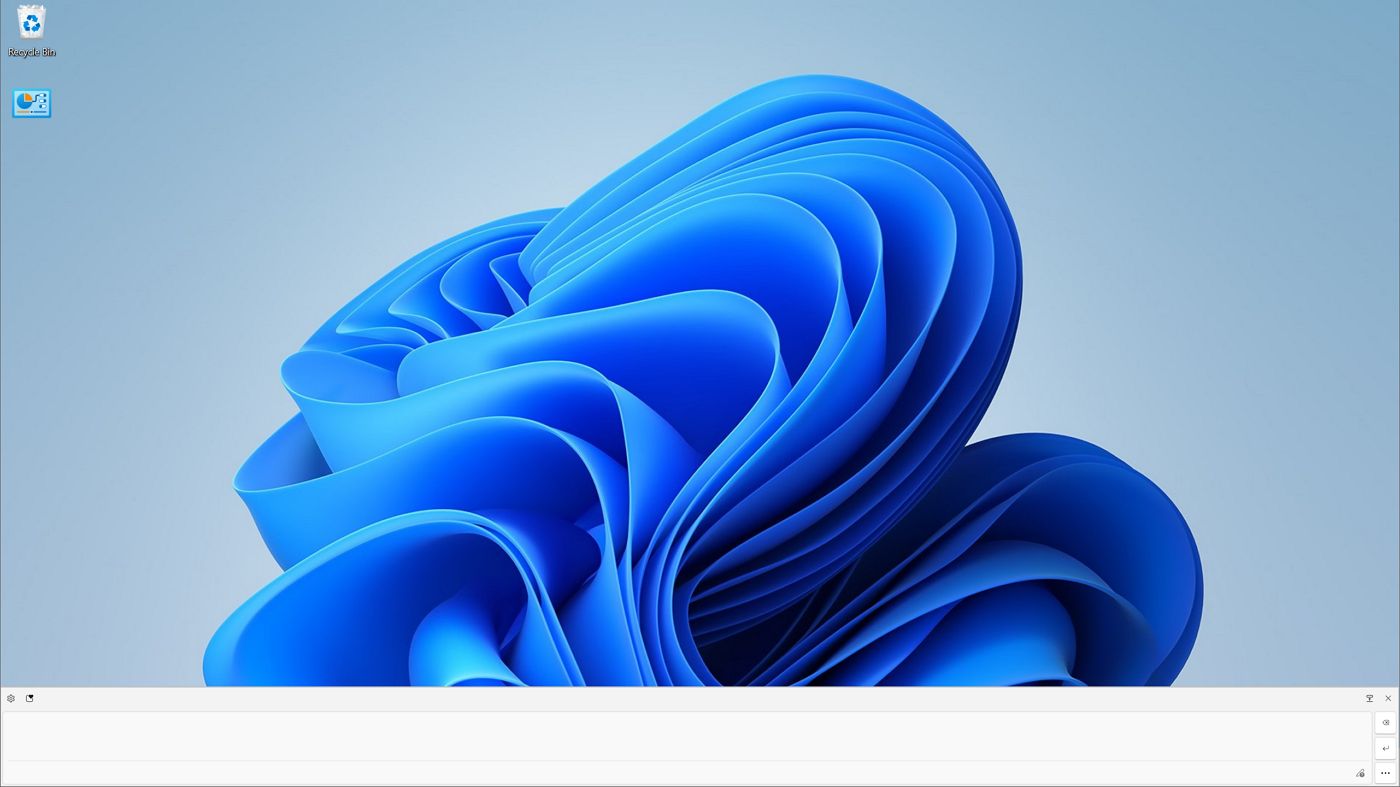
I don’t know why Microsoft opted for this.
No matter what layout you use, there’s a button at the top left with a heart, that will allow you to insert emoticons, GIFs, kaomojis, special characters and even previously copied items.
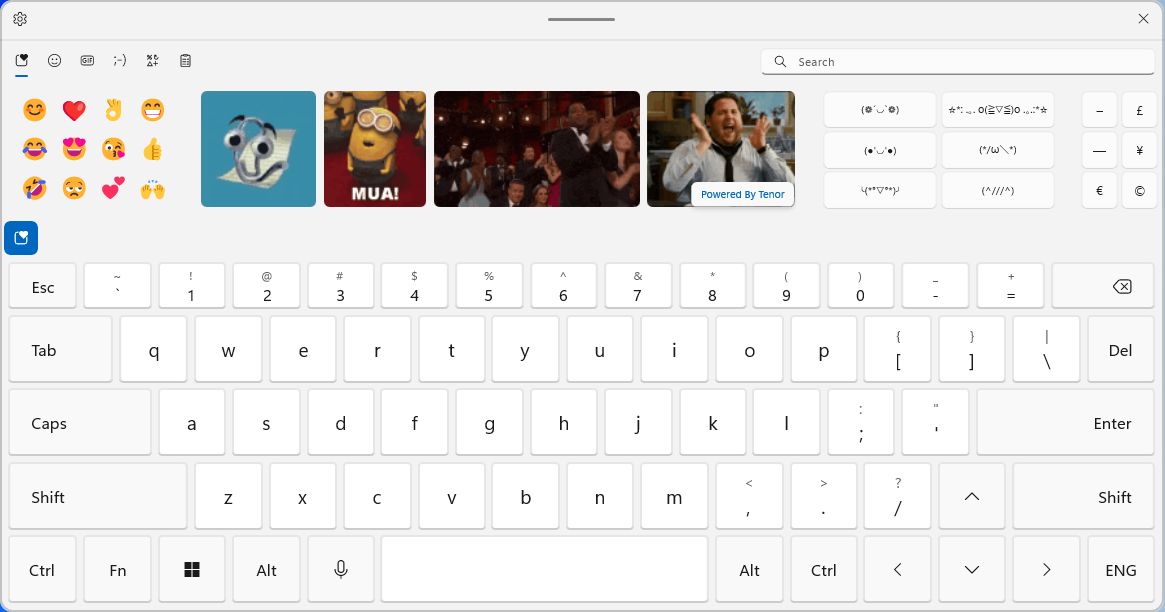
You may have seen these options before: they’re the exact panels from the emoji keyboard, accessible by pressing Win + . (period), Win + ; (semicolon) and Win + V (copy paste clipboard history).
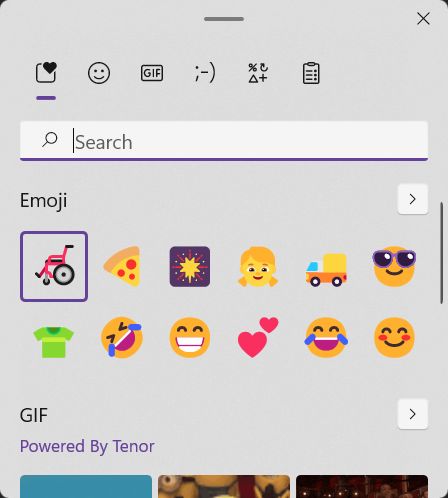
The touch keyboard themes
Under the settings cog wheel is another important menu entry, the Size and theme. This is a shortcut for Settings > Personalization > Text input.
Here you can choose one of the predefined themes, or create your own custom theme, with your own colors and optional background image.
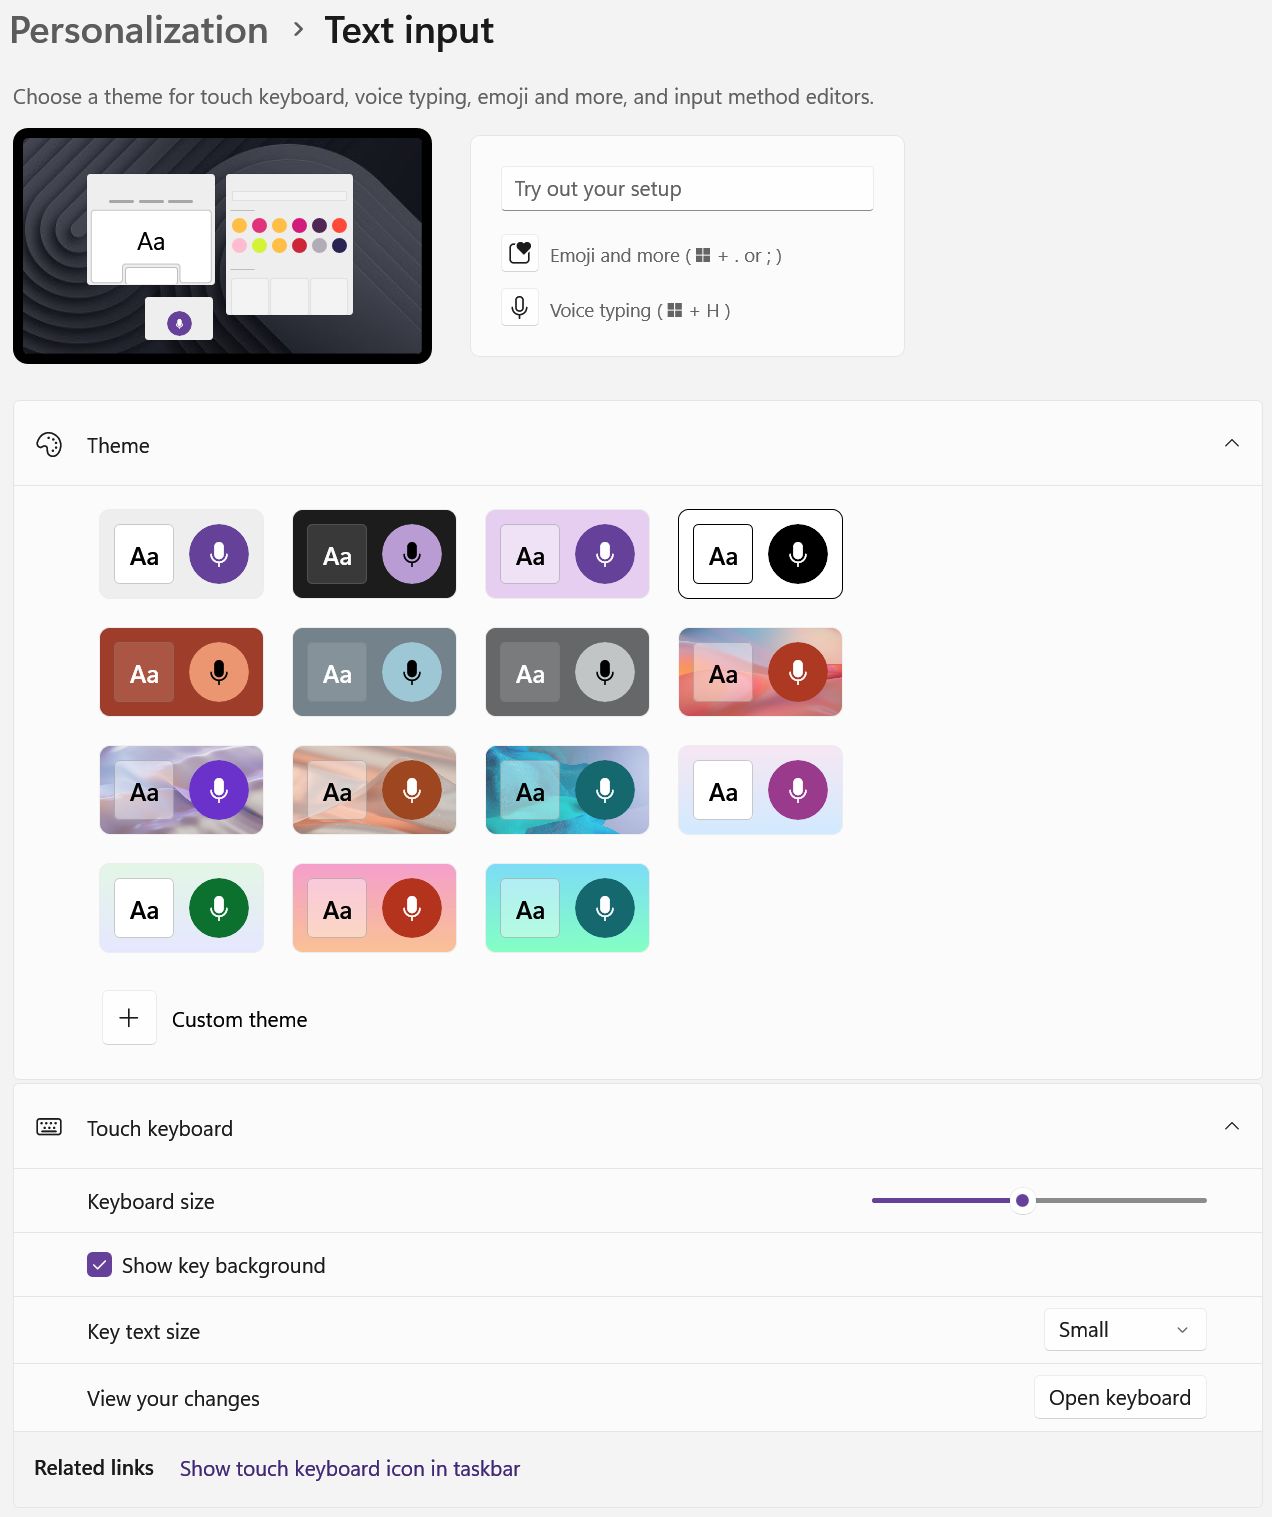
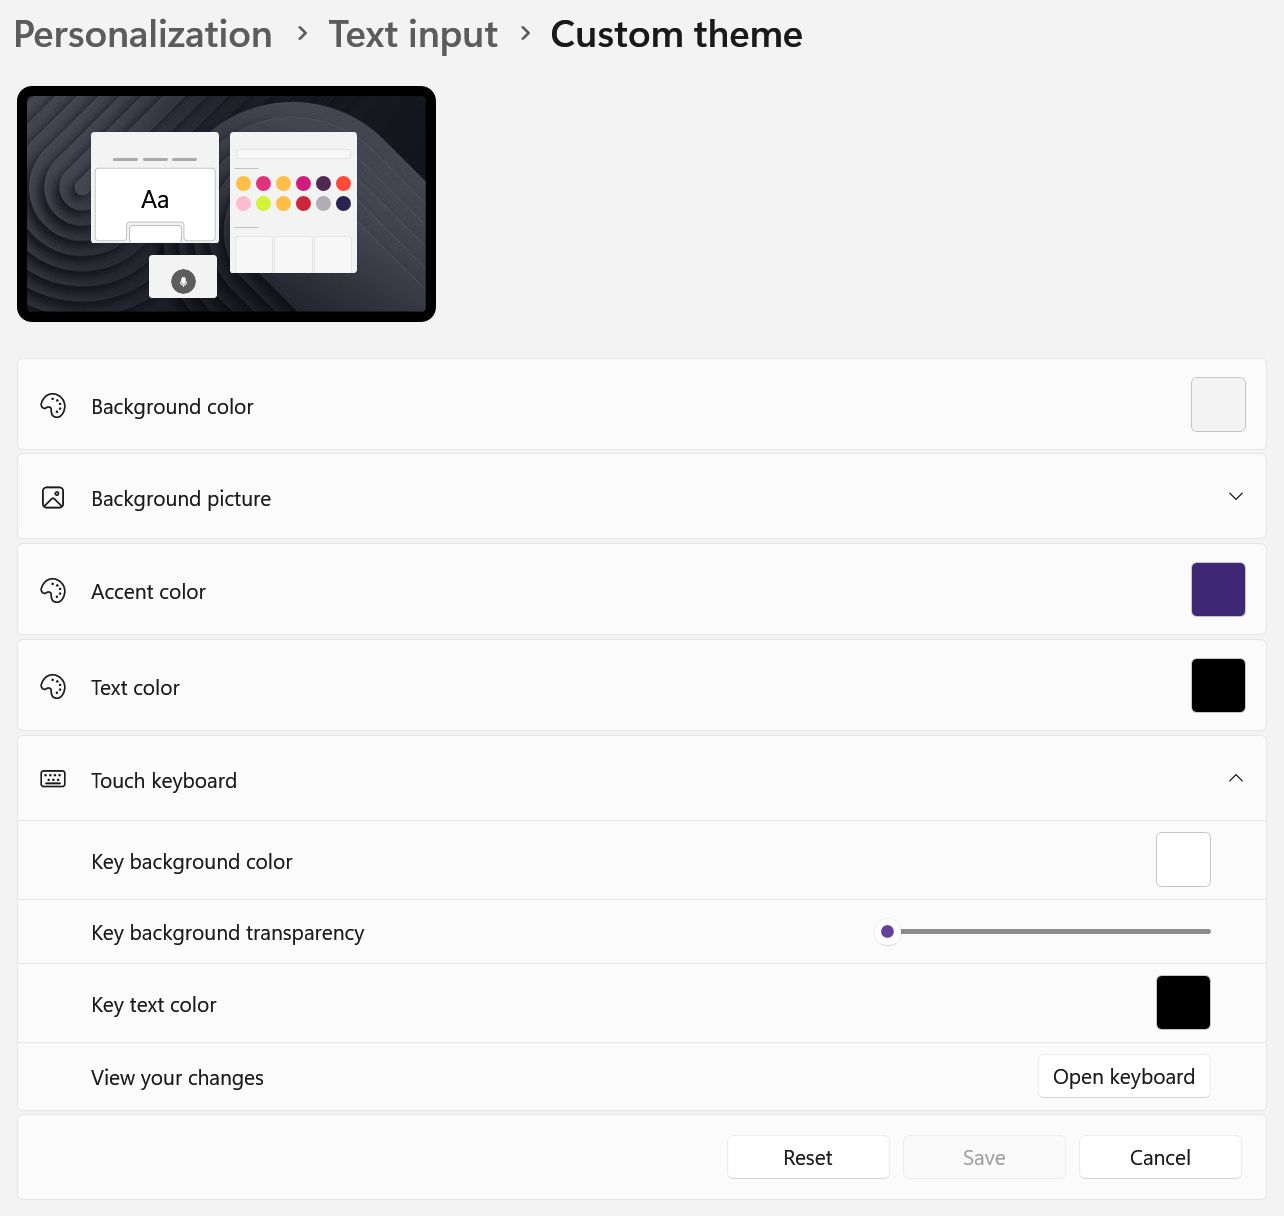
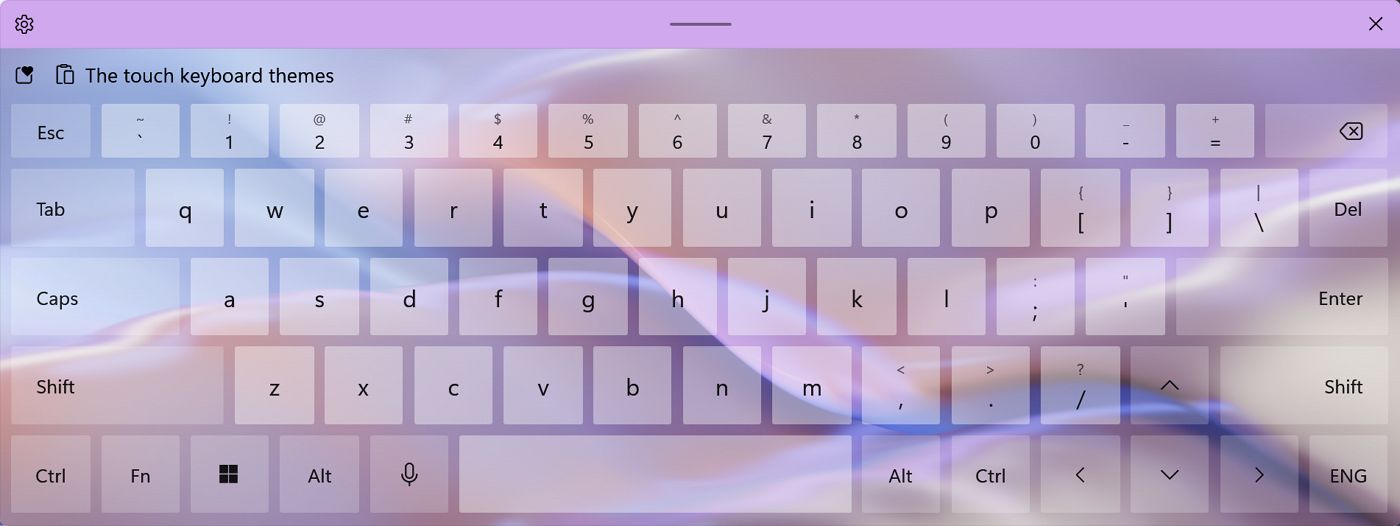
At the bottom of the Text input settings page, you can control the overal keyboard size (zoom level if you will), toggle the background image on or off, and adjust the text legend size on the keys.
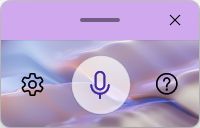
All these theme options will affect not only the touch keyboad, but also the emoji keyboad and the Voice typing overlay.
Seeing how mature, better looking, and useful the touch keyboard is, I cannot wait for Microsoft to retire the old on-screen keyboard. It has no place in Windows anymore.
