- If you find text size to be too small in Windows there are several ways to make fonts bigger, easier to read.
- The Make Text Size Bigger option will enlarge only text, leaving UI elements mostly unchanged.
- Windows Scaling will add a factor of multiplication to everything you see on screen.
- If webpages are your concern, you can easily change the browser zoom level.
For a long time, I used typical monitors with my PC. What do I mean by “typical monitor”? Something in the 22–24-inch range with Full HD (1920 x 1080 pixels) resolution.
At this resolution and pixel density everything looks (mostly) OK in Windows, so text is easy to read, and UI (User Interface) elements are easy to click.
In time, I switched to larger monitors with different resolutions, which adds the need to adjust application scaling and text size. I no longer feel comfortable leaving everything to default settings. I bet a lot of you feel the same way.
That’s why in this article I’m going to show you the three simple ways you make everything bigger in Windows and hopefully easier to read and reach with your mouse. This guide works in both Windows 10 and Windows 11.
Why not make everything smaller? Because the two most important options I’ll show you only go up in size, from the baseline of 100%.
For temporary zoom on certain parts of the screen you can always use the Windows Magnifier, but for a permanent increase in size follow the three methods below.

High Contrast Themes in Windows: How They Look, How They Work
CONTENTS
Make Text Size Bigger: Change Font Size Everywhere
This is a method that will only change text and will do so everywhere fonts are displayed on screen.
According to Microsoft changing the text size will affect title bars, menus, and icon texts. In practice you’ll find it doesn’t affect the taskbar, or the system tray, but will affect contents in apps like File Explorer and will make the Edge browser bigger (both interface elements and text).
It’s basically a mess because normally you expect all text, and only text to be increased or decreased, as you move the slider right or left. In practice it’s not.
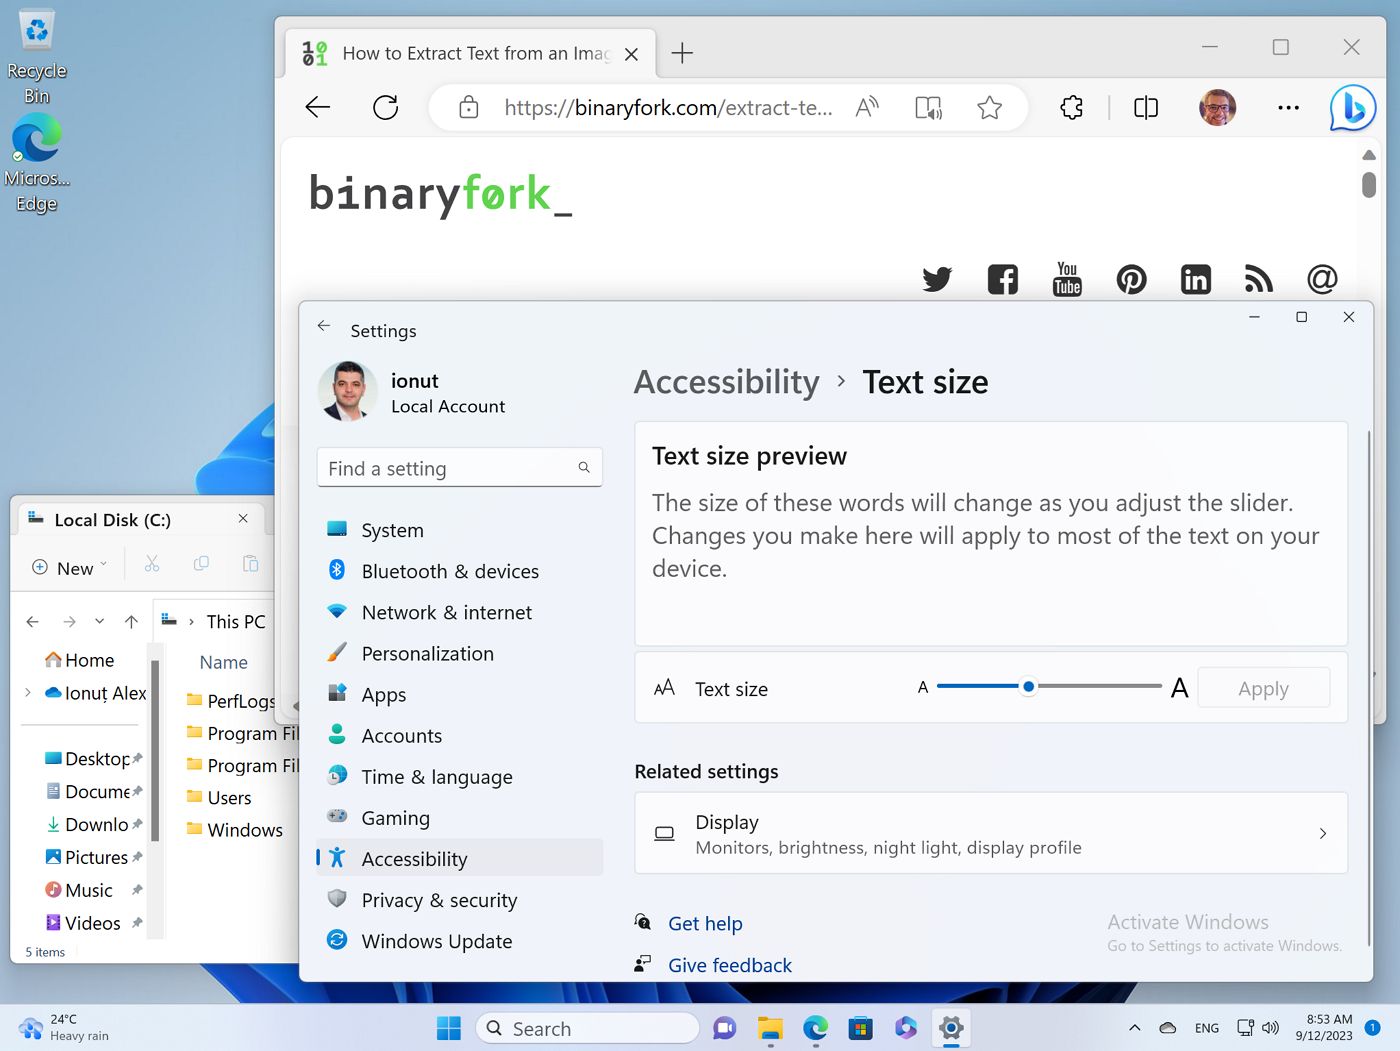
The feature can be activated from the Settings app and is found in the Accessibility section. This indicates it’s meant as an option for people with vision disabilities, but in practice it’s something anyone can use.
I’ll show you how it works:
1. Open the Settings app. My quick recommendation is to press Win + I.
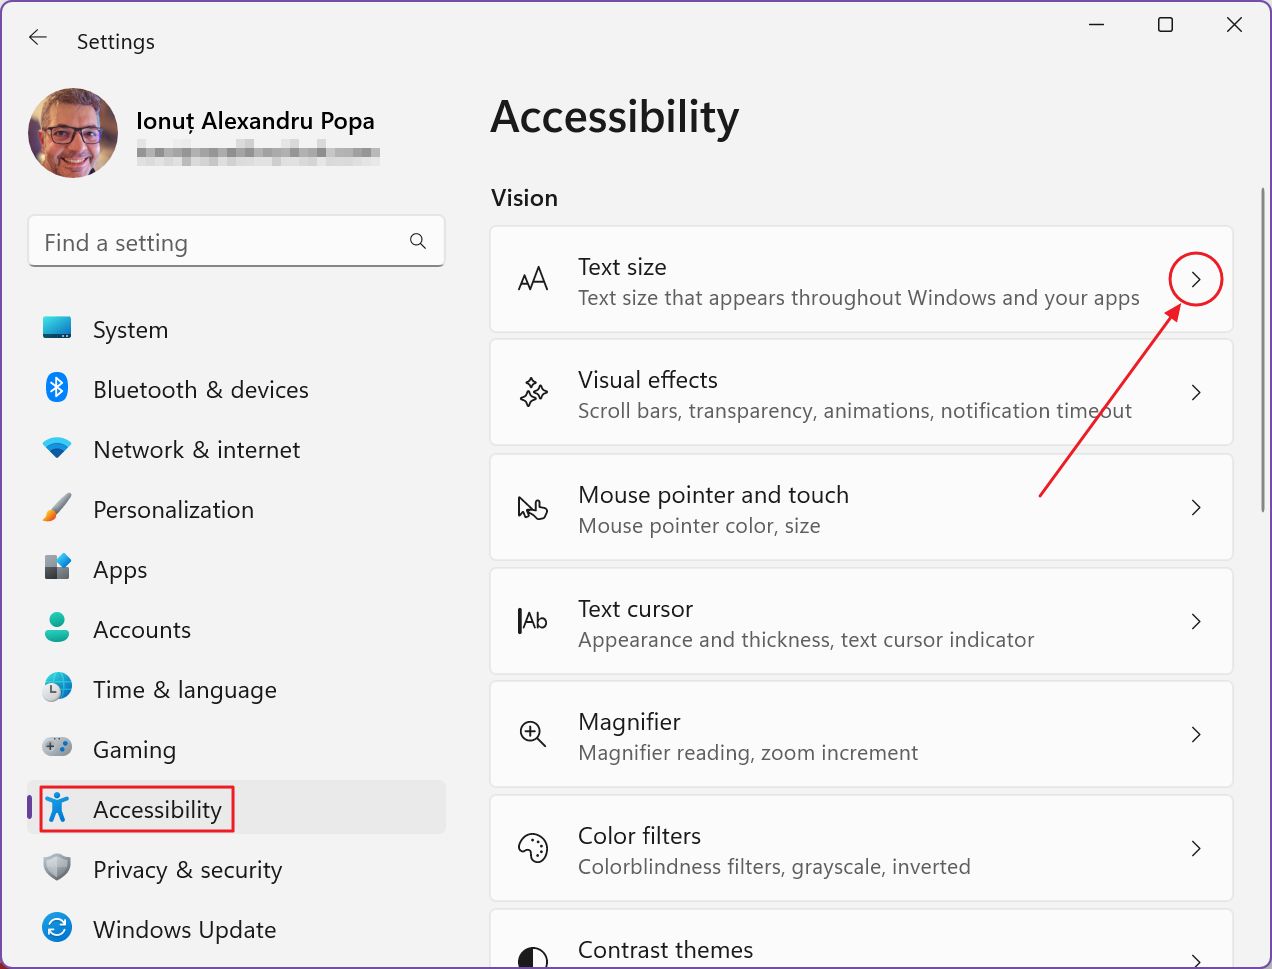
2. Navigate in the left-side menu to the Accessibility section.
3. In the Vision sub-section, the first option is Text size. Click to expand.
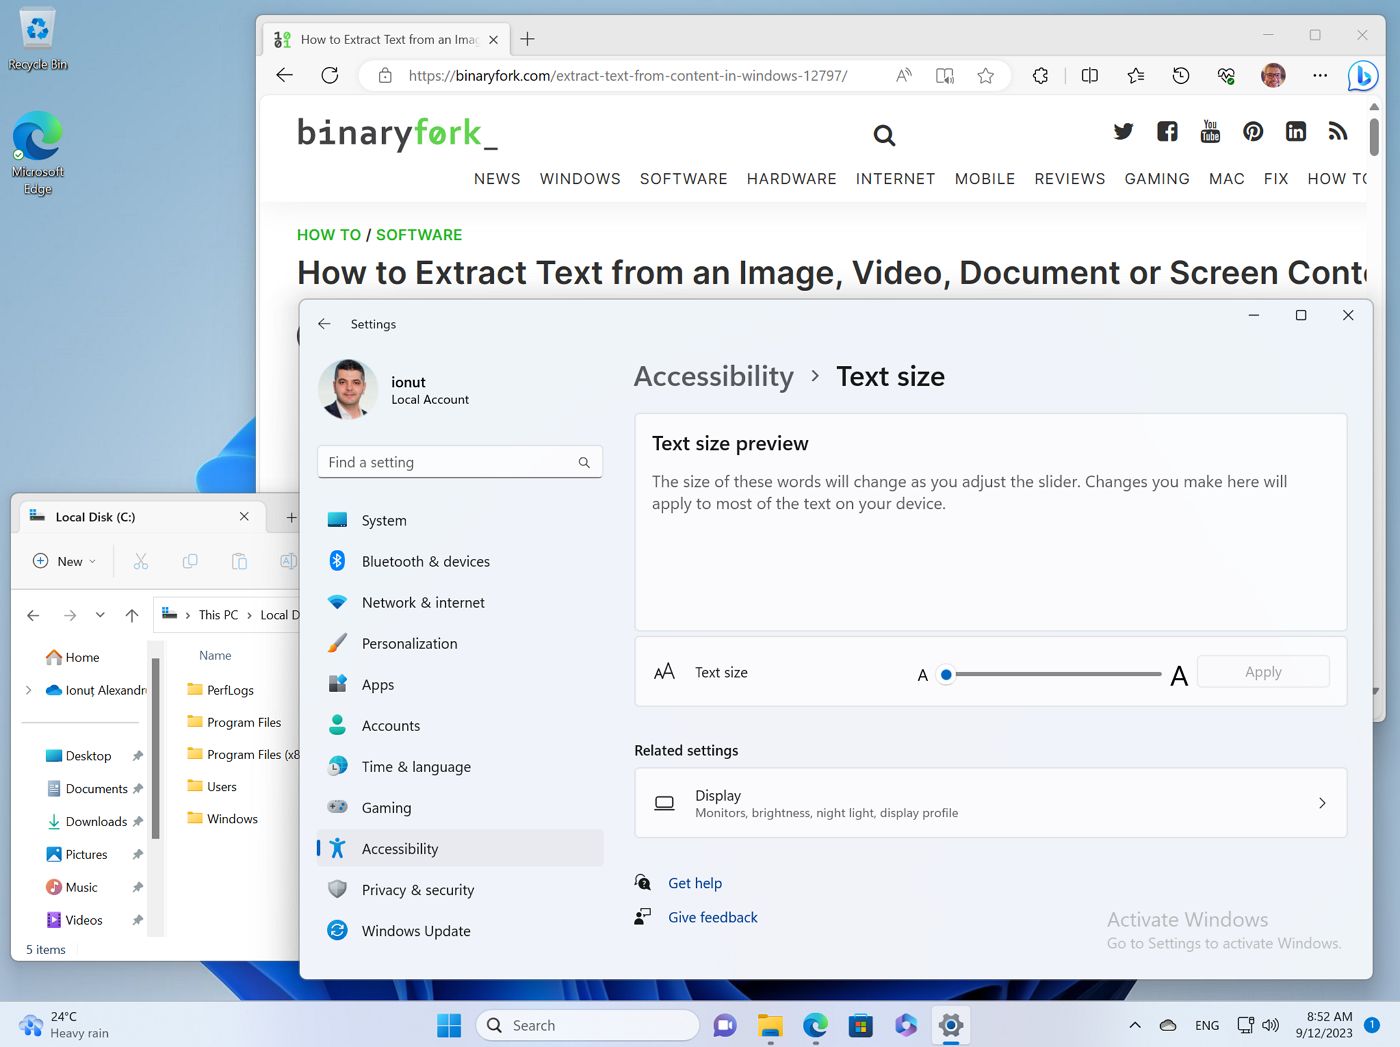
4. You will find a slider and a preview window on top. The default value is 100%. Maximum size is 225%.
As you move the slider the preview text will automatically increase or decrease in size, giving you an idea what the text would look like one the setting is applied.
Once you’re OK with the preview click the Apply button.
Important: After you change the text scaling in the Settings App you should log out or restart so that the change applies to all open windows and applications.
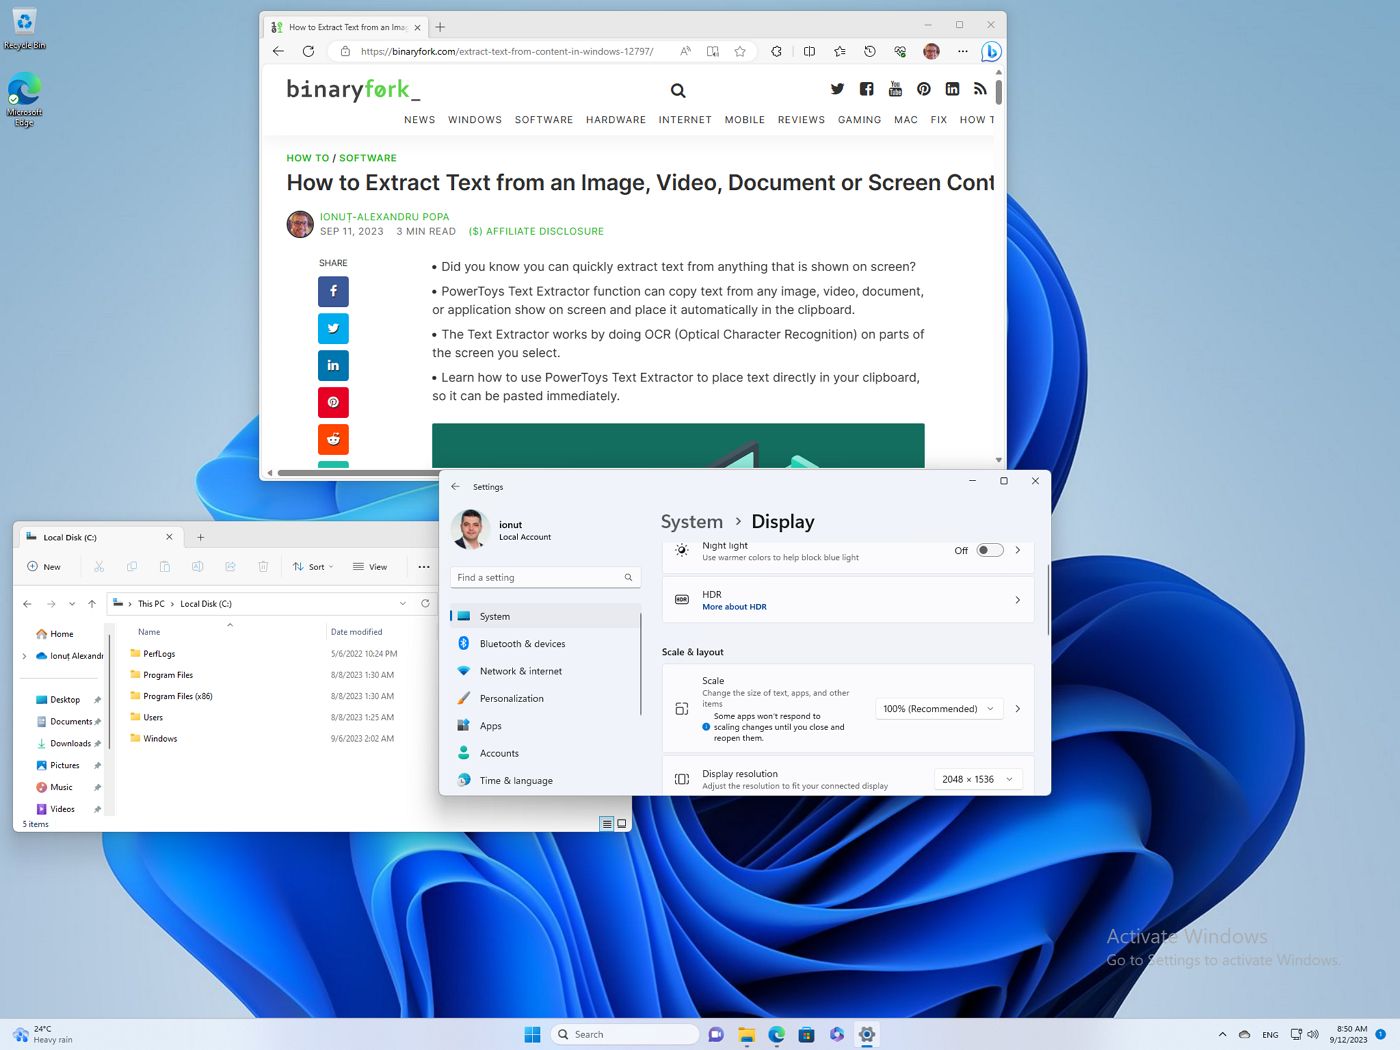
For reference, here’s how everything looks at 100% (left) and at 150% (right). Note the taskbar text size remains the same.
Change Windows Scaling: Make Everything Bigger or Smaller
This is the option for you if you want to change the size of all screen elements, including text, buttons, app windows, and the taskbar.
How it works is something like this: if you select 200%, each virtual pixel will use four actual monitor pixels (2 horizontal pixels, two vertical pixels) to render. This will make everything bigger, but also very sharp, because there are more pixels to work with in the transition contrast areas for graphic elements.
Let’s activate Windows scaling:
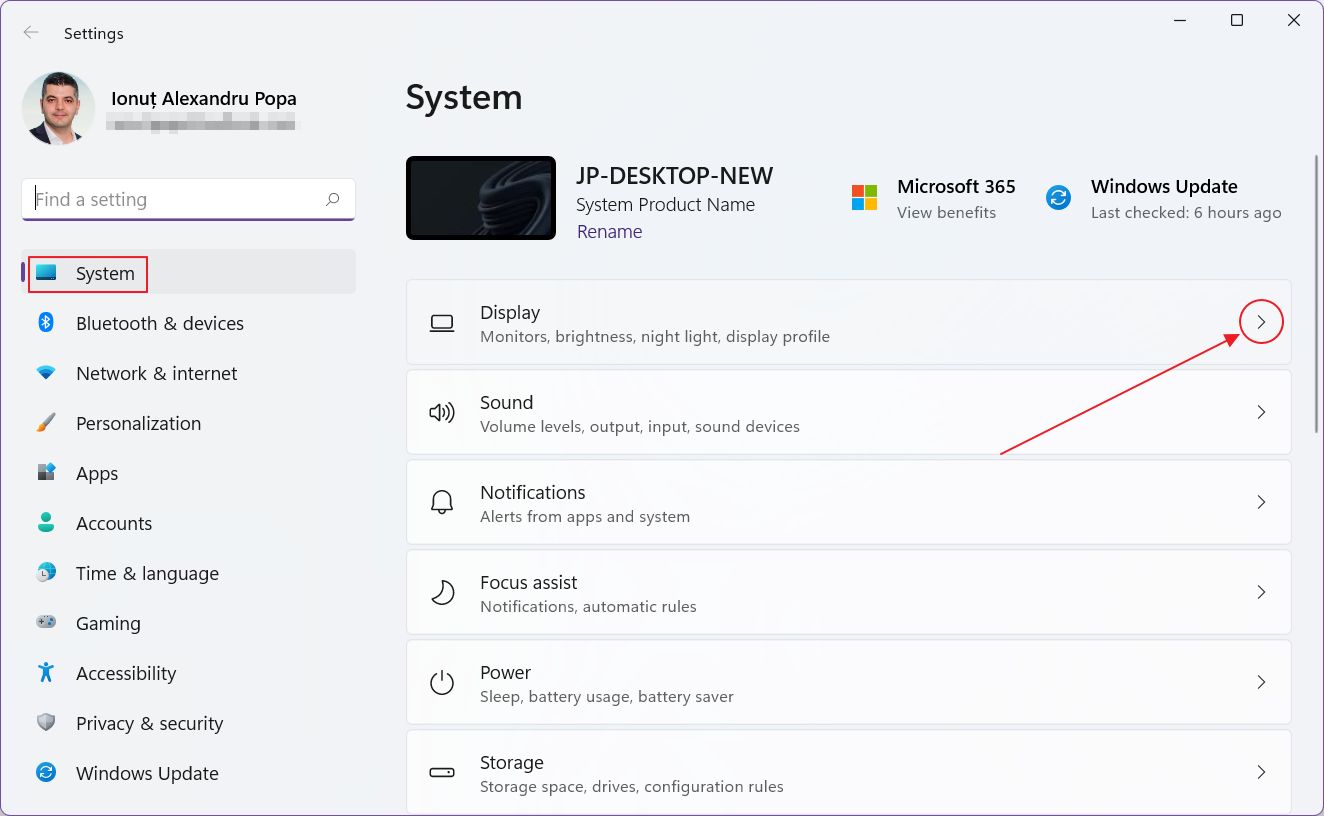
1. Open the Settings app once more.
2. Navigate to System, the first option from the left side menu.
3. Select Display, the first option in the right panel.
4. Scroll to Scale & layout and the first option is scale.
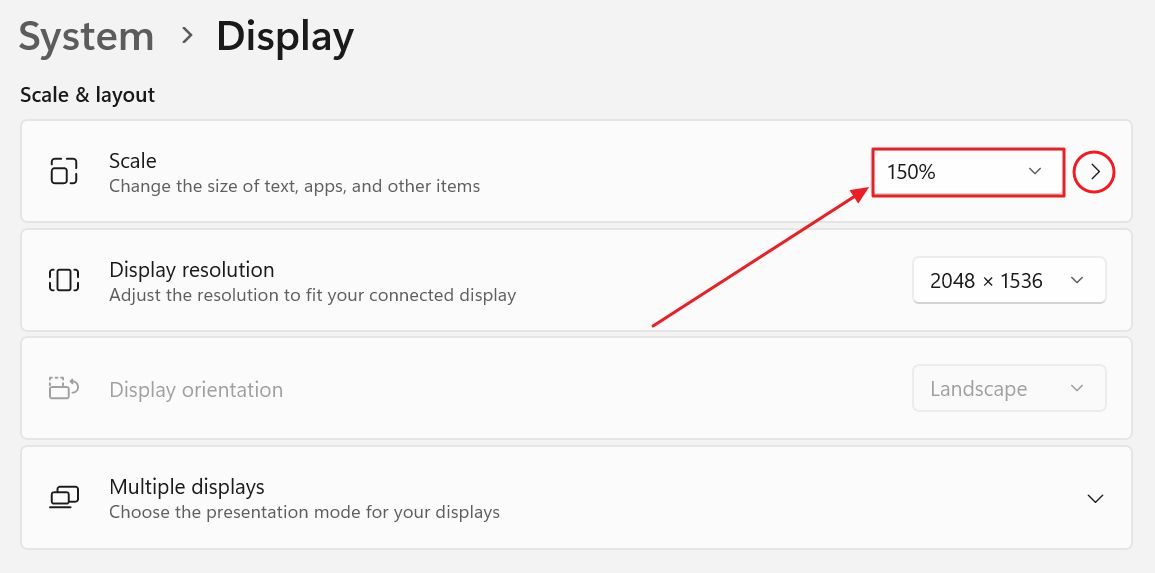
You have to click the dropdown menu to see all options. The options presented to you will depend on the monitor you select (if you’re using multiple displays, you can select each one at the top of the page) and will also depend on monitor characteristics (pixel density, diagonal size, and resolution).

Selecting an option will apply the settings immediately. No need to restart or log off.
5. Notice a right-pointing arrow next to the scaling factor. Clicking on it will bring up the Custom scaling option page where you can input any value between 100% and 500%.
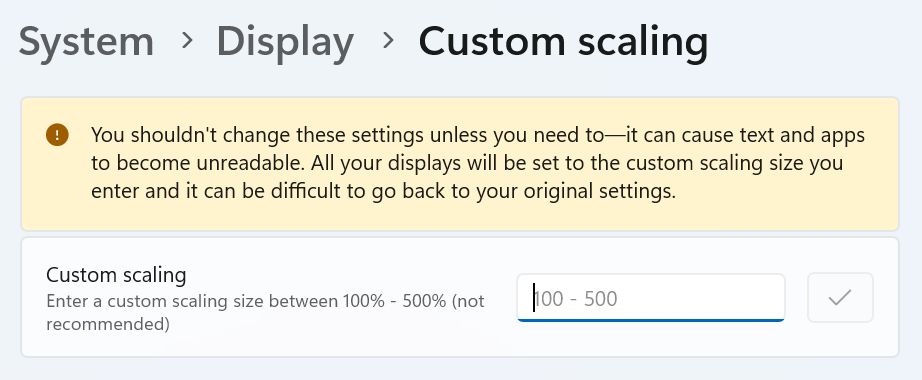
If you want to use custom scaling be aware that the custom percentage you choose will be applied to all your monitors. That’s not a problem if your setup uses identical monitors, but it becomes one on monitors with different diagonals, resolutions, and pixel densities.
One option, that I definitely do not recommend, is to lower the screen resolution instead of increasing scaling. The effect would be similar, in the sense that a lower resolution will make everything bigger on screen. In practice everything will also look less sharp because there are less pixels to play with.
Not only that, but the monitor electronics will do the scaling, which is always worse than software scaling. The best option is always to use the screen maximum native resolution and adjust Windows scaling until you’re satisfied with the results.
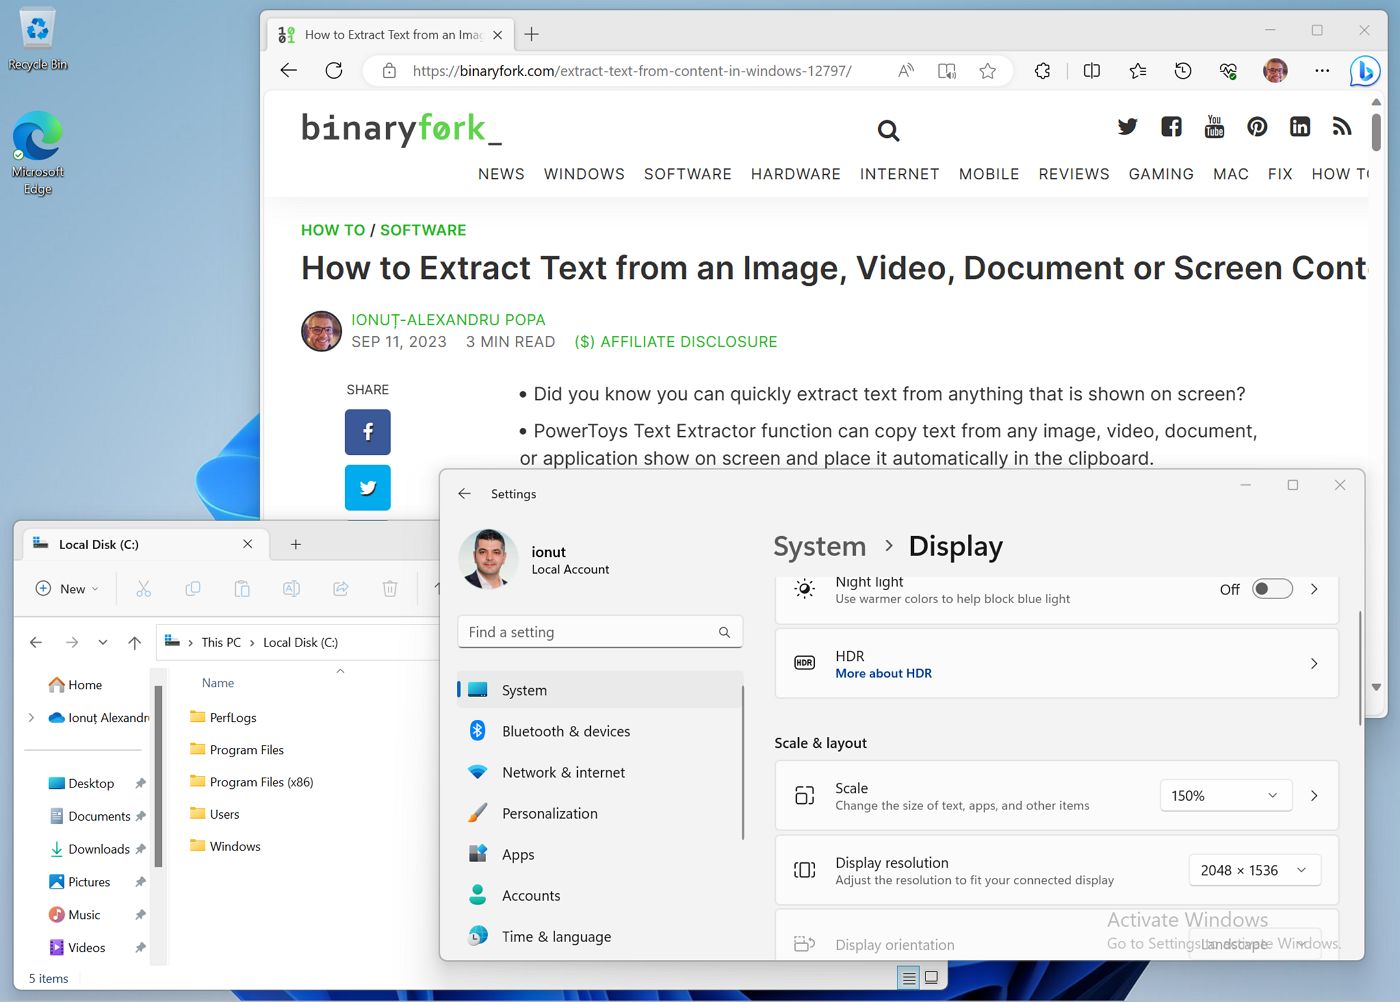
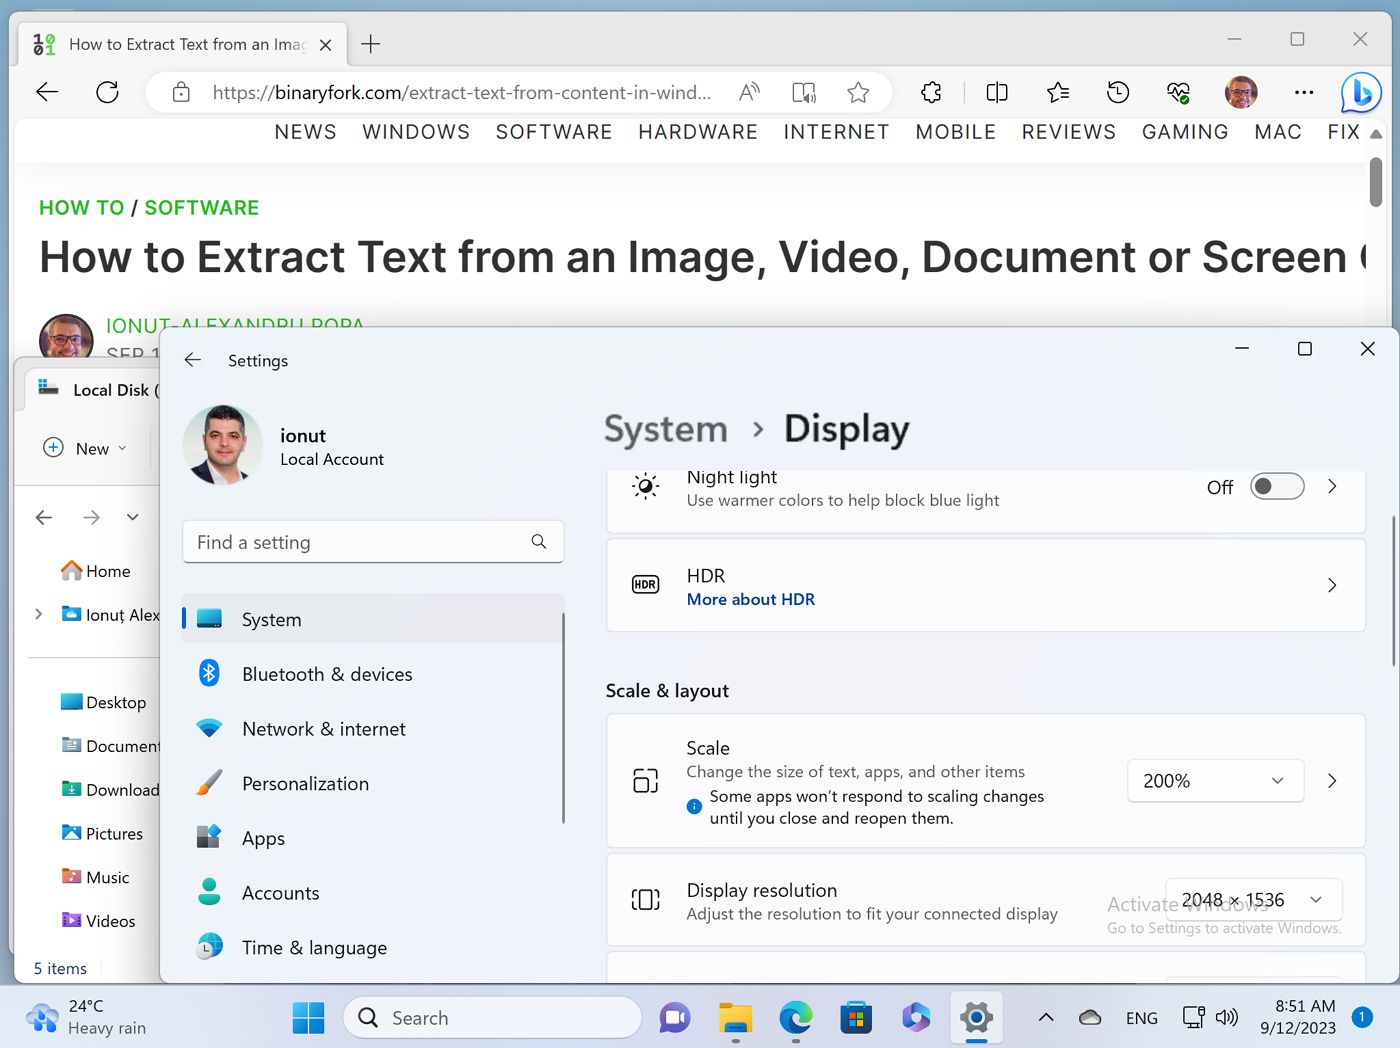
Again, for reference, here are comparisons for 100% scaling, 150% scaling, and 200% scaling. Notice everything gets bigger as you increase the scaling factor.
Zoom In Out in Any Browser with Keyboard Shortcuts
If you’re only having troubles with scaling in web pages, then it’s possible to only zoom page contents in your browser. This works in pretty much any browser out there, no matter what you use.
How browser zoom works?
With the website tab you want to use selected, you have to hold Ctrl and use the mouse scroll wheel to increase or decrease page size.
With the keyboard: Ctrl + Plus goes one step up, Ctrl + Minus goes one step down, Ctrl + 0 will reset the zoom level.
This is actually the only exception to the “make everything bigger” rule I said at the beginning of the article. It’s possible to zoom in the Edge/Chrome browsers from 25% all the way up to 500%, with 100% being the baseline value. Firefox will “only” go down to 30%.
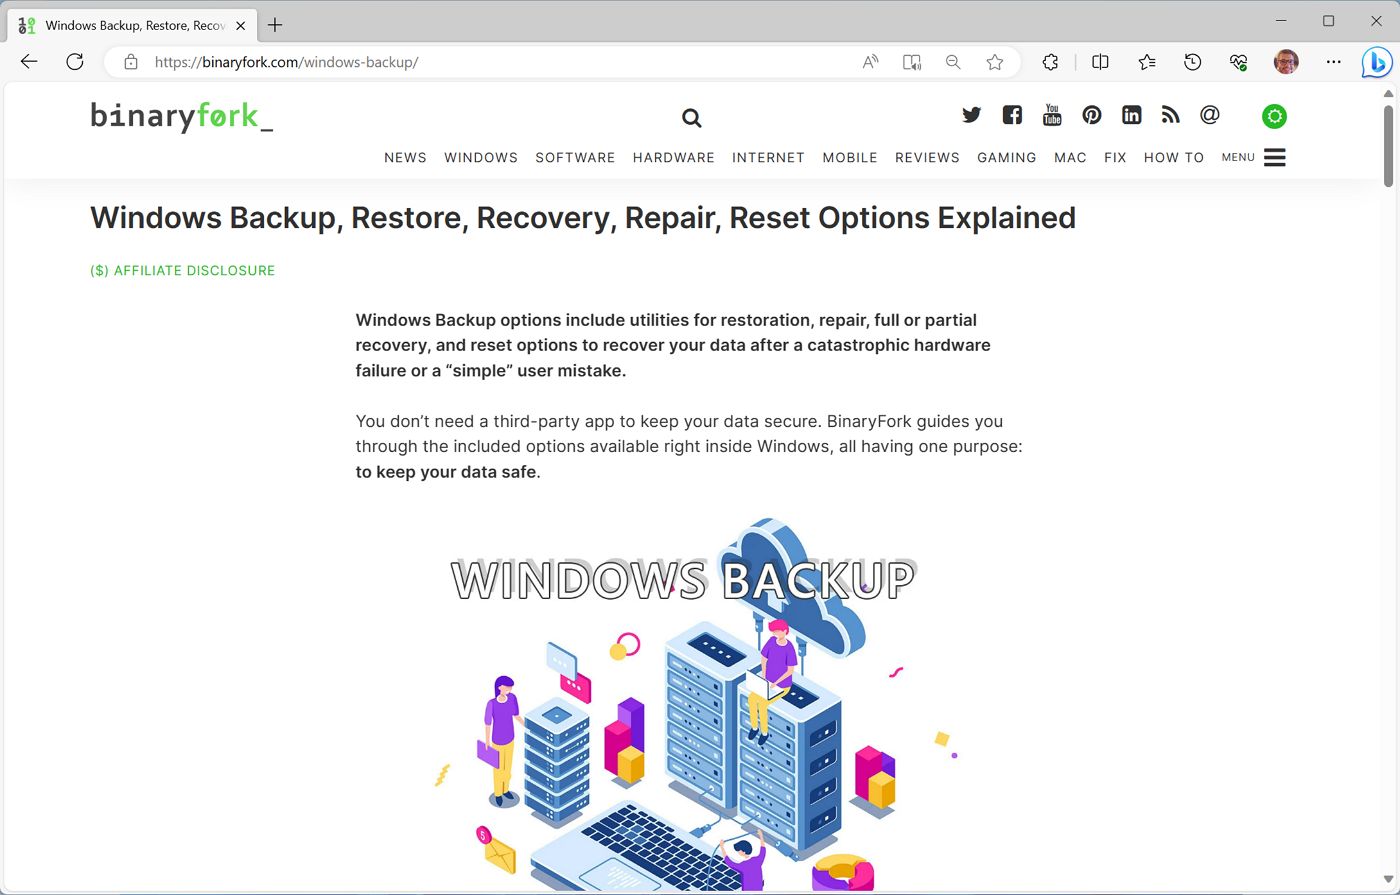
Here’s a comparison of 100%, 125%, and 150%. At certain zoom levels the web page may not look OK, so you may need to play a bit to find the ideal zoom level.

An important mention, it is possible to adjust default zoom level for all websites in Edge, Chrome, and Firefox, but I prefer to adjust per site, if needed. Browsers will remember each site setting automatically, no need for you do to anything.

Why? Because from my experience only some websites have text too small to read. Most websites are designed in a responsive way to make the suitable for most resolutions and scaling factors.
TLDR
There are three main methods to adjust text/font size in Windows. Some methods only affect text, some will afect all interface and screen elements too.
If you change all three settings the result will be a combination on these settings, because they work in a stacked manner, just like all the Windows volume controls.
How I Adjust Text/Font/UI Size in Windows
If you don’t want to scratch your head figuring out how to properly adjust text and font size in Windows, here’s how I do it:
- First, I adjust Windows scaling (method 2) to where I’m comfortable with how interface elements look like.
- Second, I change text scaling (method 1) until I’m satisfied with how text looks like in File Explorer.
- I adjust browser default zoom level for the sites that don’t look quite right.