- Controlling your computer with your voice is entirely possible in Windows 11 thanks to Voice Access.
- Learn how to set up and use Voice Access to dictate, type, launch and close apps, or even move the mouse to click on items.
- Voice control a meant as an accessibility feature for people with disabilities but can also be useful in other scenarios, such as text dictation.
Have you ever wished you could control your computer with just your voice? Like in SciFi movies? Imagine how much easier and faster it would be to perform specific tasks without having to use a keyboard or a mouse.
Well, with Windows Voice Access, you can do just that. It is a feature that allows you to use voice commands to control your Windows computer. In this guide, I will explain what Windows Voice Access is, how to set it up, and how to use it.
Before we get started, let’s get something out of the way: Voice Access can be cool in specific scenarios, but don’t expect it to be faster than normal mouse and keyboard control. That’s why I was careful to say it can be faster at specific tasks.
What is Windows Voice Access?
Windows Voice Access is a feature that lets you use voice commands to control your Windows 11 computer. You can use Windows Voice Access to open and close applications, switch between windows, scroll and zoom, select, and edit text, copy and paste, and much more.
You can also use it to dictate text into any application that accepts text input, such as Word, Outlook, or Notepad. Windows Voice Access works by listening to your voice and converting it into commands that your computer can understand.
To use Windows Voice Access, you need a microphone. You don’t even need an active Internet connection, because the voice recognition is done locally. No Cloud sharing.
Interested in just doing dictation? Take a look at Windows Voice Typing.
How to set up Windows Voice Access for first use
Setting up the app is easy and only takes a few moments. Here are the steps you need to follow:
1. Make sure you have a microphone connected to your computer. You don’t need a standalone microphone, as you can use one from a headset or webcam.
2. Open Settings by right-clicking on the Start button and selecting Settings.
3. Use the left side vertical menu to navigate to Accessibility.
4. Click on Speech in the right pane. It’s the first option in the Interaction sub-category.

5. Voice access is the first option on the Speech page. Just turn on this toggle to start the app.
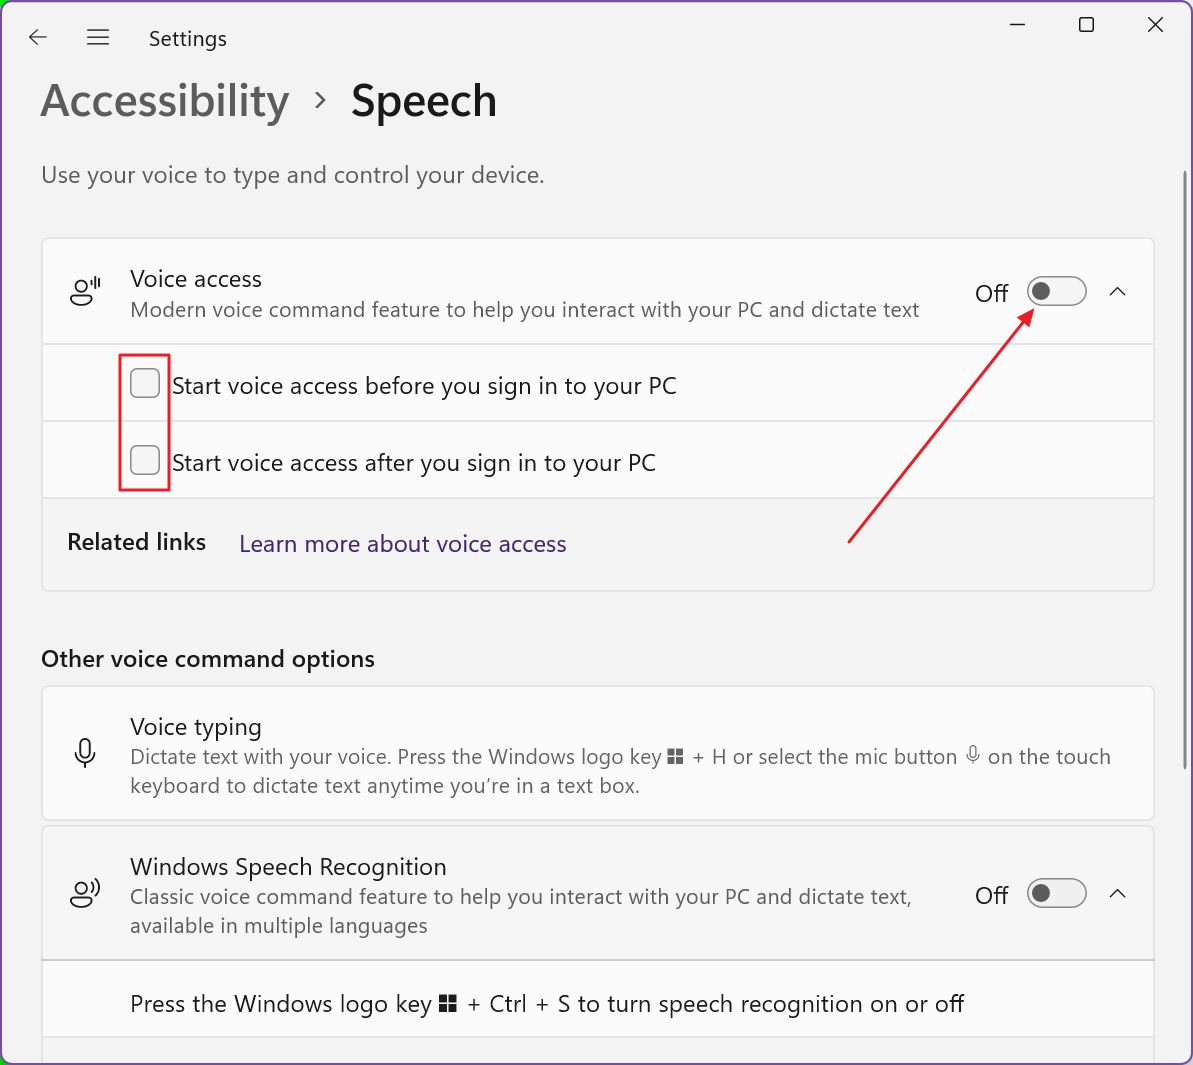
Optionally, if you plan on using the app at all times, you can set it to start automatically with Windows, after login, before entering your credentials, or both.
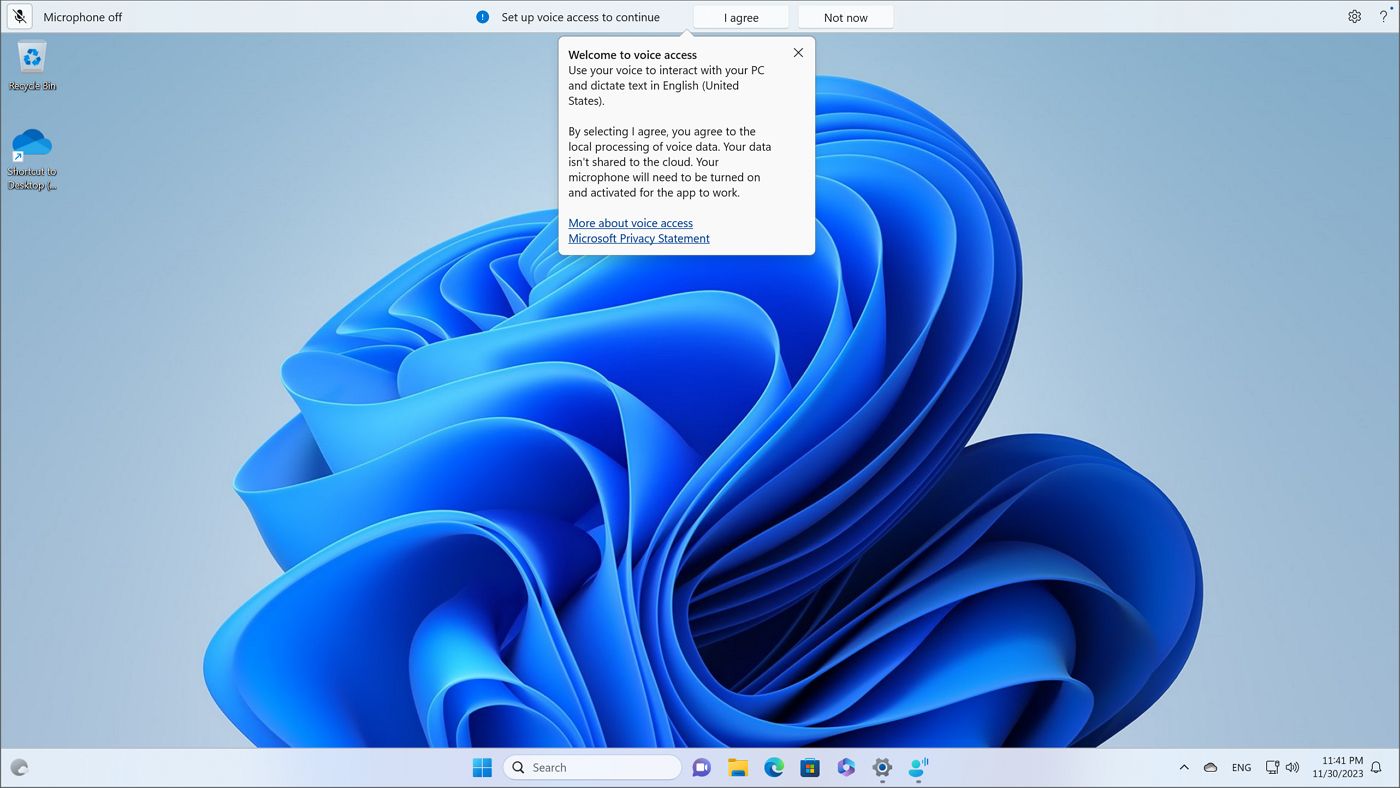
6. If it’s the first time you’re using the app, you have to agree to local processing of your voice. Microsoft swears that your voice data isn’t sent to the cloud.
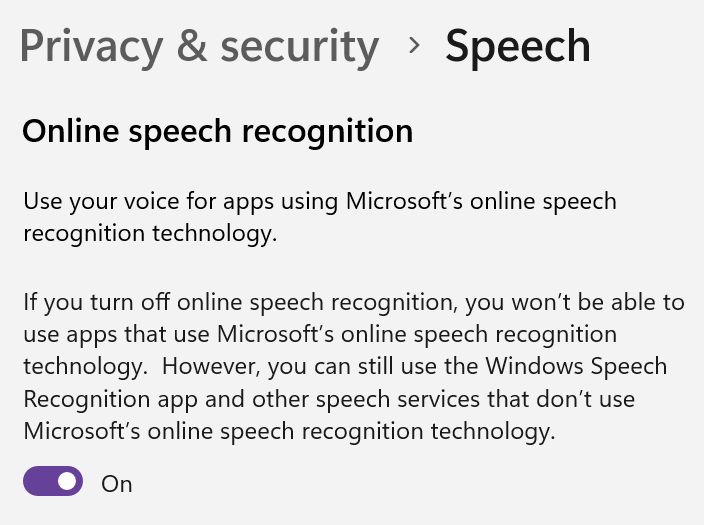
I’m not so sure why there is an Online speech recognition setting in the Windows Privacy settings that’s set to On by default. Maybe it’s related to the Voice Typing feature, not Voice Access? I’m not sure.
7. At the next screen you will have to select the microphone that will be used for voice input.
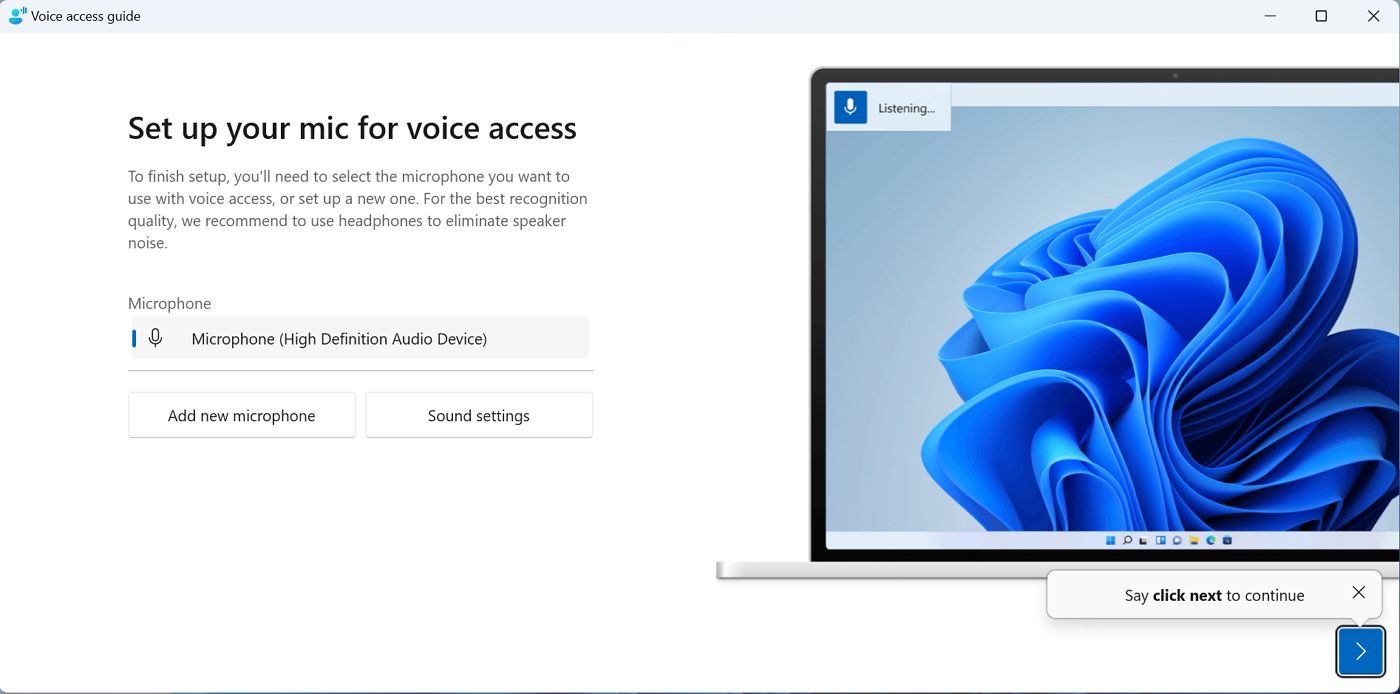
These settings can be adjusted later, if needed. Once you’re done with this step either click on the next button (the blue right arrow), or just say “click next” to get a feel of what the app can do.
8. You’re now set and ready to go, if you click Done. There’s also a first guide option.
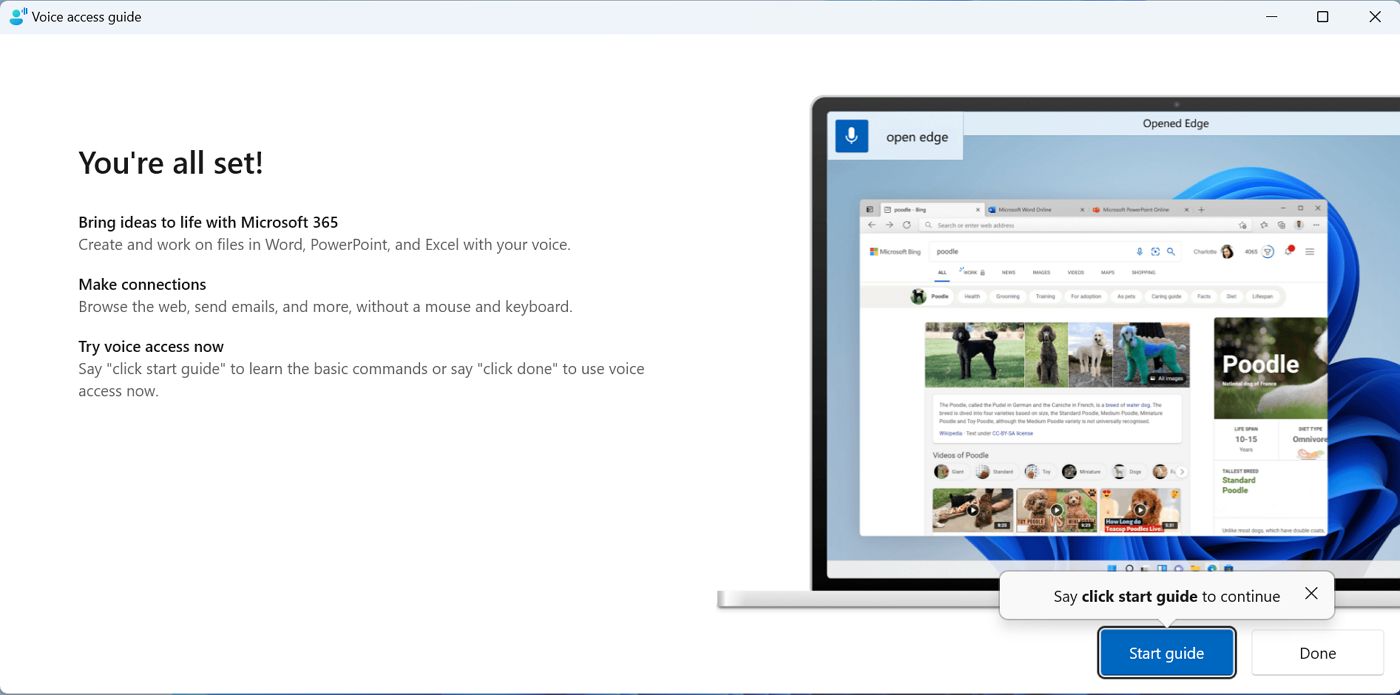
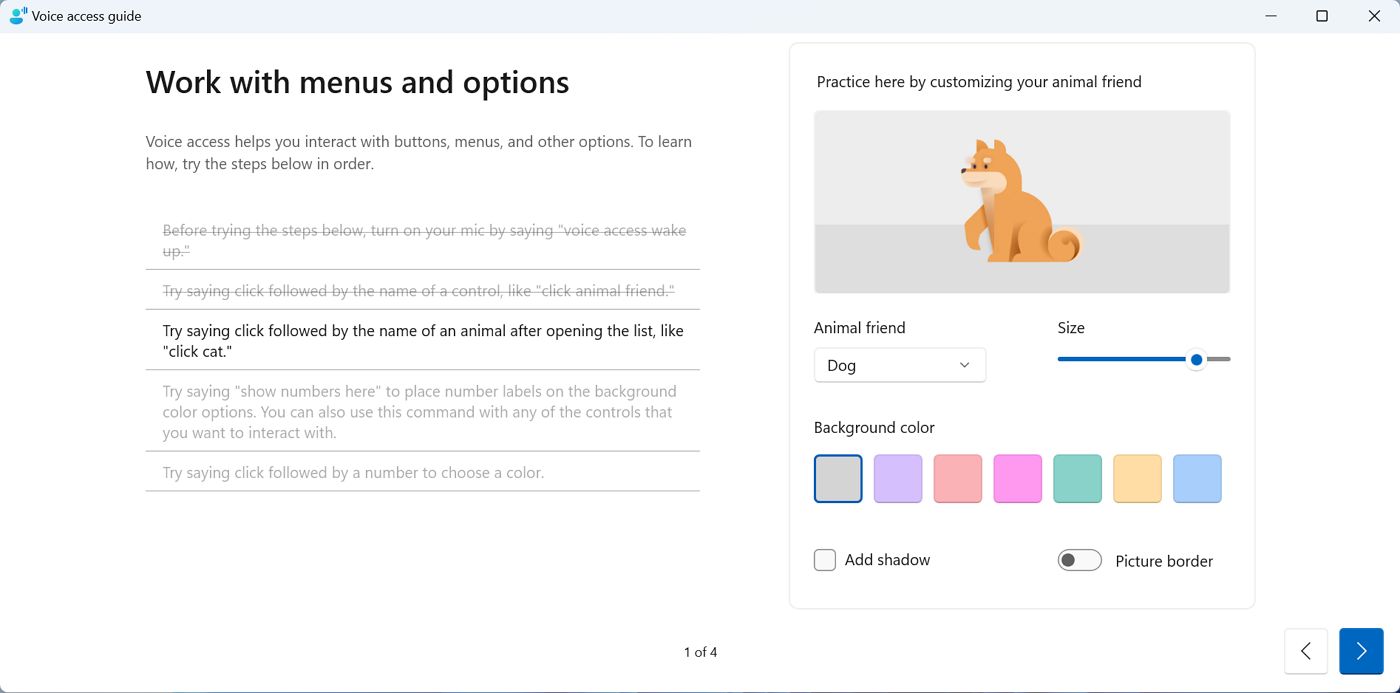
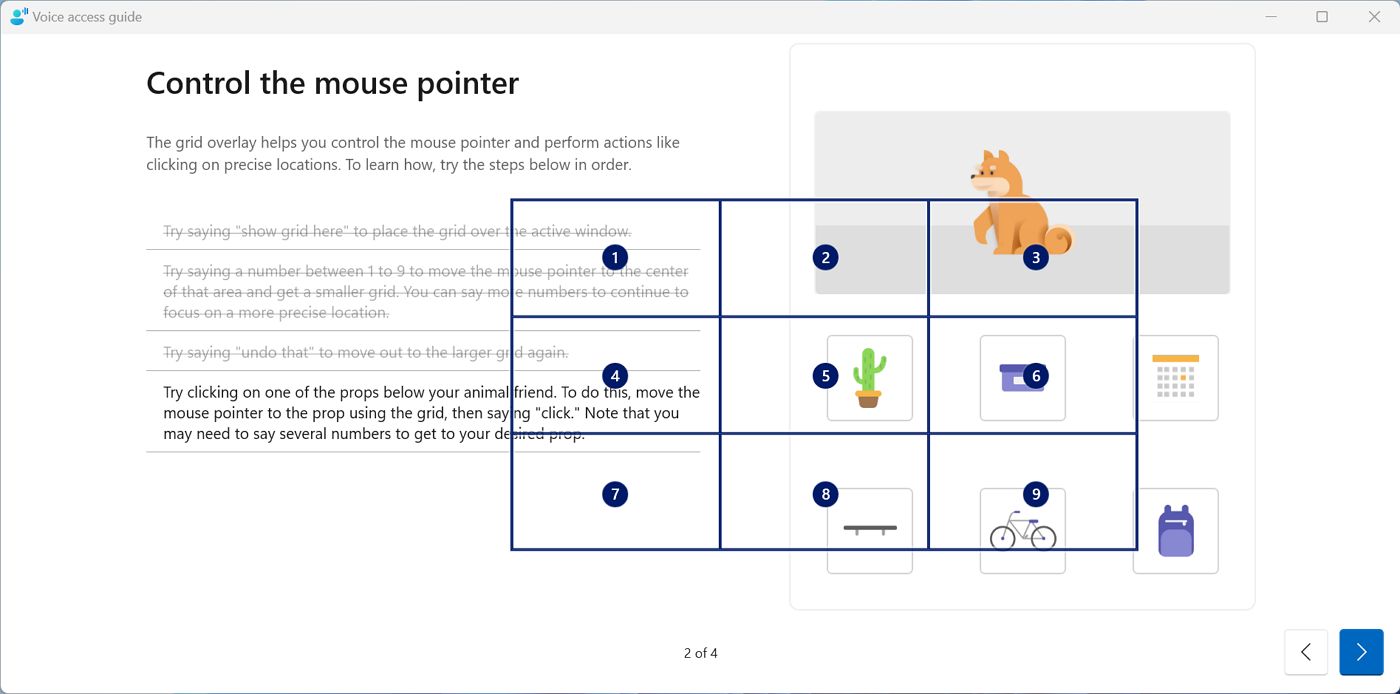
9. I suggest you to through each of the steps for the starting guide because Microsoft has done a good job of highlighting the most important features of the Voice Access function.
You will learn how to dictate, how to open the on-screen keyboard, how to select and click elements, using their name, or a number shown as a label (for privacy reasons).
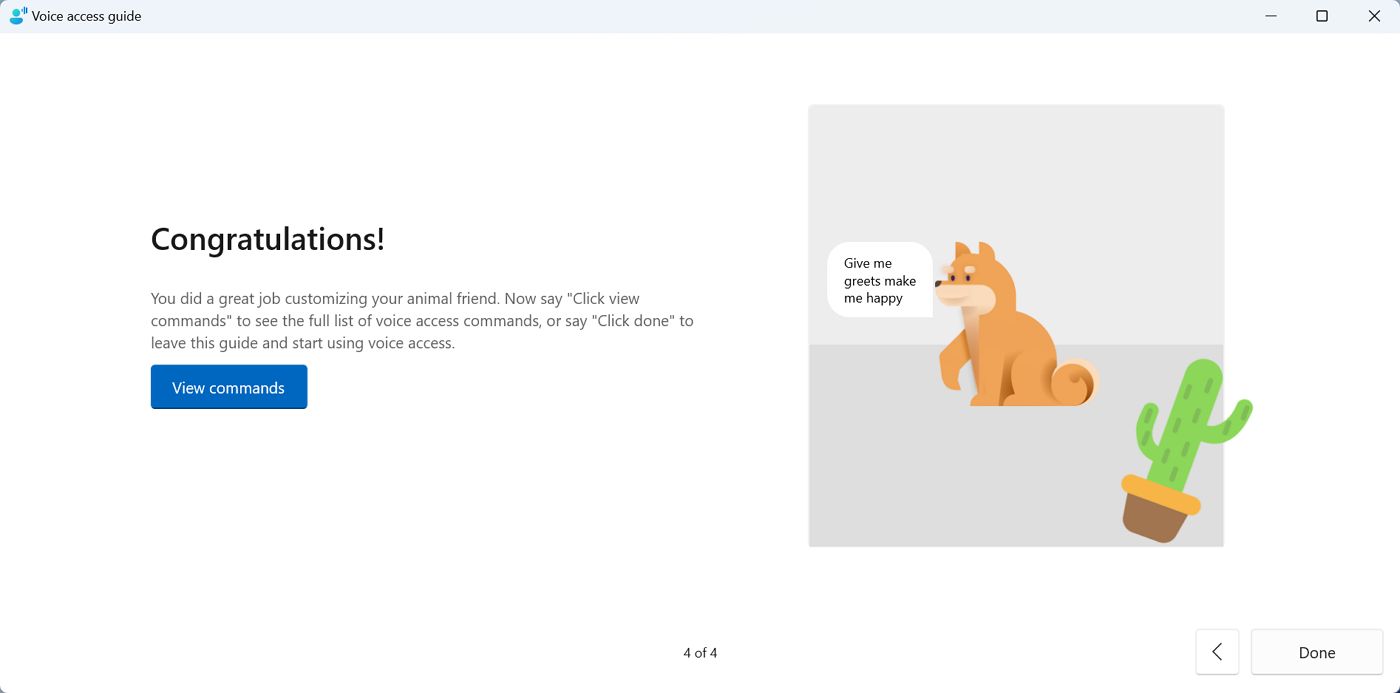
10. This guide will talk you through the basics, but if you want to see a list of all commands, just click the View commands button show on the last page of the starting guide.
There’s a lot to learn, but I chose to see this as an advantage, proving that Voice Access can be very flexible.
If you’re really ambitious it’s possible to control your computer by only using verbal commands. As long as you set up Voice Access to start automatically.

Customizing settings
Surprisingly, there aren’t many options and settings you can change when it comes to Voice Access. All these options are grouped under the gear icon, in the top right corner of the screen.
First, the Select default microphone option will let you switch between the microphones already installed on your system, add a new mic, or adjust the current mic settings. The last two options will just open the Settings app and load the related panels.
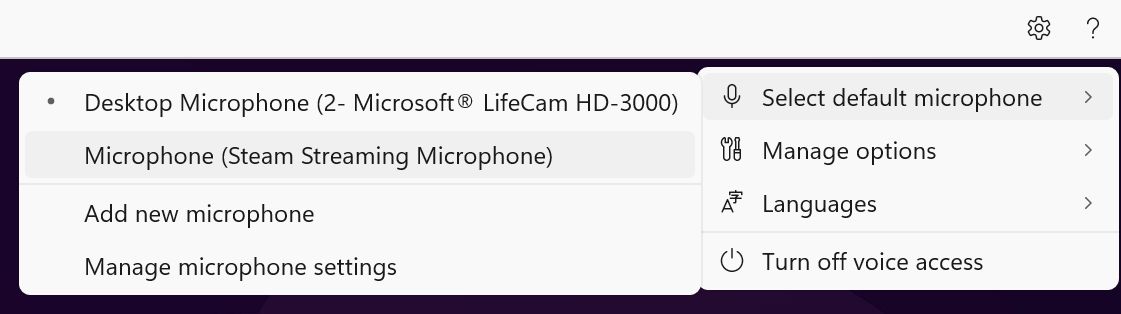
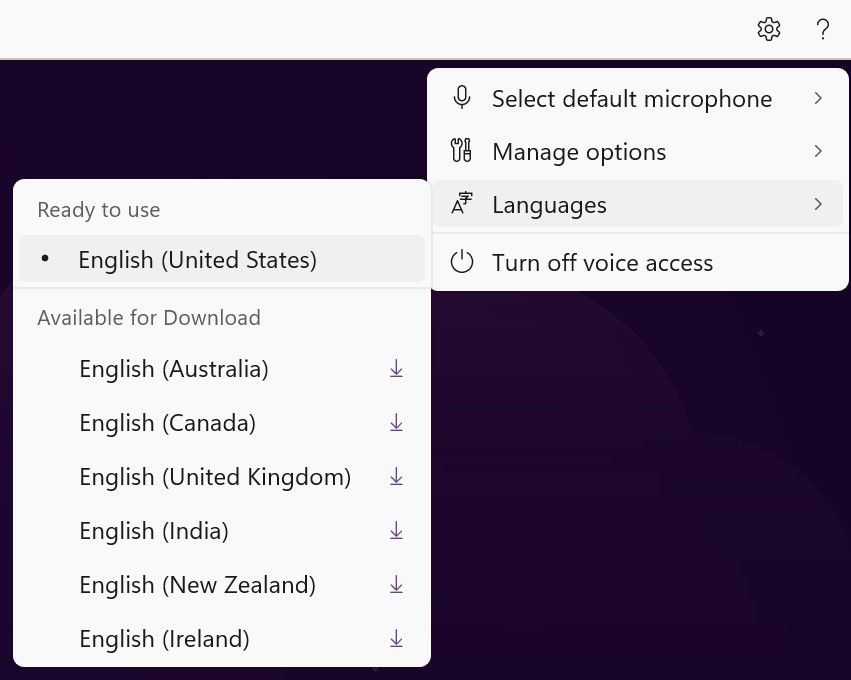
The dictation language, aka the language you can speak is limited to English, albeit a few variants are supported:
- English – US
- English – UK
- English – India
- English – New Zealand
- English – Canada
- English – Australia
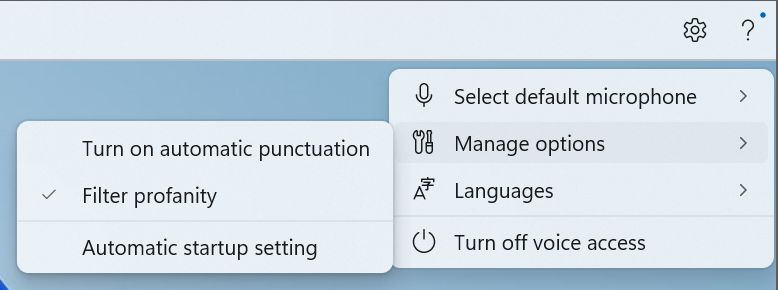
There’s also a Manage options panel. Here you can turn automatic punctuation. I find this very helpful if you dictate text. The profanity filter, if turned on, will skip any inappropiate “words” when you dictate. The Automatic startup setting will just open the Settings > Accessibility > Speech menu, where you can adjust the Voice Access automatic startup options.
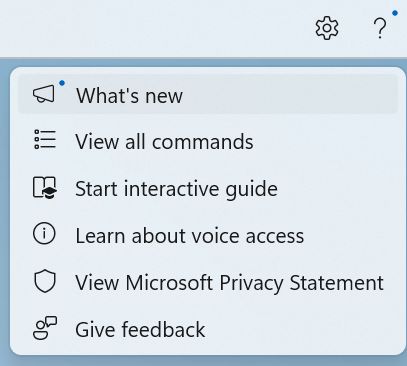
Finally, I would like to remind you about the help menu (question mark icon). Here’s where you’ll find a list of all commands supported by the Voice Access, plus a few links to Microsoft’s website where you can find update info.
Commands you can say
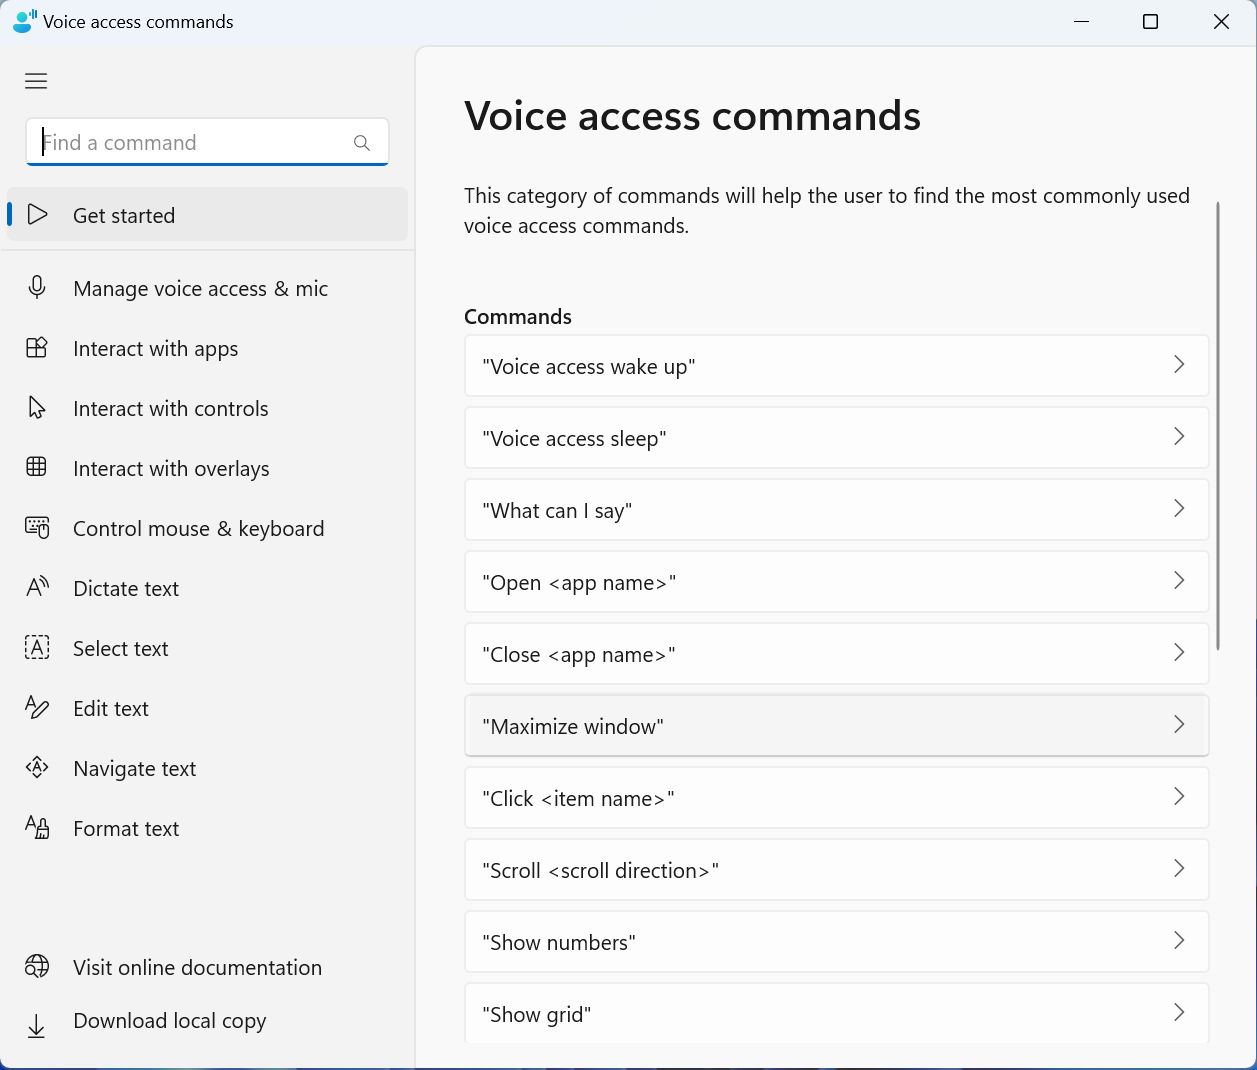
Windows Voice Access has over 200 commands that you can use to control your computer. These are the most important three commands, the ones that turn on and off microphone listening, without the need to use the keyboard.
- “Voice access wake up”: starts Voice Access from sleep mode.
- “Voice access sleep”: puts Voice Access control to sleep mode (the mic is still on).
- “Turn off microphone”: completely turns off the mic.
You can of course click the microphone icon in the top left corner of the screen, and you will cycle between sleep and listening, so a completely hands-off experience is indeed possible. Keep in mind that the microphone is always active if you put the microphone to sleep.
If you issue the “turn off microphone” command, then the microphone will be completely turned off. To reenable Voice Access you will need to click the microphone icon. For obvious reasons you can’t do it with a voice command.
You know I like shortcuts, so there are two you should remember:
- Alt + Shift + C – switches between listening and mic off.
- Alt + Shift + B – switches between listening and sleep (only works if the mic is not turned off).
Other common commands you can speak are:
- “Open [app name]”: Opens the specified application.
- “Switch to [app name]”: Switches to the specified application.
- “Close [app name]”: Closes the current application or window.
- “Show numbers”: Shows numbers next to clickable items on the screen, such as buttons, links, or icons. You can then say the number of the item you want to click.
- “Scroll up/down/left/right”: Scrolls in the specified direction.
- “Zoom in/out”: Zooms in or out of the current browser window (browser must be active).
- “Select [text]”: Selects the specified text on the screen.
- “Delete that”: Deletes the selected text or last dictated item.
- “Copy that”: Copies the selected text or last dictated item.
- “Paste”: Pastes the copied text or item.
- “Dictate [text]” or just “[text]” when in dictate mode: Dictates the specified text into the current application, at cursor.
These are just a few commands to get you started. Voice Access can recognize over 200 commands. Check the full list of commands via Help > View all commands.
How to use Windows Voice Access
Using Windows Voice Access is simple and intuitive once you learn the important commands.
There’s only one problem: there’s no way to start Voice Access via a keyboard shortcut. Most other Microsoft assistive options are linked to a keyboard shortcut, at least the important ones. I think Voice Access qualifies as important.
You will have to search for Voice Access in the Start menu every time you want to launch this utility. I recommend you at least add a shortcut to the Start menu, or better yet, the taskbar.
With Voice Access in listening mode, all you need to do is say the command you want to execute and wait for Windows to process your speak and perform the action. A transcript of your command will be shown on screen, next to the microphone icon.
For example, if you want to open Word, you can say “Open Word” and Windows Voice Access will open Word for you. If you want to switch to Outlook, you can say “Switch to Outlook” and Windows Voice Access will switch to Outlook for you. If you want to close Notepad, you can say “Close that” and Windows Voice Access will close Notepad for you.
You can also use Windows Voice Access to dictate text into any application that accepts text input, such as Word, Outlook, or Notepad. To do this, you need to say “Dictate” followed by the text you want to dictate. Or you can just say what you want to write. That works as well.
Voice Access can also select, edit, and format the text you type. Refer to the entire list of commands to get started.
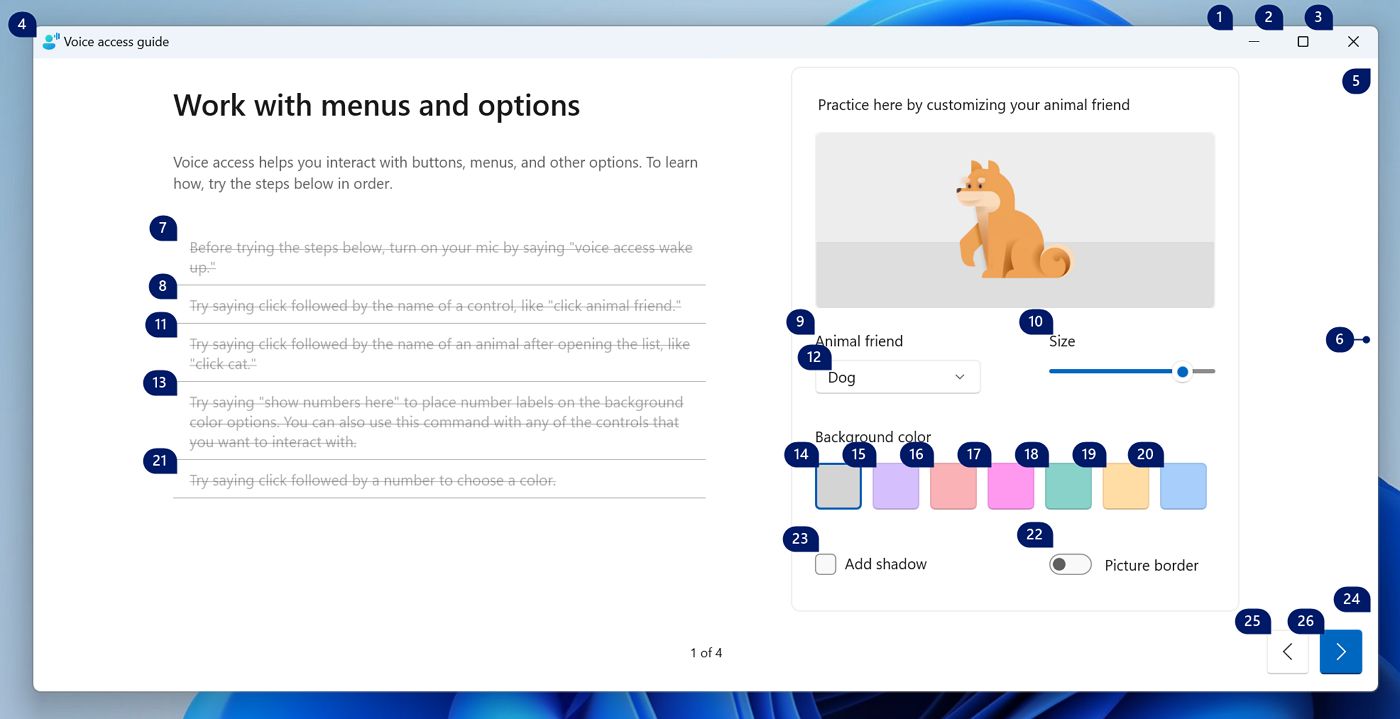
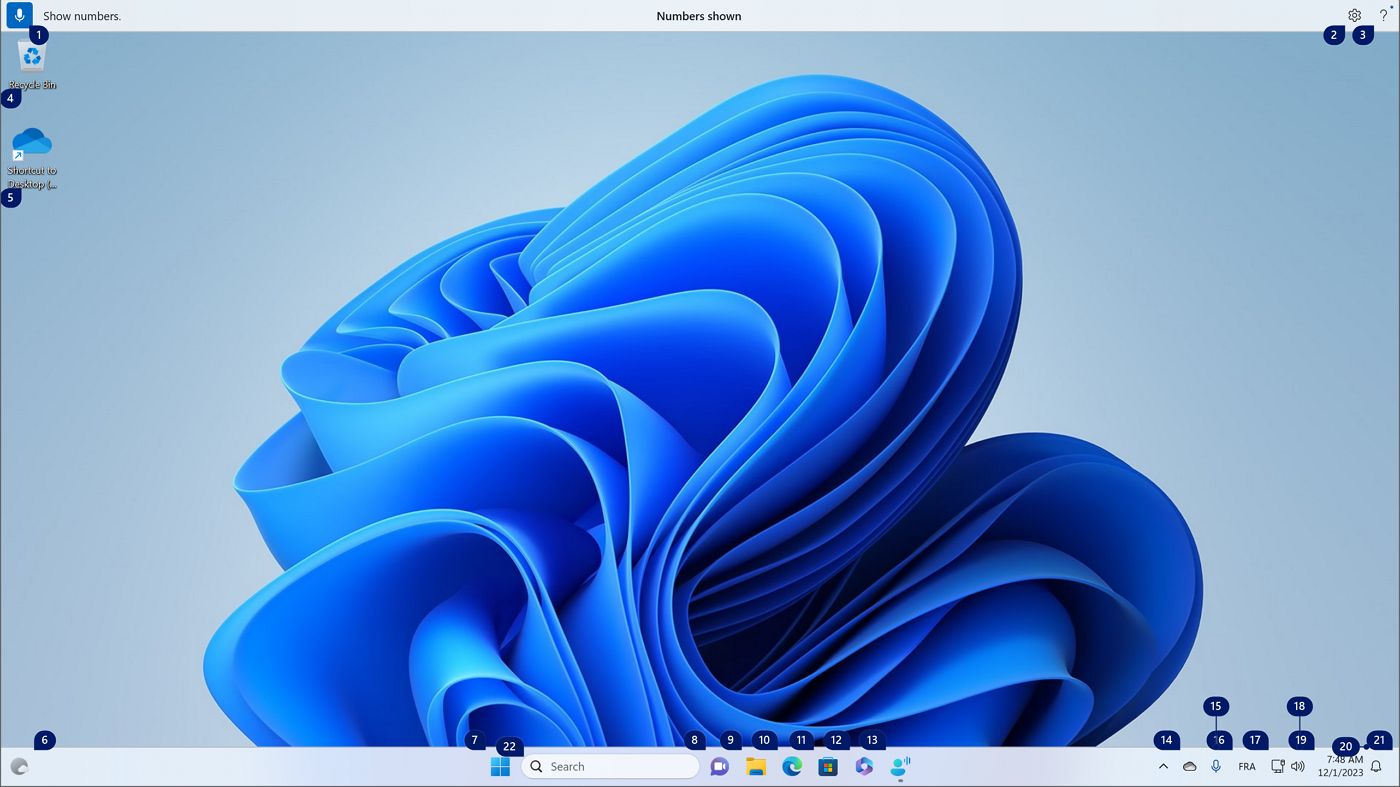
You can also use Windows Voice Access to click on items on the screen, such as buttons, links, or icons. To do this, you need to say “Show numbers” and Windows Voice Access will show numbers next to clickable items on the screen.
You can then say the number of the item you want to click. For example, if you want to click on the Start button, you can say “Show numbers” and Windows Voice Access will show a number next to the Start button. You can then say the correct number (7 in the image below) and Windows Voice Access will click on the Start button for you.
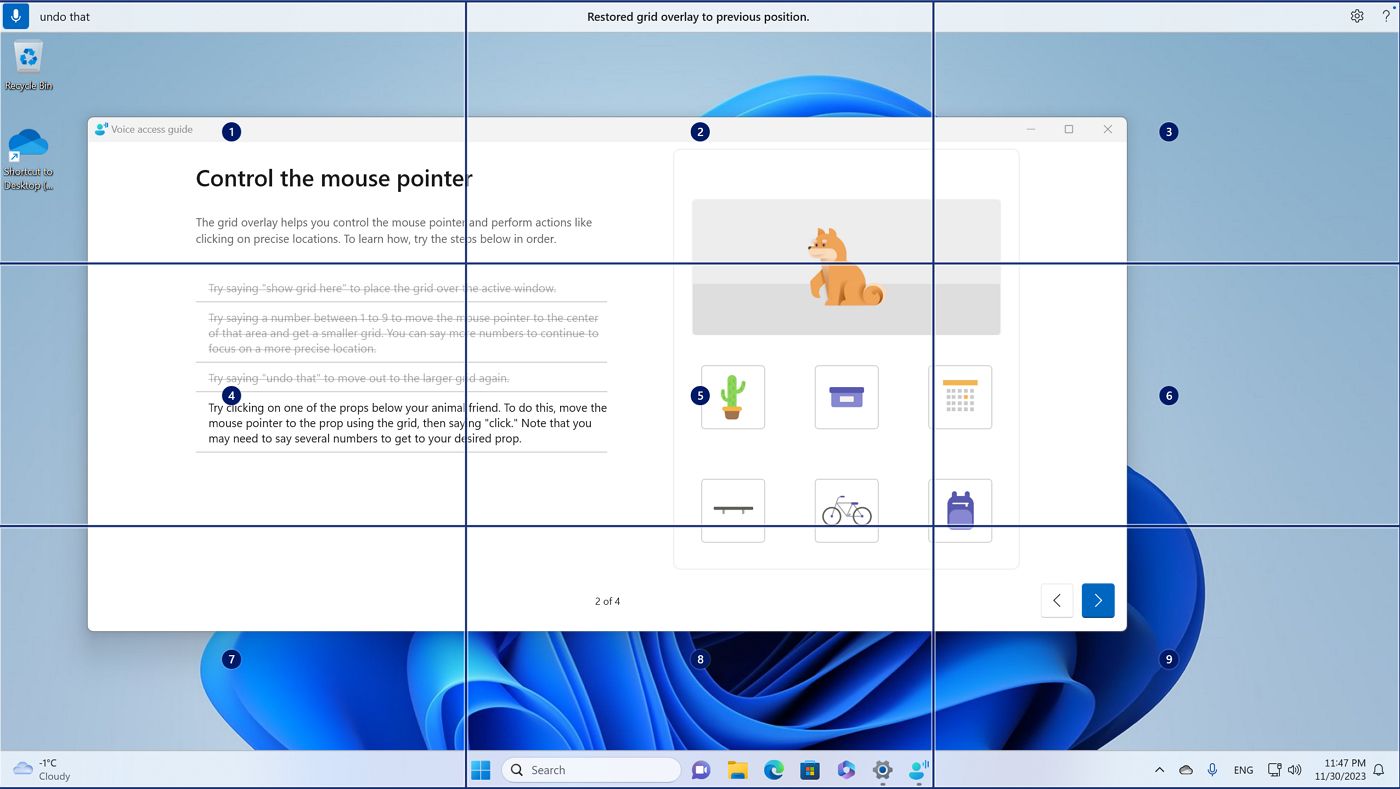
Another cool feature is the ability to focust on an element and click on it. It’s done step-by-step. First, you have to say “Show grid” to display a 3×3 grid that covers the entire display. Then you say a number and a smaller 3×3 grid will appear in the rectangle you selected previously. When you’re dead on the element you want to activate, just say “Click”.
This is both cool, and slow, so you’re better off with using the numbers functionality instead.
I found one bug linked to the number and grid functionality: these only work on your main monitor. If you have two displays, you cannot interact with the apps on the secondary monitor. I hope it’s a bug, not the way Voice Access is meant to work.
Whats next for PC voice control?
I have to admit I like Voice Access. It’s pretty good, and I want to try using it more for dictation. I’m not a native English speaker and despite that it does a good job of recognizing most of what I’m saying.
I would like to see Microsoft adding a keyboard shortcut to quickly launch the app. I’m still surprised this is missing.
Audio accessibility options in Windows explained
Then, the language support is very limited. That’s got to change for mass adoption.
Finally, I’m guessing a more natural way of interaction will follow, as Microsoft refines its AI Copilot. I don’t want to be limited to specific commands. Maybe I want to talk to my PC like I talk with other people. Is it weird? Yes! Would it be cool? Of course!
And this is my overview of one of the most underrated new functions added to Windows 11. I’m curious to hear your thoughts on this, so leave a comment, don’t be shy!