- You can revert Windows to a previously created Restore Point to fix your system when it’s not working as intended or to undo unwanted changes.
- Restore points are part of the System Restore utility which comes with Windows.
- Restore points are created automatically by System Protection, but snapshots can be saved on a manual basis.

If you’re cautious like me, you probably have at least enabled System Protection in Windows and allocated enough disk space to save quite a few snapshots of your important files.
Maybe you even created a manual Restore Point before installing that new driver or program a friend told you about. If you suspect that’s the reason your computer doesn’t work too well, because of a recent change one, you can revert Windows to an older Restore Point.
This is the quickest and easiest option to go back to a time when things were working fine (we even tested how long it takes in Windows 10 vs 11). I’ll show you how to do it if you follow along.
Guide: How to Go Back to a Restore Point in Windows
This guide only works if Windows is still able to start normally. If not, you can still use the restore from Recovery Environment method.
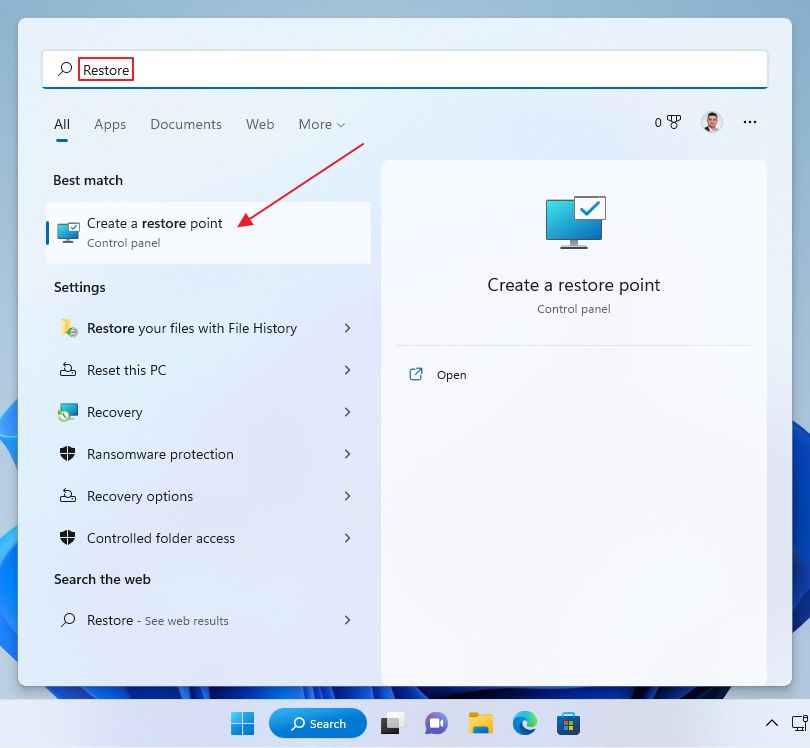
1. Open the Start menu and type Restore. Select the result called Create a restore point to open.
Even if you just want to restore, not create a new snapshot, the operation is done from the same place, the System Restore Utility.
2. On this page you’ll see a list of your local drives and partitions, with the status of their protection, which can be On or Off. Click on the System Restore… button to start the restore wizard.
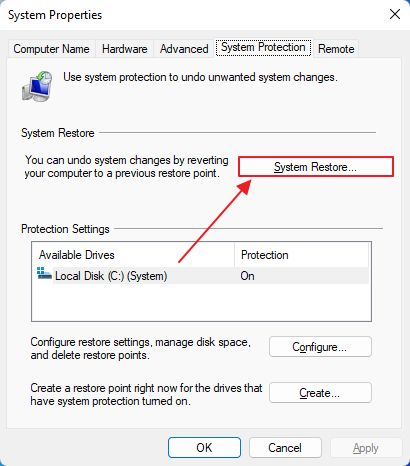
If System Protection is not enabled or was disabled on purpose for any of the drives then there are no Restore Points saved, so you will not be able to restore the system. In this case, the button will appear disabled.
3. If System Protection was just enabled, but you didn’t create a manual restore point, or Windows didn’t do it for you automatically, then you will see this message.
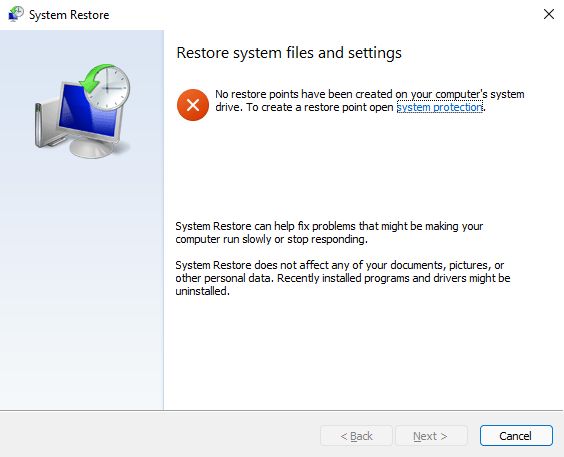
If that’s the case your options are to use either a full Windows System Image or the Backup and Restore functionality to recover files.
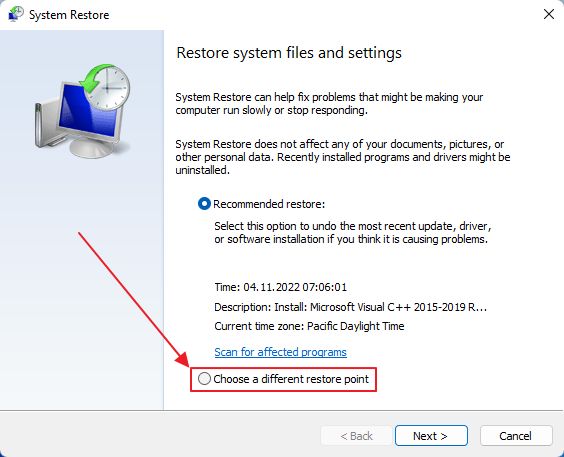
4. If you have at least one Recover Point stored on the local drive, then you will see this window. If you’re wondering how do I find an earlier restore point then click on the Choose a different restore point radio button, then click on next.
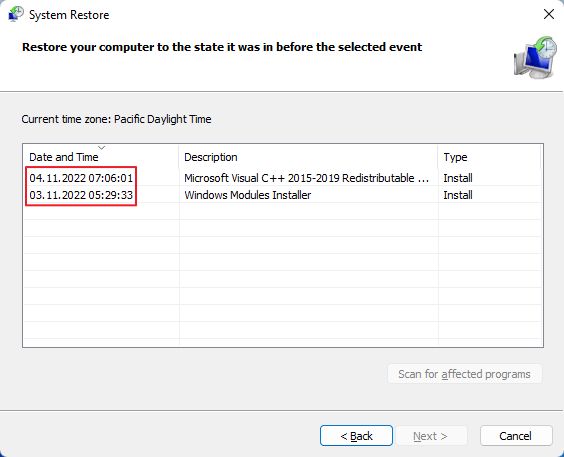
5. You will now see a list of all available restore snapshots you can recover Windows to. Each item lists its creation date, a short description and the type of operation (install, uninstall, recovery/undo and so on).
Click on one of the restore points to activate the Next > button.
6. If you want to see what programs and drivers will be affected by the restore process click on the Scan for affected programs. Use the Close button when you’re done.

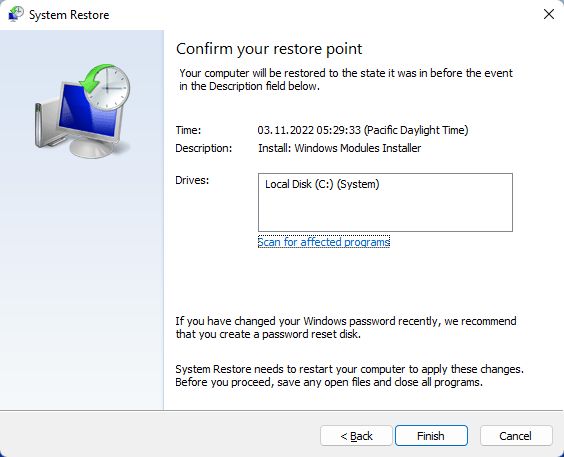
7. The next window will display a summary of your choices: restore point timestamp, its description, the drives that will be restored. Click Finish to begin. Intuitive, right?
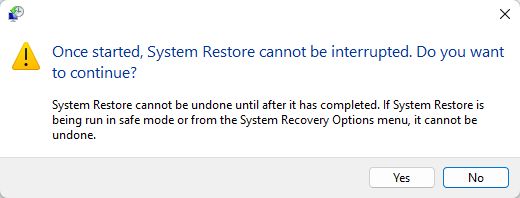
8. Not so fast! Read the warning that System Restore cannot be interrupted once started, then confirm with Yes.
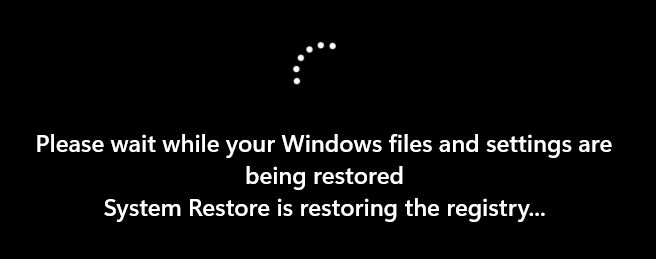
9. After a few minutes you should see the System Restore completed successfully message. It will popup after the first login.


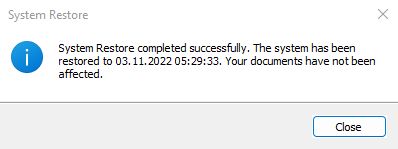
Note: If recently, after the time of the restore point was created, you changed the Windows account password, you have to use the old password after the restore is completed. You will no longer be able to login with the new one. This is valid only for local account and does not apply to online accounts. Luckly, you can use a password reset disk to regain access.
10. Out of curiosity I’ve launched System Restore once more and checked the list of available Restore Points. It looks like Windows created an automatic Restore Point before I did the restore operation.
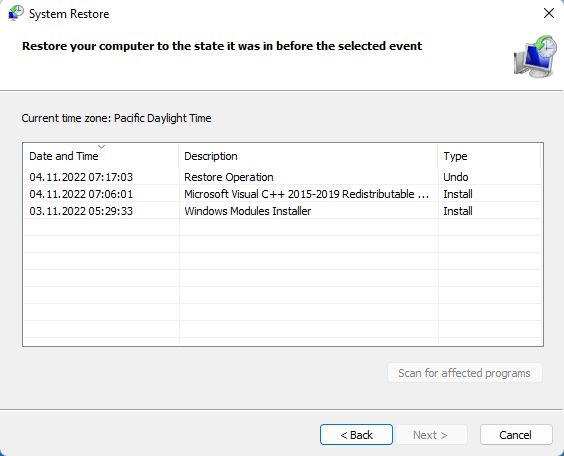
This means you can undo a restore if that makes sense. Cool, right?

Have you tried System Restore before? What kind of problems did it solve, or didn’t, for that matter? Let us know in the comments.
If you need to recover a specific file to a previous version use File History instead.