- If you create a System Restore Point you can quickly revert Windows back to that state in case something goes wrong.
- System Restore is part of the System Protection in Windows, which is turned off by default.
- Once enabled System Restore will create restore points automatically, but there’s a quick way to create a manual Restore Point every time you feel like it.

One of the ways you can fix Windows when something goes wrong is to revert to a previously saved Restore Point. Restore points are created automatically if you enable System Protection in Windows.
Before installing a new driver or a new program you want to try out, creating a manual system restore point is highly recommended. This way you make sure there’s a restore point saved on your system disk that you can later revert back to.
If you think System Restore works like saving in games it’s because it does
In this article I’ll show you how to create a restore point anytime you want to, so you don’t have to rely on the Windows algorithm, which it’s hit-and-miss sometimes.
Why not just uninstall programs or uninstall updates that cause problems? Because sometimes these can mess up your system to the point where it boots directly into the Recovery Environment.
One of the options you have at that point is to revert to a Restore Point if you have one (it can be done in a matter of minutes). That’s when a manual restore point, created just a few moments ago, for precaution, will come in handy.
What is a Restore Point?
A Restore Point is a snapshot in time of certain Windows system files, the registry system, and some other important files. If these backup files get corrupted you can use a previously saved Restore Point to revert the changes in a few moments.
Restore Points are created by System Protection, which for some reason, it’s not turned on when you install a fresh copy of Windows. The first operating system to offer this functionality was Windows Millenium Edition (ME).
What Does a Restore Point Do?
A restore point saves the current state of your Windows installation, then records changes that occur after it’s created. A restore point will store data about installed programs and important system files, but not the user files.
If you want to save user files you ill need to use the Backup and Restore utility.
Restoring to a specific restore point will remove all programs, drivers, and updates installed between the time it was created and now, plus will restore all programs, drivers, and updates that were removed in the same timeframe.
Guide: Create a Manual Restore Point in Windows 11 and Windows 10
If you ever wondered how to make a system restore on Windows this guide works for all versions that offer the System Restore protection functionality. Even in Windows 11 this utility looks and works the same as the first time it was introduced to us. It hasn’t been integrated into the Settings app, like many legacy Windows stuff.
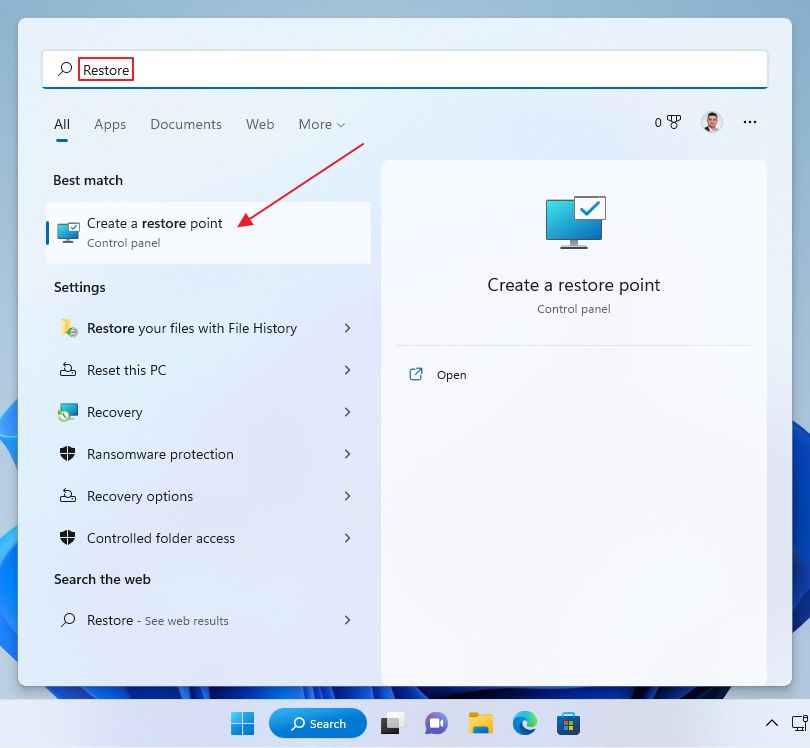
1. Open the Start menu (press the Win key) and type Restore. Select the result called Create a restore point.
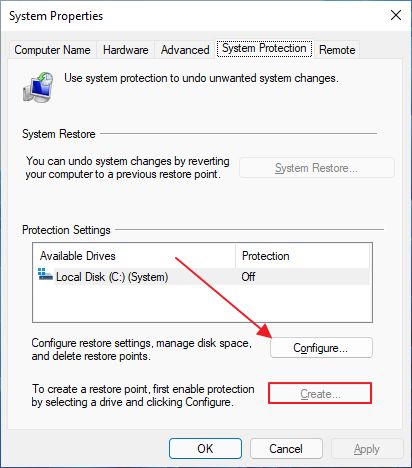
2. What, the Create… button is disabled? Yes, because system protection is disabled. You must enable system protection on this drive first if you want to create restore points, automatic or manual.
Click on the Configure… button.
3. A new window will show up. In the upper part, toggle the Turn on system protection option.
Then, in the lower section, make sure you set a maximum percentage of space the restore points will take on your hard drive. I think somewhere around 20% or 20 GB is enough.
You’ll have to decide how much space you want to allocate. Windows will delete older restore points if it runs out of space, so don’t be afraid to set a higher limit. There’s also a manual option available.
Click Apply or OK to confirm.
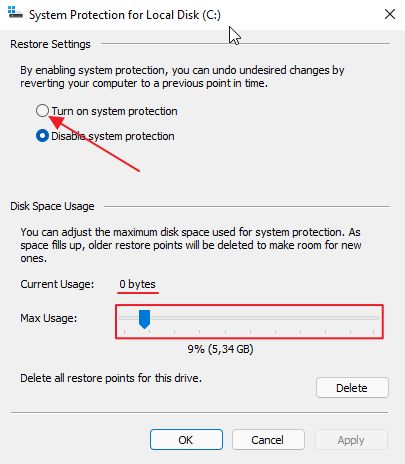
Note: If more than one disk/partition is installed on your system you have to turn on system protection for each. A restore point will back up all disks that have the protection turned on.
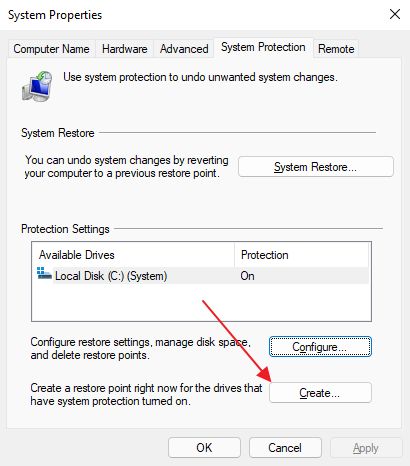
4. The window will close and in the previous window, you should see that system protection was turned on and now the Create restore point button is active. Click on it to begin.
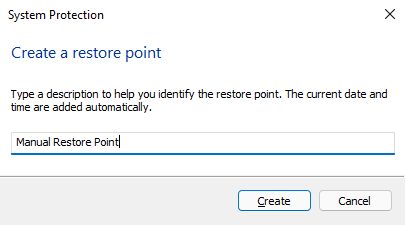
5. You will have to specify a name for the Restore Point. Use something that will help you remember why you created this backup in the first place.
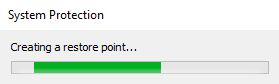
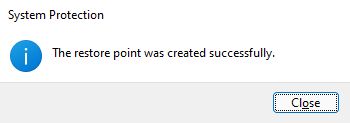
6. The backup process will start now and in a few minutes a Restore Point snapshot will be available to get back to any time it’s needed.
When Does Windows Create a Restore Point Automatically?
Windows will create Restore Points automatically, so most of the time there’s no need to create restore points manually. Windows will do it for you when the following triggers happen:
- when you install new programs.
- when new drivers are installed.
- when existing drivers are updated.
I’ll show you how to restore to a previous snapshot in another article (update: see our guide about restoring from RE or from within Windows).

How to Reset a Windows Computer from Settings in Just a Few Minutes
It’s something I hope you don’t have to do too often, but Windows it’s not a perfect OS, that’s why you may have to learn how to do it sooner rather than later.
For other ways to backup Windows make sure you check out these guides:
- Create a System Image to fully restore Windows
- Enable more repair options when RE doesn’t start automatically by creating a Restore Drive
- Set up an automatic backup of important files to a network location.
- How to use File History in Windows