- Do you have poor vision or just want to zoom in on something on screen?
- Windows Magnifier is a utility that’s part of the operating system which can zoom in on everything you see on your monitor.
- Windows Magnifier is even capable of reading the contents of the page.
- Learn how to use Windows Magnifier using only keyboard shortcuts and how to change the settings to suit your needs.
If you’re doing graphic design, web development, or a similar activity that requires pixel perfect results I think you came upon the following situation. You need to make sure something aligns perfectly, or there are no weird pixels, or lines at the edges of various on-screen elements.
You have a few options in this situation:
- Take a screenshot, import in your favorite image editor, and zoom in on the object you’re trying to study.
- Change the Windows scaling and Make text size bigger settings.
- Zoom using universal zoom keyboard shortcuts.
- Use the Windows Magnifier tool, free, and very easy to use.
The first two options are really slow. Especially if you do them repeatedly. The third one will only zoom documents, not the app interface.
I personally like to use the Windows Magnifier utility. For a more permanent solution look at our article detailing how to make everything bigger in Windows.

What is Immersive Reader and How to Use it in Edge, Word, Outlook, OneNote
CONTENTS
What is Windows Magnifier?
Windows Magnifier is a free utility that will zoom everything on screen in 100% zoom level increments by default. The tool can zoom the entire screen, use a lens effect to zoom a small portion, or split the screen in two areas: navigator and zoomed window.
Windows Magnifier is part of the Windows Accessibility options and it’s easy to see how useful it can be for people with vision related disabilities. That doesn’t make it less useful in scenarios like the one I described at the beginning of the article.
How to Use Windows Magnifier
First, you need to turn on the Magnifier utility because you can zoom in on screen elements. At the end of this article, you will find a table with useful shortcuts.
In this section I’ll show you how to use the Windows 11 Settings app to enable and configure Windows Magnifier. It works the same in Windows 10, but it just looks a bit different.
1. Open the settings app (you can use the Win + I hotkey).
2. Navigate to Accessibility in the left-side menu.
3. Scroll the right-side panel and you will find Magnifier in the Vision sub-section. Click to select.
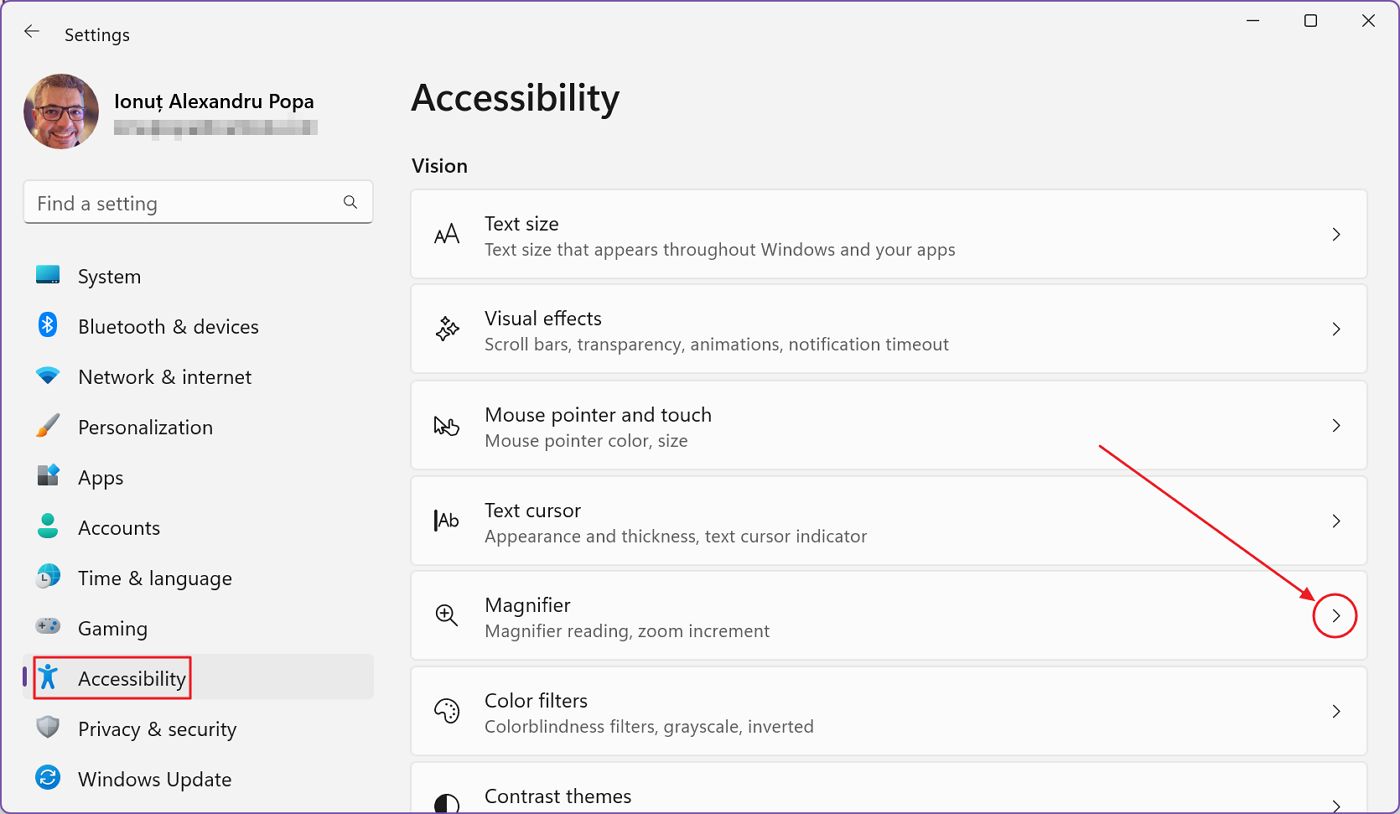
4. Use the topmost toggle to enable the magnifier. If you haven’t used the app before all your monitors will be automatically zoomed in to 200%.
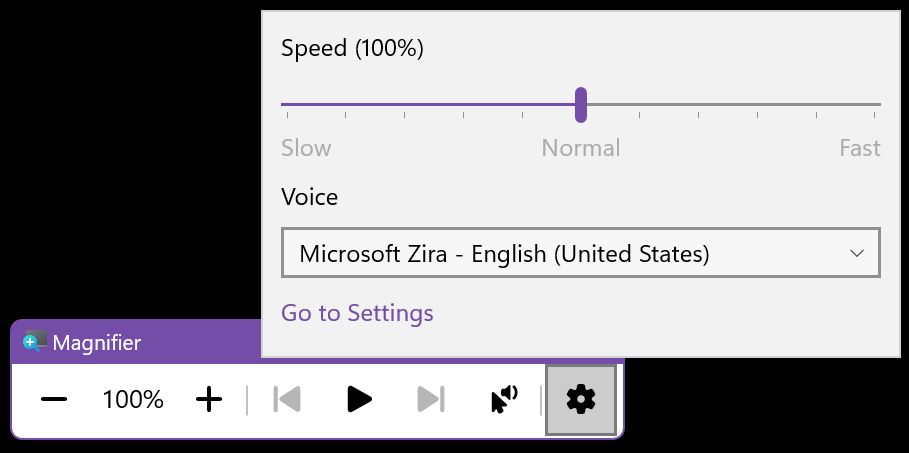
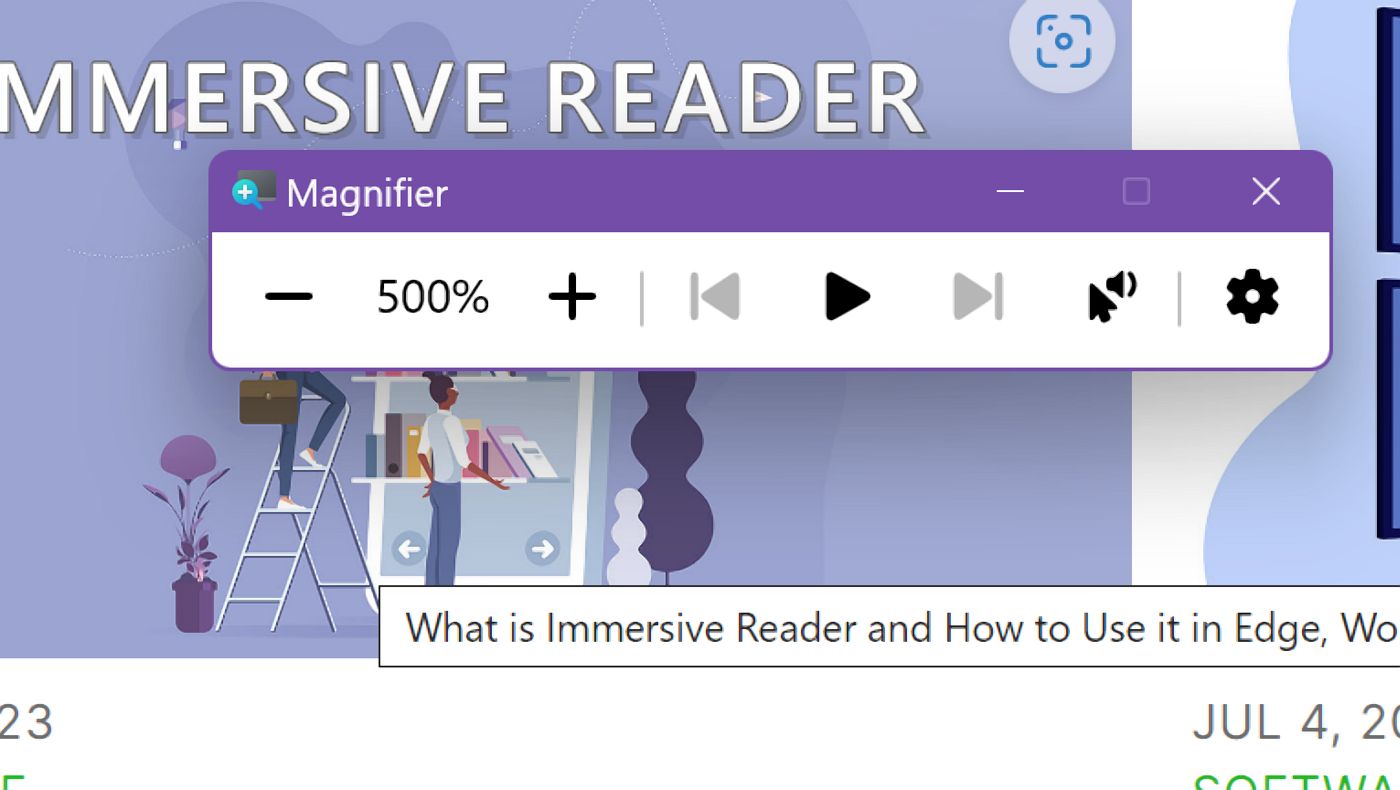
A small Magnifier toolbar will let you control the utility: zoom level and read aloud.

Yes, the magnifier includes text-to-speech functionality, just like the one found in the Immersive Reader. The only difference is that the Magnifier works at operating system level, so you can use it in all apps.
On the small toolbar there are quite a few options for the reading functionality: prevous sentence, play/pause, next sentence, select starting paragraph, and voice settings.
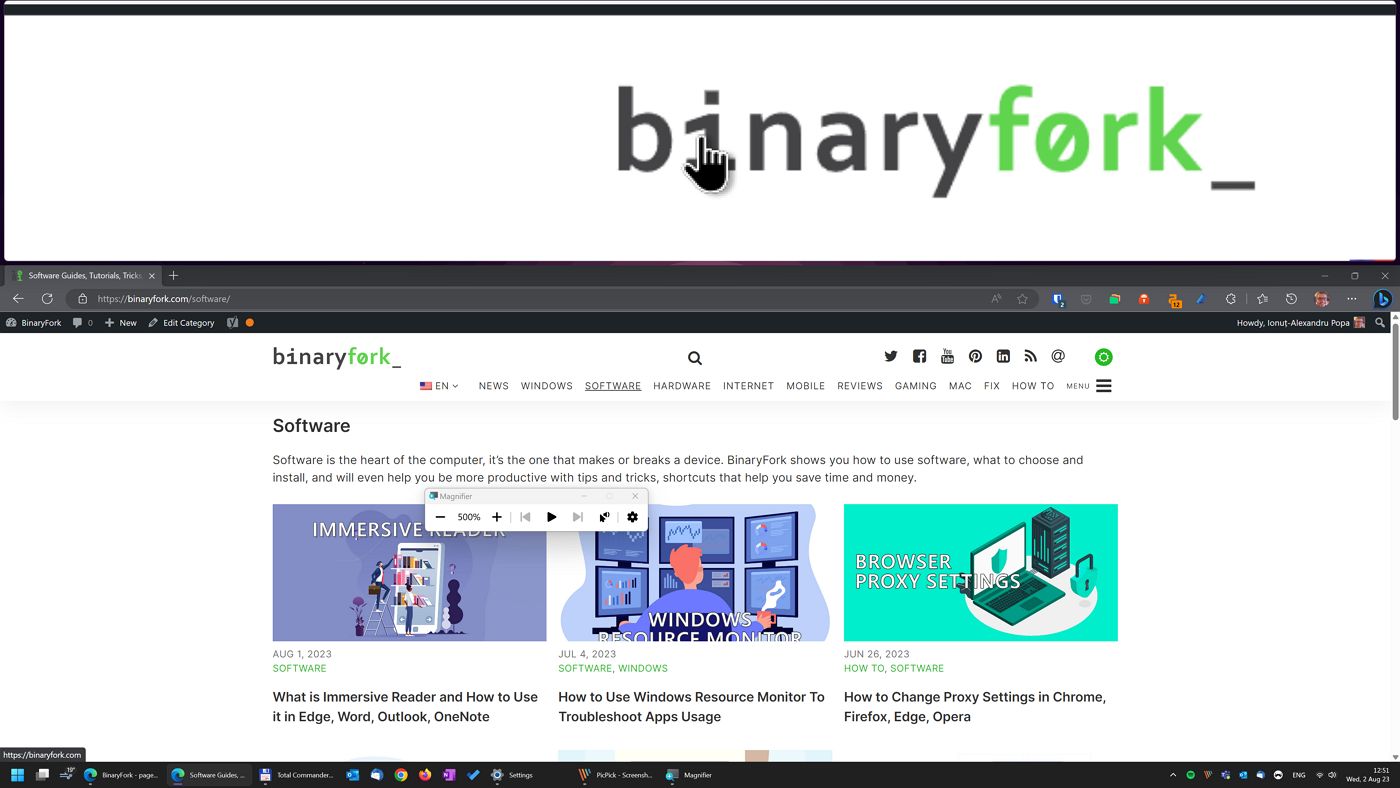
By default, while zoomed in, the magnified area will also move as the cursor nears the screen margins. If the zoom level is set too high, you will need to move the cursor carefully, as the scroll area will also be magnified.
When you’re done with the Magnifier all you have to do is close the toolbar like you would a normal app.
Tip: If you only need to use the reading functionality and don’t want to get distracted by the zoom lens just set the zoom level to 100%. You don’t need to use both functions together.
Settings: View Modes, Zoom Level, Invert Colors, Smooth Images and Text
If you want to tweak the behavior of the Magnifier head back to the Settings > Accessibility > Magnifier section. Let’s go through each option, one by one.
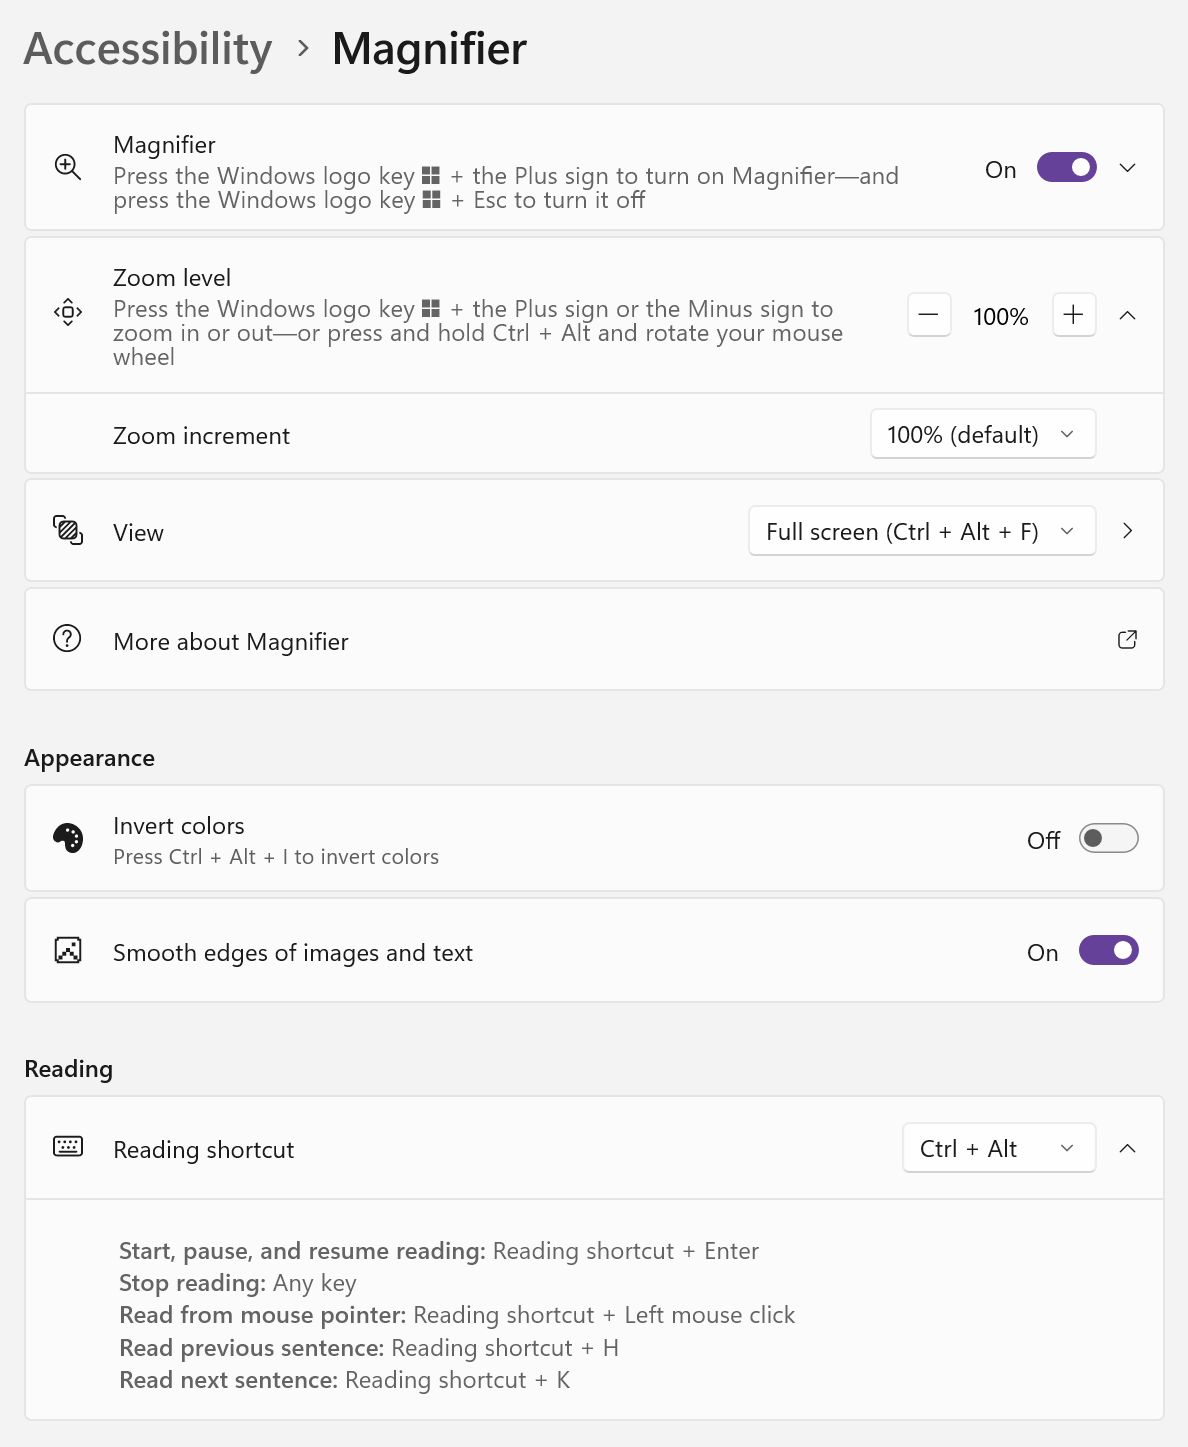
- Magnifier – this turns the utility On and Off.
- Zoom level – sets the zoom level from 100% to 1600%.
- Zoom increment – sets the step for zooming in or out. The default is 100%, but it can be set from 5% (very granular) to 400% (huge steps).
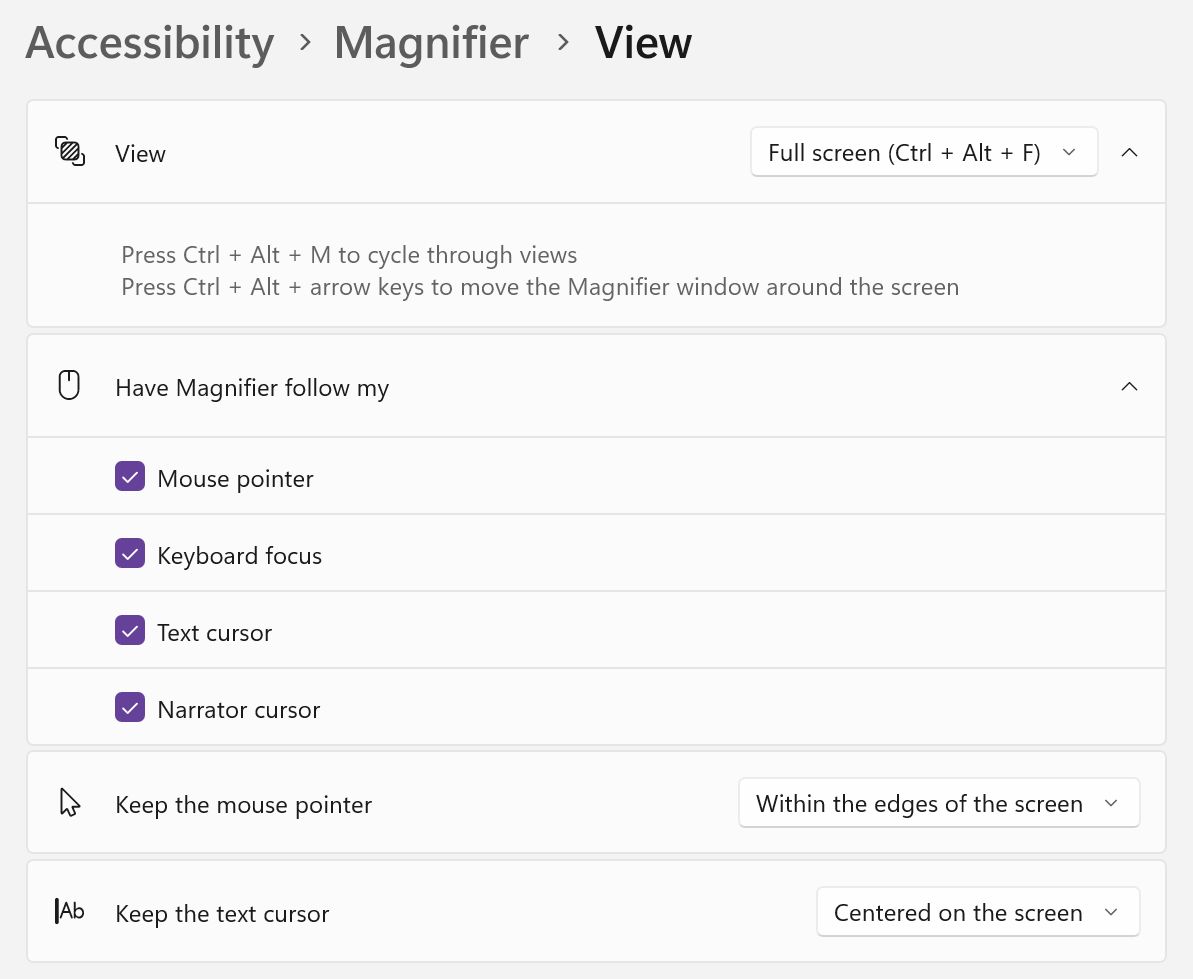
- View – selects the view mode. There are three options:
- Full screen – zooms the entire screen area.
- Docked – splits the screen in two: zoomed area and navigator. You can resize the two.
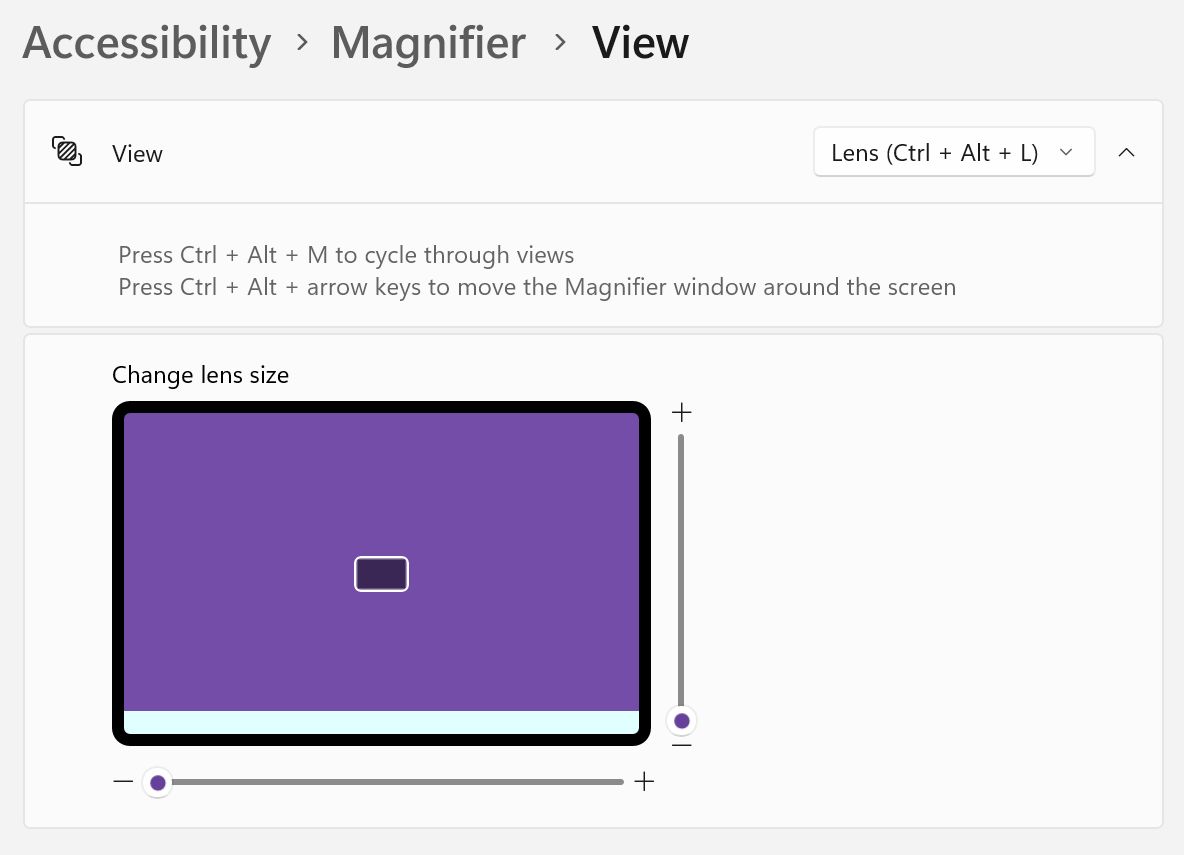
- Lens – this zooms the area near the cursor in a lens style effect.
You can expand the View setting panel to reveal more options. These are contextual to the view mode currently selected.
It’s possible to keep the mouse cursor centered on screen and the currently read word dead center, but it may cause you nausea. I know it made me switch back immediately.
Also, in the lens mode you can resize the zoomed area. For most people the default options are quite all right I reckon.
Here’s how the three Magnifier view modes look side by side:
- Invert colors – this option will invert all colors on the zoomed area.
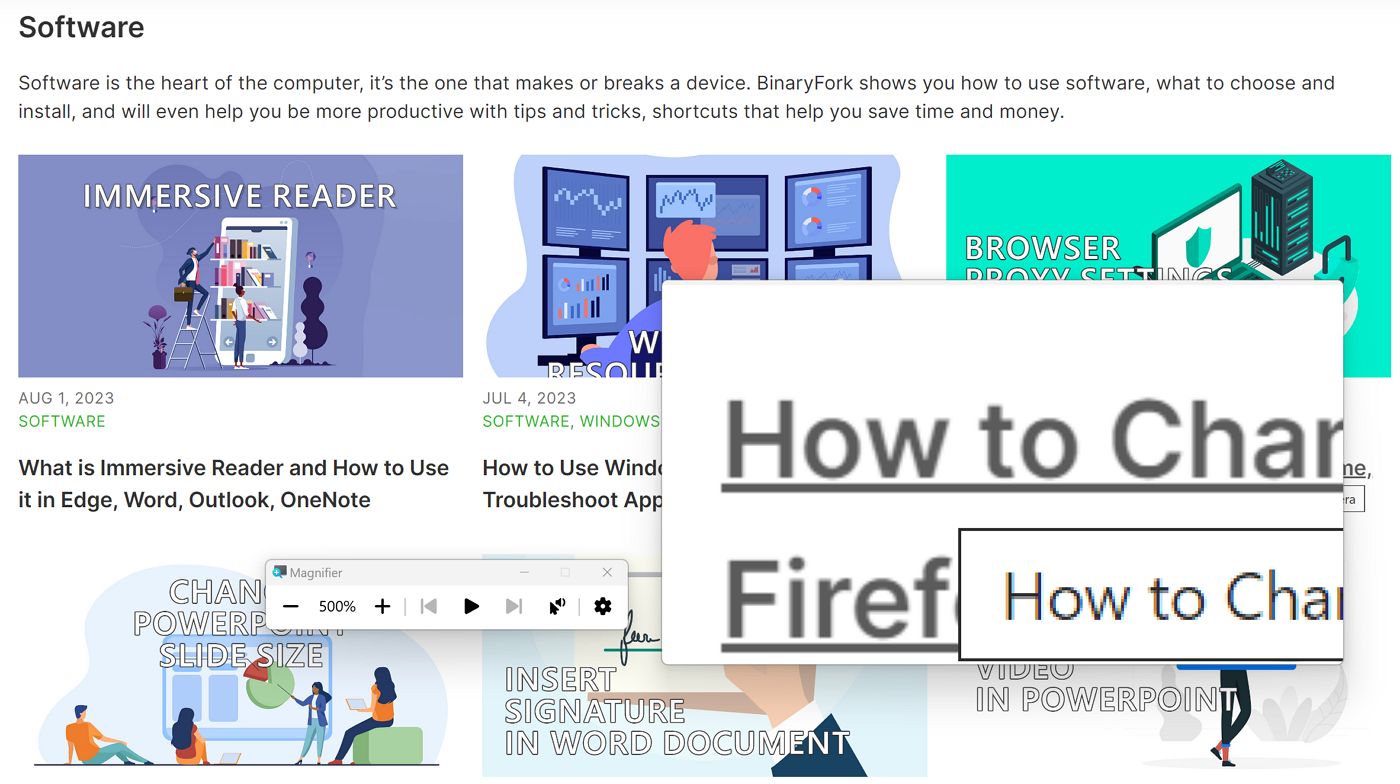
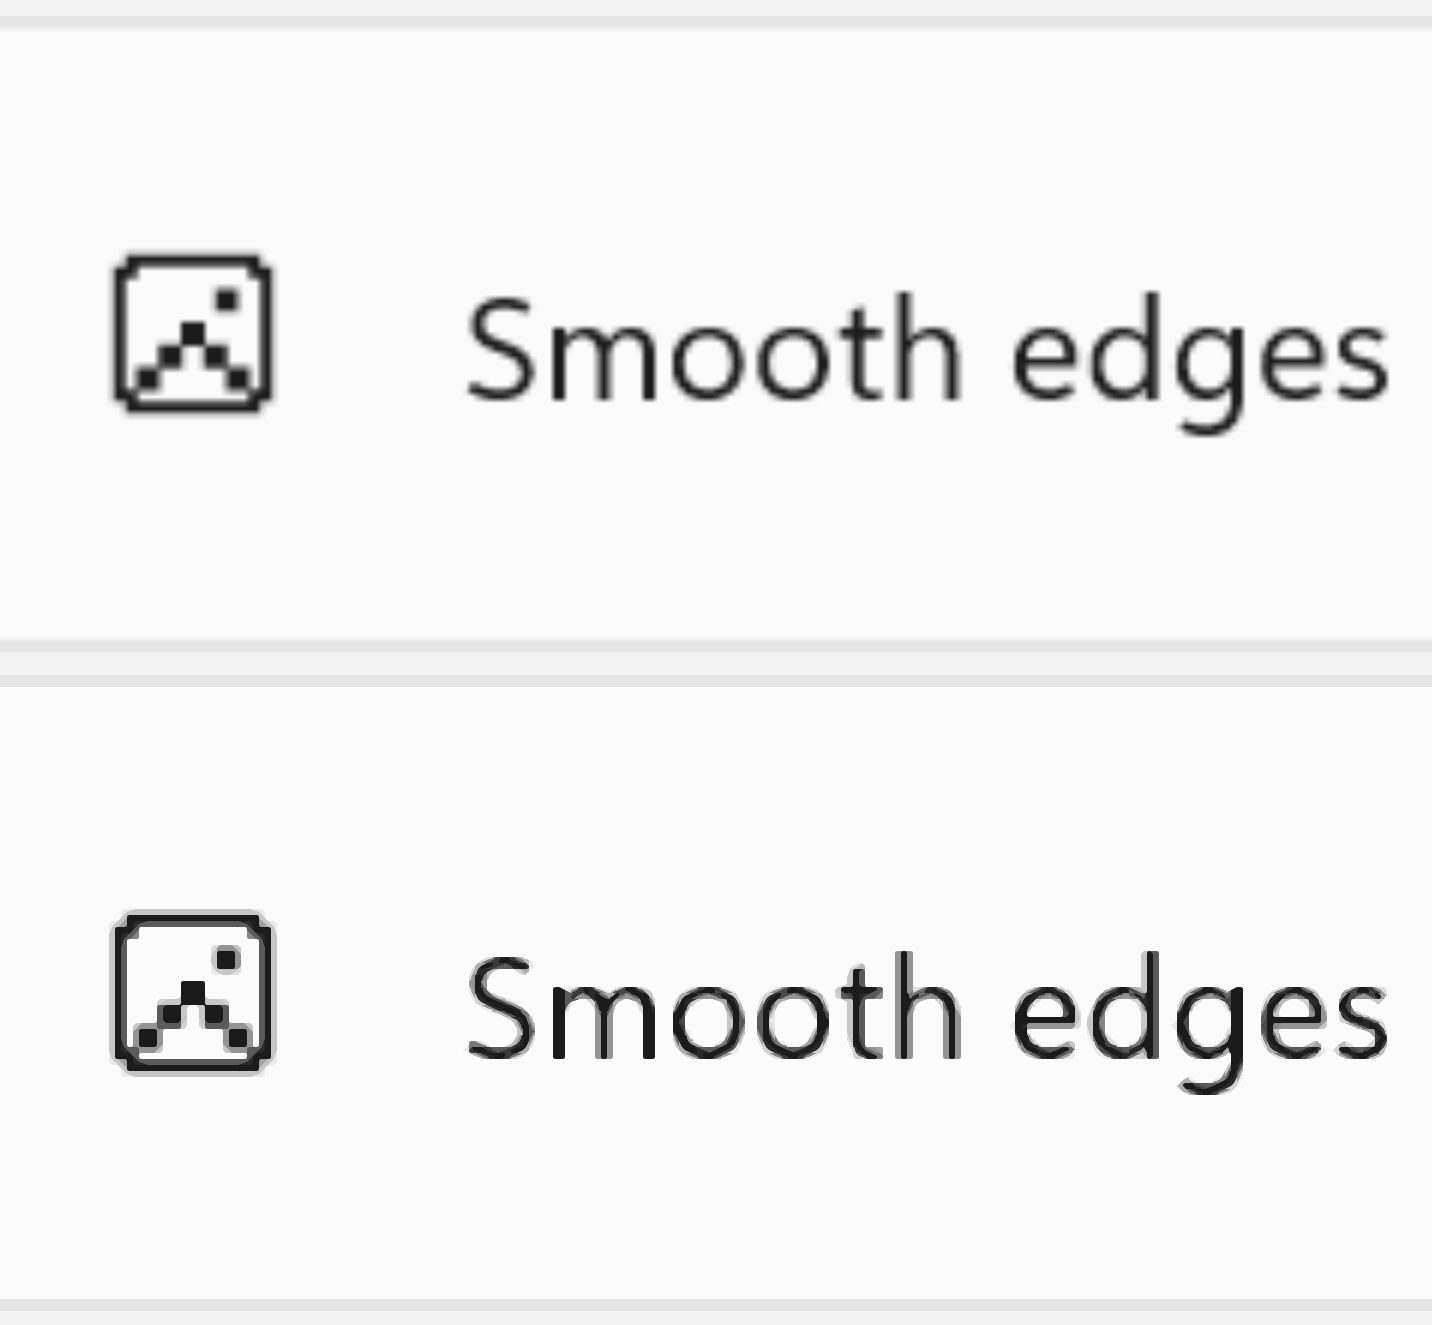
- Smooth edges of images and text – this option will make things look a bit smoother when zoomed in. It’s effective mostly at higher zoom levels, where you can start to see the individual pixels with the option turned off.
Here’s a comparison at 500%. Smooth version is at the bottom:
- Reading shortcut – here’s where you select the modifier key for the hotkeys that control the text-to-speech functionality.
Windows Magnifier Hotkeys and Shortcuts
While you can use the Magnifier tool without the keyboard, by activating the utility from Windows Settings, or by searching Magnifier in the Start menu I much prefer keyboard shortcuts.
Here’s a list of the most important hotkeys for Windows Magnifier:
| Action | Keyboard Shortcut |
| Turn On Windows Magnifier | Win + Plus |
| Turn Off Windows Magnifier | Win + Esc |
| Zoom In | Win + Plus |
| Zoom Out | Win + Minus |
| Select Full screen mode | Ctrl + Alt + F |
| Select Docked mode | Ctrl + Alt + D |
| Select Lens mode | Ctrl + Alt + L |
| Invert colors | Ctrl + Alt + I |
There are also a few hotkeys you can use to control the text-to-speech reader. You first need to choose a modifier key.
Default is Ctrl + Alt, but you can also pick Caps Lock, Insert, or get this, Caps Lock or Insert.
| Modifier + Enter | Start, Pause, Resume reading |
| Press any key | Stop reading |
| Modifier + Left click | Read starting beginning with the clicked element |
| Modifier + H | Read previous sentence |
| Modifier + K | Read next sentence |
Now that I memorized the keyboard shortcuts, I’ve started using Windows Magnifier a lot more. It’s much easier to turn on, off and change the zoom level with the keys.
What about you? Have you used Windows Magnifier? What use cases did you find for it? Let me know in the comments.