- You receive a cool image from a friend with an iPhone, and you try to open it on your Windows PC, but you just receive an error message?
- It may be because Windows doesn’t natively support the HEIC / HEIF image formats. Only Macs, iPhones, and iPads do, plus some Android smartphones.
- Fortunately, there are quick ways to make Windows display HEIC images. So, learn about how to open and view HEIC images in Windows.
- Also, find out how to convert HEIC to JPG with free tools, online, or locally on your computer.
JPEG is the most popular file format, by far I would say. Yes, files use the JPG extension most of the time, but it’s the same format. Yes, there are other formats that are being pushed by the industry, but nothing beats JPEG when it comes to compatibility.
WEBP is a growing format supported by most browsers, but native app support in Windows is so-so. The same goes for HEIC or HEIF, a newer image format that promises better quality and lower file size even compared to WEBP.
CONTENTS
What is HEIC?
HEIC, short for High Efficiency Image Container is an updated image compression format of the HEIF (High Efficiency Image Format) used by Apple in a push to replace the popular, but inefficient JPEG format.
HEIF and HEIC are not the same, as the older HEIF format can use a variety of compression algorithms, while HEIC uses only the HEVC (High Efficiency Video Coding) format to compress images.
HEIC is better at image compression, retaining more details than JPEG while taking about half the disk space. It’s even possible to store more images in one file, including edits, so you can easily restore the original, when needed. Doing this will absolutely trash the space saving advantage, but it’s a cool feature, nonetheless.
Today HEIC is the standard image format used by Apple for Macs, iPhones, and iPads. This is great news if you’re an Apple user. Not so much if you’re outside the ecosystem.
Fortunately, things are changing slowly. My two-year-old Realme GT smartphone supports HEIC natively. I’ve activated the option for the camera app to save in HEIF format from day one.
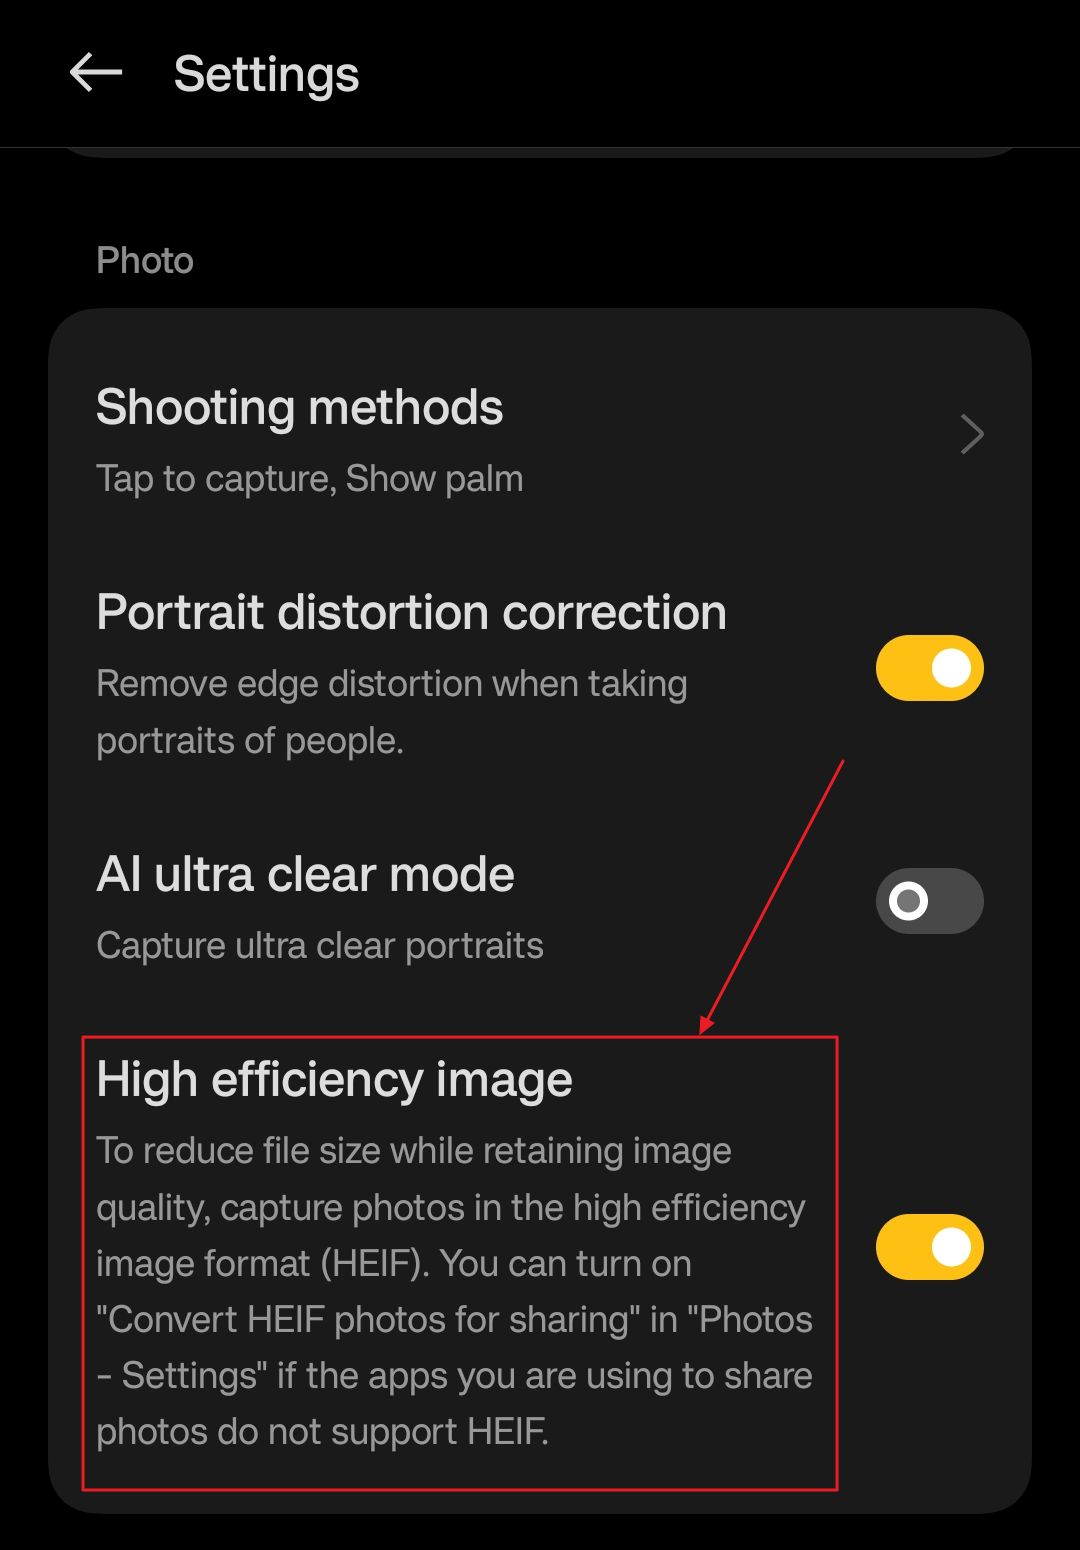
Why Isn’t Everyone Using HEIC/HEIF?
Compatibility is a tricky thing. That’s why we’re still using a lot of old programs and file formats, not just for image files.
If your device or the apps you’re using don’t support something, then it’s of no use to you. The same goes for HEIC and HEIF image files.
Apple does support this format natively, but it’s the only big player doing so. And Apple doesn’t represent most users.
The situation is getting better, but we’re still far from HEIC widespread support. My Android device is just an exception, which I’m reminded of every time I send a photo to a friend, and he replies with “I can’t open this file you sent me”.
How to Open a HEIC File in Windows?
Unfortunately, Windows doesn’t support the HEIC and HEIF decompression algorithms, so you need to install some specific extensions from the Microsoft Store if you want to display these types of images.
There are two apps you need to install: HEIF Image Extensions (free) and HEVC Video Extensions (0.99$).
The Microsoft Corporation made both, and both are required to fully support HEIC image files in Windows.

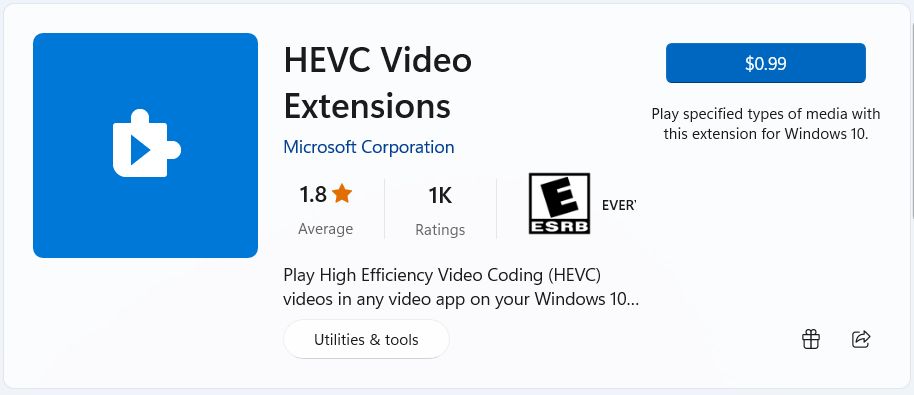
Now, checking the Microsoft Store for my account shows I hadn’t bought the paid HEVC Video Extensions app. Despite this fact, two of my Windows 11 PCs can display HEIC images just fine. I think because I have two activated copies of Windows 11, these two apps somehow came preinstalled/preactivated.
On my Windows 10 VM and on another Windows 11 VM HEIC images don’t work in Paint and FastStone. I get these messages instead:
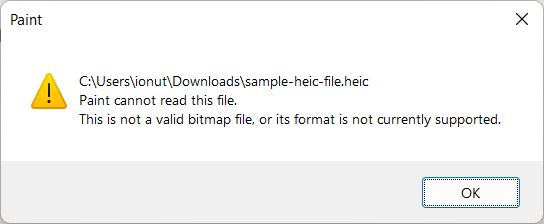

It may have something to do with the fact I haven’t activated Windows on the two VM’s.
Anyway, it’s just 0.99$, so if you need HEIC compatibility it’s not an amount that should stop you. Just install the two Microsoft Store apps (both are required) and your PC will be able to decode HEIC files in supported apps (Paint, the Photos app, FastStone, PhotoShop and so on).
How to Convert HEIC to JPG using Paint
If you don’t need to convert multiple images you can do this fairly easy in Paint, one image at a time:
1. Navigate to the folder containing the HEIC images.
2. Right-click on an image and select Open with > Paint.
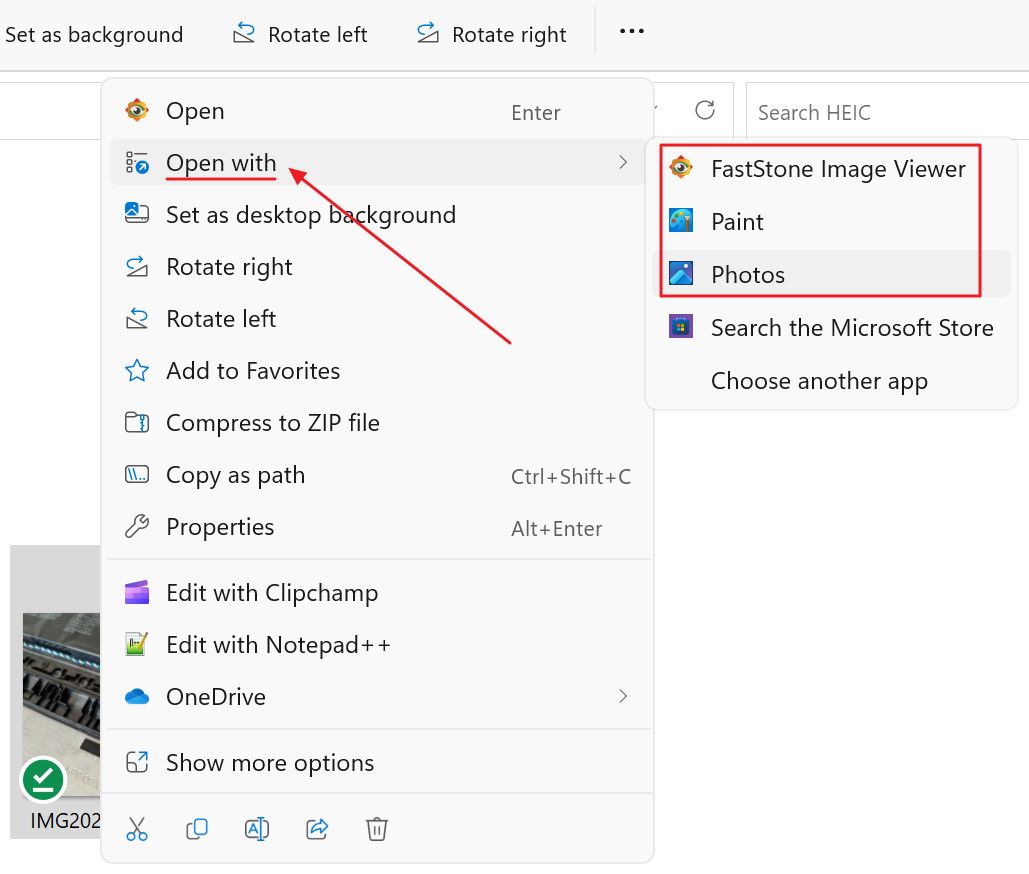
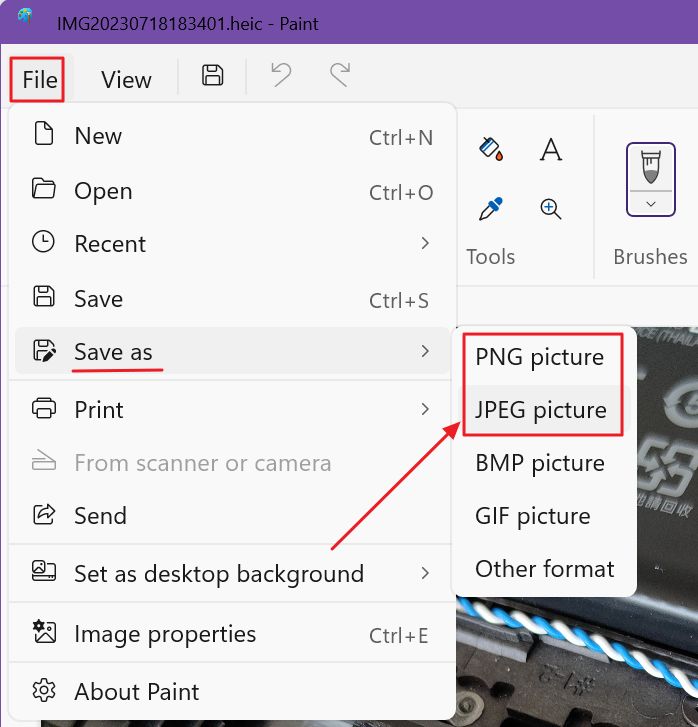
3. Select the File menu > Save as option, then choose the format you want. Your options are PNG, JPEG, BMP, GIF, and Other formats, which will expose TIFF, various BMP variants and HEIC.
How to Convert HEIC to JPG using the Windows Photos App
Alternatively, you can use the new Photos app, if you’re not a fan of the old Paint:
1. Navigate to the folder containing the HEIC images once more.
2. Right-click on the image you wish to convert and select Open with > Photos app instead of Paint.
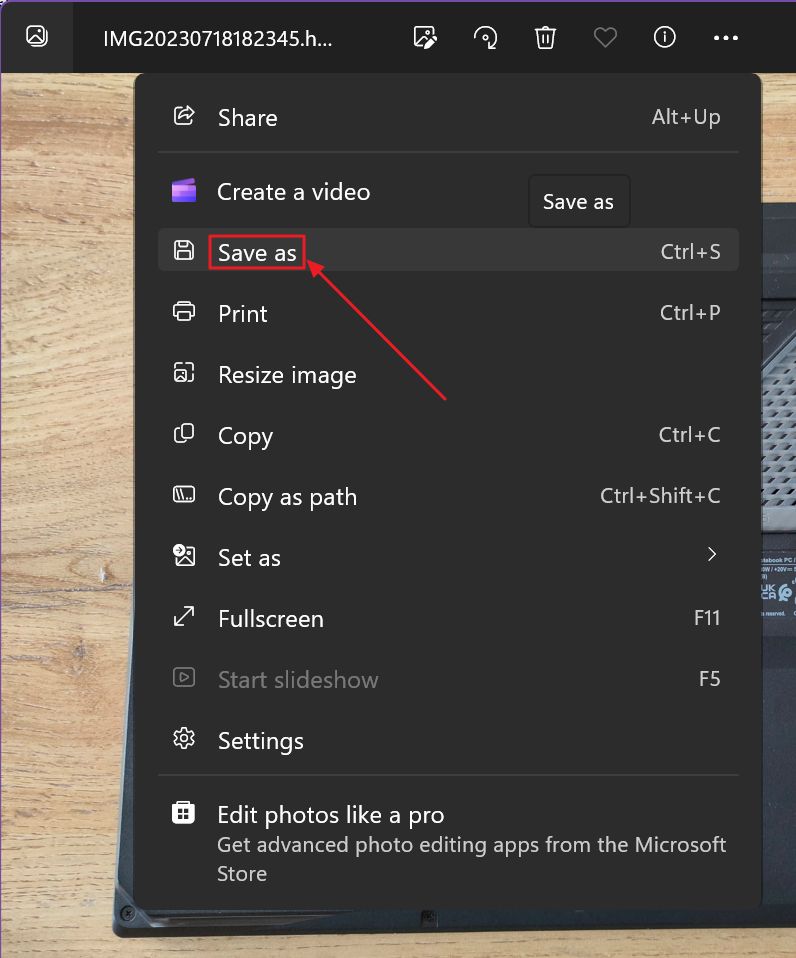
3. Click on the three-dot menu icon at the top of the app, select Save as.
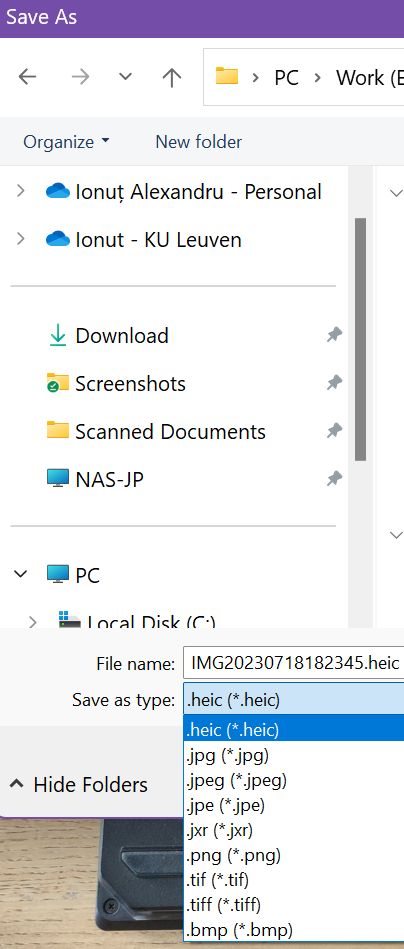
4. A new dialog window will open, asking for a save location, file name, and most important, the file type. You will get similar options to Paint, except the support for the BMP format, for some reason.
Not a big deal, since BMP is an uncompressed file format anyway, thus extremely space inefficient.
How to Batch Convert HEIC to JPG with FastStone Image Viewer
If you don’t want to install third party software the two guides above are super handy. But it gets tedious if you have to compress multiple images.
If that’s the case I suggest you try FastStone Image Viewer, which is free to download and use.
FastStone is not just an extremely fast image viewer, especially when you view big high-resolution images, but can also do basic editing, and batch processing.
The interface may seem daunting at first, and a bit dated, but I’m here to help you:
1. Navigate to your HEIC image folder.
2. Right-click again on one of the images, select Open with > FastStone.
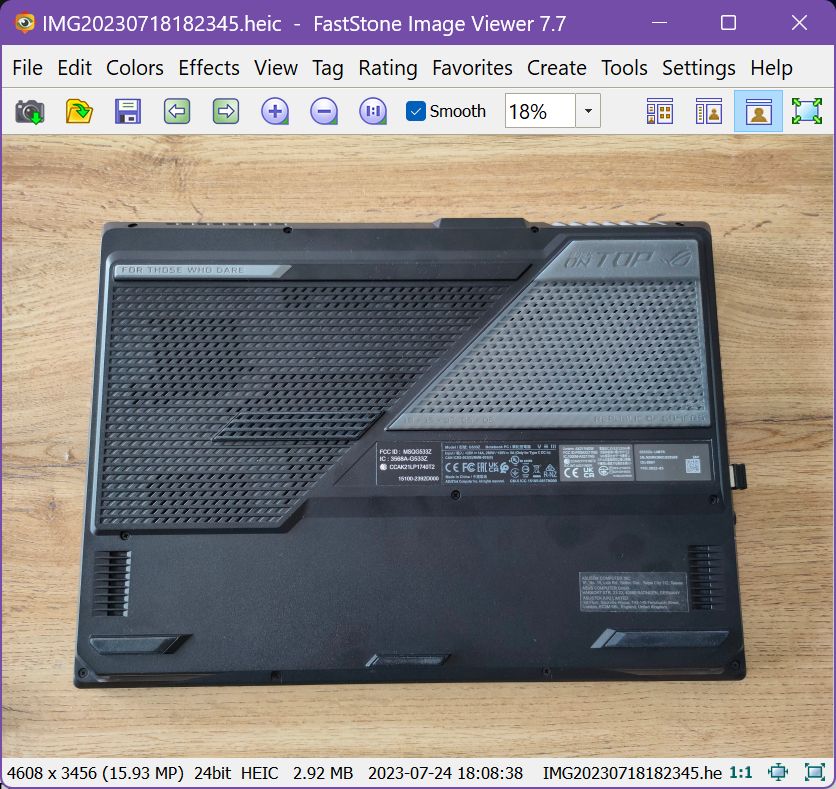
3. Once you see the image opened in FastStone press the Enter key. This will switch FastStone to the explorer view, loading the current folder and all the images in it.
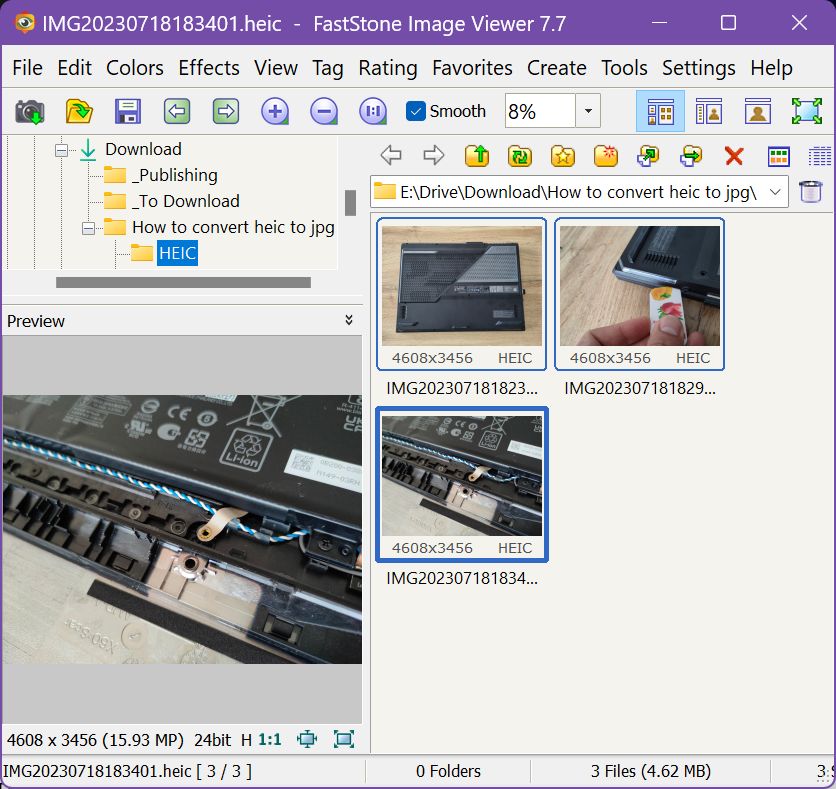
4. Select all images by pressing Ctrl + A or select only individual images by clicking on them while holding Ctrl pressed.
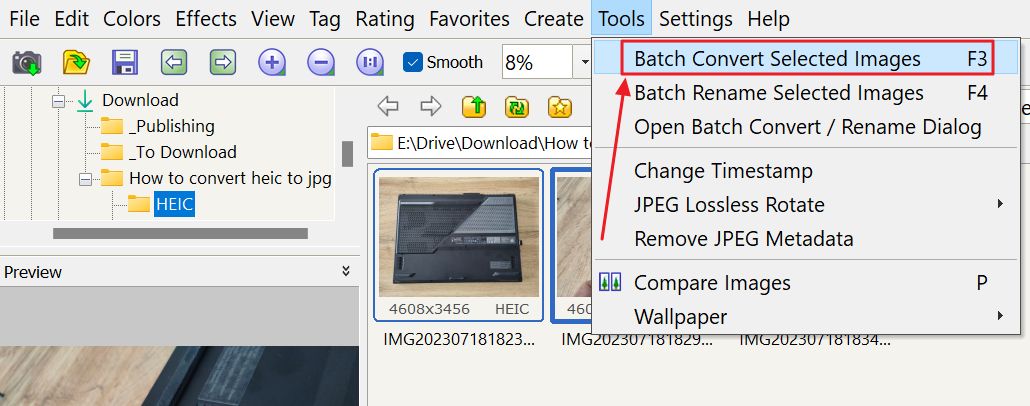
5. Now either press F3, or select the Batch Convert Selected Images from the Tools menu.
6. The following window will show up. The selected images will be automatically added to the convert queue (3), the Input List on the right side.
You can add more images from the left-side panel (1) by selecting the files just as before and pressing the Add or Add All buttons on the middle-column (2).
Note: you can select images from different folders if you wish.
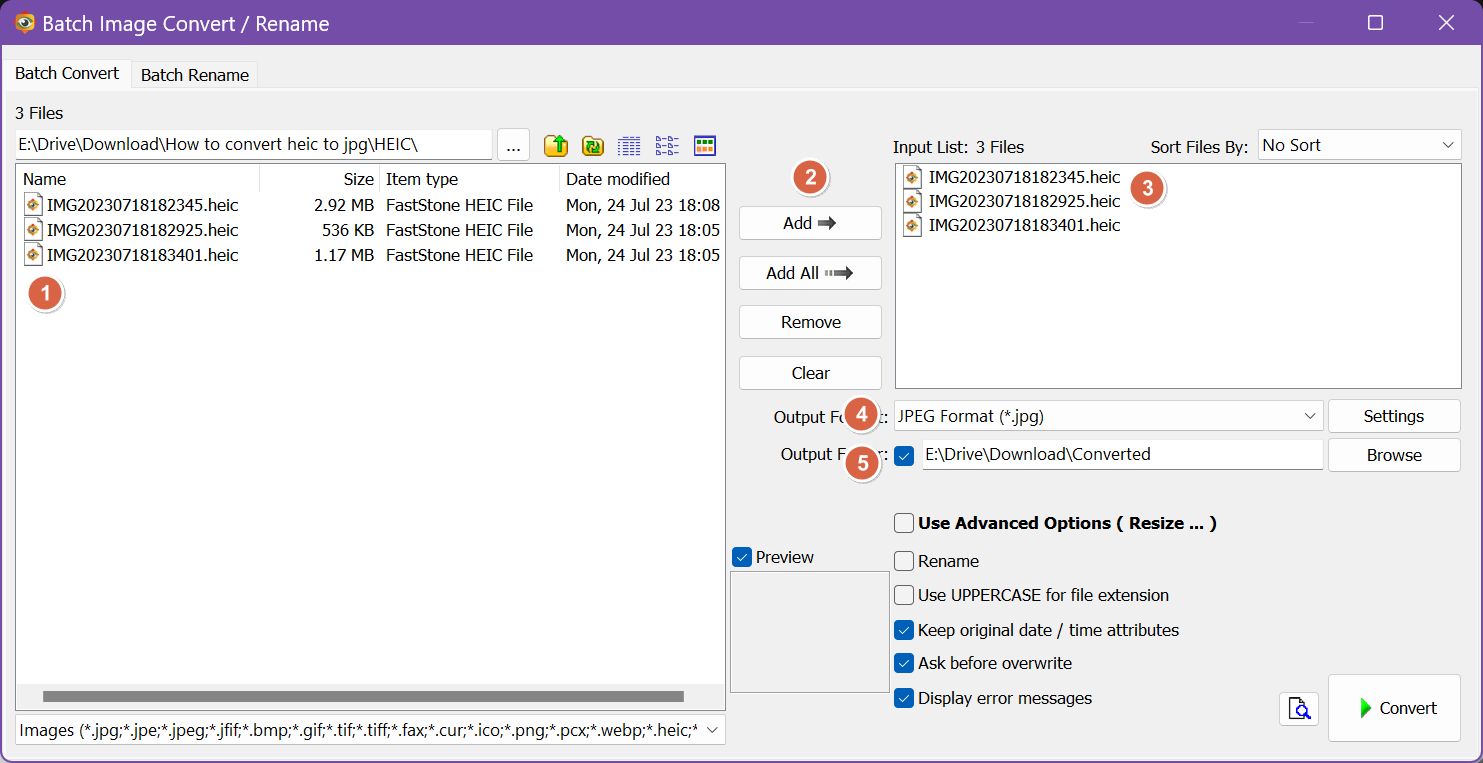
While here you can play with the other options as well if you wish to also rename the files and automatically resize, crop, or watermark them.
On the lower-right side you can select the output file format (4) and the destination folder (5). For each file format you get a bunch of options to play with. Here’s what you can adjust for JPEG.
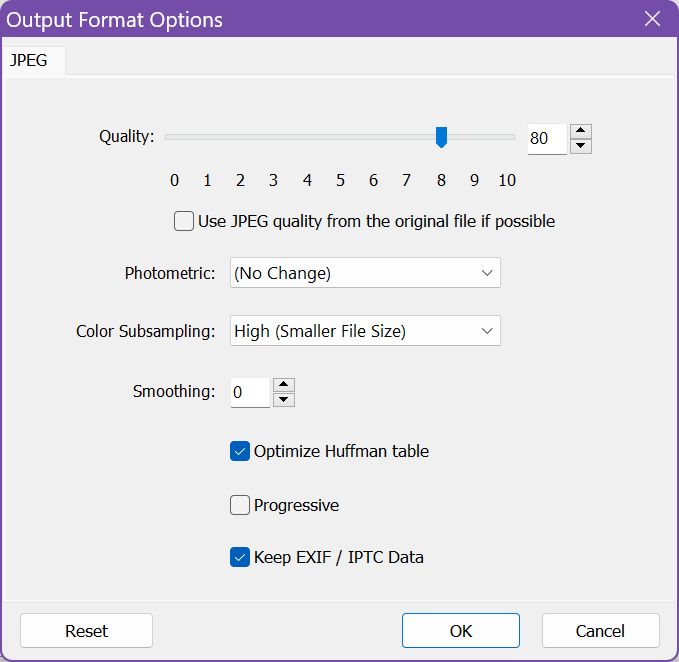
7. If the output folder doesn’t exist, you will be asked if you want to create it automatically. Hit Yes without hesitation.

8. All you need to do now is wait for the queue to process.
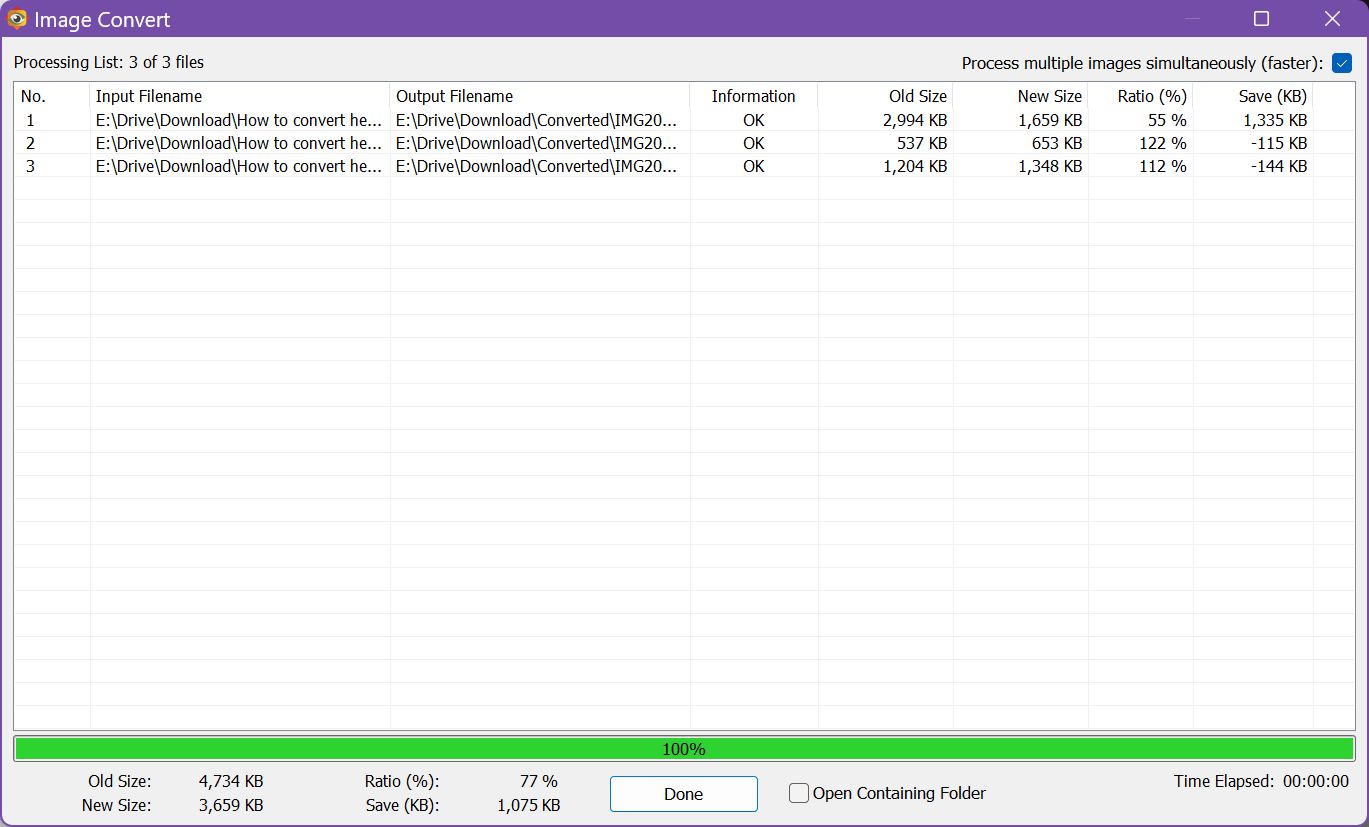
You will get a nice summary of the resulting output files, the compression ratio and total space saved with conversion.
Note that with JPEG compression set at 80% the actual resulting file size is smaller, even if some files are getting a tiny bit bigger. That would defy the HEIC promise if not for the loss of quality.
Take a closer look and you’ll see the JPEG files are worse looking overall, but it depends heavily on the image contents.
Convert HEIC to JPG Online, No Codecs Needed
What if you don’t want to install the HEIC extensions or other third-party software?
Fortunately, you can use an online service, either completely free, or free for a limited number of images.
There are many options, but the one I like most these days is the FreeConvert website. If you think the name sounds familiar, maybe it’s because I also used it in the past to make videos small enough to email as attachments.
Here’s how it works:
1. Before selecting the files to convert (up to 1GB for the free version of the service) select an output resolution if you need to also resize the files and a compression ratio).
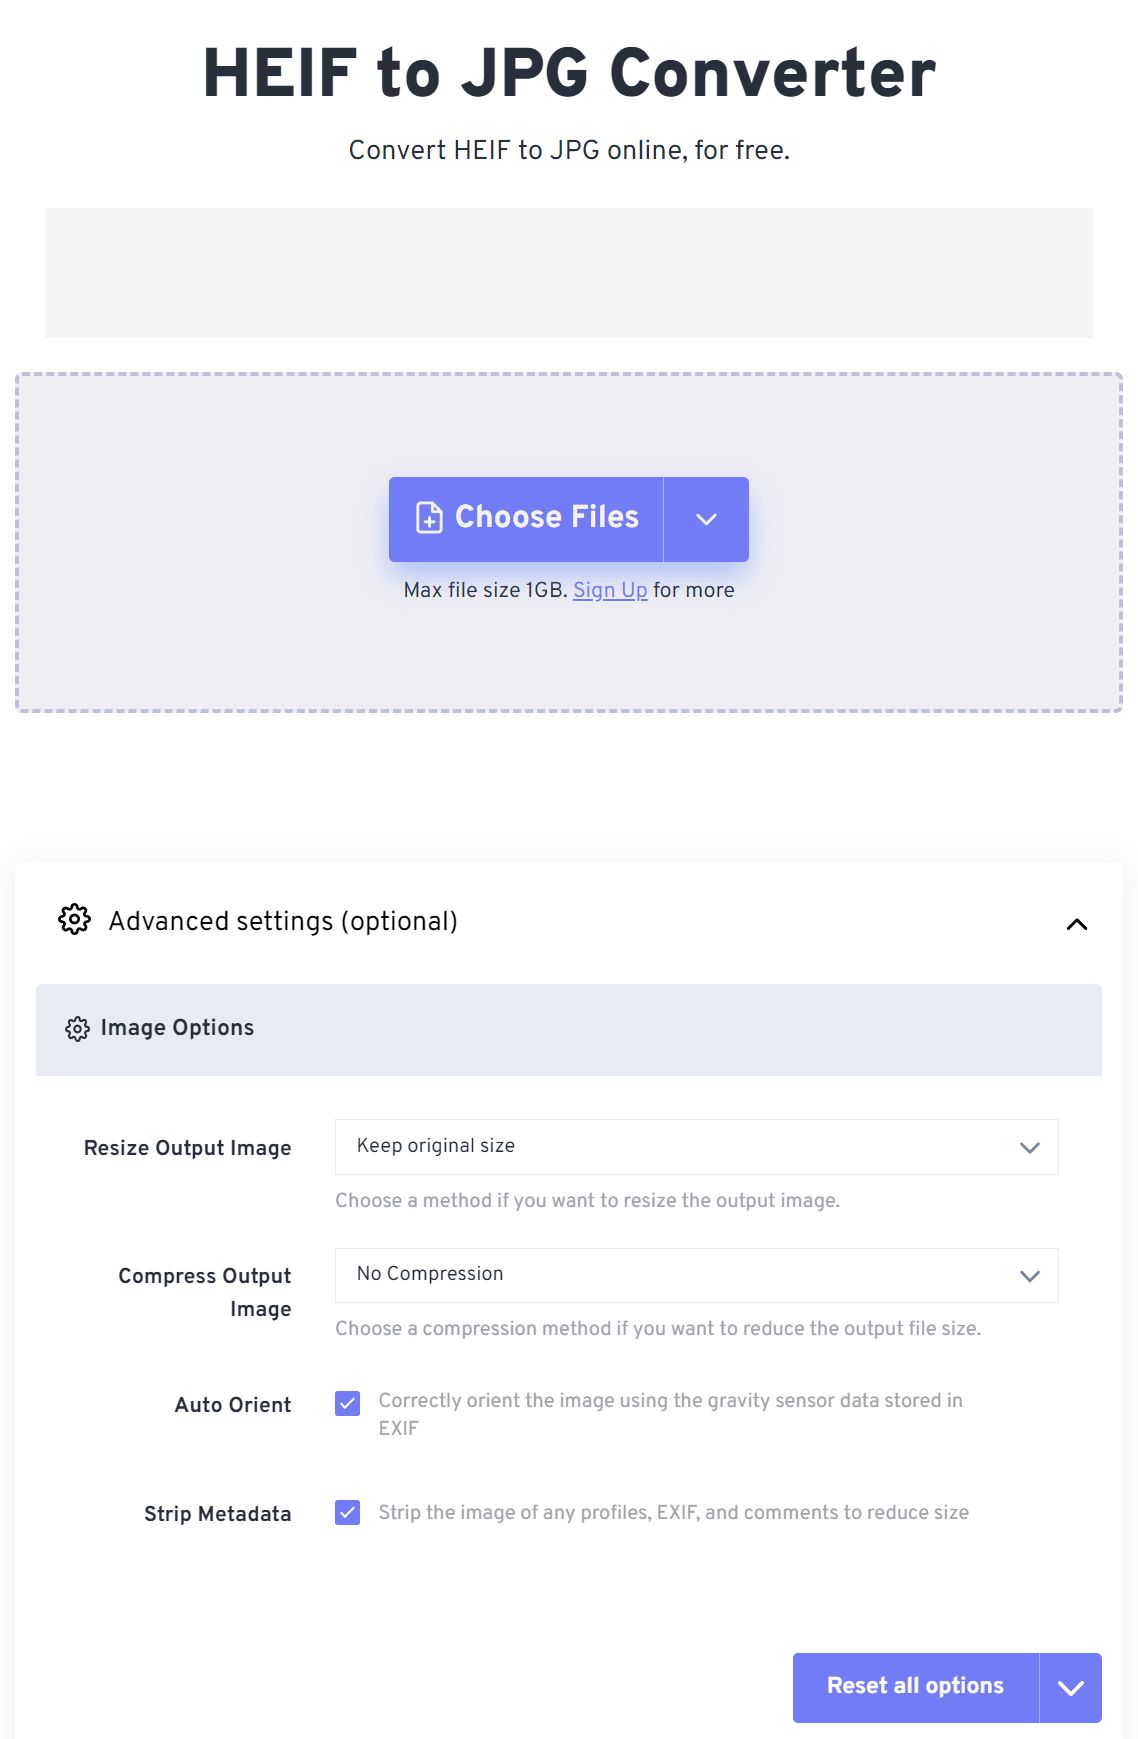
2. Browse and select the desired HEIC files or just drag-and-drop them on the gray area with the dotted border:
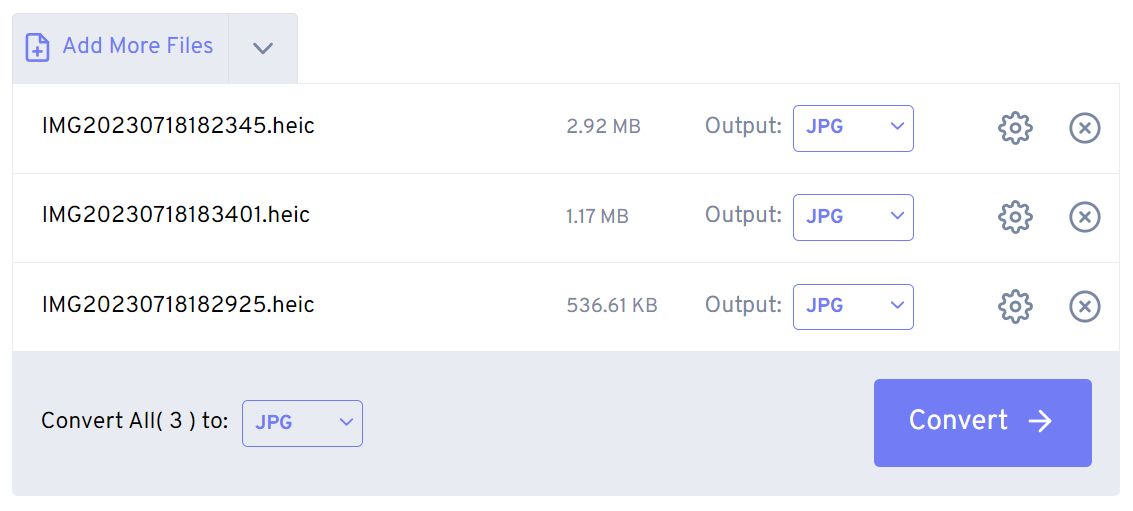
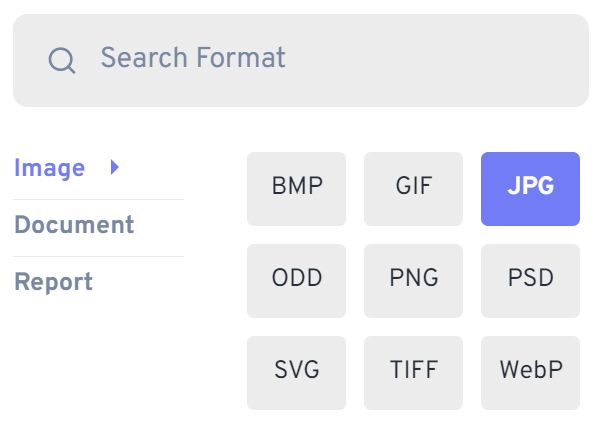
3. If you want to select another output format, not just JPG, click on the down-arrow next to each file. You’ll get quite a few options, including PSD, PNG, even PDF (under the Document submenu).
4. Click on Convert when you’re done and wait for the HEIC file queue to be processed.
Now download each file individually or click on the Download all button to get them all packed inside a single ZIP archive.
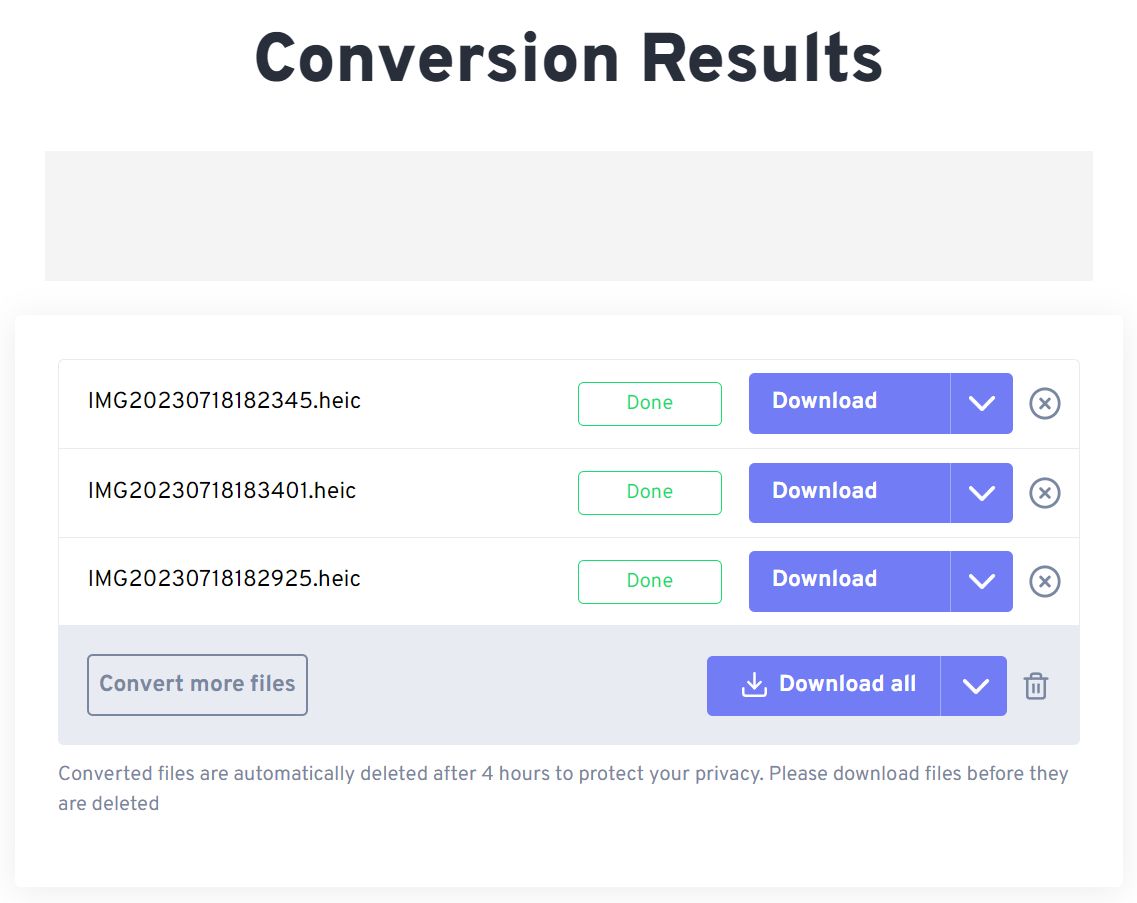
The beauty of online converters is they work on any platform, including mobile phones. Some services, if not all of them, will introduce limitations on the number or size of files you are allowed to convert before you must create an account and pay for a subscription.
Personally, I always prefer to install software on my computer, FastStone being my current go-to image app.
What about you? Are you using HEIC? How are you dealing with the compatibility shortcomings of this image format?
