- Learn how to quickly map a network drive or add a network location shortcut pointing to a FTP server or web server.
- File Explorer has to ability to add network drives and FTP/web locations as shortcuts for easy of access with just one click.
- Mapped network drives and FTP locations can be used by other apps as document save folders, even if the app doesn’t have the ability to save remotely.

If you’re like me and constantly transfer files to a network computer, NAS, or to and from an FTP server it can get frustrating to click a few times, every time, when you could easily just add a shortcut in File Explorer that’s literally just one click away.
This can be done with the included Windows functionality of mapping network drives and adding network locations. It’s super easy to do and it will save you a ton of time in the long run.
First, let’s figure out what mapping drives in Windows is all about.
CONTENTS
What is Network Drive Mapping and Why is it Useful?
Mapping is the action of adding a shortcut to a specific destination directly in File Explorer’s local drives view – aka My Computer, This PC, or PC, depending on your version of Windows.
A mapped drive will take one of the remaining letters from D:\ up to Z:\. Any app that needs to save a file can access these mapped shortcuts just like they’re local storage disks.
Mapping network drives and remote network locations not only helps with productivity since you don’t need to click multiple times to get to a network share or an FTP account but, in some edge cases, can help store files directly from apps that normally can only save to a local disk and can’t work with network locations.
Mapping network drives is not new to Windows 11, so it dates back quite a few generations. There are two ways to do it, both taking roughly the same amount of time.
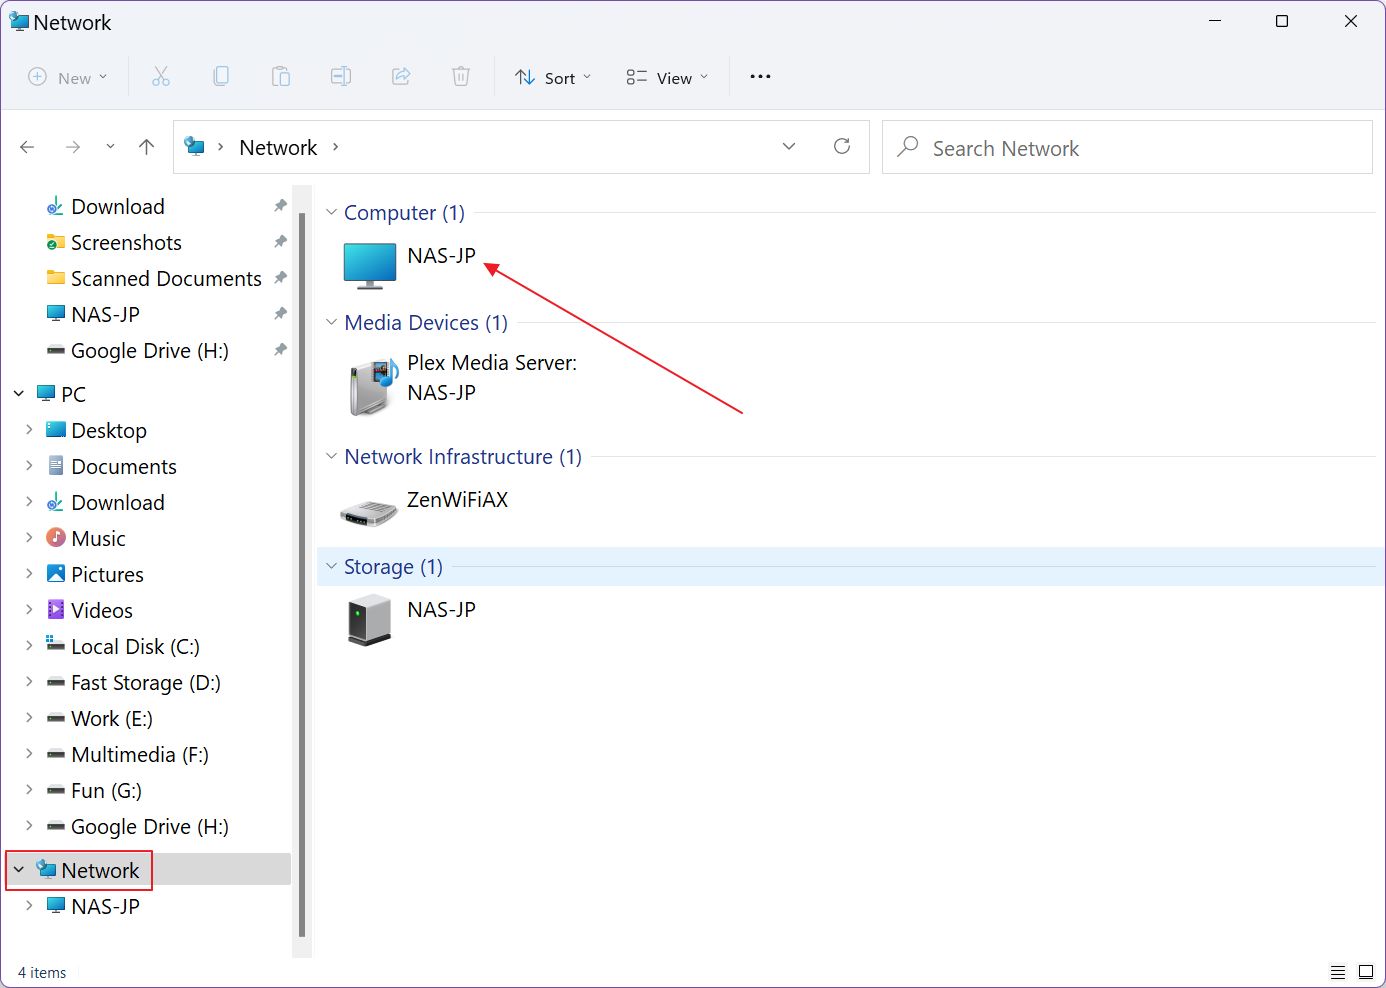
Note: you cannot map a network device, such as a computer or a NAS. These show up already in File Explorer, in the Network section.
Map a Drive by Visiting Its Location
1. Open File Explorer by pressing Win + E.
2. Click on the Network menu on the left side to expand.
3. Wait a few moments for your network devices to get detected. Double-click on the device that contains the share you want to map.
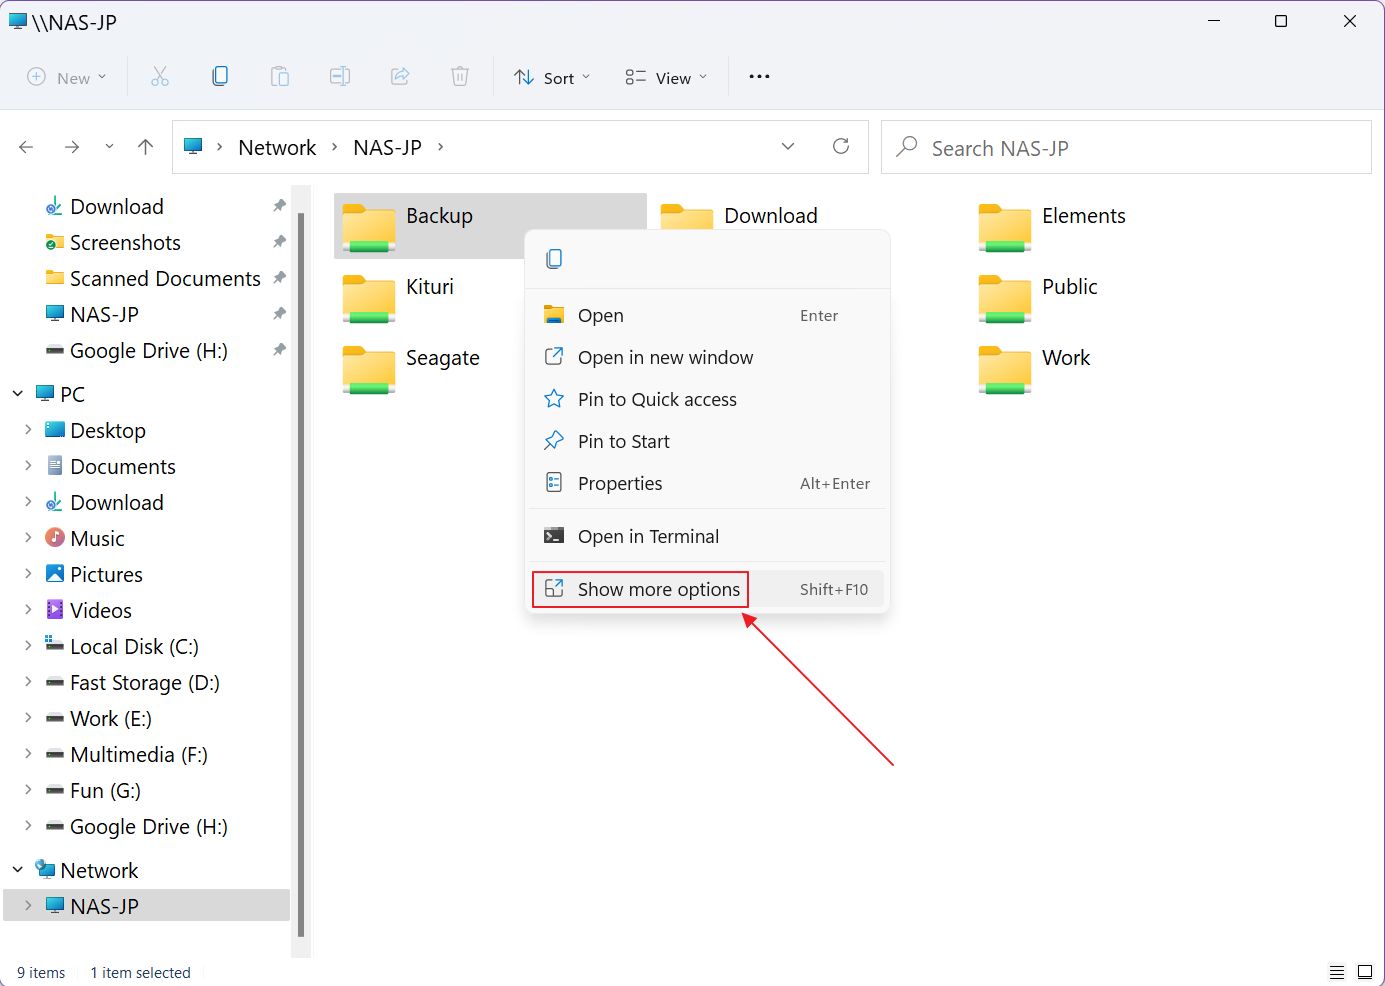
4. You should see now a list of shared folders. Right-click on the one that’s of interest to you and in the contextual menu select Map network drive…
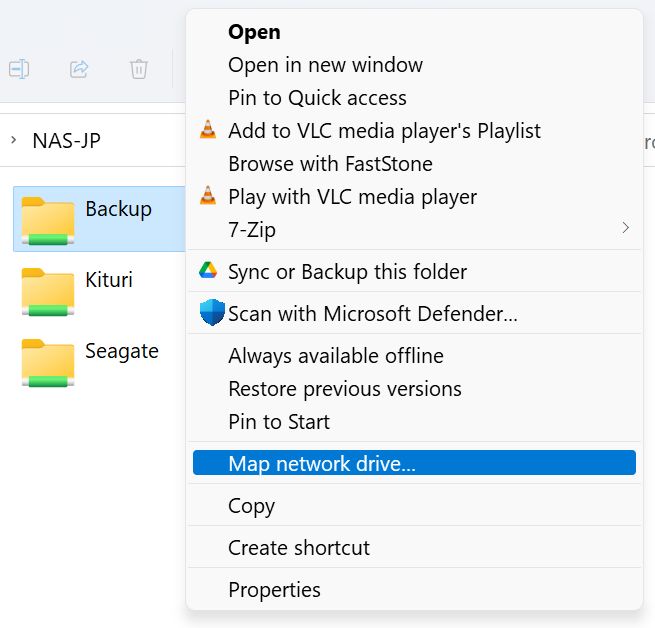
4a. If you’re in Windows 11, due to Microsoft “cleaning” up the contextual menu, the option is found in the second layered menu, which can be accessed by first clicking on the Show more options link. Totally uncalled for.
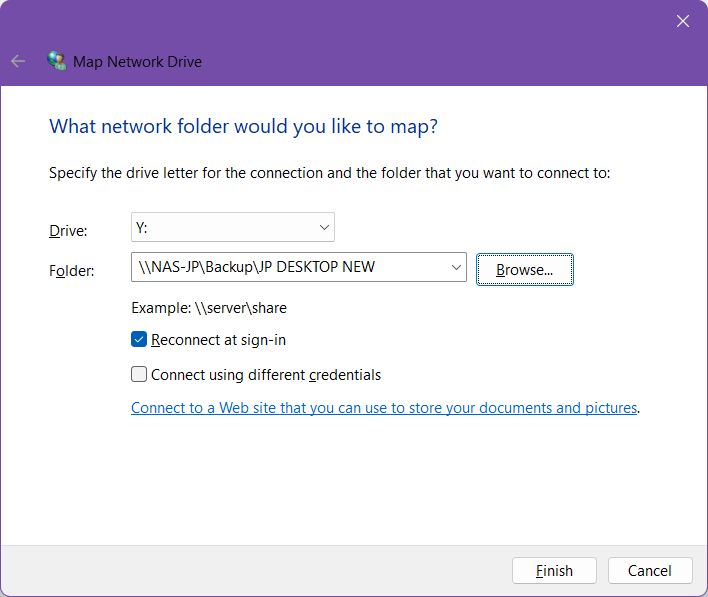
5. Now, you should see a new window. You have to (1) assign a letter to the new drive. By default, it shows the last free letter of the alphabet. If you’re fine with it, go on.
Now, (2) choose if you want the network share location to be remapped after a restart when you sign in back again, and (3) you can check the option to use different credentials than your current online or offline account if needed.
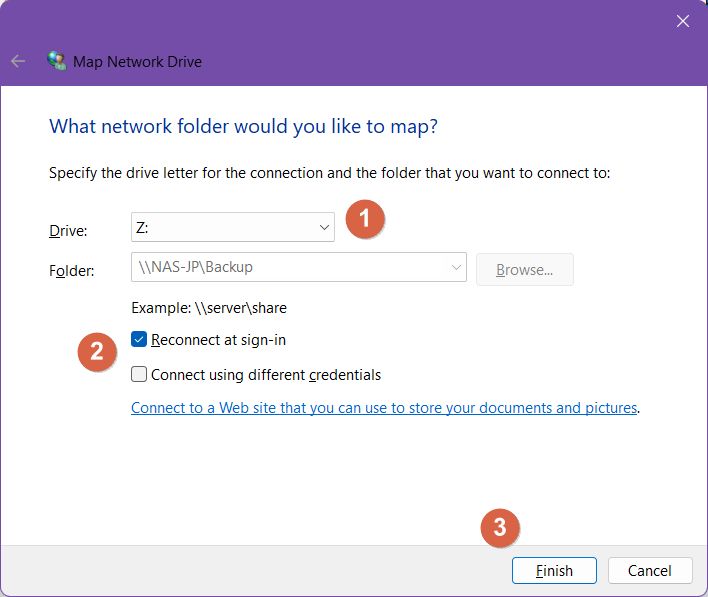
The Connect to a Web site that you can use to store documents and pictures link will open the add network location wizard. This option will be coved later in the article.
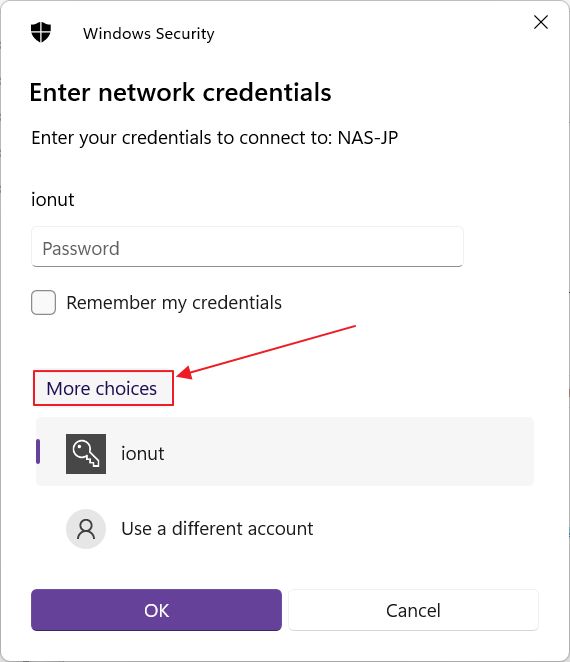
6. If you checked the credentials checkbox when clicking Finish you’ll see another popup, where you can enter the required username and password. If the user name field is prepopulated click on the More choices link to pick a previously used username or add a new one.
That’s it: the “new drive” will show up in your File Explorer and in any program that opens the save dialog window (which is basically a version of File Explorer).
Main disadvantage of this method: you can only map a top level shared folder, not its subfolders. The Map network drive… context menu option only shows up in root shared folders in Windows.
Map a Drive Step-by-Step Wizard
If you need more control and want the option to map a subfolder inside a top-level network share this is the guide you need to follow.
1. Open File Explorer again.
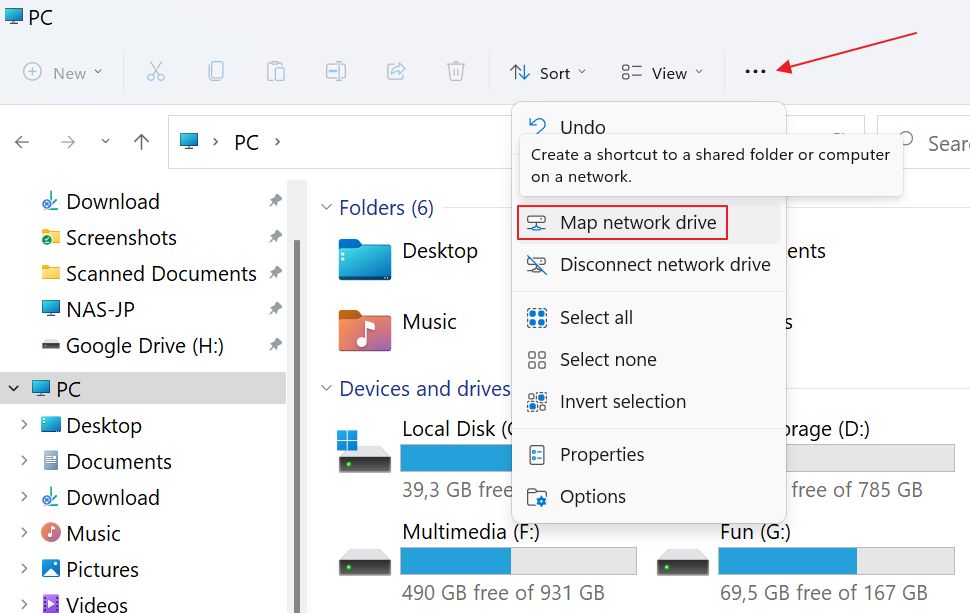
2. Make sure you have selected PC in the left navigation tree. This is very important.
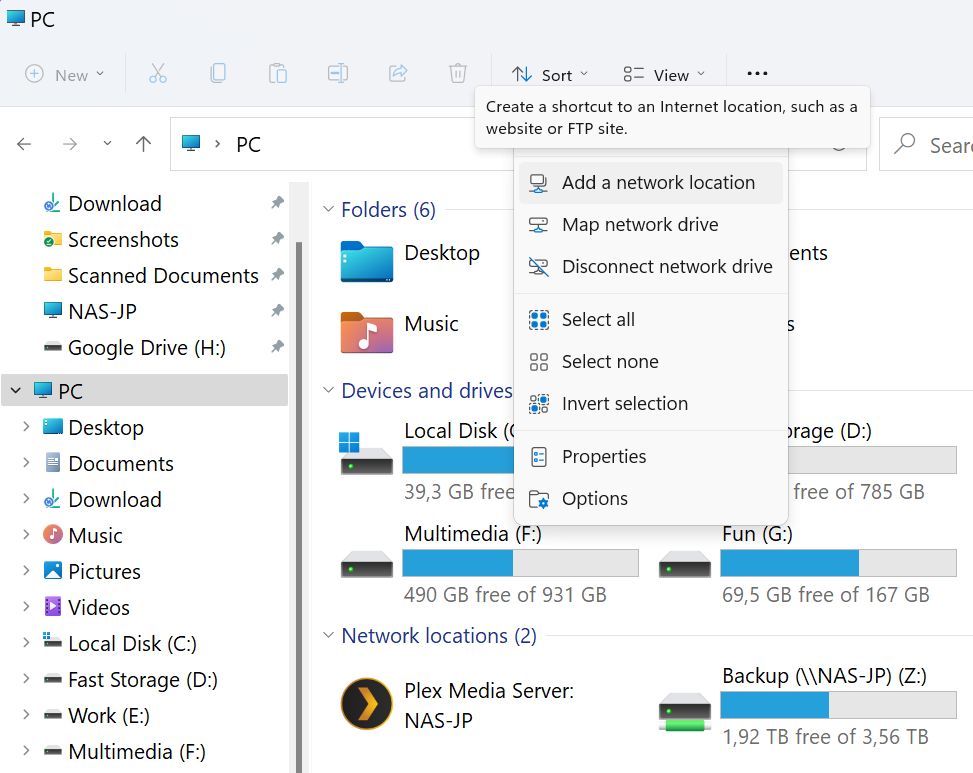
3. Now click on the three-dot menu of the File Explorer toolbar and select Map network drive from the contextual menu.
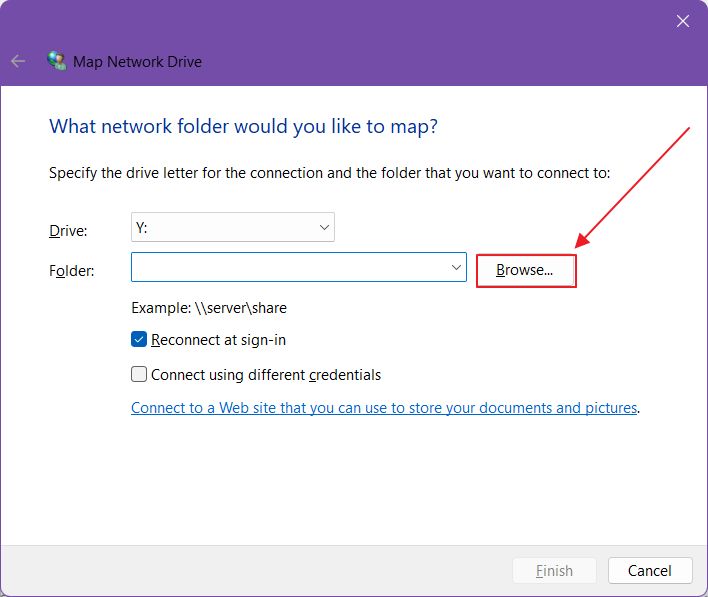
4. This new window looks almost identical to the one from the previous guide, with one important difference: you can now Browse for the network share location.
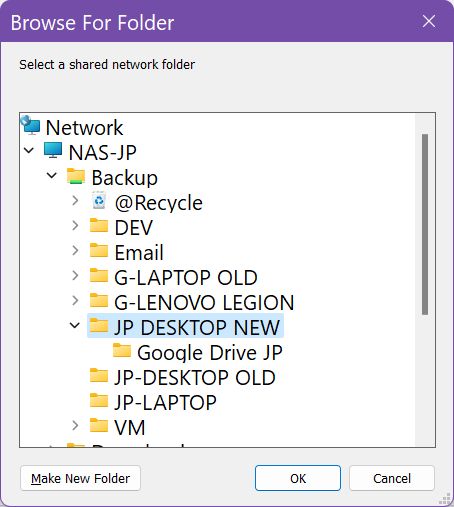
5. The next window could take a while to show network devices. Expand the network menu as needed and select the desired folder. Click OK to confirm. You can even create a new folder if you need to (but not on the topmost level).
6. Go back, choose a drive letter, leave on the option for remapping after a restart (I recommend it) and see if you need to specify different credentials other than your current user.
That’s it. Click Finish to confirm and wait for the new drive to show up in File Explorer.
What if you want more flexibility? What if you want to add truly remote locations, such as an FTP account or a web location? This is possible through the Add Network Location functionality.
There’s one major difference compared to mapping local network drives: network locations are added to your PC as shortcuts, not as drive letters.
Setting one up is a bit different:
1. Open the File Explorer app.
2. Select the PC icon from the left-side menu.
3. Click on the three-dot menu again and this time select Add a network location option.
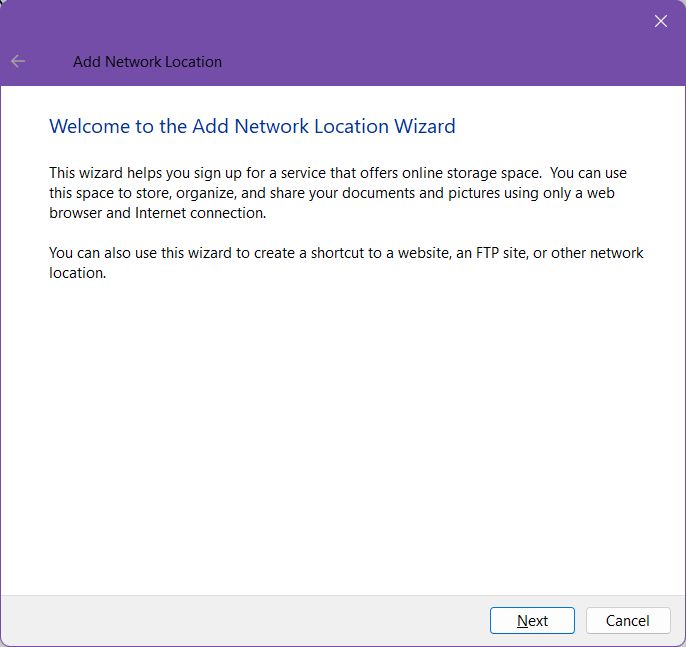
4. Now a new wizard will open. The first window is just a bunch of text. Click Next.
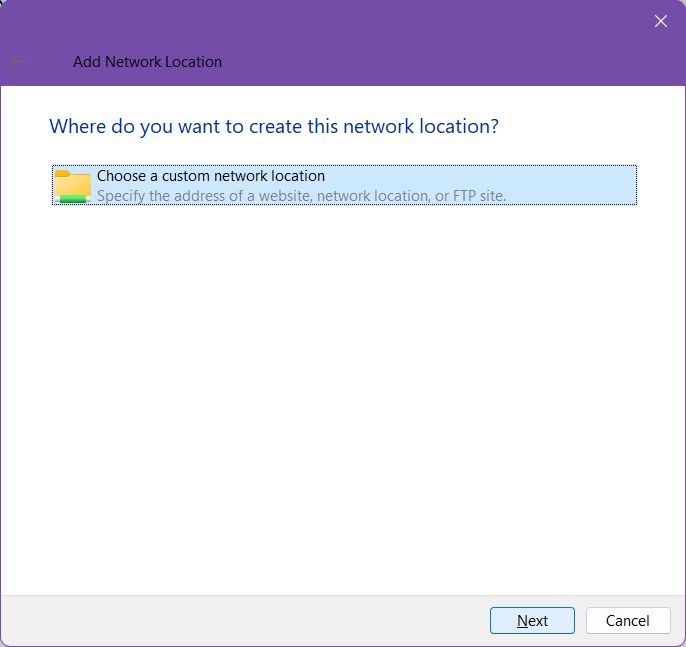
5. The second step is no better. Click Next again, since you only have one option available.
6. Here you have to browse or enter the exact location of the remote network location. Browse only works for local network shares, not for web and FTP locations. Yes, you can add LAN shares not only as mapped drives, but also as shortcuts.
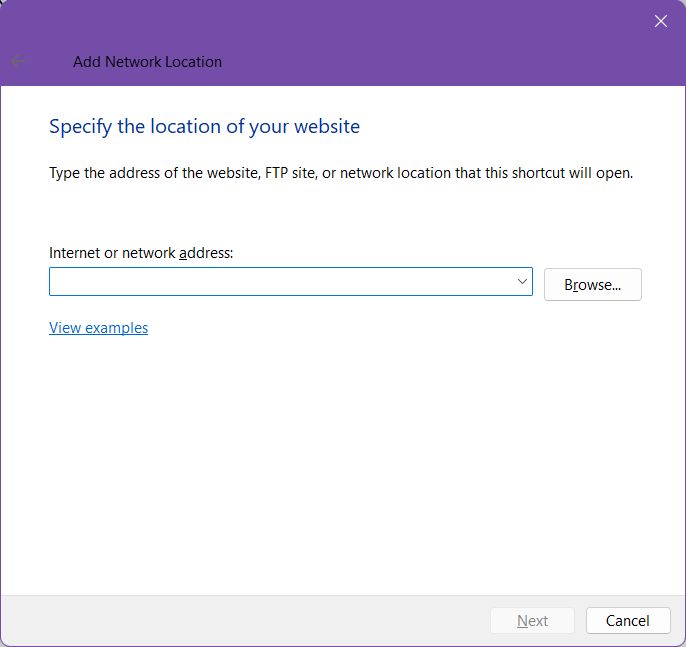
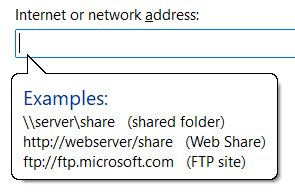
Hover over the View examples link to get an idea of how a location string should look like.
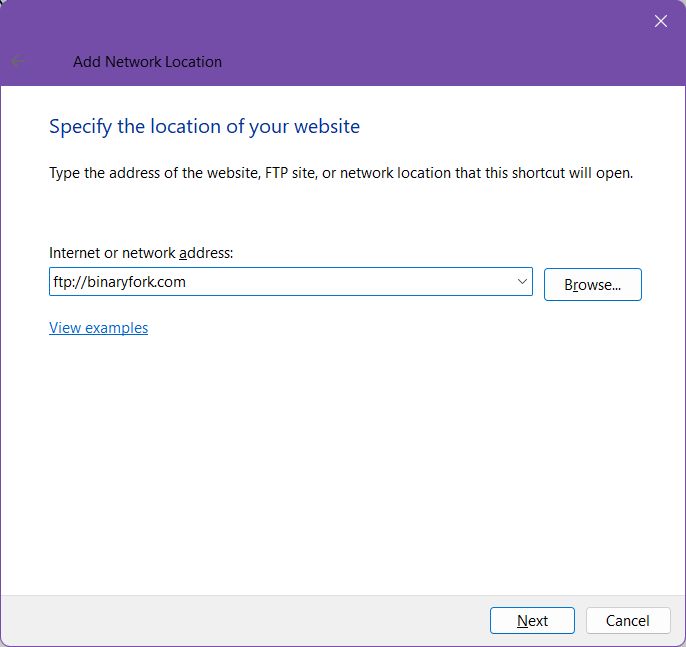
7. I’ll try and add an FTP location, so I just type the location, always starting with FTP://. I then click Next.
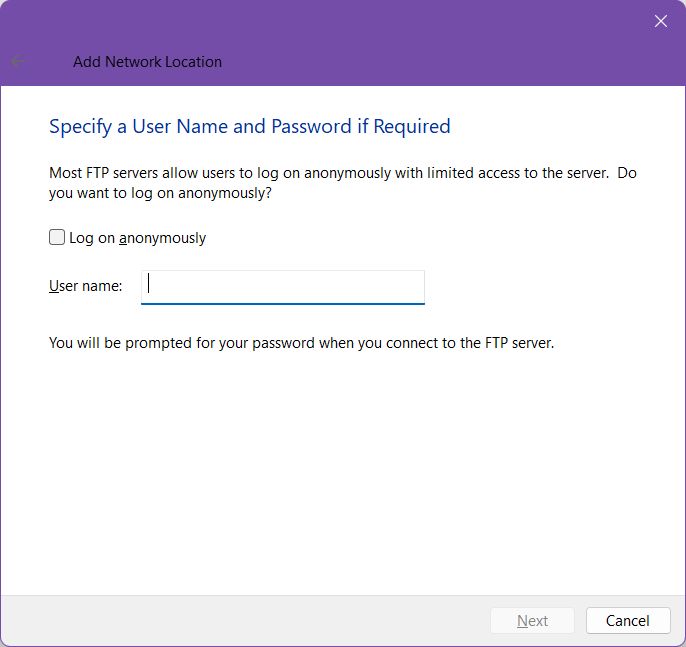
8. Now you’re being asked about login credentials. If you’re connecting to an FTP that doesn’t require authentication just click Next.
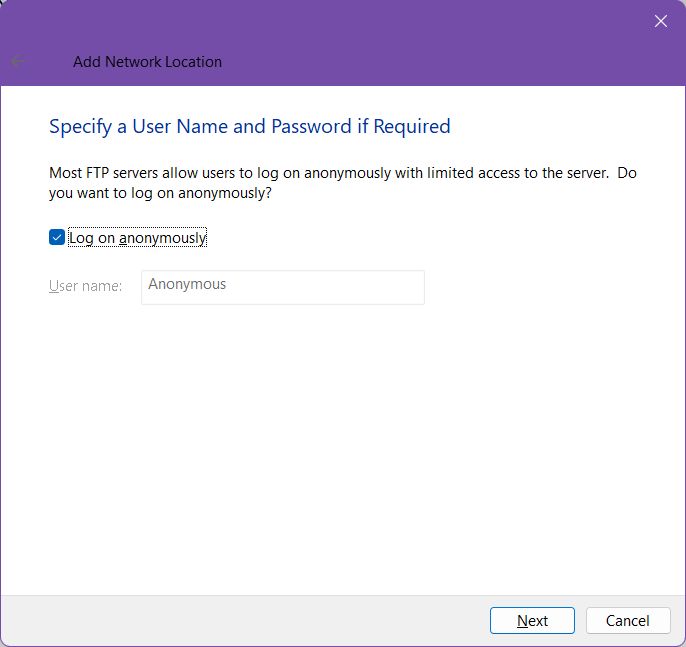
If authentication is required uncheck the Log in anonymously link and fill in the username. The password will be asked when connecting.
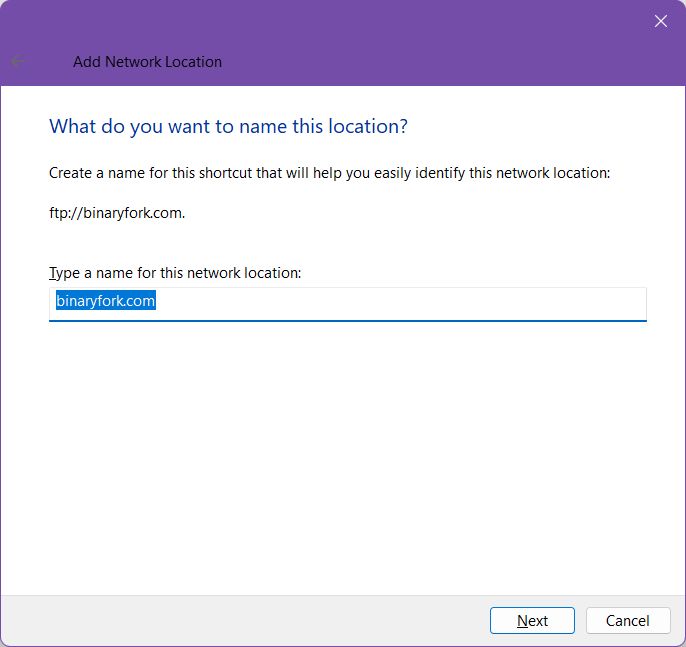
9. Now give this shortcut a name that you can easily recognise.
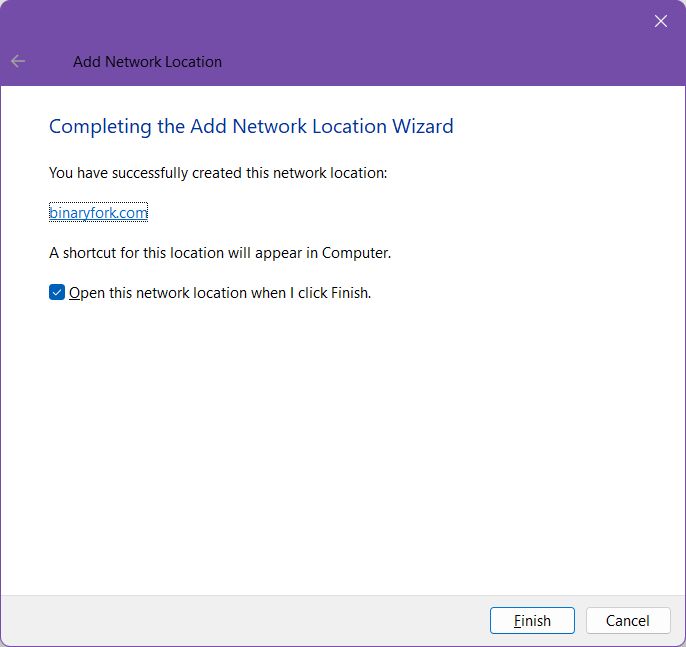
10. Click on Finish to add the network location shortcut to your File Explorer.
11. When you connect for the first time the following login window will pop up. Enter the user name (again) and the FTP account password, then click on Log On.

By checking Save password, if you don’t want to enter that again and again, you need to be aware that the FTP client inside File Explorer is a weak one, so it doesn’t encrypt passwords during communication with the server. Passwords are sent as plain text! To Microsoft’s credit, there a warning on this page about this important security issue.
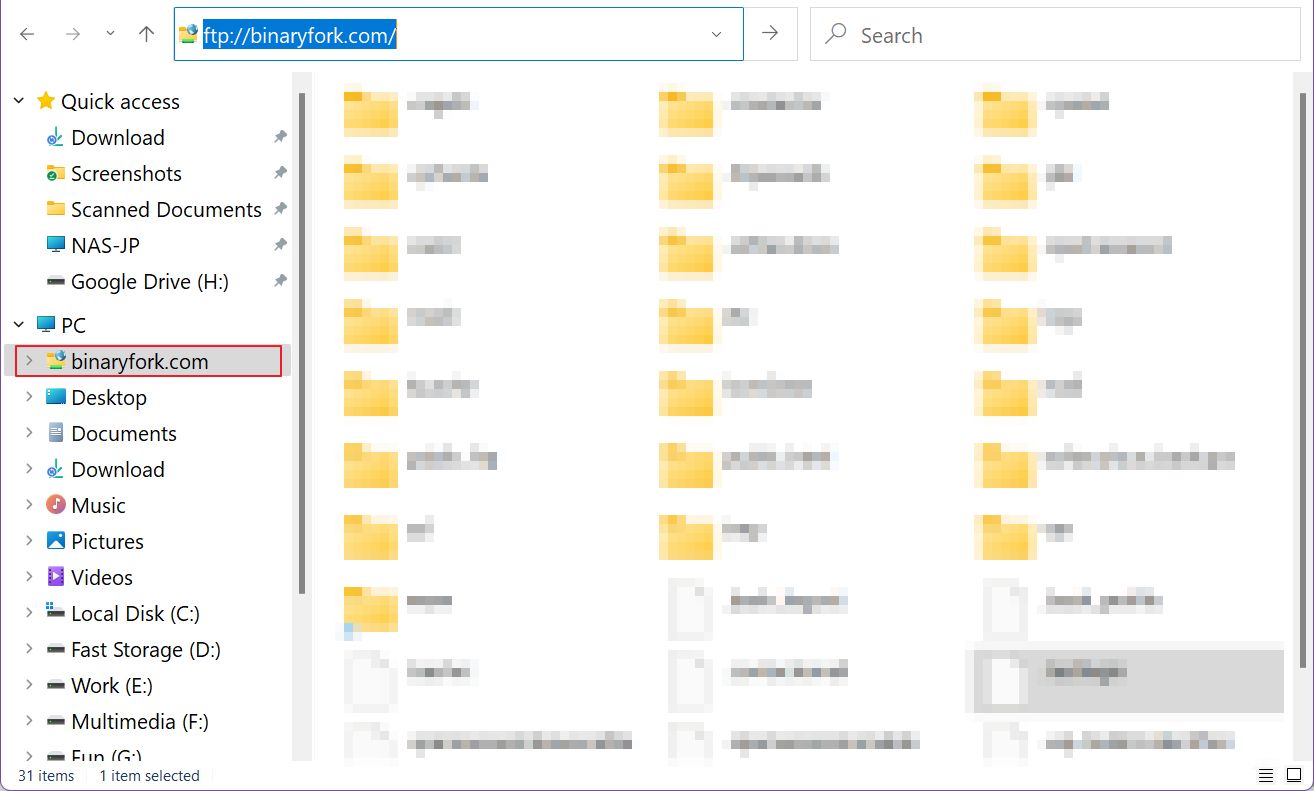
Now, let’s see how easy it is to access the newly mapped network shares and remote location shortcuts. Open File Explorer (press Win + E) and you should see an image similar to this one:
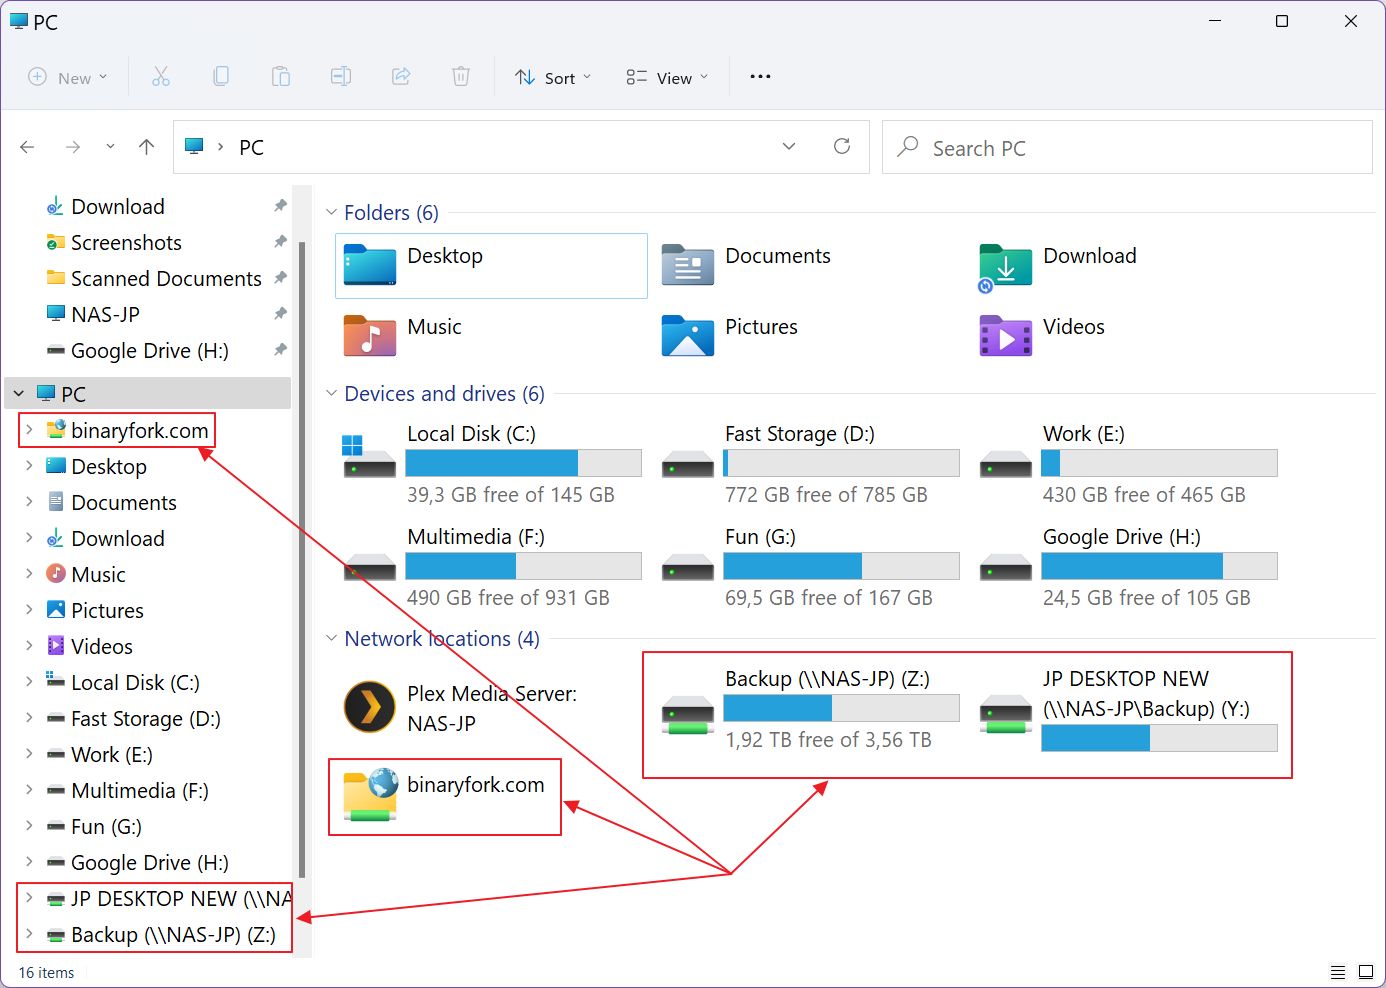
Mapped network drives show up in the Network section with icons that resemble NAS drives. Remote network locations will show up as folder icons with a globe overlay.
All these shortcuts show up in both the main PC view and in the left-side menu.
Click on any of these to browse the remote contents.

How to Disconnect a Mapped Network Drive
Now, if you chose during setup not to reconnect at sign-in, all mapped drives will disappear on restart. If not, the “drives” will reconnect each and every time. Network location shortcuts are persistent, and will always need to be removed manually.
Here’s what you have to do:
Unmap Each Drive Individually
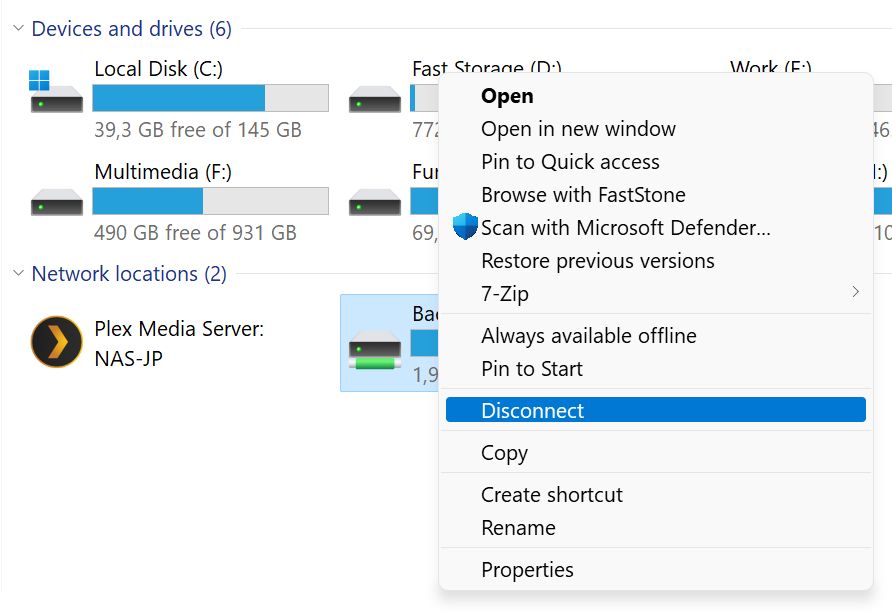
Method 1: Open a File Explorer window, go to PC, select the desired mapped drive letter, right-click, and if you’re in Windows 11 make sure you access the second menu via the Show more options link. Once open, select Disconnect. That’s all.
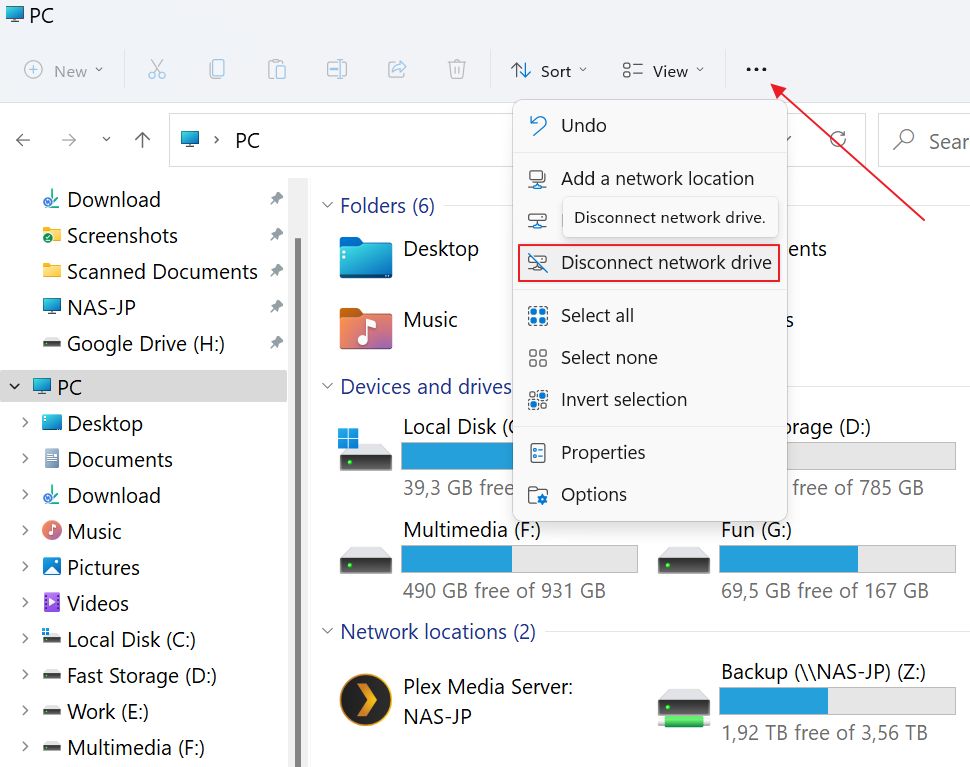
Method 2: In File Explorer, PC section, left-click on the mapped drive you wish to remove, open the three-dot menu, then select Disconnect network drive and you’re done.
Disconnect From File Explorer Shortcut
There’s a third way to disconnect a mapped network drive, which will show you all options for mapped drives:
In File Explorer > PC open the three-dot menu directly, without selecting anything, and click on Disconnect network drive.
Now a new window will show up, with all currently mapped drive letters.
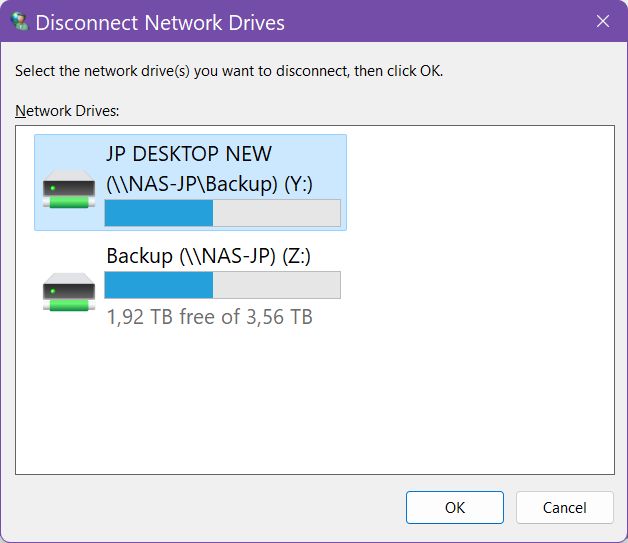
Click on the desired item and confirm with OK.
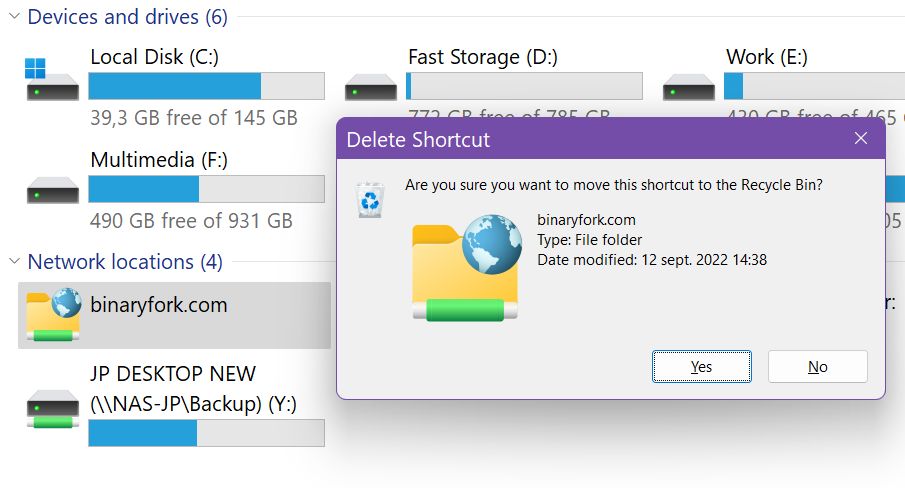
Delete FTP Network Location Shortcut Link
Removing network location links is even faster. Open File Explorer, select the shortcut you wish to remove and just press Delete. A popup will show up now, asking for confirmation. Click Yes and you’re done.
Recommended reads from our How To section:
- How to Backup Network Drives to a local PC or external hard drive
- How to share folders in Windows without a password
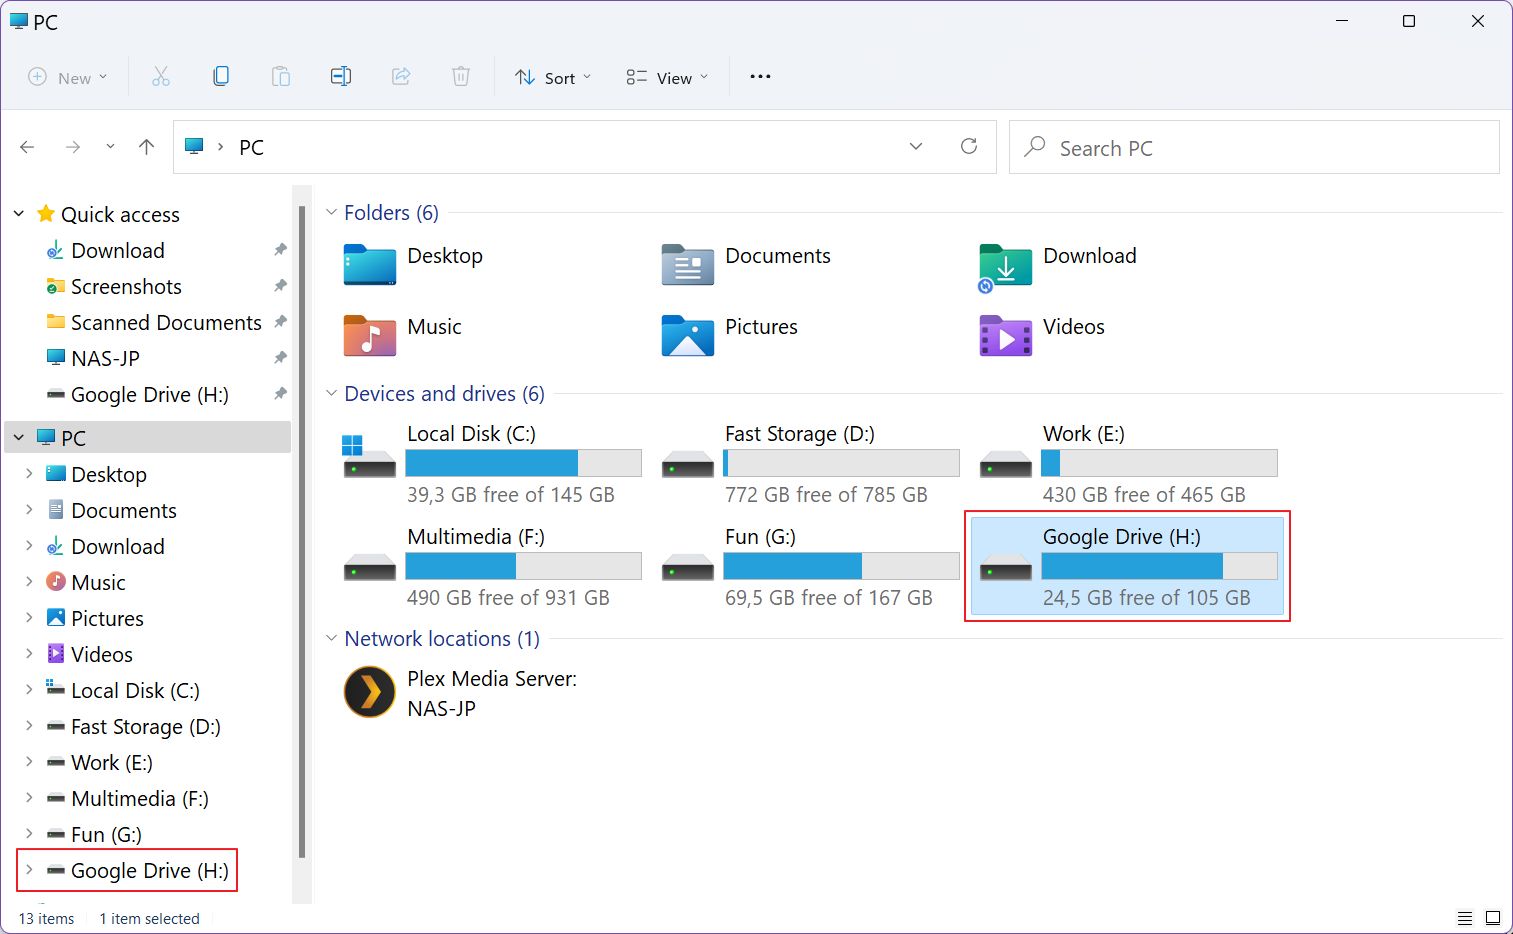
The Google Drive desktop app will automatically add a new drive letter in your File Explorer. All you have to do is click on the “new” drive and you can browse the contents of your Google Drive cloud storage.
It’s a bit redundant since you already have your Google Drive folder on your computer. The advantage is that you can browse files and folders that are not synced from the cloud to your computer without needing to use your browser, which makes it a bit faster.